If you are not able to explain it with words, you may have to add pictures. And if you still can’t manage it with pictures, you could always make a video.
About this book
In the year 1970, Prof. Niklaus Wirth invented the Pascal programming language as a way to teach his students the fundamentals of computer programming. Although the initial core Pascal language was designed for teaching purposes only, it was soon expanded by commercial vendors and gained some popularity. Later, Wirth presented the language Modula-2 with improved syntax and the module concept for larger projects, and the Oberon language family with additional support for Object-Oriented Programming.
The Nim programming language can be seen in this tradition, as it is basically an easy language suited for beginners with no prior programming experience, but at the same time is not restricted in any way. Nim offers all the concepts of modern and powerful programming languages, combined with high performance and a certain level of universality. Nim can be used to create programs for tiny microcontrollers, large desktop apps, and web applications. Most books about programming languages focus on the language itself, often assuming that the reader is already familiar with the foundations of computer hardware and has some programming experience. This is generally a valid approach, as most people are taught this fundamental knowledge, sometimes referred to as Computer Science (CS), in school today. However, there are people who, for various reasons, may have missed this introduction in school and later decide that they need some programming skills, perhaps for a technical job. Moreover, some children may not be satisfied with the introduction to computer science taught at school. Therefore, we decided to start this book with a short introduction to fundamental concepts. Most people may skip that part, but you should be really sure that you know these foundations. This book is divided into seven parts — part VII is the Appendix. It is possible to read the parts independently of each other in any order, but for Nim beginners, it is recommended to read them mostly in ascending order, perhaps while previewing some interesting sections in the second half of the book early on. In Part II, we explain the basics of computer programming step by step in a way that should enable even those with no prior experience to learn independently. In this part, we might repeat some of the material that we already mentioned in Part I. We do that intentionally, as some people might skip Part I, and because it is generally beneficial to reinforce the reader’s learning process through repetition. Part III will give you an overview of Nim’s standard library, which contains many useful functions and data types that we can use in our programs to solve common tasks like input and output operations, using the file system, or sorting data. In Part IV, we will apply what we have learned by solving some common programming tasks, like sorting, searching, or converting numbers from the internal computer format to displayable text. Part V will introduce some useful external packages that can be easily installed using one of Nim’s package managers. Nim already has a few thousand external packages — some of them may support or replace the standard library, and others offer special or advanced functionalities. Part VI of the book will finally introduce advanced concepts like asynchronous operations, threading and parallel processing, macros and meta-programming, and, last but not least, Nim’s concept implementation. Some sections, that do not integrate well into the other six parts, or that are boring or useful only for a minority of Nim users, have been moved to the Appendix and may not be part of a printed copy of the book. This currently includes a short introduction to Nim’s standard package manager: Nimble.
This book is essentially a traditional textbook — simple yet detailed. It is designed such that individuals aged 14 and above can read and understand it independently, with little or no help from adults. Unfortunately, the English language may still be a challenge for many kids not born in a country with a strong English language tradition. Fortunately, automatic translations are already supported for some languages, and we might be able to offer translated editions of the book later, possibly in Chinese and German.
In the last few decades in the area of computer programming, traditional textbooks have been partly replaced by videos, "Crash course" books, and "Learning by doing" books. Indeed, a good video may help you start with a new language, and it can enable people who have difficulties reading printed texts or concentrating on a topic for a few minutes to learn a programming language. Unfortunately, the quality of most videos is very bad; some are made by kids just having learned the first steps of computer programming themselves. Furthermore, watching videos does not necessarily improve the reading and concentration issues that people might have. "Crash course" and "Learning by doing" books may give you a good start, but for that, we already have a lot of textual tutorials. The concern with these types of books is that, while they may help you solve common tasks, they don’t necessarily foster a deeper understanding. Generally, the idea of a "Crash course" or "Learning by doing" is not bad. However, in computer science, starting with a larger example application can be overwhelming, as you have to learn a lot of things simultaneously. It may work for you, but there is the danger that you forget all the details very quickly again. Moreover, these types of books are not very helpful when you need to look something up. The other concern with "Learning by doing" in computer science is that learning materials may have only examples in which you may not be really interested: Of course, we can create a simple chat application, a simple Twitter clone, and do some basic web scraping using async/await. Or create a basic game or a simple GUI with one of the dozen available toolkits. But what if you are not interested in chatting and twittering, and that single selected toolkit? We believe that in such cases, reading the detailed examples can be very frustrating. Therefore, we recommend that after reading the first tutorial, and perhaps a few pages of this book, you start coding with topics you are interested in. Perhaps you could do it together with some friends? Whenever you need concrete help, you can find it on the Internet, using search engines, Wikipedia, or a discussion platform of your choice. And if you really have no idea what project to start with, then computer programming might not be the right profession for you.
Although Nim has a JavaScript backend and thus well supports web-related development, this book focuses on native code generation using the C and C++ backends. We will discuss some peculiarities of the JavaScript backend in the second half of the book, and we may provide some examples of the use of the JavaScript backend in the Appendix. If you are strongly interested in web development and the JavaScript backend, then you may also consult the book Nim in Action by Dominik Picheta, which gives some detailed examples for the development of web-based software using the Nim programming language, including a simple chat application and the foundation of a microblogging and social networking service. You may also consult the tutorials and manuals of Nim web packages like Karax, Jester, or Basolato.
This book will not attempt to explain things that are already well-explained elsewhere, or that should have been well-explained elsewhere — at least not in this first edition, where we have many other essential topics to cover. So, for now, we will leave out the following: the installation of the compiler, the process of installing and using text editors or IDEs with special Nim support, the use of Nim package managers such as Nimble and Nimph, the use of the foreign function interface (FFI) to create bindings to C libraries, and internal compiler details like the various memory management options and all the pragmas.[1] Also, we do not intend to fill the book with redundant information, such as tables listing all the Nim keywords or Nim’s primitive data types, as you can easily find all of that in the Nim language manual.
While the creation of graphical user interfaces (GUIs) is an important topic, we cannot provide many details for various reasons. Nim does not have a singularly accepted GUI library, but there are more than 20 attempts — from pure Nim ones like NimX or Fidget, to wrapped libraries like GTK or QML, to GUIs that try to provide a native look for various operating systems like XWidgets or NiGui, and even web-based GUIs. And for each of these, at least for the more serious ones, we could write a separate GUI book. Therefore, we will only provide a few minimal examples for some of them in Parts IV or V of the book.
Furthermore, we will not delve into game programming, as it is a broad area with numerous existing tutorials.
Maybe in later editions of the book, we will add some more topics, e.g. game programming, as so many people like it. However, we will always have to ensure that a potential printed version of the book does not exceed 500 pages, which may require us to exclude some content in the printed version.
Generally, when learning a new programming language, people start with some short tutorials before delving deeper into the language by following a book. This approach is indeed a good start. So we recommend that you read the short official tutorials, parts 1 and 2, and perhaps also some other tutorials freely available online. Tutorials typically only scratch the surface of the topics, so you may not fully understand them all, but this approach gives you a feel for the language. There also exist some video tutorials, in case you have problems reading. However, if that’s the case, this book might not be of much use to you. If you already have a background in computer science and experience with other languages such as C++, Haskell, or Rust, the tutorials and the Nim language manual might be fully sufficient for you; thus, you may not need this book at all. Or you may prefer the recently published book of Mr. Rumpf, called "Mastering Nim: A complete guide to the programming language" available at Amazon.com.
This book is based on the Nim reference implementation by Mr. A. Rumpf. Most explanations and examples should also be valid for other implementations, like the one at https://github.com/nim-works/nimskull.
Although the initial pages of this book were written in the spring of 2020, the book should be mostly up-to-date with Nim versions 1.6 and 2.0.
Nim version 1.6.14 was released on 27 June 2023 and includes many bug fixes for the 1.0 branch. Nim 2.0, initially announced for early 2023, was finally released on 01 August 2023.
The v2.0 release brings many improvements but does not include any serious breaking changes that would invalidate old code. Only a few minor modifications might be necessary for old code to compile and run again. In this book, we may use and discuss a few Nim 2.0 features, but most code should be compatible with the 1.x series of the compiler or with nimskull (cyo) with no or only minor changes.
The most significant change in Nim 2.0 is that ORC memory management has become the default indicating that it is considered ready for use in production. ORC gives us GC-like, fully deterministic memory management with minimal overhead compared to manual memory handling. It reduces the maximal memory consumption of apps, avoids GC-generated delays, and may increase the performance of our programs. Additionally, ARC and ORC memory management should bring serious advantages for the creation and performance of threaded and parallel code. We have summarized the most important new features of Nim 2.0 in the appendix titled Changes for Nim 2.0.
Note that incremental compilation (IC) or CPS task scheduling (Continuation-passing style) is still in development and not yet fully supported by Nim v2.0. And for parallel and threaded code execution, it may be useful to consider high-quality external libraries rather than those in Nim’s standard library.[2]. This may also apply to modules for asynchronous code execution and a few other libraries.[3]
Disclaimer & legal notice
For all the details please refer to the corresponding section in the Appendix: Disclaimer and legal notice
I have one more question about the Nim programming language. The following code, which is supposed to convert a string to an integer, does not compile. Can you fix it?
`var s: string = "123"; var i: int = int(s)`

Yes, the code you provided is not valid Nim syntax. In order to convert a string to an integer in Nim, you can use the parseInt procedure from the strutils module.

Here is an example of how to use it:
import strutils

var s: string = "123"
var i: int = parseInt(s)
echo i # Output: 123
In this example, we import the strutils module, which provides the `parseInt` procedure for parsing integers from strings. Then, we define a string `s` with the value "123", and use `parseInt` to convert it to an integer, which we store in the variable `i`. Finally, we use `echo()` to print the value of `i`.
Since spring 2023, GPT-4 has been available to paying subscribers, offering more helpful information and less irrelevant content.
We recently used GPT-4 to create a short Nim info page: https://nimprogramming.com/
Part I: Introduction
Give me a video; I get a headache from reading.[6]
Initially, you do not need to know many details to use computers and write computer programs. It’s much like driving a car. Even though a car is a complex machine, children can generally manage to move it after a brief introduction. [7] Nevertheless, professional racing drivers typically require a much deeper understanding of the inner workings of all the technical components, along with extensive practice.
What is a computer?
A computer is primarily a device that runs computer programs by following instructions on how to manipulate data.
Nearly all computers currently in use — from tiny ones integrated into electronic gadgets, to well-known desktop computers (PCs), and large, powerful supercomputers filling entire rooms — work internally with digital data only.[8] Digital data essentially comprises integer (whole) numbers encoded in binary form, which are represented by sequences of the symbols 0 and 1. We will discuss the term digital in more detail in the next section.
The most important part of a digital computer is the CPU, the Central Processing Unit. This tiny device, built of digital electronic circuits, can perform very basic mathematical and logical operations on numbers, such as adding two numbers or determining whether one number is larger or smaller than another. Most computer CPUs can only store a limited number of values internally, which are lost when the power is switched off. Therefore, the CPU is typically electrically connected to a RAM module, a Random Access Memory, which can store many more numbers and allows fast access to these numbers, and to a hard disk or SSD device, which can permanently store the numbers but does not allow such fast access. The stored numbers are most often simply referred to as data; in essence, this data is nothing more than numbers, but it can be interpreted in various ways, such as pictures, sounds, and more.
The traditional hard disk drives (HDDs), which store data electromechanically on rotating magnetic disks, as well as the more modern variants, the solid-state devices (SSDs), which store data using modern semiconductor technologies, can store data persistently for longer time periods, even when no electric power supply is available. Both SSDs and HDDs can be optionally split into multiple partitions; for example, one or multiple OS partitions for executable programs or pure data partitions for passive data such as text files or pictures. Before use, each partition is generally formatted, at which point a file system (FS) is created. These two steps create an internal structure on the storage device, which allows us to store and retrieve individual data blocks like programs, text files, or pictures.
Nearly all of today’s desktop computers, as well as most notebooks and cellphones, contain not just a single CPU, but multiple CPUs, also known as cores. This enables them to run different programs in parallel or parts of a single program on different CPUs to increase performance and reduce total execution time. So-called supercomputers can contain thousands of CPUs. Besides CPUs, most computers also have at least one GPU, a Graphic Processing Unit, that can be used to display data on a screen or monitor, maybe for doing animations in games or for playing video. The distinction between CPUs and GPUs is not clear-cut. Usually, a CPU can also display data on screens and monitors, and GPUs can also perform some data processing tasks that CPUs can handle. However, GPUs are optimized for the data display task.
More visible to the average computer user are the peripheral devices such as a keyboard, mouse, screen, and perhaps a printer. These enable human interaction with the computer, but they are not core components — the computer can function effectively without them. In notebooks, laptop computers, or cell phones, the peripheral devices are closely integrated with the core components. All the physical parts of a computer are also called hardware, while the programs running on that hardware are called software.
A less visible, but equally important, class of computers consists of microcontrollers and so-called embedded devices. These are typically tiny units encased in black plastic with some electrical contacts. The devices can contain all necessary elements, i.e., the CPU, some RAM, and persistent storage that can store programs and data when no electric power supply is available. Although these devices may be limited in computing power and the amount of data they can store and process, they are incorporated in many consumer devices. They control your washing machine, refrigerator, television, radio, and others. Some devices in your home may even contain multiple microcontrollers and often the microcontrollers can already communicate with each other by RF (Radio-Frequency), or access the Internet by WLAN, which is sometimes called the Internet of Things (IoT).
Another class of large, very powerful digital computers — known as mainframe computers or supercomputers — is optimized to process large amounts of data very quickly. The key to their enormous computing power lies in many fast CPUs working in parallel; problems or tasks are split into many small parts that are solved by individual CPUs, and the final result is the combination of all these solved sub-tasks. However, it is not always possible to split large problems into smaller sub-tasks.
Digital computers usually operate based on a clock signal that pulses at a certain frequency; the number of clock pulses per second is called the clock rate. The CPU can perform simple operations, such as the addition of two integers, at each pulse of the clock signal. For more complicated operations, such as multiplication or division, it may need more clock pulses. Therefore, a rough measure of a computer’s performance is the clock rate divided by the number of pulses that the CPU needs to perform a basic operation, multiplied by the number of CPUs or cores that the computer can use.
A completely different type of computer is the quantum computer. This is a large, expensive high-tech device that uses the principles of quantum mechanics to execute many computations simultaneously. Only a few of them exist today, for research at universities and some large commercial institutes. Quantum computers may fundamentally change computing and our entire world someday, but they are not the topic of this book.
Analogue and digital
Whenever we measure a quantity using a base unit, thus providing a certain level of granularity, we operate within the digital realm. Our ordinary money is digital, as the cent is the smallest base unit; you will never pay a fraction of a cent for something. Time can be considered as a digital quantity as long as we accept the second as the smallest unit. Even on so-called analogue watches, the second hand generally moves forward in one-second increments, making it impossible to measure fractions of a second with such a watch.
An obvious analogue property is the thermodynamic temperature, and its classic measurement device is the well-known capillary thermometer, consisting of a glass capillary filled with alcohol or liquid mercury. When temperature increases, the liquid in a reservoir expands more than the surrounding glass and partly fills the capillary. That filling rate is an analogue measure of the temperature.
While the hourglass is considered digital (as you can count the tiny sand grains), the sundial is not.
Most quantities in the real world appear to be analogue, and digital quantities are often perceived as an arbitrary approximation. However, quantum mechanics has taught us that many quantities in our world do have a granularity. In physical terms, quantities such as energy or momentum are multiples of the tiny Planck constant. Or consider electric charge, which is always a multiple of the elementary charge unit of a single electron. Whenever electrical current flows through a conductor such as a wire, an ionized gas, or an electrolyte like saltwater, it does so in multiples of the elementary charge, not in fractions of it. And of course, light and electromagnetic radiation also have some form of granularity, which the photoelectric effect, as well as Compton scattering, proves.
An important and useful feature of digital signals and data is their direct correlation to integers (integral numbers).
The simplest form of digital data is binary data, which can only have two distinct values. When you use a mechanical switch to turn the light bulb in your house on or off, you change the binary state of the light. Your neighbor, when watching your house, receives binary signals.[9]
Digital computers generally use binary electric states internally — voltage or current on or off. Such an on/off state is called a bit. We will discuss more details about bits and binary logic later. One bit can obviously store only two states, which we may map to the numbers 0 and 1. Larger integer numbers can be represented by a sequence of multiple bits.
The Morse code was an early application used to transmit messages encoded in binary form.
A crucial characteristic of digitally encoded data is its ability to be copied and transmitted without loss of precision. The reason for this is that digital numbers have a well-defined clean state, there is no noise overlaying the data that could accumulate when the data is copied multiple times. Well, this statement isn’t entirely accurate — under poor conditions, noise can become significant enough to alter the binary state of signals. Imagine trying to transfer some whole numbers encoded in binary form, perhaps by binary states represented as voltage levels 0 Volt and 5 Volts, over an electric wire across a long distance. Clearly, the long wire can act as an antenna and pick up electromagnetic noise, which could potentially shift the true 0 Volt data to a voltage closer to 5 Volts, leading to incorrect reception. To detect these types of transmission errors, checksums are added to the actual data. A checksum, derived from the original data using a special mathematical formula, is transferred with it. The receiver applies the same formula to the received data and compares the result with the received checksum. If they do not match, it is clear that the data transmission is corrupted, and a resend is requested.
The opposite of digital is generally called analogue, a term that is used for data that has or seems to have no granularity. For example, we speak of an analogue voltage when the voltage can assume any value in a given range, and when it does not "jump" but changes continuously.[10] To observe analogue voltages or currents, one can use a moving coil meter, a device in which the current flowing through a coil in a magnetic field causes the magnetic force to move the hand/pointer.
As mentioned in the previous section, nearly all of our current computers work exclusively with digital data. Essentially, this means they work internally with integer numbers, stored in sequences of binary bits. All input for computers must have the form of integer numbers and all output takes the form of integer numbers. Whenever we need to input analogue data into computers, such as analogue voltage, we must convert it into a digital approximation. For that task, special devices called analogue to digital converters (ADC) exist. And in some cases, we have to convert the digital output data of computers to analogue signals, like when a computer plays music: The digital data output from the computer is then converted by a device known as a digital to analogue converter (DAC) into an analogue voltage. This analogue voltage generates a current that flows through a coil in our speakers. This electric current in turn generates a magnetic field, which exerts mechanical forces that move the speaker’s membrane. The resulting oscillating movements produce variations in air pressure that our ears detect, and that we perceive as sound.
What is an operating system?
Most computers, from cellphones to large supercomputers, use an operating system (OS). A well-known OS is GNU/Linux. An operating system can be seen as the initial program that is loaded and started when we switch the computer on, functioning as a kind of supervisor:[11] it can load and execute other programs, distributing resources like CPU cores or RAM among multiple running programs. It also manages user input via the keyboard and mouse, displays output data on the screen in both textual and graphically forms, controls how data is stored in nonvolatile storage media like hard disks or SSDs, oversees all network traffic, among other tasks. An important role of the OS is enabling user programs to access all the various hardware components, regardless of vendor, in a uniform, high-level manner. An OS can be seen as an intermediary layer between user programs, such as a text processor or a game, and the computer’s hardware. The OS allows user programs to work on a higher level of abstraction, so they do not need to know much about the low-level hardware details.
An important feature of most modern operating systems is their ability to run multiple system and user programs concurrently or in parallel. Concurrent execution of programs means that the execution swiftly switches between all active programs. In this way, the user does not notice when programs pause for short time intervals. All programs appear to be running continuously, though not necessarily at full speed. True parallel execution of programs, meaning they can all run continuously at full speed, is only possible when the computer has multiple CPUs or a CPU with multiple physical cores.
Computer operating systems generally have a close relationship with software libraries. Libraries are software components that provide data types and functions through a well-defined interface, known as an Application Programming Interface (API), and exhibit specific behaviors. Libraries can either be part of the OS, or they can function largely independently of it.
Libraries can be utilized as shared libraries, which are single binary files stored on a computer’s file system — often with the .so or .dll file extension — and are accessible by different computer programs simultaneously. They can also be used as static libraries, which are an integral part of individual programs. Shared libraries have some advantages: we need only one instance of them on the file system of the computer, and the library is loaded only once into the computer memory (RAM), even when it is used by different apps simultaneously. This saves space, and when the library has serious errors, it is in principle possible to replace the library with a corrected version, which is then used by all the software on the computer. Shared libraries often come in numbered versions, where a higher number denotes a newer, improved, or extended library version. Sometimes, some of the programs we use may still need an older library version, while other software already needs a newer one. In that case, our file system has to provide multiple versions of a shared library, each of which can be used independently. On the other hand, statically linked libraries are directly glued with a single computer program. This simplifies the distribution of the program, as it can be shipped as a single entity without the need to ensure that all the necessary dynamic libraries are available on the destination computer. However, if a statically linked library has serious errors, then we have to replace all the programs that are linked statically with that corrupted library.
Small microcontrollers and embedded devices often do not require an operating system as they generally run only one single-user program and typically lack a wide variety of hardware components for support.
What is a user interface?
To interact with the OS and the application programs running on the computer, we need some form of user interface. Traditional user interfaces are text-centric and often provided directly by the OS as one single text screen filling the whole display: The user has to enter textual commands and the computer reacts with textual messages. For entering commands and data, a keyboard, whose layout was heavily inspired by the classical mechanical typewriter, is used. For about half a century now, graphical user interfaces (GUIs) have mostly replaced, or at least supplemented, textual user interfaces for desktop computers. Even cellphones and other electronic gadgets now use a form of GUI for user interaction. For large mainframe computers, the textual user interface is still common. Graphical user interfaces display sets of icons or widgets to the user. These are often arranged within rectangular graphical boxes, known as windows. These windows can be moved around, resized, and partially or fully overlapped with other windows. A special type of window, known as a terminal, shell, or console window, behaves like the traditional full-screen textual user interfaces. Graphical user interfaces allow users to interact with the computer through simple actions like clicking on buttons or using drag or swipe gestures, performed directly on a touch-sensitive display or with a device called a mouse, which mirrors its mechanical movement on the table to a graphical cursor on the computer display, and provides a set of pushbuttons that are used to initiate a click action when the mouse pointer hovers over an icon or widget. The main advantage of graphical user interfaces is that the user does not have to remember and type in long command sequences. A set of on-screen buttons labeled with single letters can simulate a traditional keyboard, but a physical keyboard is still used when the input of longer textual data is required. Graphical user interfaces are sometimes enhanced by speech recognition systems, which allow users to enter commands or textual messages vocally. Graphical user interfaces may appear to be strongly coupled with the OS, but they are still system programs executed by the OS. For the Microsoft Windows OS and the macOS, this distinction is not very obvious, as the same GUI is running permanently. For other operating systems, like Linux, the distinction is more apparent. Linux systems are sometimes used without a GUI, and various GUI toolkits, such as Gnome, KDE, and many others, are available.
What is computer programming?
Computer programming involves the creation, testing, and optimization of computer programs.
What is a computer program?
A computer program is essentially a sequence of numbers that are meaningful to a computer CPU. The CPU recognizes these numbers as instructions or numeric machine code, such as the instruction to add two numbers. The first computers, built in the 1950s, were programmed by feeding sequences of plain numbers to the device. The numbers were stored on what were known as punch cards. These were made of strong paper and the numbers were encoded through holes in the cards. The holes could be recognized by electrical contacts to feed the numbers into the CPU. Since plain numbers do not align well with human cognition, more abstract codes were soon developed and used. A very direct code that matches numerical instructions to symbols is known as the assembly language. In that language, for example, the character sequence "add A0, $8" may map directly to a sequence of numbers which instructs the CPU to add the constant integer number 8 to CPU register A0, where A0 is a storage area in the CPU where numbers can be stored. As many different types of CPUs exist, each with their own instruction sets, there are also many different assembly instruction sets. These have similar, but not identical instructions. The rules that describe how these basic instructions have to look are called the syntax of the assembly language.
Numerical machine code, and its equivalent assembly language, form the most basic instruction set for a CPU. Each command that a CPU can execute corresponds to a well-defined assembly instruction. Thus, any operation that a computer can potentially execute can be represented as a series of assembly instructions. However, complicated tasks may require millions of assembly instructions, which would take humans a significant amount of time to write, modify, proofread, and debug.[12]
A few years after the invention of the first computers, the need for more abstract instruction sets was recognized. These would include features such as repeated execution, composed conditionals, and the ability to use data types beyond plain numbers as operands. As a result, higher-level programming languages such as Algol, Fortran, C, Pascal, and Basic were created.
What is an algorithm?
An algorithm is a detailed sequence of instructions, often abstract, designed to solve a specific task or to reach a goal.
Recipes from cookbooks and car repair instructions are examples of algorithms. The basic math operations children learn in school, such as adding, multiplying, or dividing two numbers with a paper and pencil, are also examples of algorithms. Even starting a car follows an algorithm. For instance, if the temperature is below freezing and your vehicle is covered in snow, your first step would be to clean the windows and lights. Similarly, if you’re driving again after a long break, you would have to check the tires before you start the engine. You can execute an algorithm by strictly following its instructions, without necessarily understanding its underlying principles.
So an algorithm is a perfect fit for a computer, as computers are excellent at following instructions without really understanding what they are trying to accomplish.
An algorithm for calculating the sum of the first 100 natural numbers might look like this:
use two integer variables called i and sum
assign the value 0 to both variables

while i is less than 100 do:
  increase i by one
  add value of i to sum

optionally print the final value of sum
What is a programming language?
Most traditional programming languages were designed to translate algorithms into elementary CPU instructions. Algorithms typically contain nested conditionals, repetition, math operations, recovery from errors, and potentially plausibility checks. A complex algorithm can generally be split into various separate logical parts. These may include reading in data at one point, performing multiple processing steps at another, and storing or displaying data as plain text, graphics, or animation at yet another point. This division into parts is reflected in programming languages through the grouping of tasks into subroutines, functions, or procedures, which accept a set of input parameters and can return a result.
As algorithms often work not only with numbers but also with text, it makes sense to have a form of textual data type in a programming language too. Data types can also be grouped in various ways. For example, as sequences of multiple data of the same type, like lists of numbers or names. Alternatively, collections of different types can be created, such as the name, age, and profession of a citizen in an income tax database. Programming languages provide support for all these use cases.
Compilers and interpreters
We already learned that the CPU in the computer can execute only simple instructions, which we call numeric machine code or assembly instructions.
To run a program written in a high-level language that includes many abstractions, we need some kind of converter to transform that program into the basic instructions that the CPU can execute. For the conversion process, we essentially have two options: we can either convert the entire program into machine code, store it on disk, and then run it on the CPU, or we can convert it in small portions, maybe line by line, and run each portion as soon as we have converted it. Tools that convert the whole program first are called compilers. Compilers process the program that we have written, incorporate necessary library modules from other sources, check the code for obvious errors, and then generate the machine code, which we can then store and run. Typically compilers create executables that are customized for a specific CPU architecture and a single operation system. A program compiled for a x86 CPU and the Windows OS could not be run on a Linux box with an ARM CPU. Often, recompiling the source code for another target architecture is possible, but modifications to the source code may be necessary. Program code that has to be compiled can be distributes as textual source code, or as precompiled binary. For source code distribution, the targets systems needs a matching compiler, and for binary distribution, the binary has to match the CPU and the OS of the target system.
Tools that process the source code in small portions, like single statements, are called interpreters. They read a line of source code, investigate it to check if it is a valid statement, and then feed the CPU with corresponding instructions to execute it. The difference between compilers and interpreters is similar to two methods of picking strawberries: you can either pick one and eat it immediately, or you can collect them all into a basket to eat later. Interpreted program code is typically distributed as textual source code and can in principle be run on each system with an matching interpreter. But in practice, it is not that easy: The code may use functionality that is only available for a specific OS, or the code may require a specific interpreter version.
Both interpreters and compilers have advantages and disadvantages for special use cases. Compilers are capable of detecting errors before the program is run, and compiled programs generally execute quickly, as all the instructions are preprocessed and readily available when the programs run. The compiling step takes some time, of course, at least a few seconds, but for some languages and large programs, it may take much longer. This can slow down the software development process because, as you add or change code, you must compile the whole program before you can execute and test it. That can be inconvenient for beginner programmers, as they may have to do this editing and testing process very often. Some adopt a programming style that involves changing a tiny bit of the source code, running it, and observing the results. A more common practice, however, is to first thoroughly consider the problem, then write the code which, in most cases, performs nearly as intended. With this style of programming, you don’t need to compile and execute your code as frequently. Compilers have one significant benefit: they can detect many bugs, primarily typing errors, during the compilation phase and provide detailed error messages. Interpreters have the advantage of enabling code modifications and immediate execution without any delay. This feature is beneficial for learning a new language and for conducting quick tests; however, even simple typing errors can only be detected when encountered during program execution. If your test does not attempt to run a faulty statement, there will be no error, but it may surface later. Modern compilers use various techniques to enable also nearly immediate test when a part of the source code has been modified: Fast compilers, often running in parallel on all available CPUs, combined with caching and incremental compilation, makes the compilation step extremely fast. Additional, a technique called hot code reloading enables the exchange of parts of the program code without interrupting the program execution.
Generally, the execution of interpreted programs is much slower than that of compiled executables, as the interpreter has to continually process the source code in real-time as it’s being run, while the compiler does it only once before the program is run. To conclude this section, here are a few additional notes:
Compilers are sometimes paired with entities known as linkers. In such instances, the compiler transforms the source code, which may reside in multiple text files, into a sequence of machine code instructions. Subsequently, the linker amalgamates all these machine code instructions to form the final executable. Some compilers either do not require the linking step or automatically invoke the linker. Moreover, some interpreters convert the textual source code into so-called bytecode in a very fast, initial preprocessing step ("on the fly"), which can then be interpreted faster. Languages such as Ruby and Python employ this method. The Java language uses a mix of compilation and interpretation: In a first step, the Java source code is compiled into an intermediate JAR code format. This JAR file can be distributed and executed by Java’s virtual machine (JVM). The JVM acts as an intermediate layer between the hardware and the user program, and the JVM can even further optimize the code while it is run on the target machine.
Types of programming languages
Software can be crafted in numerous styles. A programming paradigm is a fundamental style of writing software, and each programming language supports a specific set of these paradigms. A popular paradigm is object-oriented programming (OOP), a concept taught in many introductory computer science courses. Other paradigm are procedural and functional programming.
We have already mentioned assembly languages, which provide only the basic operations that a CPU can perform. Assembly languages offer no abstractions, so it’s debatable whether we should categorize them as programming languages at all. Then, there are low-level languages like Fortran or C, which, while providing some basic abstractions, still work close to the hardware. These languages are primarily designed for high performance and low resource consumption (RAM), but they don’t prioritize detecting and preventing programming errors or simplifying the programming process. These languages already support some higher-order data types, like floating-point numbers or text (strings), as well as homogeneous, fixed-size containers (called arrays in C), and heterogeneous fixed-size containers (called structs in C).
A different approach is taken by languages like Python or Ruby, which aim to make writing code easier by offering many high-level abstractions. They provide better protection against errors but are not as efficient. These languages also support dynamic containers, which can grow and shrink, or advanced data structures like hash tables (maps) or support textual pattern matching by regular expressions (regex).
Another way to differentiate programming languages is by their typing system, which can either be static or dynamic. Ruby, Python, and JavaScript are all examples of dynamically typed languages. This means that they use variables capable of storing any data type. Therefore, the data type that a variable accepts can dynamically change during program execution. This appears to be user-friendly and often it is, particularly for brief programs intended for single-use, occasionally referred to as scripts. However, dynamic typing can make discovering logical errors more challenging. For instance, an illegal addition of a number to a letter may only be detected at runtime. Dynamically typed languages generally consume a lot of memory and their performance tends not to be as efficient. It’s akin to owning a set of large, equally-sized moving boxes and storing each piece of our belongings in separate boxes.
In statically typed languages, each variable has a well-defined data type such as integer number, real number, a single letter, a text element, and many more. The data type is either assigned by the author of the program with a type declaration, or is detected by the compiler itself when processing the program source code, a process called type inference. In this context, the variable’s type never changes. In this way, the compiler can check for logical errors early in the compile process, and the compiler can reserve memory blocks exactly customized to the variables that we want to store, so total memory consumption and performance can be optimized. Referring again to the box analogy, static typing is akin to using customized boxes for all your belongings.
All these types of programming languages are often called imperative programming languages, as the program specifies exactly what the computer has to do. There are also other types of programming languages, such as Prolog, which primarily provide a set of rules and then allow the computer to solve problems using these rules.
Moreover, there are emerging concepts like artificial intelligence (AI) and machine learning (ML). They rely less on algorithms and more on neural networks, which are trained with extensive data until they can yield the desired results. Nim, the computer language that this book focuses on, is an imperative language. As such, our focus will be on the imperative programming style. However, it’s worth noting that Nim can be used to create AI applications.
Additionally, we can distinguish between languages such as C, C++, Ada, Rust, D, Go, Nim, and many more that compile to native executables and can run directly on the computer’s hardware. In contrast, languages like Java, Scala, Kotlin, Julia, among others, use a large virtual machine (VM) as an intermediary between the program and the hardware, as do interpreted languages like Ruby and Python. Languages that use a virtual machine generally require some startup time when a program is invoked, as the VM needs to be loaded and initialized. Also, interpreted languages are typically slower.[13] The distinction between languages that compile to native executables, and those that are executed on a virtual machine, is not really sharp. For instance, Kotlin and Julia initially ran on a virtual machine, but they can now compile source code to native executables. And new developments, such as the Mojo languages, claims to be able to execute ordinary Python code, as well as to compile code with added type annotations to fast machine code.
An important class of programming languages is the group of so-called Object-Oriented-Programming (OOP) languages, which use classes with attached methods, and typically reference semantics, polymorphism, and inheritance with dynamic dispatch. OOP languages became very popular in the 1990s. For some time, it was assumed that Object-Oriented-Programming was the ultimate solution for managing and structuring large programs. Java is a prominent example of OOP languages. It requires programmers to use the OOP design, and other languages such as C++, Python, and Ruby also strongly encourage the use of the OOP design. Experience has shown that the OOP design is not the ultimate solution for all computing problems, as it can make the code verbose and might hinder optimal performance. So newer languages, like Go, Rust, and Nim, support some form of OOP programming but use it only as one paradigm among many others.
Another popular and important class of programming languages includes JavaScript and its more modern extensions, like TypeScript, among others. JavaScript was designed to run in web browsers to support interactive web pages, as well as programs and games running in the browser. In this way, programs become nearly independent of the computer’s native operating system. Note that despite what the name may suggest, JavaScript is not closely related to the Java language. Since Nim can compile to a JavaScript backend, it offers robust support for web development.
Finally, perhaps the most important criterion for choosing a language for a programming task is the handling of memory and other resources. Allocating memory blocks, and releasing them again when they are not needed anymore, can be a serious effort, and doing it wrong can lead to various bugs, like free-after-use or memory leaks. The original Pascal compiler had no function to release memory at all, which may have been a simple strategy to avoid this difficult matter. C does all the memory- and resource-handling manually, which is one reason why C programming is difficult, and C programs often have serious bugs. The C++ language handles most memory and resource management by scope-based destructors, but still supports manual memory- and resource handling like C. Rust is similar to C++ in this regard, but has advanced features like the borrow-checker. Fully automatic memory management is a difficult topic and can generate overhead or delay in program execution. This is why some modern languages, like Zig, Odin, and Jai, avoid automatic memory handling. Other languages like Python, Java, JavaScript, C#, Julia, Go, and D use some form of garbage collector, which makes life for the programmers much easier and avoids all the memory-management-related bugs.
Nim was initially designed to use a garbage collector, with an option for manual memory management in critical areas. However, since version 1.0, Nim additional supports ORC/ARC memory handling, a form of scope- and destructor-based automatic memory management. ARC can be used when our memory blocks have no cycles, which is often the case. And ORC can handle additional cyclic structures. ARC and ORC may not yet provide optimal throughput compared to the older Garbage Collector, referred to as REFC. However, they avoid delayed deallocation and delays in program execution, making them good choices for critical code like device drivers and games.
| Language | Paradigm | Typing discipline | Syntax | Execution | Memory Management | Generics | Macros, Meta-programming | Modules |
|---|---|---|---|---|---|---|---|---|
C |
Imperative, procedural, structured |
Static, weak |
Braces, semicolons |
Native |
Manual |
No |
Text preprocessor |
No |
C++ |
Imperative, procedural, structured, object-oriented |
Static, weak |
Braces, semicolons |
Native |
Destructors, RAII, manual, optional GC |
Yes, Templates |
Text preprocessor |
C++20 |
Nim |
Imperative, procedural, structured, functional, object-oriented |
Static, strong, inferred |
Python-like (off-side rule) |
Native, web browser (JavaScript) |
GC, refcount, destructors |
Yes |
AST based, hygienic |
Yes |
Rust |
Imperative, procedural, structured, functional, object-oriented |
Static, strong, inferred |
Braces, semicolons |
Native |
Destructors, borrow-checker |
Yes |
AST based, hygienic |
Yes |
D |
Imperative, procedural, structured, functional, object-oriented |
Static, strong, inferred, generic |
Braces, semicolons |
Native |
GC, destructors, manual |
Yes |
Yes |
Yes |
Go |
Imperative, procedural, structured, functional, composition |
Static, strong, inferred |
Braces, semicolons |
Native |
GC |
No |
No |
Yes |
Zig |
Imperative, procedural, structured, functional, (object-oriented) |
Static, strong, inferred, generic |
Braces, semicolons |
Native |
Manual, option types |
(Yes) |
No |
Yes |
Why Nim?
| In this section, we use many new Computer Science (CS) expressions but do not explain them. This is intentional; if you already know them, you may gain a better understanding of what Nim is. If you do not know them, you will at least learn that we can describe Nim using complex terms. |
Three well-known traditional programming languages are C, Java, and Python. C, created in 1972, is essentially a simple language that operates close to the hardware. Compilers can generate fast, highly optimized native machine code for C. However, C has cryptic syntax, some peculiar semantics, and it lacks the higher concepts of modern languages. Java, created in 1995, strongly encourages the object-oriented style of programming (OOP) and runs on a virtual machine. This makes it unsuitable for embedded systems and microcontrollers. Python, created in 1991, is generally an interpreted language rather than a compiled one, which results in slower program execution. Both, Java and Python, do not effectively support writing of low-level code that operates close to the hardware, making them unusable for device-driver and kernel development. Because many Python libraries are written in highly optimized C, Python can appear quite fast when performing standard tasks, such as sorting data, processing CSV or JSON files, or crawling websites. Therefore, Python is not a poor choice when primarily used for calling library functions. However, its performance deficiencies become evident when custom Python code is required to solve a problem.
Of course, there are many more programming languages, each with its own advantages and disadvantages, and some are optimized for specific use cases.
Nim is a state-of-the-art programming language well-suited for systems and application programming. Its clean Python-like syntax makes programming easy and enjoyable for beginners, without imposing any restrictions on experienced systems programmers. Nim combines successful concepts from mature languages like Python, Ada, and Modula with a few established features of the latest research. It offers high performance with type and memory safety while keeping the source code short and readable. Both the compiler and the generated executables support all major platforms, including Windows, Linux, BSD, and macOS. Cross-compiling to Android and other mobile and embedded devices and microcontrollers is possible, and the JavaScript backend allows the creation of web apps and to run programs in web browsers. The custom package managers, Nimble, Nimph and Atlas, facilitate the easy and secure use and redistribution of programs and libraries. The C, C++, and LLVM-based backends enable easy OS library calls without additional glue code, while the JavaScript backend generates high-quality code for web applications. The integration of the "Read/Eval/Print Loop" (REPL), "Hot code reloading", and incremental compilation (expected for versions > 2.0), along with support for various development environments — including debugging and language server protocols — make working with Nim both productive and enjoyable.
Some facts about Nim
* Nim is a multi-paradigm programming language. Unlike some popular programming languages, Nim doesn’t predominantly focus on the OOP paradigm. It’s primarily an imperative and procedural programming language, but it also supports OOP, data-oriented, functional, declarative, concurrent, and various other programming styles. Nim supports common OOP features, which include inheritance, polymorphism, and dynamic dispatch.
-
The generated executables are small and dependency-free. For instance, a simple chess program with a plain GTK-based graphical user interface is only 100 KB in size,[15] and the Nim compiler executable itself is approximately 6.5 MB. It is possible to shrink the executable size of "Hello World" programs to about 10 KB for use on tiny microcontrollers.
-
Nim is fast, with its performance typically rivaling that of other high-performance languages, such as C or C++. There are still some exceptions: other languages may have libraries or applications that have been tuned for performance for many years, while similar Nim applications are so far less tuned for performance, or are perhaps written with more priority on short and clean code or run-time safety.
-
Nim has a clean, Python-like syntax characterized by significant whitespace. There’s no need for block delimiters such as {} pairs or begin/end keywords, and no need for statement delimiters like ;.
-
Safety: Nim programs are type- and memory-safe. The compiler prevents memory corruption as long as unsafe low-level constructs, such as casts, pointers, the address operator, or the {.union.} pragma, are not used.
-
Nim boasts a fast compiler capable of compiling itself and other medium-sized packages in less than 10 seconds. The upcoming incremental compilation feature could further increase this speed.
-
Nim is statically typed, meaning each variable or other entity has a well-defined type. This feature catches most programming errors at compile-time, prevents run-time errors, and ensures optimal performance. At the same time, the static typing makes it easier to understand and maintain larger codebases.
-
Nim supports various memory management strategies, including manual allocations for critical low-level tasks, as well as various garbage collectors, including a destructor-based, fully deterministic memory manager.
-
Nim produces native, highly-optimized executables and also has the capability to generate JavaScript output for web applications.
-
Nim has a clean module concept, which helps to structure large projects.
-
Nim features a well-designed standard library that supports a multitude of basic programming tasks. The full source code of the library is included and can be viewed easily from within the HTML-based API documentation.
-
Library modules, such as the os module, provide OS-independent abstractions. These allow for the compilation and running of the same program on different operating systems without modifications.
-
The Nim standard library is supplemented by over 1000 external packages for a wide range of use cases. External packages can be installed easily with Nim’s package managers.
-
Nim supports asynchronous operation, threading, and parallel processing.
-
Nim supports all popular operating systems including Linux, Windows, macOS, and Android, as well as various hardware types such as x86, ARM and RISCV procesors, including embedded systems and micro-controllers.
-
Utilizing external libraries written in C is straightforward, requiring no additional glue code. Moreover, Nim can even work together with code written in other languages. For instance, some Nim-Python interfaces are available.
-
Many popular editors have support for Nim syntax highlighting and other IDE functionality like on-the-fly checking for errors and displaying detailed information about imported functions and data types.
-
In the last few years, Nim has reached some important milestones: Version 1.0, which brought some stability promises, has been released. Along with the ARC and ORC memory management strategies and full destructor support, fully deterministic memory management comparable to memory management in C++ or Rust is available. Therefore, problems associated with conventional garbage collectors, such as delayed memory deallocation or extended pauses in programs due to the garbage collection process, are eliminated. And some larger companies have started using Nim in production, the most influential is currently the Status Corp. with their Ethereum client development.
Nim supports many programming styles
We have already mentioned that Nim is a multi-paradigm programming language that supports various programming styles. While Nim can primarily be regarded as an imperative, procedural programming language, it also effectively supports popular functional and object-oriented programming styles.
In classical OOP languages, such as Python, we have the concept of classes with attributes and methods that are tightly bound to the classes:
class User:
  def say(self):
    print("It does not work!")

user = User()
user.say()
In this Python snippet, we define a class, User, with a custom method named say() attached to it. We then create an instance, user, of this class and invoke its say() method.
This tight coupling of methods to classes lacks flexibility. For example, extending a class with additional methods can prove difficult or, in some cases, impossible. Another challenge with this class concept is determining the ownership of a method when multiple classes are involved. For instance, if we need a method that appends a single character to a text string, would that method belong to the character class or the string class?
Nim avoids such a strict class concept, while its generalized method call syntax allows us to use a class-like syntax for all our data types. For example, to get the length of a string variable, we can write len(myString) in classical procedural notation, or we can use the method call syntax myString.len() or just myString.len. The compiler treats all these notations as equivalent, making the method syntax available without the restrictions inherent to the class concept. The method call syntax can be used in Nim for all data types, even for plain numbers — so the notation abs(myNum) is fully equivalent to myNum.abs.
The Python code from above might look like this in Nim:
type User = object

proc say(self: User) =
  echo ("It does not work!")

let user = User()
user.say()
Instead of classes, we use object types in Nim, and we define procedures and methods that can work on objects or other data types.
As an example of the functional programming style in Nim, we could examine a code fragment from a real-world app required to generate a string from four numbers, separated by commas. Using the mapIt() procedure imported from the sequtils module and the fmt() macro from the strformat module, we may write that in functional programming style in this way:
from std/strutils import join
from std/sequtils import mapIt
from std/strformat import fmt
const DefaultWorldRange = [0.0, 0, 800, 600]
let str = DefaultWorldRange.mapIt(fmt("{it:g}")).join(", ")
echo str # "0, 0, 800, 600"
In the imperative, procedural style, we would write it like
from std/strformat import fmt
const DefaultWorldRange = [0.0, 0, 800, 600]
var str: string
for i, x in pairs(DefaultWorldRange):
  str.add(fmt("{x:g}"))
  if i < DefaultWorldRange.high:
    str.add(", ")
echo str # "0, 0, 800, 600"
Nim is efficient
Nim is a compiled, statically-typed language. Unlike interpreted, dynamically-typed languages like Python, where every statement must be run to check for errors, the Nim compiler catches most errors during the compilation process. The static typing, in conjunction with Nim’s robust type system, allows the compiler to catch a majority of errors, such as undefined operations like adding a number to a letter, during compilation. These errors are reported in the terminal window or directly in the editor or IDE. When no errors are found or after all errors have been fixed, the compiler generates highly optimized, dependency-free executables. This compilation process is typically quite fast; for example, the compiler can compile itself in less than 10 seconds on a modern PC.
Modern concepts such as zero-overhead iterators, compile-time evaluation of user-defined functions, and cross-module inlining, in combination with the preference for value-based, stack-located data types, lead to extremely efficient code. Multi-threading, asynchronous input/output operations (async IO), parallel processing, and SIMD instructions including GPU execution are supported. Various memory management strategies exist: selectable and tunable high-performance Garbage Collectors (GC), including a new fully deterministic destructor-based memory management system, are supported for automatic memory management. These can be disabled for manual memory management. This makes Nim a good choice for application development and close-to-the-hardware system programming at the same time. The unrestricted hardware access, small executables, and optional GC will make Nim a perfect solution for embedded systems, hardware drivers, and operating system development.
Nim is expressive and elegant
Nim offers a modern type system with templates, generics, and type inference. Built-in advanced data types such as dynamic containers, sets, and strings with full UTF support are complemented by a large collection of library types like hash tables and regular expressions. While Nim supports the traditional Object-Oriented Programming style with inheritance and dynamic dispatch, it doesn’t enforce this paradigm, instead offering modern concepts such as procedural and functional programming. The optional method call syntax enables the use of all data types and functions in an OOP-like fashion; for example, instead of len(myStr), we can also use the OOP style myStr.len.[16] The powerful AST-based hygienic macro system offers nearly unlimited possibilities for the advanced programmer. This macro and meta-programming system allows compiler-guided code generation at compile-time. This way, the Nim core language can be kept small and compact, while many advanced features are enabled by user-defined macros. For example, the support of asynchronous IO operations has been created with these forms of meta-programming, as well as many Domain Specific Language (DSL) extensions.
Nim is open and free
Both the Nim compiler and all modules of the standard library are implemented in Nim. All source code is available under the permissive MIT license.
Nim has a community
The Nim forum is hosted at:
and the software running the forum is coded in Nim.
Real-time chat is supported by IRC, Gitter, Discord, Telegram, and others.
Nim also has a presence on Reddit.com and Stackoverflow.com:
Nim is evolving
Initiated over 15 years ago as a small community project by a group of bright CS students under the leadership of Mr. A. Rumpf, Nim is now considered one of the most interesting and promising programming languages. Supported by countless individuals and leading companies in the computer industry, Nim is actively used in the areas of application, game, web, and cryptocurrency development. Nim has made a large amount of progress in the last few years: it reached version Nim v2.0 with some stability guarantees and a new deterministic memory management system was introduced, which will enhance parallel processing support and the utilization of Nim in embedded systems development.
Nim is not a virus
Because Nim is a powerful yet simple systems programming language, it has been exploited by a few individuals to write malware in recent years. As a result, numerous Nim programs, including the compiler and other official tools, frequently get falsely flagged as viruses on Windows. Unfortunately, this poses a serious issue for newcomers wishing to explore Nim, and it lacks an easy solution. Nim developers have already reported this issue to Microsoft and other related companies, but they appear to show limited concern about it. Advanced Windows users can manually disable virus scans and potentially firewall protection. However, this can be seen as risky should a genuine Nim-related virus ever emerge.
References:
Why is Nim not a popular mainstream language yet?
Mr. A. Rumpf initiated the development of Nim in 2008, and since then, he, along with a handful of volunteers, has been diligently advancing its development. Finally, in 2018, Nim got some significant monetary support from Status Corp., and in 2019, the stable Nim version 1.0 was released. However, Nim is still developed by a small core team and some volunteers, while other languages like Java, C#, Go, or Rust are supported by large companies, or, like C and C++, have a very long history and well-trained users. Finally, there are many competing languages, some with a longer history and some possibly better suited for special purposes, like JavaScript, Dart, or Kotlin for web development, Julia or R for numeric applications, or Zig, C, and Assembly for the tiny 8-bit microcontrollers with a small amount of RAM.
While we’ve said that Nim can be used universally, from tiny microcontrollers to large desktop and web applications, we must admit that its use for mobile devices with Android or iOS operating systems is not as easy and well-documented. However, this applies to many other languages, including popular ones like Python, Go, and Rust. The reason simply is that Android and iOS devices are not really open systems. For example, Android is strongly coupled to Java or its new variant, Kotlin. However, using Nim on Android and iOS devices is possible. Games and apps have already been created for these devices. See https://github.com/treeform/glfm as an example.
Currently, Nim does not have a single perfect GUI library. Instead, there are a lot of attempts: Various GTK and Qt bindings, many web-based GUIs, a few simple, pure Nim GUIs, and the Fidget project. The situation is currently not really satisfactory, but the same is the case for most other modern languages like Go, Julia, Rust, and even Python. The exceptions are Dart with Flutter, perhaps C++ with Qt and the Java/Kotlin/Android bundle, and of course the commercial languages Swift and C#.
Some people just prefer languages with full OOP support and true classes. While Nim does support OOP design with heap-allocated reference objects, inheritance, and methods with dynamic runtime dispatch, it does not strongly enforce its use. People educated in the 1990s might still be influenced by the Java OOP hype and argue that classes make structuring larger programs easier.
Others detest all forms of automatic memory management and might believe that Rust’s borrow checker or Zig’s C-like memory management suffices. In fact, Nim might not always match Rust’s performance completely. And while Nim’s executables are already compact, Zig, being essentially an improved C, provides no overhead to C libraries and might generate even smaller executables.
For some "professional" programmers, Nim’s use of significant white space instead of curly brackets for identifying blocks and scopes could be a reason to avoid Nim. The use of significant white space, also called the Off-side rule,[17] has some tradition in computer textbooks and is used in some other languages, like Python, Haskell, and Scala 3. With Python being the most popular programming language these days, it is hard to believe that programmers really prefer the use of curly brackets. But actually, most professionals started their education with languages like C, C++, or Java, and just feel more professional when they have their curly brackets. Scala introduced significant white space in version 3 of the language, and its designer Martin Odersky said that this improves productivity overall by 10%.[18]
Nim programmers usually import symbols from other modules unqualifiedly ("import std/strutils" instead of "from std/strutils import …"). Fully qualified symbol import is possible (from std/strutils import nil), but since Nim doesn’t use classes, this may make it difficult to use imported operators. It could also cause issues with Nim’s method call syntax not working properly (strutils.toUpperAscii(myStr) vs myStr.toUpperAscii). People coming from dynamically typed languages like Python sometimes express concern about namespace pollution and symbol conflicts due to unqualified imports. Experience has shown that unqualified import isn’t an actual problem in Nim. This is because procedure overload resolution typically works reliably when the proc parameter types are not all identical. Conflicts may only occur in rare situations for constants or enumeration data types. These are reported by the compiler and can easily be resolved by using module name prefixes when necessary. Nevertheless, some people worry and argue that fully qualified names make it easier to see the origin of symbols.[19]
A similar point is the style-insensitivity of Nim: With the exception of the first letter of a symbol, Nim does not distinguish between lower- and upper-case letters and ignores underscores. This approach has some advantages and disadvantages, but in practice, it’s not as problematic as it might seem. We will discuss it later in this book in more detail.
Not directly related to the Nim language itself, but to the user experience, is the programming environment or tooling: editors, IDEs, REPL (read–eval–print loop), package managers, and debugging and profiling support. All this may not be as perfect as for other popular major languages yet. Indeed, Nim’s language server support (based on nimsuggest) is not very reliable and tends to be slow.
The language server support depends on compile times, as nimsuggest is some form of a Nim compiler variant. So this may improve when Nim eventually receives incremental compilation support (IC), expected in Nim 2.0 or later. Providing good language server support is generally hard for languages with templates, generics, macros, and type inference — the Crystal language has similar issues.[20]
However, all this tooling is more of an implementation detail and not a direct issue of the language. Since Nim is a high-level language with very clear syntax, tooling should not be that important. Programs that compile successfully generally just work, so there may not be a significant demand for robust debugger support. In fact, Nim already has all of this tooling; it just doesn’t function as effectively as it could. [21]
Nim is already supported by more than 1000 external packages which cover many application areas, but that number is still small compared to really popular languages like Python, Java, or JavaScript. However, some current Nim packages might not measure up to the libraries of other languages, which have benefited from years of optimization by hundreds or thousands of full-time developers.
Indeed, the future of Nim is not entirely secure. Core developers might vanish, financial support could stop, or a better language could emerge. However, even if the development of Nim were to cease someday, you would still be able to use it, and many of the concepts you’ve learned with Nim could be applied to other modern languages as well.
Is Nim a good choice as the first language for a beginner?
When you use C as your first language, you may learn a lot about how computers really work, but the learning experience may not be as enjoyable, progress can be slow, and C lacks many concepts of modern programming languages. C++, Rust, and Haskell are often too difficult for beginners. So, currently, many beginners start with Python. While you can efficiently grasp high-level concepts with Python and quickly achieve useful results, you might not learn much about the internal workings of computers. Thus, you might not understand why your code is slow and consumes so many resources; you could also be uncertain about how to improve the program or run it successfully on restricted hardware. It’s like learning to drive a car without any knowledge about how a combustion engine, the transmission, or the brakes really work. Nim has none of these restrictions; it offers high-level concepts like Python, but also provides access to low-level operations, enabling a deeper understanding of internal workings if desired. Although learning resources for Nim are not yet as developed as those for mainstream languages, some good tutorials are already available. Hopefully, this book will also prove helpful to beginners.
Is Nim really a good teaching language?
Generally yes, in the same way as Pascal was in the 1980s, and Modula/Oberon was at the end of the last century. However, Nim still faces the same issues as Wirthian languages: it doesn’t necessarily assist in job seeking. If we teach children Python, JavaScript or C, they might find entry-level employment, particularly if they have to deviate from their intended educational path for some reason. Unfortunately, this is not the case with niche languages, so teachers should be aware of their responsibility. Furthermore, it doesn’t make much sense to teach against the interests of the kids. When they are keen to learn JavaScript to create visual effects or similar tasks easily, teaching another language that might not be immediately available on their home PC or smartphone becomes challenging.
So, is Nim really the best starting point for me?
Maybe not. If you intend to learn a programming language today and want to make a great video game tomorrow, then Nim is definitely not the best starting point. This is just not possible. While there are nice libs for making games with Nim already available, there exist easier solutions in other languages. With some luck, you might find source code in that language allowing you to patch a few strings, modify colors and background music, and claim it as your game.
After learning Nim, will I still have to learn other programming languages?
Nim is quite a versatile language, making it a good candidate for someone intending to learn only one language. But of course, it is always a good idea to learn a few other languages later. Generally, it’s hard to avoid learning C, given the prevalence of C code worldwide. Most algorithms that have ever been invented are available in a C implementation somewhere, and most libraries are written in C or at least have a C API that you can use with other languages, including Nim. Since C is a compact language without complex constructs, a basic understanding of C is typically sufficient to convert a C program to another language. Often, that conversion process is supported by tools, such as the Nim c2nim tool. So learning some C later is really a good idea, and when you have some basic understanding of Nim and CS in general, learning some C is an easy task. However, learning C before Nim could be an option, as more learning resources exist for C. A few years ago, some people would have recommended learning C or Python before Nim. However, Nim now has sufficient learning resources, so we indeed recommend starting directly with Nim.
Why should I not use Nim?
Perhaps it is simply not the ideal solution for you. Both a racing bicycle and a mountain bike are excellent, but for cycling a few hundred meters to the baker’s shop, neither might be the perfect solution. A standard bicycle would be more suitable. Even though Nim seems to combine the advantages of both a racing bicycle and a mountain bike — high performance and robust design — and isn’t expensive, it might not be the optimal solution for everyone. People who write only small scripts and aren’t concerned about performance can continue using Python. People who are interested solely in specific applications, perhaps just web development or 8-bit microcontrollers, might not necessarily need Nim. Nim can do this and much more well, but for special use cases, better-suited languages may still exist. Additionally, someone who has spent many years mastering C++ might decide to continue using it. Currently, another potential reason for not using Nim could be the absence of certain libraries. If you require certain important libraries for your project that are currently unavailable for Nim, of course, this could pose a significant problem if you lack the skills or time to write them from scratch or at least create high-level bindings to a C library.
How long does it take to learn Nim?
Some people might tell you that you can learn it in just two weeks.[22] Perhaps, when you are very, very bright. However, if it were that easy, the world would be filled with Nim experts. Studying the official tutorials Part I and II should really take only a few hours, and then you have already a basic feeling for the language and can do some simple exercises. In theory, to learn the fundamentals of Nim, reading this book should suffice, and you might even skip Part I and the exercises in Part IV. Thus, you actually only need to read 400 pages, which should be possible in 100 hours. But who can really read 8 hours a day, and remember all the details without practicing? Reading the language manual or Mr. Rumpf’s book would also be ways to learn the language.
I started with Nim in 2014, with some prior experience in Pascal, C, Modula, Oberon, Ruby, and assembly language. I learned from all the tutorials, the Nim forum, IRC, and later from the Manning book. I also studied the Nim language manual, the API docs of Nim’s standard library, and a few important external packages. I estimate it took me one year, studying 10 hours a week, to understand the basics and become proficient in the language. In addition to learning, I did some exercises, such as writing a simple chess game. So for me, it actually took more than 500 hours. We believe that with a good book, the learning process could be at least 50% faster. So, if you can dedicate 10 hours a week to learning and a few additional hours to practicing, you could consider yourself a Nim programmer after about six months. Of course, your motivation makes a big difference. Loving the language, having an interesting project for which you intend to use the language, and maybe even a job where you can use it, helps a lot.
Our first Nim program
To maintain our motivation, let’s now present our first tiny Nim program. Ideally, we would delay this section until after installing the Nim compiler on our computer. However, we can already run and test the program by copying it into one of the available Nim online playgrounds like
There are two more unofficial sites that can run Nim code online:
In the section What is an algorithm? we described an algorithm to sum up the first 100 natural numbers. Converting that algorithm into a Nim program is straightforward, resulting in the text file provided below. You can copy it into the playground and run it now if you want. The program uses some basic Nim instructions, which we will briefly describe here. Everything will be explained in much more detail in the next part of this book.
var sum: int
var i: int
sum = 0
i = 0
while i < 100:
  inc(i, 1)
  inc(sum, i)
echo sum
We write Nim programs as plain text files using an editor tool, and you will learn how to create them soon. We call these text files the source code of the program. The source code is the input for the compiler. The compiler processes the source code, checks for obvious errors, and then generates an executable file that contains the final CPU instructions and can be run. Executable files are sometimes called executables or binary files. The term binary could be considered misleading, as all computer files are indeed stored as binary data. However, the expression 'binary' is used to differentiate executable programs from text files, such as Nim source code, which we can read, print, and edit using an editor. Don’t try to load the executable files generated by the Nim compiler into a text editor, as the content is not plain text, but numeric machine code that may confuse the editor. On the Windows OS, executable files typically get a special name extension .exe, but on Linux, no special name extensions are used.
Nim source code files are processed by the Nim compiler from top to bottom. In principle, for the generated executable, program execution also starts at the top. However, there are some exceptions to program execution; for example, program code enclosed in functions is not immediately executed where it appears in the source code file but rather when the function is called (invoked). And the program execution is not a linear process — we can use conditional expressions to skip parts of the program, or various loop constructs to repeat the execution of some program segments. In fact, the program execution in Nim is more similar to languages like Python or Ruby than to the C language: A C program always needs a main() function with exactly this name, and the execution of a C program always starts with a compiler-generated call to this function.
Variables are elementary entities of computer programs and are essentially named storage areas in the computer. As Nim is a compiled and statically-typed language, we have to declare each variable before we can use it. We do that by choosing a meaningful name for the variable and specifying its data type. To tell the compiler about our intention to declare a variable, we start the line with the var keyword, followed by the chosen name, a colon, and the data type of our variable. We have to put at least one space character between the var keyword and the name of the variable, to allow the compiler to recognize the two separate entities. Usually, we also put a space after the colon that separates the variable name from its data type. But this is only a convention to improve the readability of the source code. For the compiler, the colon already separates the variable name from the data type. The first line of our program declares a new variable named sum of data type int. int is short for integer and indicates that our variable should be able to store negative or positive integer numbers. (Integer numbers are whole numbers without a fraction, like -1, 0, 1234. Floating-point numbers, like 3.14159, represent another important numeric data type that we will use later as well.) The var at the start of the line is a keyword. Keywords are reserved symbols that have a special meaning for the compiler. Var indicates that we want to introduce a new variable. The compiler recognizes this and reserves a memory location in the computer’s RAM to store the actual value of the variable.
The second line is nearly identical to the first: we declare another variable, again of int type and a simple name, i.
Variable names like i, j, and k are typically used when we cannot think of a meaningful name or when we intend to use these variable as (array) indizes or as counters in loops. Note that in Nim, we can use arbitrary names for variables (with some restrictions) and that the actual name of a variable is not coupled to its data type or behavior. In early Fortran, that was handled differently, as the convention was that variables named i, j, and k were automatically of integer type by default.
In lines 3 and 4 of our program, we initialize the variables, that is, we give them a well-defined initial start value. To do that, we use the = operator to assign a value to the variable. Operators are special symbols like +, -, *, or / to indicate our desire to do an addition, a subtraction, a multiplication, or a division. Note that the = operator is used in Nim like in many other programming languages for assignment, and not like in traditional mathematics as an equality test. The reason for this is that, in computer programming, assignments occur more frequently than equality tests. Some early languages, like Pascal, used the compound := operator for assignment, which aligns more closely with mathematical usage. However, it is more difficult to type on a keyboard and is not visually appealing to most people. An expression like x = y assigns the content of variable y to x. In other words, x gets the value of y, the former value of x is overwritten and lost, and the content of y remains unchanged.
After such an assignment, x and y contain the same value. In the above example, we do not assign the content of a variable to the destination; instead, we use a literal numeric constant with the value 0. When the computer has executed lines 3 and 4, the variables sum and i each contain the start value 0. When we use the = operator for an assignment, we usually put a space character on both sides of the operator. However, this is merely a convention to improve the readability of the source code and is not strictly necessary. As a convention, spaces are typically placed on both sides of most Nim infix operators. This includes arithmetic operators, the assignment operator, and relational operators such as < or >. Also, similar to usage in ordinary text files, when we use a colon or a semicolon to separate two entities from each other, we usually put a space after the punctuation character.
Line 5 of our code example is much more interesting: it contains a while condition. The line starts with the term while, which is again a reserved keyword, followed by the logical expression i < 100 and a colon. An expression in Nim is something that produces a result, like the math expression 2 + 2, which yields the integer result of 4. A logical expression doesn’t yield a numerical result; instead, it yields a logical (boolean) result, which can be true or false. The logical expression i < 100 is dependent on the current value of the variable i. The two lines following the line with the while keyword are each indented by two spaces, meaning that these lines start with two additional spaces compared to the previous line. This form of indentation is used in Nim (and Python) to indicate blocks. Blocks are grouped statements. The complete while loop consists of the line containing the while keyword followed by a block of statements. The statement block after the while condition is executed as long as the while condition evaluates to the logical value true. For the first loop iteration i has the initial value 0, the condition i < 100 evaluates to the boolean value true, and the block after the while condition is executed for the first time. In this block, we have the inc() instruction. Inc is an abbreviation for increment. Inc(a, b) increases the value of variable a by b, while b remains unchanged. So in the above block, i is increased by one, followed by sum being increased by the current value of i. So when that block has been executed for the first time, i has the value 1 and sum also has the value 1. At the end of that block, execution starts again at the line with the while condition, now testing the expression i < 100 with i containing the value 1. Again, it evaluates to true, so the block is executed again; i then gets the new value 2, and sum becomes 3. This process continues until i reaches the value 100, at which point the condition i < 100 evaluates to false, and execution proceeds with the first instruction after the while block. That instruction is an echo statement, which is used in Nim to write values to the terminal or screen of the computer. Some other languages use terms like print or put instead of echo. You might still be wondering about the colon that terminates line five, which contains the while condition. That colon serves solely as a marker to indicate the end of a conditional statement.
Don’t worry if you haven’t understood much of this short explanation; we will explain all of it in much more detail later.
Binary numbers
When we write numbers in everyday life, we typically use the decimal system with base 10, which includes the ten available digits 0 through 9. To get the value of a decimal number, we multiply each digit with powers of 10 depending on the position of the digit and sum the individual terms. The rightmost digit is multiplied by 10^0, the next digit by 10^1, and so on. A literal decimal number like 7382, therefore, has the numerical value 2 * 10^0 + 8 * 10^1 + 3 * 10^2 + 7 * 10^3. Here, we have used the exponential operator ^ — where 10^3 = 10 * 10 * 10. Current computers use binary representation internally for numbers. Generally, we do not care much about that fact, but it is good to know some properties of binary numbers. Binary numbers work nearly identically as decimal numbers. The difference is that we have only two available digits, which we write as 0 and 1. A number in binary representation is a sequence of these two digits. Like in the decimal system, the numerical value results from the individual digits and their position: The binary number 1011 has the numerical value 1 * 2^0 + 1 * 2^1 + 0 * 2^2 + 1 * 2^3, which is 11 in decimal notation. For binary numbers, the base is 2, so we multiply the binary digits by powers of two. Formally, the addition of two binary numbers works as we know it from the decimal system: we add the matching digits and take the carry into account, as in 1001 + 1101 = 10110, because we start by adding the two least significant digits of each number, which are both 1. That addition of 1+1 results in a carry and the resultant 0. The next two digits are both zero, but we have to take the carry from the former operation into account, so the result is 1. For the next position, we have to add 0 and 1, which is just 1 without a carry. And finally, we have 1 + 1, which results in 0 with a carry. The carry generates an additional digit, concluding the operation. In the decimal system with base 10, a multiplication with 10 is easily calculated by just shifting all digits by one place to the left and writing a 0 at the now empty rightmost position. For binary numbers, it is very similar: a multiplication by the base, which is two in the binary system, is simply a shift to the left, with the rightmost position filled by digit 0. [25]
In the binary system, the digits are typically called bits, and these bits are numbered from right to left, starting with 0 for the rightmost bit. For example, the binary number 10010101 is referred to as an 8-bit number because it requires eight digits to be represented in binary form. Often, individual bits are conceptualized as small bulbs, with a 1 bit represented as a lit bulb and a 0 bit represented as a dark bulb. A lit bulb is also referred to as a set bit. For instance, in the binary number 10010101, bits 0, 2, 4, and 7 are set, and the other bits are unset or cleared.
Groups of eight bits are called a byte, and sometimes, four bits are called a nibble. A word, which is an entity a computer can process in a single instruction, may consist of one, two, four, or eight bytes, depending on the CPU’s capacity. In the case of a CPU with an 8-byte word size, this means that the computer can, for instance, add two variables, each of 8-byte size, in a single instruction.
Let’s investigate some basic properties of binary numbers, starting with the assumption that we have an 8-bit word, also known as a byte. An 8-bit word can have 2^8 different states, as each bit can be set or unset independently of the other bits. That corresponds to the numbers 0 up to 255. For now, we’ll assume that we’re working with positive numbers only, but we will discuss negative numbers soon. An important property of binary numbers in computers is the wrapping around, which is a consequence of the fact that we have only a limited set of bits available to store the number. Therefore, when we continuously add 1 to a number, all bits eventually become set. This corresponds to the largest number that can be stored with that number of bits. When we then add again 1, we get an overflow. The run-time system may catch that overflow, so we might receive an overflow error, or the number is just reset to zero, as it may happen in our car when we manage to drive one million miles, or when the ordinary clock jumps from 23:59 to 00:00 of the next day. A useful property of binary numbers is the fact that we can easily invert all bits, that is, replace set bits with unset ones and vice versa. Let us use the prefix ! to indicate the operation of bit inversion, then !01001100 is 10110011. It is an obvious and useful fact that for each number x, we get a number with all bits set when we add x and !x. This means x + !x = 11111111 when considering an 8-bit word. Furthermore, if we ignore overflow, it follows that x + !x + 1 = 0 for each number x. This is a useful property that can be applied when considering negative numbers.
Now, let us investigate how we can encode negative numbers in binary form. In binary representation, only two states are available: 0 or 1, representing a set or an unset bit, respectively. But we have no unitary minus sign. The sign of a number could be encoded in the most significant bit of a word — if this bit is set, it indicates that the number is negative. Generally, a modified version of this encoding is used, called two’s complement: a negative number is constructed by first inverting all the bits — a 0 bit is transferred into a 1 bit and vice versa — and finally the number 1 is added. That encoding simplifies the CPU construction, as subtraction can be replaced by addition in this way:
Consider the case that we want to do a subtraction of two binary encoded numbers. The operation can be symbolically represented as A - B for arbitrary numbers A and B. Subtraction is, by definition, the inverse operation of addition. In other words, A + B - B = A, or B - B = 0 for every number B.
Assume we have a CPU that can do additions and that can invert all the bits of a number. Can we perform a subtraction with that CPU? Indeed, we can.
Remember that for each number X, X + !X + 1 = 0, provided we ignore overflow. If that relation is true for each number, then it is obviously true for each B in the expression A - B, and we can write A - B = A + (B + !B + 1) - B = A + (!B + 1), using the associative property of addition and subtraction in mathematics, that is we can group the terms as we want. But the term in the parenthesis is just the two’s complement, which we get when we invert all bits of B and add 1. So, to perform subtraction, we need to invert the bits of B and then add A, !B, and 1, ignoring overflow. That may sound complicated, but a bit inversion is a very cheap operation in a CPU, which is always available, and adding 1 is also a straightforward operation. The advantage is that we do not need separate hardware for the subtraction operation. Typically, subtraction in this way is not slower than addition because the bit inversion and the addition of 1 can be performed at the same time in the CPU as an ordinary addition.
From the equation above, indicating A - B = A + (!B + 1), it is obvious that we consider the two’s complement (!B + 1) as the negative of B. Note that the two’s complement of zero is again zero, and two’s complement of 00000001 is 11111111. All negative numbers in this system have a bit set to 1 at the leftmost position. This restricts all positive numbers to bit combinations where the leftmost bit is unset. For an 8-bit word, this means that positive numbers are restricted to the bits 00000000 to 01111111, which is the range 0 to 127 in decimal notation. The two’s complement of decimal 127 is 10000001. Seems to be fine so far, but note that there exists also the bit pattern 10000000, which is -128 in decimal. For that bit pattern, no positive value exists. If we try to construct the two’s complement of that bit pattern, we end up with the same pattern again. This is an asymmetry of two’s complement representation, which cannot be avoided. It generally is no problem, with one exception. We can never invert the sign of the smallest available integer, as that operation would result in a run-time error.[26]
Summary: When working only with positive numbers, we can store numbers from 0 up to 255 in an 8-bit word, also known as a byte. In a 16-bit word, we could store values from 0 up to 2^16 - 1, which is 65535. When we need numbers that can also be negative, we have for 8-bit words the range from -128 to 127 available, which is -2^7 up to 2^7 - 1. For a signed 16-bit word, the range would be -2^15 up to 2^15 - 1.
While we can work with 8 or 16-bit words, for PC programming the CPU usually supports 32- or 64-bit words, so we have a much larger number range available. But when we program microcontrollers or embedded devices we may indeed have only 8- or 16-bit words available, or we may use such small word sizes intentionally on a PC to fit all of our data into a smaller memory area.
An important note to conclude this section is that whenever we have a word with a specific bit pattern stored in our computer’s memory, we cannot directly determine the type of data from the bit pattern. It can be a positive or a negative number, but maybe it is not a number at all but a letter or maybe something totally different. As an example, consider this 8-bit word: 10000001. It could be 129 if we have stored intentionally positive numbers in that storage location, or could be -127 if we intentionally stored a negative value. Or it could be not a number at all. Is that a problem? No, it is not as long as we use a programming language like Nim which uses static typing. Whenever we are using variables, we declare their type first, and so the compiler can do bookkeeping about the type of each variable stored in the computer memory. The benefit is that we can use all the available bits to encode our actual data, without having to reserve any bits to encode the actual data type of variables. For languages without static typing, this is not the case. In languages like Python or Ruby, we can use variables without a static type, so we can assign whatever we want to them. That seems to be comfortable at first but can be confusing when we write larger programs and the Python or Ruby interpreter has to do all the bookkeeping at runtime, which can slow down the program and consume additional memory.
Put another way, to determine if an operation is valid, it’s generally sufficient to know only the data type of the operands. We do not have to know the actual content. The only exception is if we invert the sign of the most negative integer number or if we perform an operation that causes an overflow, as there are not enough bits available to store the result — we may get a run-time error for that case.[27] In a statically-typed language, each variable has a well-defined type, and the compiler can ensure at compile-time that all operations on that variable are valid. If an operation is not valid, the compiler will generate an error message. Then, when these operations are executed at run time, they are always valid operations, and the actual content, like the actual numeric value, does not matter (with the exception of overflow and perhaps a few other invalid math operations like division by zero).
Hexadecimal numbers
Hexadecimal numbers, based on the 16-base numerical system, might seem less prevalent compared to binary numbers and their technical rationale may not be immediately apparent. However, these numbers continue to be relevant and you might come across them occasionally in various contexts. Originally, hexadecimal numbers emerged from the infancy of computer science when programming was primarily conducted through numerical codes rather than sophisticated programming languages. Despite their historical origin, hexadecimal numbers remain integral to modern computing. They serve as a more human-friendly representation of binary numbers, facilitating their comprehension and manipulation. This function has led to their extensive use in different areas of computing, including programming and networking. So, even though hexadecimal numbers are seen as a remnant from the nascent phase of computing, they retain their utility and relevance in contemporary computer science.[28] To represent the 16 possible values of a hexadecimal digit, the 10 decimal digits 0 up to 9 are supplemented with the characters A through F. The most significant characteristic of a hexadecimal digit is that it can represent four bits — a unit equivalent to half of a byte, sometimes called a nibble. In the past, when manually entering binary numbers was necessary, it was often easier to encode a nibble using a hexadecimal digit:
| Decimal | Binary | Hexadecimal |
|---|---|---|
0 |
0000 |
00 |
1 |
0001 |
01 |
2 |
0010 |
02 |
3 |
0011 |
03 |
4 |
0100 |
04 |
5 |
0101 |
05 |
6 |
0110 |
06 |
7 |
0111 |
07 |
8 |
1000 |
08 |
9 |
1001 |
09 |
10 |
1010 |
0A |
11 |
1011 |
0B |
12 |
1100 |
0C |
13 |
1101 |
0D |
14 |
1110 |
0E |
15 |
1111 |
0F |
The only place where we will encounter hexadecimal characters again in this book will be when we introduce character and string data types. There, control characters like a newline character are sometimes specified in hexadecimal form, such as "\x0A" for a newline character.
Installation of the compiler
We will not go into great detail about installing the Nim compiler, as the process largely depends on your operating system, and the installation instructions may change in the future. We assume that you have a computer with an installed operating system and Internet access, and you are able to do at least very basic operations with your computer, such as switching it on, logging in, and opening a web browser or a terminal window. If that is not the case, then you should really seek help for these basic steps, and possibly with other basic tasks.
Detailed installation instructions are available on the Nim homepage at https://nim-lang.org/install.html.[29] Try to follow these instructions. If they are not sufficient, please seek help in the Nim forum: https://forum.nim-lang.org/
If you are using a Linux operating system, then your system usually provides a package manager, which should make the installation very easy.
For example, on a Gentoo Linux system, you would open a root terminal and simply type emerge -av nim. That command would install Nim, including all necessary dependencies, for you. It may take a few minutes as Gentoo compiles all packages fresh from the source code, but then you are done. Similar commands exist for most other Linux distributions. This installation by a package manager installs Nim system-wide, so all users of the computer can now use Nim.
Another solution, which is preferable when you want to ensure that you get the most recent Nim compiler, is compiling directly from the latest git sources. This process is also straightforward and is described here: https://github.com/nim-lang/Nim. However, before you can follow these instructions, you must ensure that Git software and a working C compiler are installed on your computer.
Creation of source-code files
Nim source code, like the source code of most other programming languages, is based on text files. Text files are documents saved on your computer that contain only ordinary letters, which you can type on your keyboard. This means no images or videos, no HTML content with fancy CSS styling. Generally, source code should contain only ordinary ASCII text, that is, no umlauts or Unicode characters.
To create source code, we typically use a text editor, which is a tool designed for creating and modifying plain text files. If you don’t already have a text editor, you could technically use a word processor to write your source code, though it’s not recommended. However, you would need to ensure that the file is saved as plain ASCII text. Editors typically support syntax highlighting, meaning keywords, numbers, and such are displayed with a unique color or style, making it easier to recognize the content. Some editors support advanced features like checking for errors while you type the program source code.
A list of recommended editors is available at https://nim-lang.org/faq.html
If you do not want to use a specialized editor now, then Gedit or Nano should be available on Linux. For Windows, you can use something like Notepad.
Typically, we store Nim source code files in their own directory, a separate section on your hard drive. If you’re working on Linux in a terminal window, you can type
cd
mkdir mynimfiles
cd mynimfiles
gedit test.nim
You type these commands in the terminal window and press the return key after each of the above lines — that is, you type cd on your keyboard and then press the return key to execute that command. The same for the next three commands. What you have done is the following: you navigated to your default working area (home directory), created a subarea named mynimfiles, entered that subarea, and finally, launched the gedit editor. The argument test.nim tells gedit that you intend to create or modify a file called test.nim. If gedit is not available, or if you work on a computer without a graphical user interface, then you may replace the gedit command with nano. While gedit opens a new window with a graphical interface, nano opens only a very simple interface in the current terminal. Notable text editors without a GUI include Vim or NeoVim. These are very powerful editors, but they are difficult to learn, and they might seem unconventional as they have both a command mode and an ordinary text input mode available. For NeoVim, there is very good Nim support available.
If you prefer not to work from a terminal, or if you are using Windows or macOS, you should have a graphical user interface that allows you to create a directory and launch an editor.
Once the editor is open, you can type in the Nim source code from our previous example and save it as test.nim. Afterward, you can close the editor.
Note that the return key behaves differently in editors than in the terminal window: In the terminal window, you type in a command and finally press the return key to "launch" or execute the command. In an editor, the return key behaves similarly to the other keys: if you press ordinary keys in your editor, the corresponding character is added to your text, and the cursor moves one position to the right. And when you press the return key, then an invisible newline character is inserted, and the cursor moves to the start of the next line.
Launching the compiler and running the program
If you are working from a Linux terminal, then you can type
ls -lt
cat test.nim
That is, you first list the content of your directory with the ls command, and then display the content of the Nim source code file that you have just typed in using the cat command.
Now type
nim c test.nim
This command invokes the Nim compiler and instructs it to compile your source code. The "c" letter is called an option or a sub-command. It tells the Nim compiler to compile your program and to use the C backend to generate an executable.
The compiler should display a success message almost immediately. If it displays error messages instead, you should relaunch Gedit or Nano, correct your typing error, save the modified file, and recompile.
When the source text is successfully compiled, you can run your program by typing
./test
In your terminal window, a number will be displayed, which is the sum of the numbers 1 to 100.
If you haven’t been able to open a terminal to invoke the compiler, you might want to consider installing an advanced editor like VS-Code. These editors typically have the capability to launch the compiler and run the program directly within the editor.
The command
nim c test.nim
is the most basic compiler invocation. The extension .nim is optional, the compiler can infer that file extension. This command compiles our program in default debug mode; it uses the C compiler back end and generates a native executable. Debug mode means that the generated executable includes many checks, such as array index checks, range checks, nil dereference checks, among others. The generated executable may not run very fast, and it will be large, but if your program has bugs, then it will provide a meaningful error message in most cases. Only after you have carefully tested your program, you may consider compiling it without debug mode. You may do that with
nim c -d:release test.nim

nim c -d:danger test.nim
The compiler option -d:release removes most checks and debugging code, and it enables the backend optimization by passing the option "-O3" to the C compiler backend, resulting in a very fast and small executable file. The option -d:danger includes -d:release and removes all checks. You should be aware that compiling with -d:danger means that your program may crash without any useful information, or even worse, it may run, but contain uncaught errors like overflows, which could lead to incorrect results. Generally, you should compile your program with plain nim c first. After you have tested it well, and if you need the additional performance, you may switch to the -d:release option. For games, benchmarks, or other non-critical tasks, you may try the option -d:danger, to get an executable without any checks for utmost performance.
There are many more compiler options. You can find explanations for them in the Nim language manual, or you can display them using the commands nim --help and nim --fullhelp. An important new option is --mm:arc, which enables the new deterministic memory management. You could combine --mm:arc with -d:useMalloc to disable Nim’s own memory allocator. This reduces the executable size and enables the use of Valgrind to detect memory leaks. Similar to --mm:arc is the option --mm:orc, which can additionally deal with cyclic data structures. Another powerful option is --passC:-flto. This option is for the C compiler backend and enables link time optimization (LTO). LTO enables inlining for all procedure calls and can significantly reduce the final program size. In recent versions of the Nim compiler, -d:lto can be used instead of --passC:-flto. Furthermore, for Nim v2.0, --mm:orc is the default memory management strategy. It’s worth mentioning that you can also try the C++ compiler backend using the cpp sub-command instead of the plain c command. Additionally, you may compile with the CLang backend instead of the default GCC backend using the --cc:clang option. You can additionally specify the option -r to immediately run the program after a successful build. For testing small scripts, the compiler invocation in the form nim r myfile.nim can be used to compile and run a program without generating a permanent executable file. Here’s an example of how you can use all these options:
nim c -d:release --mm:arc -d:useMalloc --passC:-flto --passC:-march=native board.nim
In this example, -march=native is additionally passed to the C compiler backend to enable the use of the most efficient CPU instructions of your computer. This could result in an executable that won’t run on older hardware. Of course, you can save all these parameters in configuration files, eliminating the need to type them in for each compiler invocation. You may find more explanations for all the compiler options in the Nim manual, or in later sections of this book; this includes the options for the JavaScript backend.
Stropping for keywords and operators
Before concluding this introduction, we should mention that the Nim language supports stropping for keywords and operators by enclosing them in backticks.
This way, it is possible to use Nim keywords like type, from, or object as ordinary symbols, for example, as variable or field names.
Typically, we avoid using keywords as ordinary symbols.
However, when interfacing with C libraries, there may be instances where these libraries use symbols that are keywords in Nim.
So, instead of renaming the symbols, we could
use a notation like `object` for a proc parameter name, or `from` for a field name. Actually, we have to use
stropping when we define procedures and functions that serve as operators, as in the example
proc `*`(c: char; i: int): string = c.repeat(i).
Part II: The Basics
In this section of the book, we will introduce some of the most essential constructs of the Nim programming language. These include statements, expressions, conditional and iterative code execution, as well as functions, procedures, iterators, templates, and exceptions. We will also discuss various basic data types, including the container types: array, sequence, and string.
Declarations
In the Nim programming language, declarations serve a significant role by allowing us to define constants, variables, procedures, and even our unique data types. Declarations serve to inform both the compiler and the human reader about crucial attributes such as the name and data type of the variable we intend to use. Being a statically and strongly typed language, Nim requires this information for the compiler to function correctly. These declarations are not only useful to the compiler but also prove beneficial for us as programmers. They act as compact references, simplifying the process of understanding and managing the code. This is particularly valuable when collaborating with others, as it ensures clear communication and consistency in coding style, fostering a more effective development environment.[30]
We will explain the type and procedure declarations in later sections. For now, we will focus on constant and variable declarations.
A constant declaration in its simplest form maps a symbolic name to a value, like
const Pi = 3.14159We use the reserved keyword const to inform the compiler that we want to declare a constant named Pi and assign it the numeric decimal value 3.14159. Nim has a small set of reserved keywords such as var, const, proc, and while, among others, which tell the compiler that we want to declare a variable, a constant, a procedure, or that we want to use a while loop for some repeated code execution. Reserved keywords in Nim are specific symbols that hold special significance for the compiler. Therefore, we should avoid using these symbols as names for other entities such as variables, constants, or functions to prevent confusion for the compiler. The symbol = is the assignment operator in Nim; it assigns the value or expression on its right side to the symbol on its left. You have to understand that this assignment operator is different from the equal sign we may use in mathematics to express an equality relation. Some languages, like Pascal, initially used the compound operator := for assignments. However, this can be challenging to type and may confuse individuals unfamiliar with it. Since source code typically contains many assignments, using the symbol = is quite sensible. For the actual equality test of two entities, which is not used that often, we use the compound == operator in Nim, as in most other programming languages including C and Python. We call = an operator. Operators are symbols that execute basic operations, like + for addition of two numbers, or = for assignment of a value to a symbol. Most operators are used as infix operators between two arguments, as in the expression 2 * Pi, which denotes the multiplication of the named constant Pi with the literal number 2, resulting in the floating-point value 6.28318. However, operators can also function as unary operators, such as in -Pi where in unary minus inverts the sign of a numeric value. When declaring named constants, we must always assign a value immediately. That value can never change, but of course, we can use the named constant in expressions to derive different values, as in
const Pi = 3.14
const TwoPi = 2 * Pi
const MinusPi = -Pi
When declaring constants, you can also specify the exact data type of the constant value, as in
const Pi: float = 3.14
const Two: float = 2
Typically, specifying the type isn’t necessary, as Nim employs type inference. From the literal value 3.14, it is obvious that it is a decimal floating point number. For the second line, type inference would conclude that the constant Two is of integer type, as no fractional part is given. In this case, we can specify the desired data type after the name of the constant, separated by a colon. Alternatively, we could write const Two = 2.0. When dealing with numeric expressions with constants, the Nim compiler performs intelligent automatic type promotion. For instance, when given the expression const TwoPi = 2 * Pi, Nim assumes that what we actually intended was const TwoPi = 2.0 * Pi.
For numeric expressions with variables, this type-promotion is stricter. It aims to avoid unnecessary type conversions at runtime and to ensure that the final program truly utilizes the intended data types.
As mentioned in Part I of the book, we usually place a space on either side of an operator when we use it in infix notation between two operands. This convention improves the readability of the source code. As mentioned before, in Nim, spaces can sometimes change the interpretation of an expression. This is because Nim adheres to the conventions of handwritten notation. For instance, a + -b is significantly different from a+-b. We will discuss these notations in later sections of the book in more detail.
With the aforementioned constant declaration, we can use the symbol Pi in our program’s source code, eliminating the need to remember or retype the exact sequence of digits. Utilizing named constants, such as Pi from our previous example, simplifies value modification. If we need more precision, we can update the exact value of Pi in one place in our source code, rather than searching for the digit sequence 3.14 throughout our code files.
For numeric constants, such as our Pi value, the compiler will substitute the symbol with its actual numeric value in the source code during compilation.
Expressions assigned to constants are already evaluated at compile time. Thus, complicated constant expressions do not negatively impact the program’s performance. The expressions can contain simple operations like basic math, and most Nim functions can be used as well, but functions like sin() from external C libraries might currently be unavailable.
Variable declarations are more complex because they require the compiler to reserve a specific named storage location:
var velocity: intIn this case, we place the reserved keyword var at the start of the line to indicate to the compiler that we are declaring a variable. We then give the variable our chosen name, followed by a colon and the data type. The int type is a predefined numeric data type indicating a signed integer. The storage capacity of an integer variable depends on the operating system of your computer. On 32-bit systems, 32 bits are used, and on 64-bit systems, 64 bits are used to store one single integer variable. This range is adequate even for large signed integers, with a range from -2^31 to 2^31 - 1 for 32-bit systems, and from -2^63 to 2^63 - 1 for 64-bit systems.
While we generally use lower-case names for variables, the names of constants can start with an uppercase letter as well.
Variables declared using the var keyword act as simple containers, storing a value which can be accessed or modified later. We can assign an initial value to the variable immediately when we declare it, similar to how we do it for constants, or we can assign the value later. If no actual value is assigned to the variable, it assumes a default value, which for numeric variables is zero:
var start: int
var stop: int
var delta: int = 3
stop = 10 * start + 1
In the first and second lines, we declare two variables, start and stop, both of which initially hold the default integer value of zero. In the third line, we declare one more integer variable called delta, to which we assign an initial value of 3. And finally, in the fourth line, we assign an integer expression to the variable stop. Nim offers more variants for variable declarations, which we will discuss shortly. These include utilizing type inference when immediately assigning an initial value, using var sections to declare multiple variables without repeating the var keyword, listing multiple names of the same data type in front of the colon separated by commas, or using the let keyword to declare immutable variables.
Nim v2.0 introduces the strictDefs pragma, which can enforce variable initialization. This helps avoid errors that might occur when variables default to zero but require a different initial value. The strictDefs pragma, along with other new features of Nim 2.0, is described in detail in the book’s Appendix.
Statements
Statements, or instructions, are a core component of Nim programs; they tell the computer what it shall do. Often statements are procedure calls, like the call of the echo() or inc() procedure, which we have already seen in Part I of the book. We will learn what procedures exactly are in later sections. For now, we can consider procedures as entities that perform specific tasks when we call (or invoke) them. We invoke them by writing their name in our source code file, followed by a list of parameters, or arguments. When we write echo 7, echo() is the procedure that we call, and 7 is the argument — an integer literal in this case. When the parameter list includes more than one argument, we separate the arguments with a comma and typically add an optional space afterward. As a result of our procedure call, the decimal number 7 is written to the terminal window when we execute the compiled program. The parameter list can be empty, and the parameters can be expressions, that may again contain function calls like echo sin(0) + 2.0. In contrast to languages like C, where the parameter list must always be enclosed in brackets, Nim often allows us to omit the brackets — a feature known as the command invocation syntax.
const SquareOfFive = 5 * 5
echo(5 * 5, SquareOfFive) # ordinary procedure call
echo 5 * 5, SquareOfFive # command invocation syntax
The command invocation syntax is typically used with the echo() procedure, or when a procedure has only a single argument. For multiple arguments, or when the argument is a complicated expression, the use of brackets is preferable. In some programming languages, like C, coding styles may suggest placing a space between the function name and the opening bracket. For Nim, we should not do that, the reason will become clear when we later explain the tuple data type. A few procedures have no parameters at all. When we call these procedures, we always have to use the syntax myProc() with an empty pair of brackets to make it clear to the compiler that we want to call that procedure. The statement res = myProc() assigns the result of the procedure call to res, while res = myProc assigns the procedure itself to res, which is a significantly different operation.
Functions are a special form of procedures that return a value or a result. For instance, in mathematics, sin() or cos() are functions — we pass an angle as an argument and they return the sine or cosine of that angle, respectively. On the other hand, the echo() procedure, which prints the arguments, is not a function as it doesn’t return a result.
Let’s examine this minimal Nim program:
var a: int
a = 2 + 3
echo a
echo(cos(0) + 2)
The Nim program above consists of a variable declaration and three statements: in the first line, we declare the variable we want to use. In the next line, we assign the value 2 + 3 to it, and finally, in line 3 we use the procedure echo() to display the content of our variable in the terminal window. In the last line, we once again use the echo() procedure with a conventional parameter list enclosed in brackets. The parameter list contains a single argument, which is the sum of a function call to cos(0) and the literal value 2. Here, the compiler would first call cos(0), then add the literal value 2 to that result, and finally pass the sum to the echo procedure to print the value. [31]
Nim programs are generally processed from top to bottom by the compiler, and they also execute in the same order after successful compilation. A consequence of this is that we have to write the lines of the above program exactly in that order. If we moved the variable declaration down, then the compiler would complain about an undeclared variable because the variable is used before it has been declared. If we exchanged lines 2 and 3, then the compiler would be still satisfied, and we would be able to compile and run the program. However, the output would be significantly different because the uninitialized value of the variable a would be displayed first and only then would it be assigned a value.
When we have to declare multiple constants or variables, we can use a block. That is, we write the keyword var or const on its own line, followed by the respective declarations as shown:
const
  Pi = 3.1415
  Year = 2020
var
  sum: int
  age: int
These blocks are also referred to as sections, for example, const section or var section, as is customary in Wirthian languages. Take note of the indentation — the lines following const and var begin with a few spaces, forming an indented block that allows the compiler to identify the end of the declaration. Typically, we use two spaces for each level of indentation. While other numbers of spaces can be used, it’s essential to maintain consistency in the indentation scheme. Two spaces are generally recommended as they are easily recognizable in the source code and do not consume excessive space; thus, they do not create overly lengthy lines that may not fit on the screen.
Also note that in Nim, we generally write each statement on its own line. The line break indicates to the compiler that the statement has ended. Special statement delimiters as the ; in C are not require at the line end, but can be used to separate multiple statements on the same line. There are a few exceptions to this rule — for example, long mathematical expressions can continue on the next line. Generally, when a line ends with a punctuation character, and the next line is indented, the compiler recognizes the continuation. (for more details, refer to the Nim manual). Multiple statements can also be put on a single line by separating them with a semicolon:
var a: int
echo a; inc(a) (1)
a = 2 * a + (2)
a * a| 1 | Here, two statements are separated by a semicolon on a single line. |
| 2 | A longer math expression split over multiple lines. An operator as the last character on a line indicates that the expression continues on the next indented line. |
It is also possible to declare multiple variables of the same type in a single declaration, as shown below:
var
  sum, age: int
Alternatively, we can assign an initial start value to a variable as shown in the example below:
var
  year: int = 1900
Nim also currently supports the initialization of multiple variables with the same value:
var
  i, j: int = 1
Here, both i and j would get the initial value 1. However, this notation is often avoided as it may not be immediately clear to all readers.
Lastly, we can use type inference for variable declarations when an initial value is assigned, as shown in the example below:
var
  year = 1900
The compiler recognizes in this case that we assign an integer literal to that variable, and so silently gives the variable the int type for us. Type inference can be convenient, but it might make the source code more difficult for readers to understand, or the type inference might not always yield the expected results. For example, in the above code, year gets the data type int, which is a signed 4 or 8-byte number. However, we might prefer an unsigned number or a number that occupies only two bytes in memory. For the final executable, it makes no difference whether a variable received its runtime type through direct user specification or by the use of type inference, as long as the actual data type is the same. Although the use of type inference may slightly increase the compile time for our source code, this increase is typically negligible.
Note: For integral data, we mostly use the int data type in Nim, which is a signed type with a 4 or 8-byte size. It usually does not make sense to use many different integral types — signed, unsigned, and types of different byte sizes. Mixing them in numerical expressions can be confusing and potentially even decrease performance, because the computer may have to do type conversion before it can do the math operation. Another problem associated with unsigned types is that mathematical operations on unsigned operands could yield a negative result. Consider the following example, where we use a hypothetical data type "unsigned int" to indicate unsigned integers:
var a, b: unsigned int
a = 3
b = 7
a = a - b
The true result should be -4, however, a is an unsigned type and cannot contain a negative value. So, what should happen — an incorrect result or a program termination?
Another aspect related to variable declarations is the initial value of variables. Upon declaration, Nim resets all the bits of our variables. This means that numerical variables automatically have an initial value of zero unless we assign a different value in the variable declaration.
In this declaration
var
  a: int = 0
  b: int
both variables get the initial value of zero.
We have already mentioned that Nim 2.0 introduces the strictDefs pragma, which enforces explicit initialization. That is explained in more detail in the Appendix where we summarize all the new 2.0 features.
There is a variant for variable declarations that uses the let keyword instead of the var keyword. Let is used when we need a variable that gets assigned a value only once, while var is used when we anticipate changing the content of the variable during the program execution. We say that we use var to create mutable variables, and let to create immutable variables. Let seems to be similar to const, but in const declarations, we can only use values that are known at compile time. Let permits us to assign values to variables that become available only at program runtime, possibly because the value derives from a previous calculation. However, let also indicates that the assignment occurs only once, and the content does not change later during the program’s execution. We refer to such a variable as immutable. The use of the let keyword can aid in understanding the source code and potentially help the compiler optimize for faster or more compact code. For now, we can just ignore let declarations and use var instead — later, we may use let where appropriate, and the compiler will tell us when let will not work, and we have to use var.
With the knowledge we have gained in this section, we can rewrite our initial Nim example from Part I as follows:
const
  Max = 100
var
  sum, i: int
while i < Max:
  inc(i)
  inc(sum, i)
echo sum
In the code above, we declare both int type variables in a single line and take advantage of the compiler initializing them to 0. We also use a named constant for the upper loop boundary. Another tiny fix is that we write inc(i) instead of inc(i, 1). We can do that because there exist multiple procedures with the name inc() — one which takes two arguments, and one which takes only one argument and always increases that argument by one. Procedures with the same name but different parameter lists are referred to as overloaded procedures. Instead of inc(i), we could have written also i = i + 1, and instead of inc(sum, i) we could write sum = sum + i. Either form would generate identical code in the executable, so it’s a matter of personal preference.
Input and output
We have already used the echo() procedure for displaying textual output in the terminal window. In previous code examples, we passed integer type arguments to the echo() proc. This procedure automatically converted these integers into a textual sequence of decimal digits for display in the terminal window. In the Nim programming language, text is represented by a predefined, built-in data type known as a string. We will delve into the details of the string data type in the next section. For now, it’s sufficient to know that it exists and we can use the echo() proc to print text strings. The echo() procedure is capable of automatically converting other data types, such as numbers or Boolean values (true/false), into human-readable text strings for terminal output. Recall that most data types are stored internally in our computer as bits and bytes, which have no true human-readable representation by default. Numbers, like most other data types stored in the computer, are essentially abstract entities. As we’ve learned, all data in a computer is stored internally in binary form, which means it’s stored as a bit pattern of 0s and 1s. However, even that bit pattern is an abstraction. We would require a procedure that prints a 0 for each unset bit and a 1 for each set bit to display the content of an internally stored number in binary form in the terminal or elsewhere. Similarly, we require a procedure to print an internally stored number as a human-readable sequence of decimal digits. Even text strings are stored internally as abstract bit patterns and require conversion procedures to be rendered as readable text. The echo() procedure is capable of accomplishing all this, although we will not delve into these details at this point.
For our subsequent experiments, we may want to input some user data in the terminal. As we do not know much about the various available data types and the procedures that can be used to read them in, we will just present a procedure that can read a text string that the user types in the terminal window. We will utilize the readLine() function for this task.
echo "Please enter some text"
var mytext = readLine(stdin)
echo "You entered: ", mytext
Please note that the return key must be pressed after entering your text.
The first line of our program demonstrates how we can print a literal text string with the echo() proc. To mark text literals unambiguously and to separate them from other literals like numeric literals or from variables, the string literals have to be enclosed in quotation marks. In the second line of our example program, we use the readLine() function to read textual user input. Note that we call readLine() a function, not a procedure, to emphasize that it returns a value. The readLine() function requires one parameter to specify the source of the input — for instance, the terminal window or a file. The stdin parameter directs the function to read from the current terminal window. Notably, stdin is a global variable of the system (io) module and represents the standard input stream. Finally, in line 3 we use again the echo() proc to print some text. In this case, we pass two arguments to echo(): a literal text enclosed in quotes, and the mytext variable, separated by a comma. The mytext variable has the data type string. In this example, we employed type inference to declare the data type. Since the readLine() function always returns a string, which is known to the compiler, our mytext variable is automatically declared as a string. We will learn more about the data type string and other useful predefined data types in the next section.
When you try the example code from above, you might want a variant that reads the textual input not on its own line but directly after the prompt, such as 'What is your name: Nimrod'. As the echo() proc always writes a newline character after the last argument has been written, we have to use a different function to get the input prompt on the same line. We can use the write() proc from the system module for this. As write() can not only write to the terminal but also to files, it needs an additional parameter that specifies the destination. We can pass the variable stdout from the system module to indicate that write() should write to our terminal window. Often, beginners also desire the ability to read single-character input without the additional need to press the return key. For that, we can use the getch() function from the terminal module — that function waits (blocks) until a key is pressed and returns the ASCII character of the pressed key:
from std/terminal import getch

stdout.write("May you tell me your name: ")
var answer = readLine(stdin)
if answer != "no":
  echo "Nice to meet you, ", answer
echo "Press any key to continue"
let c = getch()
echo "OK, let us continue, you pressed key:", c
Don’t be misled by the fact that the first write() call and the subsequent readline() call do not appear on the same line in our example. In this case, the actual format of our source code does not influence the program output. We could write both function calls on a single line, separated by a semicolon. But that would make no difference for the program output. The key difference between the two function calls above is that write() prints the text without advancing the cursor to the next line in the terminal window, while echo() does so once all arguments have been printed. We say that echo() prints automatically a '\n' character, which we call a newline character, after all the arguments have been printed.
Data types
Nim is a statically typed programming language, which means that all variables have a well-defined data type, and this data type does not change during program execution. Moreover, we say that Nim is a strongly typed language, meaning that it does nearly no automatic type conversions when variables are assigned to each other or used in expressions or as arguments in function calls. Automatic type conversion may seem beneficial at first, but it can easily introduce errors or degrade the performance of our programs.
The most fundamental data type — in real life and in computer science — is the integer (whole) number. All other numeric data types, like fractional, floating-point, or complex numbers, and other fundamental types like the boolean type with its two values true and false, and character and text string types, can be represented as integers. For that reason, both the early computers built in the 1950s and today’s smallest microcontrollers work internally only with integer numbers. The integer data type is not only crucial for arithmetic operations, but it is also used as an index to access elements in data structures such as arrays. Furthermore, integer numbers are often interpreted as bit vectors to represent set-like data types. As all CPUs are able to do basic bit operations like setting or clearing individual bits, and as bit patterns map well to mathematical sets, set data types are well-supported by all CPUs, and so set operations are generally very efficient. Advanced computers, built in the 1980s, received support for the crucial class of floating-point numbers through specialized floating-point processors for fast numerical computations. Today, these floating-point units are typically integrated into the CPU, and GPUs can even process many floating-point operations in parallel. However, the precision of GPUs is typically limited to the ranges needed for games and graphic animations; that is, 32- or even 16-bit. Modern CPUs often also have some form of support for vector data types to process multiple values in one instruction (SIMD, single instruction, multiple data).
Non-numeric types like characters or text strings are internally represented by integer numbers. In the C language, the data type to represent text strings is called char, but it is indeed only an 8-bit integer type that supports all the mathematical operations defined for ordinary integer types. In Nim and the Wirthian languages, most math operations are not directly allowed for the char data type, which helps prevent misuse and allows the compiler to catch logical errors.
Nim also supports several built-in homogeneous container types like arrays and sequences, along with numerous built-in derived types like enumeration types, sub-ranges and slices, distinct types, and view types (experimental). The built-in inhomogeneous container types object and tuple, which allow grouping of other types, are complemented by a variant type container, which allows instances of that type to contain different child types at runtime. These inhomogeneous container types are similar to the struct and union types from the C programming language.
Other basic and advanced data types like complex and fractional numbers, types with arbitrary-precision arithmetic, as well as hash sets and hash tables, dynamically linked lists, or tree structures are available through the Nim standard library or external packages. Of course, we are also able to define our own custom data types with our own operators, functions, and procedures working on them.
Note that all the data types that are built into the language, like the primitive types int, float, or char, as well as the built-in container types like tuple, object, seq, and string, are written in lower case, while data types that are defined by the Nim standard library or that we define ourselves, by convention, start with a capital letter like the CountTables type defined in the tables module. Some people may regard this as an inconsistency, while others may say that this distinction allows us to differentiate built-in types from types defined by libraries.
At least, we can agree that using capital notation for common types such as Int, Float, or String would be more difficult to type and wouldn’t look as nice.
Integer types
We’ve already mentioned the int data type, a signed integer that can be either 4 or 8 bytes depending on the operating system. The reasoning behind Nim’s int size depending on the OS word size will become clearer as we explore concepts of references and pointers. For now, let’s provide a brief explanation for readers already familiar with pointers and their role in memory addressing. If you’re unfamiliar with pointers, feel free to skip this section. The reasoning behind Nim’s int size dependency on the OS lies in memory addressing. A 32-bit OS can generally address 2^32 bytes (which equals 4 GBytes), limiting pointers and references to 32 bits. Having more bits wouldn’t be practical. Integers often serve as indices for arrays and sequences, interacting with computer memory in ways similar to pointers and references. So, in a 32-bit OS with 32-bit pointers, 32-bit integers are sufficient as array indices since an array cannot have more than 2^32 entries. In contrast, a 64-bit OS, equipped with 64-bit pointers, might require 64-bit integers as indices for larger arrays and sequences. However, exceptions exist. There could be scenarios where 32-bit integers are sufficient on a 64-bit OS, or situations on a 32-bit OS requiring 64-bit integers, such as for extensive counting tasks. These considerations led to some advocating for a configurable int type of either 32 or 64 bits. Similarly, some proposed a user-defined float type of 32 or 64 bits. Yet, Nim’s int type is OS-determined, and its float type is invariably 64 bits. This approach represents a pragmatic solution. For other sizes, one can use the int32, int64, float32, and float64 data types, which offer user-defined sizes.
Besides the int data type, Nim has some more data types for signed and unsigned integers: int8, int16, int32, and int64 are signed types with well-defined bit and byte size, and uint8, uint16, uint32, and uint64 are the unsigned equivalents. The number at the end of the type name indicates the bit size; we can calculate the byte size by dividing this value by 8. Additionally, we have the type uint, which corresponds to int and has the same size, but stores unsigned numbers only. [33] Generally, we should try to use the int type for all integral numbers, but sometimes it can make sense to use the other types. For example, if you have to work with a large collection of numbers, know that each number is not very big, and your RAM is not really that large, then you may decide, for example, to use int16 for all your numbers. Or when you know that your numbers will be huge and will not fit in a 4-byte integer, then you may use the int64 type to ensure that the numbers fit in that type even when your program is compiled and executed on a computer with a 32-bit OS.
For integer numbers, we have the predefined operators +, -, and * available for addition, subtraction, and multiplication. Basically, these operations work as one might expect, but it’s important to remember that overflows can occur. For signed integers, we get compile- or run-time errors in that case, while unsigned integers just wrap around, see the example at the end of this section. For the division of integers, we have the operators div, mod, and / available. The div operator does an integer division ignoring the remainder, mod is short for modulus and gives us the remainder of the division, and / finally is currently only predefined for the signed int type and gives us a fractional result of data type float. That type is introduced in the next section.
It can be challenging to remember how div and mod behave when either the divisor or dividend is negative, as this behavior may vary across different programming languages. You can find a detailed and justified explanation for this specific behavior in the Nim manual and on Wikipedia.
Result of i div j
   -4 -3 -2 -1  0  1  2  3  4
-4  1  1  2  4    -4 -2 -1 -1
-3  0  1  1  3    -3 -1 -1  0
-2  0  0  1  2    -2 -1  0  0
-1  0  0  0  1    -1  0  0  0
 0  0  0  0  0     0  0  0  0
 1  0  0  0 -1     1  0  0  0
 2  0  0 -1 -2     2  1  0  0
 3  0 -1 -1 -3     3  1  1  0
 4 -1 -1 -2 -4     4  2  1  1

Result of i mod j
   -4 -3 -2 -1  0  1  2  3  4
-4  0 -1  0  0     0  0 -1  0
-3 -3  0 -1  0     0 -1  0 -3
-2 -2 -2  0  0     0  0 -2 -2
-1 -1 -1 -1  0     0 -1 -1 -1
 0  0  0  0  0     0  0  0  0
 1  1  1  1  0     0  1  1  1
 2  2  2  0  0     0  0  2  2
 3  3  0  1  0     0  1  0  3
 4  0  1  0  0     0  0  1  0
When performance matters, we generally should try to use the "CPU native" number type, which for Nim is the int type. Furthermore, we should try to avoid using math expressions with different types, as the CPU may have to do type conversion in that case before the math operation can be applied. Adding two int8 types on some CPUs can be slower than adding two ints, because the CPU may have to size extend the operands before the math operation is performed. But this depends on the actual CPU, and there are important exceptions: Multiplying two ints would result in an int128 result if the int size is 64 bits, which can be slow if the CPU does not support that operation well. Another essential factor to consider for maximum performance is cache usage. If you are performing operations on a large set of data, then you may get a significant performance gain when large fractions of your data fit in the caches of your computer, as cache access is much faster than ordinary RAM access. So using smaller data types, i.e. int32 instead of Nim’s default int, which is int64 on a 64-bit OS, may increase performance in this special application.
When we use Nim on tiny microcontrollers, maybe even on 8-bit controllers like the popular AVR devices, it is recommended to use only integers of well-defined size like int8.
When we write integer literal numbers, we generally use our common decimal notation, as in var i = 100. To increase the readability of long number literals, we can use the underscore character as in 1_000; that underscore character is just ignored by the compiler. We can also write integer literals in binary, octal, or hexadecimal notation. For that, we prefix the literal value with 0b, 0o, or 0x. The leading zero is necessary, and the next letter indicates a binary, octal, or hexadecimal encoding. But such integer literal notation is very rarely used.
What’s more important is the actual size of integer literals, especially when we use type inference. Ordinary integer literals have the int type, but integer literals not fitting in 32 bits have int64 type. We can also specify the type of integer literals by appending the literal with i8, i16, i32, or i64 for signed types and with u, u8, u16, u32, or u64 for unsigned types. We can separate the actual number from the suffix with a ' character, although this is not necessary for integer literals.
var
  a = 100 # int literal in decimal notation
  b = 1234567890000 # int64
  c = 5'i8 # 8-bit integer
  d = 7u16 # unsigned integer with 2 byte size
  e = 0b1111 # ordinary integer in binary notation, value is 15 in decimal notation
  f = 0o77 # integer in octal notation, value is 7 * 8^0 + 7 * 8^1 in decimal notation
  g = 0xFF # integer in hexadecimal notation

echo g, typeof(g)
In arithmetic expressions, integer types of different sizes are generally compatible when all the types are either signed or unsigned. For example, in the code provided above, we could write echo a + b + c, and typeof(a + b + c) would be int64. This means that the expression is propagated to the largest type of all the involved operands. However, echo a + b + c + d would not compile because it’s not clear whether signed or unsigned arithmetic should be used when there’s a mix of signed and unsigned operands. It’s also worth noting that echo typeof(a) is typeof(b) would print false, even on a 64-bit OS.
An important property of the Nim implementation, by A. Rumpf, when used with the C backend, is that unsigned integers do not generate overflow errors but simply wrap around:
var x: int8 = 0

while true:
  inc(x)
  echo x
The code above would print the numbers 0 through 127, then terminate program execution due to an overflow error. But when we change the data type to uint8, we would get a continuous sequence of the numbers 0 up to 255. After the value 255 is reached, the value wraps around to 0 again and the process continues. This behavior can lead to strange bugs and is one of the reasons why the Nim team generally recommends avoiding unsigned integers.
For compatibility with external libraries, Nim has also the integer types cint and cuint, which exactly match the C types int and uint when we compile for the C or C++ backend. These types may also be available for the JavaScript backend, the LLVM backend, and other backends. For details, you should consult the compiler documentation. For most operating systems and C compilers, the int and uint types in C are 4 bytes in size. However, there can be exceptions, so it would be better not to write code that depends on the actual byte size of these types. The Nim types cint and cuint are mainly used only for parameter lists of (C) library functions. To match other C integer types like char, short, long, longlong Nim supports these types when we put a c letter in front of the name like clong. Again, you should consult the Nim language manual if you need more details, for example, when you create bindings to external libraries.
Floating-point types
Another important numeric data type is float, for floating-point numbers. Floats are approximations of real numbers. They can also store fractions and are most often printed in the decimal system with a decimal point, or in scientific notation with an exponent. Examples of the use of variables of the float data type are
var
  mean = 3.0 / 7.9
  x: float = 12
  y = 1.2E3
The result of the division of two float literals is assigned to mean — this result is also of the data type float, allowing the compiler to infer the same type for mean. If we printed the result of the division, there would be a decimal point and some digits following it. For variable x we specify the float type explicitly and assign the value 12. We could use type inference if we assigned 12.0, as the compiler can recognize from the decimal point that we want a float, not an int variable. In line 3 we use scientific notation for the float literal that we assign to y, and the assigned value is 1.2 * 10^3 = 1200.0. Literal values, like 2E3, are also valid float literals — the value would be 2000.0. But literals with a decimal point and no digits before or after the point — 1. or .2 — are not valid in Nim.
In the current Nim implementation, float variables always occupy 64 bits. Nim also has the data type float64, which is currently identical to plain float, and float32, which can only store smaller numbers and has less precision.[34]
That is, when you do a division of two arbitrary floats and print the result, you will get up to 16 valid digits. If you try to print more than 16 significant digits, then the additional decimal places will be just some form of random garbage. Note: The number of significant digits of a floating-point number is the total number of digits before and after the decimal point, but possibly leading zero digits would not be counted. The reason that leading zeros are not significant is just that in the ordinary notation of numbers, we always assume that there is just nothing before the first non-zero digit. For our car odometer, 001234.5 km is identical to 1234.5 km. And whether we give our body size as 1.80 m or 180 cm makes no difference; both values have 3 significant digits.
Generally, we use floating point numbers whenever integers are insufficient for some reason. For example, when we have to do complicated mathematical operations which include fractional operands like Pi, or when we have to do divisions and need the exact fractional value.
The float, float32, and float64 data types provide the +, -, *, and / operators for addition, subtraction, multiplication, and division. Unlike with the int types, we never get overflow or underflow errors with the float types, and also no error for a division by zero. But the result of an operation of two float operands can be a special value, like system.Inf, system.NegInf or system.NaN. The first two indicate over- or underflow, and NaN (Not a Number) indicates that the result of an operation is not a valid number at all, such as the result of a division by zero or the result of calculating the square root of a negative number. This behavior is sometimes called saturated arithmetic. When a variable has one of these special values and we apply further math operations, this value is kept. So we can detect at the end of a longer mathematical calculation if something went wrong — we have not to check after every single operation.[35] An interesting property of floating-point numbers is, that when we test two variables of float type for equality, and one has the value NaN, then the test is always false. That is, the test a == NaN is always false. If we forget this fact, we might initialize a float variable to the value NaN and later test with if a == NaN: to check if we have already assigned a value. However, this is not what we really intend, as that test will always yield a negative result. The actual test for the value NaN is a == a, which is only false when a has the value NaN; alternatively, we can use math.isNaN(). More useful constants and functions for the float data types can be found in the std/fenv module, and functions working with floats like the trigonometric ones are available from the std/math module.[36]
For floats, we have the operators +, -, *, and / for addition, subtraction, multiplication, and division. To calculate powers with integral exponents, you can use the ^ operator, but you must import it from the std/math module. The expression x ^ 3 is the same as x * x * x. The math module contains many more functions like sin() or cos(), sqrt() and pow(). The function name sqrt() is short for square-root, and pow() stands for power, so pow(x, y) is x to the power of y when both operands have type float. For performance-critical code you should always keep in mind that pow() is an actual function call, maybe a call of a dynamic library that can not be inlined, so a call of pow(x, 2) is typically a lot slower than a plain x * x. Even when using the ^ operator, as in x ^ 3, we should be a bit critical. But of course, we always hope that the compiler will optimize all that for us.
The operators +, -, *, and / can also be used when one operand is a float variable and the other operand is an integer literal. In that case, the compiler knows that we really intend to do a float operation and converts the integer literal automatically to the float type. However, when one operand is a float variable and the other is an integer variable, an explicit type conversion is necessary, such as in float(myIntVal) * myFloatVal. For the type conversion, we treat the desired type as a function, as in float(). One explanation for why the int value is not automatically converted to float in this case is that this may result in a loss of precision, as large int64 values cannot be represented exactly as a float. Well, this reasoning does not really apply for int32, but there is still no automatic conversion. Indeed, given that Nim is used as a systems programming language, requiring explicit conversions in this case seems to be a sensible decision, as it clarifies the programmer’s intention. Generally, it’s advisable to avoid operations with mixed types, as they may necessitate type conversions and potentially affect performance. If we really do not care, we may import the module std/lenientOps, which defines the arithmetic operations for mixed operands.
Floating-point literals default to the float data type, but, similar to integer literals, we can also explicitly specify the data type: The suffixes f and f32 specify a 32-bit float type, and d and f64 specify a 64-bit type. We can separate the suffix from the actual number with a ' character, but that is not required as long as there is no ambiguity. We can also specify float literals in binary, octal, or hexadecimal notation when we append one of these suffixes. In the case of hexadecimal notation, the ' is obviously needed to separate the suffix, as f and d are valid hex digits.
Similar to integer variables, Nim also supports the compatible types cfloat and cdouble, which match the C types float and double when the C backend is enabled. For most C compilers, C float matches Nim’s float32 and C double matches Nim’s float64.
Two important properties of floats are that not all numbers can be represented exactly, and that math operations are not absolutely accurate. Recall that in our decimal system, some fractions like 1/2 can be represented exactly as 0.5 in decimal notation, while others like 1/3 can be only approximated as 0.3333… Like all data, floats are stored internally in binary form, following the IEEE Standard for Floating-Point Arithmetic (IEEE 754). In that format, some values, such as 0.1, cannot be represented exactly. As a consequence, some simple arithmetic operations executed on the computer may not give us the exact result we expect. It’s crucial to remember this fact, and to illustrate it, we will investigate this behavior with a small example program. In this program, we will divide a few small integers, converted to float, by another integer j, also converted to float, and sum the result j times:[37]
for i in 1 .. 10:
  echo "--"
  for j in 2 .. 9:
    let a = i.float / j.float
    var sum: float
    for k in 1 .. j:
      sum += a
    echo sum
which generates this output:
--
1.0
1.0
1.0
1.0
0.9999999999999999
0.9999999999999998
1.0
1.0
--
2.0 # for all iterations!
--
3.0 # for all iterations!
--
4.0
4.0
4.0
4.0
4.0
3.999999999999999
4.0
4.000000000000001
--
5.0
5.0
5.0
5.0
5.0
5.0
5.0
4.999999999999999
--
6.0
6.0
6.0
6.0
6.0
5.999999999999999
6.0
6.0
--
7.0
7.0
7.0
7.0
7.000000000000001
7.0
7.0
7.0
--
8.0
8.0
8.0
8.0
7.999999999999999
7.999999999999998
8.0
8.000000000000002
--
9.0 # for all iterations!
--
10.0
10.0
10.0
10.0
10.0
10.0
10.0
9.999999999999998
The echo() procedure prints up to 16 significant digits of a float value, making the accumulated tiny arithmetic errors visible. Given our previous remarks, this should no longer be surprising; the general solution is to round results to fewer than 16 decimal digits before printing. Various ways to do that will be shown later in the book. A related issue of float arithmetic is caused by scaling and extinction. When we add numbers with very different magnitudes, the result can be just the value of the largest number, as in echo 1.0 == 1.0 + 1e-16, which prints true. The tiny summand is just too small to actually change the result. This is similar to when you switch on a torch on a sunny day; it will not really become brighter. Perhaps more surprising is that calling echo() with some simple float literals will print a different value, such as when echo 66.04 which gives 66.04000000000001 for Nim v2.0, while with Python3 we get 66.04 exactly. However, this is only surprising for people who do not fully understand what a statement like echo 66.04 does: We already know that the value 66.04 is converted by the compiler to an internal binary representation, and then converted back to a decimal string when we run the program. Thus, it’s not surprising that some tiny inaccuracies can accumulate in this process. Actually, it should be possible to achieve exactly 16 digits of precision when a sophisticated conversion routine, such as the Ryu or DragonBox algorithm is used. We may still wonder why Python seems to consistently get it right. There are rumors that Python might be "cheating" with some post-processing to produce the string that the user may prefer.
From the above discussions, it should be clear that testing two floats for equality is often problematic. Instead of merely testing for equality, we can define a small epsilon value like eps = 1e-14 and then write (a - b).abs < eps. This approach is generally good; it is frequently seen and often works, but not always. Imagine you write a program that processes chemical elements, and you work with atomic mass and radii. Consequently, the result of the above test could imply that all atoms in the periodic table have equal mass and size, especially when using the SI system with meter and kilogram as base units. So an equality test like
const eps = 1e-16 # an arbitrary relative precision
if (a == 0 and b == 0) or (a - b).abs / (a.abs + b.abs) < eps: # avoid div by zero

if (a - b).abs / (a.abs + b.abs + 1e-32) < eps: # a similar check, avoiding also a div by zero
can be a better solution in the general case. Whenever you need to perform a general equality test, consider the problem carefully and conduct some tests. The code provided above is merely an untested possible example.
The term machine epsilon is sometimes used in conjunction with floating-point numbers. This value is the difference between 1.0 and the next value representable by this data type, and is a measure for the floating-point precision of a computer system. Nim’s standard library provides a function, almostEqual(), that compares two float numbers based on this epsilon.
At the end of this section, some remarks about the performance of float data types compared to plain ints: On modern hardware like the popular x86 systems for the basic operations performance of floats and ints is very similar; addition, subtraction, and even multiplication is typically done in only one clock cycle, and division can be a bit slower. Even operations like sqrt() which have been regarded as slow in the past, are now close to a plain addition on modern hardware. As the CPU does its float arithmetic internally with 64 or even with 80 bits, float32 is not faster than float64, as long as the operations are not memory bound, that is large data sets are processed so that it is an advantage when the data types are smaller so that more of it fits into the cache. For tiny microcontrollers and embedded devices, things are very different, as these devices typically lack floating-point units.
So the compiler has to emulate all the float arithmetic, maybe by the use of libraries. This is very slow and produces large executables. So when writing software for modern desktop PCs, there is no reason to try to avoid float math, when solving the problem with float is easier. When the data spans a wide range, for example, from nanometers to millions of kilometers, or when operations like square root or trigonometric functions are needed, there is typically no reason to avoid float. In cases where both floats and ints may work, it is generally a good strategy to initially try using ints. Ints may still provide better performance for SIMD, threading, and parallel processing, as ints may avoid the expensive saving of floating-point CPU registers. For restricted hardware, we should better try to avoid float math. For restricted hardware, it would be better to try to avoid float math. However, this is a complex topic, and this advice only provides some basic recommendations, which might not apply in every specific case. So finally you have to decide for yourself, and as always it is a good idea to do some performance tests. In the Appendix of this book, you can find a small test for the performance of various int and float operations in section Performance of multiplication vs. division.
References:
Distinct types
Before we continue with subrange types, we should introduce the distinct types. In the real world, there are many quantities for which the set of meaningful mathematical operations is restricted, and these should not be mixed with quantities of other types. For example, we may have physical quantities such as time and distance, measured in seconds and meters respectively, mapped to the float or int data type. While adding seconds and adding meters is a valid operation, adding seconds to meters makes no sense and would be a program bug if it should occur in the program code. However, dividing a distance by a time period, resulting in the average speed, would be a valid operation. Nim provides the distinct keyword, which allows the definition of new data types. These new types are based on existing ones but are not compatible with them or with other distinct types. The newly defined distinct types have no predefined operations; we have to define all desired operations ourselves.
type
  Time = distinct float # in seconds
  Distance = distinct float # in meters

var t: Time = 0.2 # not allowed
var t: Time = Time(0.2)
For distinct types, we have to define all the allowed operations ourselves. We can convert distinct types to the base types and then use operations of the base type, or we can borrow operations from the base type by use of the {.borrow.} pragma. Using distinct types can be complicated when the new type should support many operations, but it can make our code safer. For some data types with a very limited set of operations, distinct types can be used easily. Distinct types are explained in detail in the Nim language manual; we might explain them in more detail in later sections. For now, it is enough that we know about their existence.
Subrange types
Sometimes it makes sense to limit the range of numeric variables to only a sub-range. For this, Nim uses the range keyword with the following notation: range[LowVal .. HighVal]. Values of this type can never be smaller than LowVal or larger than HighVal. In Nim v2.0 we can also define range types by leaving out the range[], that is, by using just two constants separated by ...
type
  Year = range[2020 .. 2023] # software update required at least for 2024!
  Month = range[1 .. 12]
  Day = 1 .. 31 # same as range[1 .. 31]

var a: int = 0
var d: Day = 1 # OK
d = 0 # compile-time error
d = a # run-time test and error
echo d
In the above example, the base type of the defined ranges is int. As a result, the ranges are compatible with the predefined int type, and we can assign values of int type to our range types, and vice versa. In our example, the size of the range types is the size of the int base type, but of course, we could use other base types, like type Weekday = 1.int8 .. 7.int8. If we try to assign to a range type a value that falls not into the allowed range, then we get a compile-time or run-time range error. This can help us to prevent or to discover errors in our programs. Note that whenever we use range types, the compiler may have to add additional checks to ensure that variables are always restricted to the specified range. This check is active in debug mode and also when we compile with the -d:release option. It is only ignored when we compile with -d:danger or when we explicitly disable range checks. Therefore, using a large number of range types may increase code size and decrease performance. For the example above, the line with the assignment d = a generates a runtime check. An important and often used range type is the data type Natural, defined as range[0 .. int.high]. This type is compatible with the int type and does not wrap around as uint would. It is regularly used as the type for proc parameters when the arguments must be non-negative. In the procedure body, we sometimes copy arguments of natural type to an ordinary integer — this way, we can ensure a non-negative start value and can avoid many range checks in the procedure body.
We can also declare sub-range types with float base types like type Probability = range[0.0 .. 1.0].
Note that we can still mix different sub-range types:
var d: Day = 13
var m: Month = 3
d = d + m
Such an operation is generally a bug. To prevent it, we can put the distinct keyword in front of our ranges. However, we would then have to define the allowed operations ourselves or borrow them from the base type.
Enumeration types
Enumeration types are shortened as enum in Nim. While enums in C are nothing more than integers with some special syntax for creation, Nim’s enums are more complex.
In Nim, enums can be used whenever some form of symbols are needed, such as the colors red, yellow, and green for a traffic light, or the directions north, south, east, and west for a map or a game.
Most of the time, we declare an enum type and the corresponding values by simply listing them like
type
  TrafficLight = enum
    red, yellow, green
We can then use variables of the type TrafficLight like
var tl: TrafficLight
tl = green
if tl == red:
  tl = ... # some other enum value
Enums support assignment, plain tests for (in)equality and for less or greater. Additionally, the functions succ() and pred() are defined for enums to get the successor or predecessor of an enum, ord() or int() deliver the corresponding integer number and the $ operator can be used to get the name of an enum. We can also iterate over enums, so we can print all the colors of our TrafficLight by
for el in TrafficLight:
  echo el.ord, ' ', $el
Ordinary enums start at 0 and use continuous numbers for the internal numeric value, which allows enums to be used as array indices.[38]
type
  A = array[TrafficLight, string]

var a: A
a[red] = "Rot"
echo a[red]
However, we can also assign custom numbers like
type
  TrafficLight = enum
    red = -1, yellow = 3, green = 8
We should avoid doing this, as these 'enums with holes' generate some problems for the compiler and may later be deprecated. For example, array indexing or iterating is obviously not possible for enums with holes.
It is also possible to set the string that the stringify operator $ returns, like in
type
  TrafficLight = enum
    red = "Stop"
    yellow = (2, "Caution")
    green = ("Go")
Here the assigned numerical values should be 0, 2, and 3. Currently, the enum’s numerical values must always be specified in ascending order.
When there are many enums in a program, name conflicts may occur. For example, we may have an additional enum type named BaseColor, which also has red and green members. For such cases, the {.pure.} pragma exists:
type
  BaseColor {.pure.} = enum
    red, green, blue
With the pure pragma applied, we can use the fully qualified enum name when necessary, like BaseColor.red. But we can still use unqualified names like blue when there is no name conflict.
With the upcoming Nim 2.0, the compiler will have improved handling of enums: The pure pragma is not needed anymore, and for set expressions like {BaseColor.red, green} the compiler knows that the second set member is a BaseColor as well, so we do not need the prefix anymore. For details, see the Appendix.
Boolean types
Boolean types are used to store the result of logical operations. The type is called bool in Nim and can store only two values, false and true. Although we have only two distinct states for a boolean variable and so one single bit would suffice to store a bool, generally, a whole byte (8 bits) is used for storing a boolean variable. Most other programming languages, including C, do the same. The reason is that most CPUs can not access single bits in the RAM — the smallest entity that can be directly accessed in RAM is a byte. The default initial state of a boolean variable is false, corresponding to a byte with all bits cleared.
var
  age = 17
  adult: bool = age > 17
  iLikeNim = true
  iLikeOtherLanguageBetter = false
In the third line, we assign the result of a logical comparison to the variable adult. The next two lines assign the boolean constants true and false to the variables, with their type bool inferred.
Variables of type bool support the operators not, and, or and xor. Not inverts the logical value, a and b is only true when both values are true, and false otherwise. And a or b is true when at least one of the values is true, and only false when both values are false. Xor is not used that often. It is called exclusive or; a xor b is false when both values have the same logical state, i.e., when both are true, or both are false. When the values are not the same, then the result of the xor operator is true. The xor operator makes more sense for bit operations, which we will learn later — for the boolean type, a xor b is identical to a != b.
When using conditional execution, some people like to write expressions like if myBoolExp == false:, which is identical to if not myBoolExp:. While this may be permissible, avoid writing if myBoolExp == true: as it is redundant.
Sometimes it is useful to know that false is mapped to the int value 0, and true to the int value 1. That is similar to the C language, but C has no real boolean type, instead, the numerical value 0 is interpreted as false in conditional expressions, and all non-zero values are interpreted as true.
var a: int = 0
var cond: bool
if cond:
  a = 7

a = 7 * cond.int
The effect of the last line is identical to the if statement above. In very, very rare cases, working with the actual int value of boolean variables may make sense, but generally, we should avoid that. Later in the book, there is a section about branchless code where we will present a procedure that actually may get faster by using such a trick.
Characters
The data type for single characters in Nim is called char. A variable of this type has 8 bits and is used to store individual characters. Indeed, it stores 8-bit integers which are mapped to characters. The mapping is described by the ASCII table. For example, the integer value 65 in decimal is mapped to the character A. When we use single character literals, we have to enclose the letter in single quotes. As only 8 bits are used to store characters, we only have 256 different values, including upper and lower case letters, punctuation characters, and some characters with a special meaning like a newline character to move the cursor in the terminal to the next line, or a backspace character to move the cursor one position backward. In practice, single characters aren’t used frequently. This is because they are typically grouped into sequences known as strings to construct text.
The initial ASCII table contains only the characters with numbers 0 up to 127, here is an overview generated with the small program listed in the Appendix:
Visible ASCII Characters

      +0   +1   +2   +3   +4   +5   +6   +7   +8   +9  +10  +11  +12  +13  +14  +15
  0
 16
 32        !    "    #    $    %    &    '    (    )    *    +    ,    -    .    /
 48   0    1    2    3    4    5    6    7    8    9    :    ;    <    =    >    ?
 64   @    A    B    C    D    E    F    G    H    I    J    K    L    M    N    O
 80   P    Q    R    S    T    U    V    W    X    Y    Z    [    \    ]    ^    _
 96   `    a    b    c    d    e    f    g    h    i    j    k    l    m    n    o
112   p    q    r    s    t    u    v    w    x    y    z    {    |    }    ~
The position of a character in the table is calculated by summing the number on the left with the one on top. For instance, character A is at position 64+1=65. This is the value that the Nim standard functions ord('A') or int('A') would return. The characters with a decimal value less than 32 cannot be printed and are called control characters, like linefeed, carriage return, backspace, audible beep, and such. Character 127 is also not printable and is called DEL. An important property of this table is the fact that decimal digits and upper- and lower-case letters form contiguous blocks. So to test, for example, if a character is an uppercase letter, we can use this simple condition: c >= 'A' and c <= 'Z'.
Characters with ord() > 127 are so-called umlauts, exotic characters of other languages, and some special characters. However, these characters can look different on different computers, as their appearance depends on the active code page, which maps positions to the actual character, and there are multiple code pages. When we need more than the plain ASCII characters, then we use strings in Nim, which can display many more glyphs by using UTF-8 encoding.
The control characters with a decimal value less than 32 cannot be typed on the keyboard directly, and for some characters with a decimal value greater than 126, it can be difficult to enter them on some keyboards. For these characters, as well as for all other characters, escape sequences can be used. Escape sequences start with the backslash character, and the following characters are interpreted in a special way: The backslash can follow a numeric value in decimal or hexadecimal encoding, or a letter, which is interpreted in a special way. We mentioned already that the character 'A' is mapped to the decimal value 65, which is its position in the ASCII table. So instead of 'A', we could use the escape sequence '\65' for this character. Or, as decimal 65 is 41 in hexadecimal notation (4 * 16^1 + 1 * 16^0) we can use '\x41' where the x indicates that the following digits are hexadecimal. Given that remembering the numeric value of frequently used control characters can be challenging, an alternative notation that involves a letter following the backslash can be employed. For the important newline character, we can use the decimal numeric value '\10', the hexadecimal value '\xA', or the symbolic form '\n'. Here, the letter n stands for newline.
We can consider the backslash character, which initiates escape sequences, as a unique cautionary symbol for the compiler, indicating that the subsequent characters must be interpreted in a special way.
It is important that you understand that all these escape sequences are only a way to help the programmer to enter these invisible control characters — the compiler replaces the control sequences immediately with the correct 8-bit value from the ASCII table, so in the final compiled executable '\65' or '\n' are both only a plain 8-bit integer value:
var a, b: char
a = 'A'
b = '\65'
echo a, ord(a), b, ord(b) # if you don't know the output, read again this section and run this code.
The following table lists a few important control characters:
| Decimal | Hexadecimal | Symbolic | Meaning |
|---|---|---|---|
10 |
xA |
\n, \l |
newline or linefeed — move the cursor one position down |
12 |
xC |
\f |
formfeed |
9 |
x9 |
\t |
tabulator |
11 |
xB |
\v |
vertical tabulator |
92 |
x5C |
\\ |
backslash |
39 |
x27 |
\' |
single-quote, apostrophe |
7 |
x7 |
\a |
alert, audible beep |
8 |
x8 |
\b |
backspace |
27 |
x1B |
\e |
Escape, [ESC] |
13 |
xD |
\r, \c |
return or carriage return — move the cursor at the beginning of the line |
The hexadecimal numbers after the \x character can be in upper or lower case and can have one or two hexadecimal digits. For symbolic control characters like '\a' for alert, the upper case variant '\A' seems to be identical currently. Entering a single quote as ''' does give an error message, so you have to escape it as '\''. Unfortunately, by supporting this form of escaping it becomes impossible to enter a backslash character directly, so we have to escape the backslash character as '\\' to print a single backslash.
For Nim, the most important control character is '\n', which is used to start the output in a terminal window at the beginning of a new line. But '\n' is generally not used as a single character but embedded in strings, that is, sequences of characters. We will learn more about strings soon. Note that the echo() function inserts a newline character automatically after each printed line, but the write() function does not:
echo 'N', 'i', 'm'
stdout.write 'N', 'i', 'm', '\n'
It might be slightly confusing that while we use the backslash character as an escape symbol, the table above includes an entry '\e', also referred to as [ESC]. These '\e' control character with decimal value 27 is fully unrelated to the backslash character that we use to type in control characters. [ESC] is a different special character to start control sequences, it was used in the past to send special commands to printers or modems and can be used to control font style or colors in terminal windows.
Nim’s control characters should, with few exceptions, be identical to the control characters of the C language, so you may also consult C literature for more details.
Ordinal types
In Nim, integers, enumerations, characters, and boolean types are ordinal types. Ordinal types are countable and ordered, and for each of these types, a lowest and largest member exists. The integer ordinal types support the inc() and dec() operations to get the next larger or next smaller value, and the other ordinal types use succ() and pred() for this operation. These operations can produce overflow- or underflow-like errors if applied to the largest or smallest value. The function ord() can be used on ordinal types to get the corresponding integer value. Note that unsigned integers are currently not called ordinal types in Nim and that these unsigned types wrap around, instead of generating overflow and underflow errors.
Sets
In mathematics, sets are considered an unordered collection where we can test membership (x is included in mySet) and perform operations like building the union of multiple sets. In Nim, we can have sets of all the ordinal types and the unsigned integer types, but due to memory restrictions, integer types larger than two bytes can not be used as set base types. All elements in a set must have the same base type. A set can be empty, or it can contain one or multiple elements. A specific element can either be contained in a given set or not, but it can never be contained multiple times. A very basic set operation is to test if an element is or is not contained in a set. Sets are unordered data types; that is, sets containing the same elements are always equal, regardless of the sequence in which we added the elements. Important set operations are building the union and building the difference of two sets with the same base type: The union of set a and set b is a set that contains all the elements that are contained in set a or in set b (or in both). The intersection of set a and set b is a set that contains only elements that are contained in set a and in set b.
The mathematical concept of sets maps well to words and bits of computers, as most CPUs have instructions to set and clear single bits and to test if a bit is set or unset. CPUs can execute and, or and xor operations, which correspond to the union and intersection operations in mathematical sets.
Nim supports sets with base type bool, enum, char, int8, uint8, int16, and uint16. Note that we need a bit in the computer memory for each member of the base type. The types char, int8, and uint8 are 8-bit types and can have 2^8 = 256 distinct values, thus requiring 256 bits in the computer memory to represent such a set. That would be 32 bytes or four 64-bit words. To represent a set of the base type uint16 or int16, we need already 2^16 bits, that is 2^13 bytes or 2^10 words on a 64-bit CPU. So it becomes clear that supporting base types with more than 16 bits makes not much sense.
While testing whether an element is included in a set with the in or notin operators is always a fast operation, other operations, like building the intersection or union, and set comparison operations, may not be as fast with the int16 or uint16 base types, as these operations involve processing the whole set — that is, 2^10 words on a 64-bit CPU.
We will start our explanations with sets that have a character base type, as these sets are both easy to understand and very useful. Let us assume that we have a variable x of character type, and we want to test if that variable is alphanumeric, that is if it is a lower or upper case letter or a digit. A traditional test would be (x >= 'a' and x <= 'z') or (x >= 'A' and x <= 'Z') or (x >= '0' and x <= '9'). For this test, we use the fact that letters and digits build continuous blocks in the ASCII table. Using Nim’s set notation, we can write that in a simpler form:
const
  AlphaNum: set[char] = {'a' .. 'z', 'A' .. 'Z', '0' .. '9'}

var x: char = 's'
echo x in AlphaNum
Here, we have defined a constant of set[char] type that contains lower and upper case letters and decimal digits. We used the range notation to save a lot of typing ({'a', 'b', 'c', …}). It works only in this case, as we know that all the lowercase letters, uppercase letters, and decimal digits form an uninterrupted range in the ASCII table.
With that definition, we can use a simple test with the in keyword. This test is equivalent to the procedure call, AlphaNum.contains(x). Moreover, this set membership test should be faster than the test using <= and or, as mentioned above.
Some older languages, like C, do not have a dedicated set data type. However, since sets are so useful and efficient, C emulates these operations using bit-wise and and or operations in conjunction with bit shifts.
Two important operations for sets are building the union and the intersection:
const
  AlphaNum: set[char] = {'a' .. 'z', 'A' .. 'Z', '0' .. '9'}
  MathOp = {'+', '-', '*', '/'} # set[char]

  ANMO = AlphaNum + MathOp # union
  Empty = AlphaNum * MathOp # intersection
The constant ANMO now contains all the characters from AlphaNum and MathOp - that is, letters, digits, and math operators. The constant Empty is assigned all the characters that are concurrently contained in set AlphaNum and in set MathOp. However, as there isn’t a single common character, the set Empty is indeed empty. It’s not easy to remember the two operators, + and *, for union and intersection. For the intersection operator * it may help when we imagine the set members as bits, and we assume that we multiply the bits of both operands bitwise, that is we multiply the set or unset bits at corresponding positions each. The resulting bit pattern would have set bits only in positions where both arguments have set bits.
We can use the functions incl() and excl() to add or remove single set members:
var s: set[char]
s = {} # empty set
s = {'a' .. 'd', '_'}
s.excl('d')
s.incl('?')
The result is a set containing the letters a, b, c and the characters _ and ?. Note that calling incl() doesn’t affect the set when the value is already included, and similarly, calling excl() has no effect when the value isn’t present in the set.
Another operation is the difference of two sets — a - b is a set that contains only the elements of a that are not contained in b. In Nim, there is currently no operator for the complement or the symmetric difference of sets available. We can produce a set complement by using a fully filled set and then removing the elements of which we want the complement. For a character set, this would look like {'\0'..'\255'} - s, where s is the set to be complemented. And the symmetric difference of set a and set b can be generated by the operation (a+b) - (a*b) or by (a-b) + (b-a).
As the not operator binds more tightly than the in operator, we have to use brackets for the inverted membership test, like not(x in a), or we can use the notin operator and write x notin a. We can test for equality of sets a and b like a == b and for subset relation a < b or a <= b. a <= b indicates that b contains all members of a or more, and a < b indicates that b contains all members of a plus at least one more element.
Finally, we can use the function card() to get the cardinality of a set variable, that is the number of contained members.
It is also worth mentioning that we can have character sets that are restricted to a range of characters:
type
  CharRange = set['a' .. 'f']

# var y: CharRange = {'x'} #invalid

var y: CharRange = {'b', 'd'}
echo 'c' in y
In the code above, the compiler detects the first assignment to the variable y as invalid.
Sets of numbers work in principle in the same way as sets of characters. A key detail to note is that in Nim, integer numbers are generally 4 or 8 bytes large, but sets can only contain numbers with 1- or 2-byte size. Therefore, we have to specify the type of set members explicitly:
type
  ChessPos = set[0'i8 .. 63'i8]

var baseLine: ChessPos = {0.int8 .. 7.int8}
# var baseLine: ChessPos = {0 .. 7} # this also works
var p: int8
echo p in baseLine
In the code above, we defined a set type that can contain int8 numbers in the range 0 to 63.
We can also use another notation for numeric sets when we define an explicit range type like in
type
  ChessSquare = range[0 .. 63]
  ChessSquares = set[ChessSquare]

const baseLine = {0.ChessSquare .. 7.ChessSquare}
# or
const baseLineExplicit: ChessSquares = {0.ChessSquare .. 7.ChessSquare}
assert baseLine == baseLineExplicit
An important detail to note is that Nim’s sets support negative numbers:
type
  XPos = set[-3'i8 .. +2'i8]

var xp: XPos = {-3.int8 .. 1.int8}
var pp: int8 = -1
echo pp in xp
Enum sets are also very useful and can be used to represent multiple boolean properties in a single set variable instead of using multiple boolean variables for this purpose:
type
  CompLangFlags = enum
    compiled, interpreted, hasGC, isOpenSource, isSelfHosted
  CompLangProp = set[CompLangFlags]

const NimProp: CompLangProp = {compiled, hasGC, isOpenSource, isSelfHosted}
Enum sets can be used to interact with functions of C libraries, where for flag variables often or’ed ints are used. For example, for the Gintro C bindings, there is this definition:
type
  DialogFlag* {.size: sizeof(cint), pure.} = enum
    modal = 0
    destroyWithParent = 1
    useHeaderBar = 2

  DialogFlags* {.size: sizeof(cint).} = set[DialogFlag]
Here, the {.size.} pragma is used to ensure that the byte size of that set type matches the size of integers in C languages.
When we define a set of enums in this way to generate bindings to C libraries, then we have to ensure that the enum values start with zero, otherwise, Nim’s definition will not match with the C definition. For example, in the gdk.nim module we have
type
  AxisFlag* {.size: sizeof(cint), pure.} = enum
    ignoreThisDummyValue = 0
    x = 1
    y = 2
    pressure = 3
    xtilt = 4
    ytilt = 5
    wheel = 6
    distance = 7
    rotation = 8
    slider = 9

  AxisFlags* {.size: sizeof(cint).} = set[AxisFlag]
The first enum with ordinal value zero was automatically added by the bindings generator script to ensure type matching. Nim’s developers sometimes recommend using plain (distinct) integer constants for C enums. That may appear easier, but integer constants provide no namespaces, so names may be aFlagWheel instead of AxisFlag.wheel or plain wheel when there is no name conflict for pure enums. And with integer constants, we have to combine flags by an or operation like (aFlagWheel or aFlagSlider) instead of using the clean {AxisFlag.wheel, slider} syntax.
Can we print sets easily? As sets are an unordered type, it is not fully trivial, but we can iterate over the full base type and check if the element is contained in our set like
var s: set[char] = {'d' .. 'f', '!'}

for c in 0.char .. 255.char:
  if c in s:
    stdout.write(c, ' ')
echo ' '
! d e f
We will learn how the for loop works soon. Note that the sequence in which the set members are printed is determined by our query loop, not by the set content itself, as sets are unordered types.
At the end of this section, we should mention that Nim’s standard library has also a module called setutils that provides a few useful functions and a template: The function '[]=' allows to write s[x] = false or s[x] = true to exclude or to include value x to set s, instead of using the incl or excl notation. And the functions fullset() and complement() make it easy to get a set that includes all possible members, and to complement ("invert") a set. Finally, the template toSet() can be used to convert other data types to corresponding sets.
Strings
The string data type is a sequence of characters. It is used whenever textual input or output operations are performed. Usually, it is a sequence of ASCII characters, but characters in the string can also be interpreted as UTF-8 Unicode characters, which allows the display of a vast range of symbols as long as the necessary fonts are installed on your computer and you can input them. Note that Unicode characters may not always be accessible via a simple keystroke. For now, we will only use ASCII characters, as they are simpler and work everywhere. String literals must be enclosed in double quotation marks. Nim’s string type is similar to the Nim seq data type: both are homogeneous variable-size containers. This means that a string, like a seq, expands automatically when you append or insert characters or other strings. Nim’s seq data type is discussed later in the book in some detail. Don’t confuse short strings consisting of only one character with single characters: A string is a non-trivial entity with an internal state like a data buffer (the characters it actually contains), length, and storage capacity, while a variable of the char type is nothing more than a single byte interpreted in a specific way. Therefore, a string like "x" is fundamentally different from 'x'.
var
  str: string = "Hello"
  name: string
echo "Please tell me your name"
name = readLine(stdin)
add(str, ' ')
echo str, name
In the above example code, we declare a string variable called str and assign it the initial literal value "Hello". We use the echo() proc to ask the user for his name and use the readLine() procedure to read the user input from the terminal. To demonstrate how characters can be added to an existing string variable, we call the add() procedure to append a space character to our str variable and finally call the echo() procedure to print the hello message and the name to the screen. Note that the echo() proc automatically terminates each output operation with a jump to the next line. If you desire an output operation without a new line, you can utilize the similar write() procedure. But write() needs an additional first parameter, for which we use the special variable stdout when we want to write to the terminal window.
So we could substitute the last two lines of the above code by
write(stdout, str)
write(stdout, ' ')
echo name
The Nim standard library provides a lot of functions for creating and modifying strings, most of these functions are collected in the system and in the strutils module. The most important procedures for strings are len() and high(). The len() fiunction returns the length of a string, namely, the number of ASCII characters or bytes that the string currently contains. The empty string "" has length zero. Note that the plain len() function returns the number of 8-bit characters, not the number of Unicode glyphs, when the string should be interpreted as Unicode text. To determine the number of glyphs of Unicode strings, you should use some of the unicode modules. The high() function is very similar to the len() function; it returns the index of the last character in the string. For each string s, high(s) == len(s) - 1; hence, high("") is -1. Remember that Nim supports the method call syntax, so we can also write s.len instead of len(s).
The most important operators for strings are the subscript operator [] which allows access to individual characters of strings, and the .. slice operator, which allows access to sub-strings. The first character in a string always has the index zero. For concatenation of string literals or string variables, Nim uses the & operator.
var s = "We hate " & "Nim?"
s[3 .. 6] = "like"
s[s.high] = '!'
In the example above, we define the string variable s by the use of two literal strings to show the use of the concatenation operator. In line two we use the slice operator to replace the sub-string "hate", that is, the characters with index position 3 up to 6, by the string literal "like". In this case, the replacement has exactly as many characters as the text to replace, but that is not necessary: We can replace sub-strings with longer or shorter strings, which includes the empty string "" to delete a text area. In the last line of the above example, we use the subscript operator [] to replace the single character '?' at the end of our string with an exclamation mark. For subscript and slice operators, Nim also supports a special notation that indicates indexing from the end of the string. Python and Ruby use negative integers for this purpose, whereas Nim uses the ^ character. So [^1] is the last character, [^2] the one before the last. So we could have written s[^1] = '!' for the last line of our code fragment above. The reason Nim does not use negative integers for this purpose is that Nim arrays don’t have to start at index zero; they can start with an arbitrary index, including negative indices. Therefore, for negative indices, it may not always be clear whether a regular index or a position from the end of the {string] is intended. The term s[^x] is equivalent to s[s.len - x]. We will learn some more details about the slice operator in a later section when we have introduced arrays and sequences.
Another important operator for strings is the "toString" or stringify operator $. It can be applied to variables of nearly all data types and returns their string representation, which can then be printed. Some procedures like echo() apply this operator to their arguments automatically. When we define our own data types, it can make some sense to define the $ for them, in case we need a textual representation of our data, perhaps only for debugging purposes. Note that directly applying the $ operator on a string has no effect and is ignored, as the result would not change.
strings can contain all characters of the char data type, including the control characters. The newline character '\n', which is used at the end, and sometimes as well in the middle, of strings to start a new line, is the most essential control character for strings. For strings, Nim also supports the virtual character "\p" to encode an OS-dependent line break. When compiled for Windows, "\p" is automatically converted to "\r\n", and to a plain '\n' on Linux. Note that "\p" can be used in strings, but not as a single character, as it is two bytes on Windows. "\p" is only needed to support very old Windows versions or potentially another exotic operating system, as modern Windows recognizes plain '\n' well.
Since strings support utf-8 Unicode, they can use an escape sequence starting with "\u" to insert Unicode code points. The "\u" follows exactly 4 hexadecimal digits or an arbitrary number of hex digits enclosed in curly braces {}.
Because string literals are enclosed in quotation marks, it follows that strings cannot directly contain this character. We have to escape it as in "\"Hello\", she said".
It may be worth mentioning that Nim strings use copy semantics for assignment. Since we have not yet introduced references or pointers, you should expect copy semantics. Strings behave just like all the other simple data types we have used before, such as integers, floating-point numbers, enums, and characters:
var
  s1: string
  s2: string
s1 = "Nim"
s2 = s1
s1.add(" is easy!")
echo s1 & "\n" & s2
The output is
Nim is easy!
Nim
The assignment s2 = s1 creates a copy of s1, so the subsequent add() operation modifies only s1, not s2. This might not be surprising to you, but other programming languages may behave differently. For example, the assignment might not copy the textual content but only create a reference to the first string, so that modifying one of them also affects the other. We will delve deeper into the concept of references when we introduce the object data type.
Entering Unicode characters
UTF-8 is a variable-width character encoding. To cite the introduction section from https://en.wikipedia.org/wiki/UTF-8:
In Nim, there are four ways to enter Unicode characters: by using hexadecimal digits following the "\x", by using a Unicode code point following the "\u", by typing the Unicode sequence directly on your keyboard either as one single keystroke when your keyboard layout supports it, or as a special OS-dependent sequence of keystrokes:
echo "\xe2\x99\x9A \xe2\x99\x94"
echo "\u265A \u2654"
echo "\u{265A} \u{2654}" # {} is only necessary for more than 4 hex digits
echo "♚ ♔"
The code above shows three ways to print the symbol for a black and a white king in a chess game. In the first line, we typed the Unicode sequence directly as hexadecimal digits. This method is rarely used today. In the second line, we used "\u" to enter the code point directly. We obtained the code from https://en.wikipedia.org/wiki/List_of_Unicode_characters. Lastly, the glyph was entered directly into an editor. For some Linux editors, like Gedit, you can hold down the Shift and Control keys, type u, release all keys, and then type the Unicode digits like 265a, followed by a space. See https://en.wikipedia.org/wiki/Unicode_input for details and other operating systems.
The cstring data type
In the C programming language, strings are pointers to sequences of characters terminated by a null character '\0'. [39] The end of such a C string is generally marked with the character '\x0' — a null byte with all bits cleared. C functions like printf() need these "\x0" characters to determine the end of the C string. While Nim strings are complex entities that store their current size and other properties and can grow dynamically, the character sequence of Nim strings has also a hidden terminating '\x0' character at the end to make them compatible with C strings. Nim also has the data type cstring, called "compatible string" in modern Nim, which matches the strings in C language if we compile as usual with the C backend. The cstring data type is used in binding definitions for C libraries, but as cstrings cannot grow and support only a few string operations, they are only used in rare cases in ordinary Nim source code. The Nim compiler automatically passes the zero-terminated data buffer of Nim strings to C libraries whenever we call a C library, so there is no expensive type conversion involved. But the other way is much more expensive: When you have an existing cstring and need a Nim string with the same content, then a simple conversion is not possible as a Nim string is a different, more complex entity. Therefore, we have to create a Nim string and copy the content. You can use the stringify operator $ for this, as in myNimStr = $myCString. Generally, string creation is an expensive operation compared to simple operations like adding two numbers, so when performance matters, one should try to avoid unnecessary string creation and other unnecessary string operations as well. This is particularly important in loops, which are executed frequently. We will explain more about the internals of strings and why string creation and dynamically allocating memory is expensive in later sections of the book.
Escape sequences in strings
We learned about control characters already in the section about characters, and earlier in this section, we mentioned that strings can also contain control characters. As the use of control characters may not be really easy to understand, we will explain their use in strings in some more detail and give a concrete example.
The most important control character for strings is the newline character, which moves the cursor in the terminal window to the beginning of the next line. The echo() procedure prints that character automatically after each output operation. Indeed, it can be important to terminate each output operation with that character, as the output can be buffered, and writing just a string without a terminating newline may not appear at once on the screen, but can be delayed. That is bad when the user is asked something and should respond, but the message is still buffered and not yet visible.
The problem with special characters like backspace or newline is that we cannot enter them directly with the keyboard.[40] To solve that problem, escape sequences were introduced for most programming languages. An escape sequence is a special sequence of characters that the compiler can discover in strings and then replace with a single special character. Whenever we want a newline in a string, we type it as "\n", which is the backslash character followed by an ordinary letter n, "n" standing for newline.
echo "\n"
echo "Hello\nHello\nHello"
The first line prints two empty lines — one because the \n generates a jump to the next line, and another because echo() automatically adds a newline. The second line prints three lines, each containing the word Hello, and the cursor is moved below the last Hello because echo() automatically adds another newline character.
Historically, older versions of Windows employed a two-character sequence, '\r' (carriage return) and '\n' (linefeed), to initiate a new line. The carriage return would reset the position to the start of the line, and the linefeed would move it downward. You might encounter these control characters in older Windows text files, marking the end of each line. This combination was also common in older printers, facilitating direct text file printing by just copying the file to the printer device on Windows OS. In Nim, we have the "\p" escape sequence, which is known as the platform-dependent newline. On a Windows system, "\p" translates to "\r\n". In other words, when a program is compiled on Windows, the compiler replaces "\p" in our strings with both a carriage return and a linefeed character. Conversely, if the program is compiled on Linux, "\p" is replaced with only a newline character. Modern Windows versions, however, support '\n', allowing us to use this character more universally. The control character '\n' corresponds to the decimal value 10, and Nim provides an alternative control character '\l' with the same value. Similarly, the control character '\r', with a decimal value of 13, can also be expressed as '\c' in Nim. As a result, you may see descriptions indicating that "\p" maps to "\c\l" on Windows, equivalent to "\r\n". Currently, Nim allows the use of capital letters in place of the lowercase ones for these control characters, namely '\L', '\C', '\N', and '\R'
Raw strings and multi-line strings
In rare situations, you may want to print exactly what you have typed, so you do not want the compiler to replace a '\n' with a newline character. You can do that in two ways: You can escape the escape character, that is, you put one more backslash in front of the existing backslash. When you print the string "\\n", you will get a backslash and the n character in your terminal. Or, you can use so-called raw strings, where you put the character r immediately in front of the string literal, like:
echo r"\n"
echo "\\n"
Multi-line strings are also raw strings; that is, contained escape sequences are not interpreted by the compiler. As the name implies, multi-line strings can extend over multiple lines of the source text. A multi-line text starts and ends with three quotes, as demonstrated below:
echo """this is
three lines
of text"""

echo "this is\nthree lines\nof text"
Both echo() commands above generate the exact same machine code!
Comments
Comments are not a data type, yet they are important. Ordinary comments start with the hashtag character # and extend to the end of the line. The # character itself and all following characters up to the line end are ignored by the compiler. You can also start the comment with ##; this designates a documentation comment. It is also ignored by the compiler but can be processed when you use tools to generate documentation for your code. Documentation comments are only allowed in certain places in the source code; often, they are inserted at the beginning of a procedure body to explain its use. There are also multi-line comments, which start with the two characters #[ and end with ]#. These forms of comments can extend over multiple lines and can be nested; that is, multi-line comments can again contain plain or multi-line comments.
# this is comment
## important note for documentation
#[ a longer
but useless comment
]#
Multi-line documentation comments also exist and can be nested as well.
proc even(i: int): bool =
  ##[ This procedure
  returns true if the integer argument is
  even and false otherwise.
  ]##
  return i mod 2 == 0
You can also use the #[ comment ]# notation to insert comments anywhere in the source code where a whitespace character is allowed, but this form of in-source comment is rarely used.
Other data types
There are additional predefined types such as the container types array and seq, which can contain multiple elements of the same base type, and the tuple and object types, which can contain data of different types. Nim tuples and objects are similar to C structs and are not as verbose as Java classes. We will learn more about these types in later sections of the book.
Nim source code
You have already seen a few examples of simple Nim source code. The code essentially consists of a plain text file made up of ASCII characters - that is, the ordinary characters that you can type on your keyboard. Generally, Nim source code can also contain Unicode utf-8 characters, so instead of using names consisting of ASCII characters for your symbols, you could just use single Unicode characters or sequences of Unicode characters. However, this typically doesn’t make much sense as entering Unicode isn’t easy with a keyboard. Additionally, it can only be displayed correctly on the screen or in the terminal if the editor or terminal properly supports Unicode and all necessary fonts are installed. This may be possible on your local computer, but what happens when someone else edits your source code?
Starting with Nim version 1.6, we received support for Unicode operators, which could be useful for some applications. For details, please see the Nim language manual.
Nim currently does not permit the insertion of tabular characters (tabs) in your source code, so you must indent blocks using spaces only. Typically, we use two spaces for each indentation level. Other quantities also work, but it’s best to stick to a consistent number.
Identifiers in Nim, as used for modules, variables, constants, procedures, user-defined types, and other symbols, can contain lowercase and uppercase letters, digits, Unicode characters, and additional underscores. However, names must not start with digits or begin or end with an underscore, and one underscore may not immediately follow another underscore.
var
  pos2: int # OK
  leftMargin: int # OK
  next_right_margin: int # OK
  _private: int # illegal
  custom_: int # illegal
  strange__error: int # illegal
Generally, we use camel-case like leftMargin for variable names, not snake-case like left_margin.
Current Nim has the special property that identifiers are case-insensitive and that underscores are simply ignored by the compiler. The only exception is the first letter of a name; that letter is case-sensitive. So the names leftMargin, leftmargin, and left_margin are identical for the compiler. But LeftMargin is different from all the others because it starts with a capital letter. This may sound a bit strange at first but works well in practice. One advantage is that a library author can use snake_case in their library for names, while users of the library can freely decide if they prefer camelCase. Still, you might think this could generate confusion. In practice, it does not, it prevents confusion. Imagine a conventional programming language that is fully case-sensitive and does not ignore underscores. In a larger program, we could then have names like nextIteration and next_Iteration or keymap and keyMap. What when both names are visible in the current scope, and we type the wrong one? The compiler may not detect it when types match, but the program may do strange things. Nim would not allow such similar-looking names, as the compiler would regard them as identical and would complain about a symbol redefinition.
You might wonder why the first letter is case-sensitive. This is to allow user-defined types to use capital letters in their names and then write something like var window: Window. So we can declare a variable named window of a user-defined data type named Window. That is a common practice.
The case insensitivity and the ignoring of underscores may not be the greatest invention of Nim, but it does not really hurt. The only exception occurs when we create bindings to C libraries where leading or trailing underscores are used, necessitating some renaming.
The only minor disadvantage of Nim’s fuzzy names arises when using tools like Grep or your editor’s search functionality. You cannot be certain if a search for "KdTree" will yield all results; you might have to try "Kd_Tree" or "KDTree" and potentially some other variants as well. To address this issue, Nim provides a tool called nimgrep that conducts a case- and style-insensitive search. Your editor may also support that type of search. You can enforce a consistent naming scheme by calling the compiler with the command-line argument --styleCheck:error or --styleCheck:hint.
| Whenever you convert source code from other programming languages to Nim, you should first ensure that the original code is correctly indented. Some editors can maintain or rectify this, or you can use external tools. If you overlook this aspect and attempt to convert from C to Nim, removing the braces of blocks, you might introduce errors if the initial indentation was not correct. |
Blocks, scopes, visibility, locality, and shadowing
Like most other programming languages, Nim has the concept of code blocks or scopes. The bodies of procedures, functions, iterators, templates, and macros as well as those of various loop constructs or code following conditional statements, build indented blocks and create new scopes. In this new scope, we can define variables, named constants, or types with the var, let, const and type keywords that are local to this block. These symbols are only visible in this scope, and local variables that require storage are actually created when the program executes the block and are destroyed when the block is exited. This holds true in principle, and at least for ordinary stack-allocated value variables; however, things are a bit more complicated for references and pointer variables. We will discuss this in more detail when we introduce references. Here, we have used the term 'code block' to clearly distinguish it from the const, var, type, and import sections, which are different forms of indented blocks. Remember that the compiler processes our program code from top to bottom, so we always have to define symbols before we can actually use them. When we define an entity in a code block, and a symbol with that name was already declared before outside this block, then that symbol is shadowed, that is, the previous declaration becomes temporarily invisible. Let us investigate the following small example program:
proc doSomething =
  type NumType = int
  const Seven = 7
  var a: NumType = Seven
  var b: bool = true
  if b:
    echo a, ' ', b # variables of outer scope are visible
    var a, sum: float # now outer a is shadowed
    a = 2.0
    sum = a * a + 1
    echo a, ' ', sum # local data only visible in if block

  echo a # initial int variable with value 7 becomes visible again

doSomething()
Although we haven’t officially introduced procedures as units for structuring our program code yet, we have intentionally enclosed the above code in the body of a proc called doSomething() this time. Actually, in real-life programs, nearly all the program code is embedded in procs. We will discuss the peculiarity of global code later. By enclosing the program code in a procedure, we can ensure that the two variables a and b defined in that proc are indeed stack-allocated and local to the scope of that procedure.. The variables a and b are created on the stack when the procedure is called, that is, when its execution starts with a statement like doSomething(). These two variables are never visible in code outside this procedure, and the storage for these two variables is automatically released when the execution of that procedure ends, in this case when the last line of the proc is reached. In the body of the procedure, we also define a new custom type and a named constant, just to demonstrate that it is possible. Both symbols are also local to this proc and invisible outside.
The indented code block following the if b: statement is sometimes called an "if then" block or just if block — in that block we define two other variables called a and sum of float type, which are also stack-allocated. If these two variables are already allocated when the proc starts its execution, or only when the then block following the if statements is executed, is actually an implementation detail. As the variable a of float type in the if then block has the same name as the outer variable of int type, that integer variable is shadowed in the if block — the outer value gets temporarily invisible as soon as the new symbol is declared. Other symbols of outer scopes remain visible. In the if then block as well as in most other indented code blocks we could also define named constants or custom types, these would be visible only in this block. Indented code blocks can be nested; within one block, we can have additional indented blocks in which all declared symbols are again local and invisible outside. The last echo() statement in our code example above is located after the if-then block, so the initial variable a of integer type becomes visible again.
Global code
In the introductory sections of the book, we generally used program code at a global level, not embedded in a procedure body. We did this for simplicity, as we hadn’t yet introduced procedures. Global code is sometimes used in small scripts or for special purposes, like program initialization. But for larger programs, most of the code is typically grouped into procs. The storage location for variables defined in global code isn’t well-defined; it can depend on the actual Nim compiler implementation and the compiler backend. The performance of global code can be worse than that of code enclosed in procedure bodies, so when performance matters, we should put our code in procs. One reason for the suboptimal performance of global code is that global variables are not located on the stack but in the global BSS segment of the program, and the backend cannot optimize global code well. For example, global variables may not be cached in CPU registers. Note that variables, which need to exist and retain their value for the entire runtime of the program and not just for the duration of a single procedure execution, must be defined as global. The same obviously holds for global variables that are used in the code of different procedures, such as the stdout and stdin variables of the system module. An alternative to using global variables, when a variable in a procedure should retain its value between different proc calls, is to attach the {.global.} pragma to a local variable within the proc. This way that variable is still only visible in that procedure where the variable is declared, but the variable is stored in the BSS segment instead of on the stack and so its value is preserved between procedure calls.
Note that structured named constants, such as constant strings, are also stored in the BSS segment, even when they are defined only locally within a procedure. So large structured constants can increase the executable size, as the BSS segment is a part of the program executable.
Whitespace, punctuation, and operators
The space character, with decimal ASCII value 32, is used in Nim program code to indent code blocks and separate different symbols from each other. Nim’s keywords are always separated from other symbols by leading and trailing whitespace, while other symbols are most often separated by punctuation and an additional, optional space character. Whenever the syntax allows a space, we can also insert multiple spaces or a comment enclosed in #[ ]# into the source code. Tabulator characters are not allowed in the Nim source code, but we can use them in comments and of course in string literals. We have already mentioned that spaces can make a difference in how operators or function parameters are handled. In expressions like a+b or a + b the + operator is regarded as an infix operator, but in a + -b the minus sign is regarded as a unary operator bound to b. This way, asymmetric expressions like a +b or a <b would be invalid, as the operators are interpreted as unary ones attached to b, and then, there is no infix operator between the two variables. A procedure call such as echo(1, 2) is interpreted as a call to echo() with two integer literal arguments, while a call like echo (1, 2) — with a space after the proc name — is interpreted in command invocation syntax as a call with a tuple argument. Although it’s not uncommon in C code to always insert a space between the function name and its parameter list, we should avoid doing so in Nim for the reason described. We will learn more about procedure calls and the tuple data type later.
Operators
Nim uses the following punctuation characters as operators:
=, +, -, *, /, <, >, @, $, ~, &, %, |, !, ?, ^, ., :, \
These symbols can be used as single entities or in combination, and we can define our own operators or redefine existing operators. All these symbols can be used as infix operators between two arguments or as unary prefix operators. However, Nim does not support unary postfix operators, so a notation like i++ from the C language is not possible in Nim. A few combinations of these punctuation characters have special meanings. We will learn more about that and how we can define our own operators later in the book.
In Nim, these keywords are also used as operators:
and, or, not, xor, shl, shr, div, mod, in, notin, is, isnot, of, as, from.
Operators have different priorities. For example, * and / have a higher priority than + and -. In most cases, the priority is as we would expect, with perhaps a few exceptions. If we are unsure, we can group terms with brackets or consult the Nim language manual for details.
Since version 1.6, Nim also allows the definition and use of a few Unicode operators, but these are still considered experimental.
Order of execution
Global program code, or code enclosed in procedures, is generally executed from top to bottom and from left to right, unless control structures enforce a different order. To demonstrate this, we use here a set of four different procs, which contain an echo() statement each, and return a numeric expression. However, we have not yet formally introduced procedures, so if the code below feels too complex, feel free to skip this section for now and return once you have read the section about procs:
proc a(i: int): int =
  echo "a"
  i * 2

proc b(i: int): int =
  echo "b"
  i * i

proc c(i: int): int =
  echo "c"
  i * i * i

proc d(i: int): int =
  echo "d"
  i + 1

echo a(1); echo b(1)
echo b(2) + d(c(3)) # (2 * 2) + ((3*3*3) + 1)
echo "--"
echo a(1) < 0 and b(1) > 0
echo a(1) > 0 or b(1) > 0
It should be no real surprise that the first three echo() statements produce this output:
a
2
b
1
b
c
d
32
For the term d(c(3)), it is obvious that the inner expression c(3) has to be evaluated first before that result can be used to call proc d().
The last two lines demonstrate the so-called short-circuit evaluation for expressions with the Boolean and or or operators. As the expression a() and b() is always false when a() is false, in this case, b() has not to be evaluated at all. Similarly, as the expression a() or b() is always true when a() is true, in that case, b() does not have to be evaluated at all. So in the last two lines of the above code, b() is never called at all, and the output is just
a
false
a
true
Note that, in Nim as in most other programming languages, the assignment operator = behaves differently compared to ordinary operators like + or *. In assignments such as let a = b + c(), obviously, the right side has to be evaluated before the result can actually be assigned to variable a.
Control structures
Larger computer programs generally consist not only of code that is executed linearly but also of code for conditional or repeated execution.
The most important control structures of Nim are the if statement for conditional execution, the related case statement, and the while and for loops for repetitions. All these statements control program execution at runtime. Nim’s when statement, which is syntactically very similar to the if statement, is evaluated at compile-time. It can be used to adapt our program code for various operating systems or to compile our code with special options, such as for debugging or testing purposes.
All these control structures can be nested in arbitrary ways, so we can have in one if branch other if conditions or while loops, and in while loops again other control structures including other loops.
If statement and if expression
The if statement with multiple optional elif branches and an optional else branch evaluates a sequence of boolean conditions at program runtime. As soon as one condition evaluates as true, the corresponding statement block is executed, and thereafter, the program execution continues after the entire if construct. That is, at most one branch is executed. If none of the conditions after the if or elif keywords evaluates to true, then the else branch is executed if it exists. A complete if statement consists of one if condition, an arbitrary number of elif conditions, and one optional else part:
if condition1:
  statement1a
  statement1b
  ...
elif condition2:
  statement2a
  statement2b
  ...
elif condition3:
  statement3a
  statement3b
  ...
elif ...:
  ...
else:
  statementa
  statementb
  ...
The simplest form of an if statement is
if condition:
  statement
if age > 17:
echo "You are of legal age, but remember to drink and smoke responsibly!"Note that the branches are indented by spaces. We generally use two spaces, but other numbers work as well. Also, note that it is elif, not elsif as in Ruby, and that there is a colon after the condition. Instead of a single statement, we can use multiple ones in each branch, all on their own line and all indented in the same way.
When there is no elif and no else part, then we can also write the conditional code directly after the colon, like
if age > 17: echo "You may drink and smoke, but better avoid it!"With an elif and an else branch, the example from above may look like
var age: int = 7
if age == 1:
  echo "you are really too young to drive"
elif age < 6:
  echo "you may drive a kid's car"
elif age > 17 and age < 75:
  echo "you can drive a car"
else:
  echo "drive carefully"
Note that we perform the age tests in ascending order. It would not make much sense to first test for a condition age < 6, and later to test for age < 4, because the if statement is evaluated from top to bottom. As soon as one condition is evaluated as true, that branch is executed, and the program execution continues after the entire if construct. So a later test age < 4 would be useless when that condition is already covered by a prior test age < 6.
As the various conditions of the if statement are processed from top to bottom until one condition evaluates to true, it can be beneficial to place the most likely conditions first for optimal performance. This approach reduces the need to evaluate unlikely conditions in most cases.
Another strategy for larger if/elif constructs is to put the most simple and fast tests to the top when possible.
We can also have if/else expressions that return a value like in
var speed: float = if time > 0: delta / time else: 0.0 # prevent div by zero errorIn C, for a similar construct, the ternary ? operator is used.
In languages like C or Ruby, the assignment operator = is an expression that returns the assigned value, so in C we can write code like
while (char c = getChar()) {process(c)}In Nim, the assignment operator is not an expression with a result, but we can group multiple statements in round brackets separated by semicolons, and when the last statement in the bracket is an expression, then the whole bracket has the same value. So we can use conditional terms like
while (let c = getChar(); c != '\0'):
  process(c)
If we declare a variable in this way using the var or let keyword, then that variable is only visible in the bracket expression itself and in the following indented block.
Note that if-expressions must always return a well-defined value, so they must always contain an else branch. A plain if, without an else, or an if/elif without an else, does not work. And as Nim is a statically typed language, and all variables have a strictly well-defined type, the if-expression must return the same type for all branches!
var a: int
var b: bool
a = if b: 1 elif a > 0: 7 else: 0 # OK
a = if b: 1 elif a > 0: 7 # invalid
a = if b: 1 # invalid
a = if b: 1 else: 0.0 # invalid, different types!
The when statement
The when statement is syntactically very similar to the if statement, but while all the boolean conditions are evaluated during the program runtime for the if statement, for the when construct all the when/elif/else conditions have to be constant expressions, and are already evaluated at compile-time. In ordinary program code, the when statement is not often used. However, it is useful when we write bindings to C libraries and low-level code. Common use cases for the when statement include the isMainModule condition test and testing for defined symbols, such as defined(windows):
when not defined(gcDestructors):
  echo "You may try to compile your code with option --mm:arc"
when isMainModule:
  doAllTheTests()
The value isMainModule is only true for a source code file when that file is compiled directly as the main module, that is, when it is not indirectly compiled because it is imported by other modules. This way, we can easily include test code in our library modules. This test code is ignored when the module is used as a library, but it becomes active when we compile the module directly for testing.
A when defined() construct can be used to test for predefined or our own custom options. For example, we may pass the optional argument -d:gintroDebug to the compiler and test for this option within the code of the module, like when defined(gintroDebug):
One difference between the when and the if statement is that the 'then' branches do not open a new scope. This means variables defined there are still visible after the construct has been processed:
when sizeof(int) == 2:
  var intSize = 2
  echo "running on a 16-bit system!"
elif sizeof(int) == 4:
  var intSize = 4
  echo "running on a 32-bit system!"
elif sizeof(int) == 8:
  var intSize = 8
  echo "running on a 64-bit system!"
else:
  echo "cannot happen!"

echo intSize # variable is visible here!
Another peculiarity of the when statement is that it can be used inside object definitions. We will show an example of that in a later section of the book when we introduce the object data type. Just like the if construct, when can also be used as an expression.
The case statement
The case statement is not used that often, but it can be useful when we have many similar conditions:
case inputChar
of 'x': deleteWord()
of 'v': pastWord()
of 'q', 'e': quitProgram()
else: echo "unknown keycode"
To enable optimizations, the case construct has some restrictions compared to a more flexible if/elif statement:
The variable following the case keyword must be of an ordinal type, such as int, char, or string. A float, however, would not work. Also, the values following each of keyword must be constant, that is, a single constant value, multiple constant values, or a constant range like 'a' .. 'd' for the 4 first lower case letters. Of course, these constants must have a type compatible with the type of the variable after the case keyword. A case statement must cover all possible cases, so most of the time an else branch is necessary.
Since Nim version 1.6, the case statement can also contain optional elif branches with arbitrary boolean conditions. This was not the case in the Wirthian languages Pascal, Modula, and Oberon. It now makes Nim’s case construct very similar to the ordinary if/elif/else.
Unlike the similar switch statement in C, the case statement requires no break after each branch. If a condition following the of keyword evaluates to true, the corresponding statement or sequence of statements is executed. Afterward, the program execution resumes beyond the entire case construct.
The case construct can also be used as an expression, as illustrated below:
var j: int
var i: int =
  case j
    of 0 .. 3: 1
    of 4, 5: 2
    of 9: 7
    else: 0
Here, an else is necessary to cover all cases. And as you see, we can also indent the block after the case keyword if we want.
The while loop
The while loop is used when we want to implement conditional repetitions, i.e., when we want to check a condition and execute a block of statements only as long as the condition remains true. If the condition is false in advance or becomes false after some repetitions, then the program execution proceeds after the indented loop body block.
A basic while loop has the following structure:
while condition:
  statement1
  statementN
firstStatementAfterTheWhileLoop
var repetitions = 3
while repetitions > 0:
  echo "Nim is easy!"
  repetitions = repetitions - 1
The aforementioned loop would print the message three times. Like the condition in the if-clause, the condition is terminated with a colon. Note that the condition must change during the execution of the loop, otherwise, when the condition is true for the first iteration, it would remain true and the loop would never terminate. We decrease the loop counter repetitions in the loop. So, at some point, the condition will become false, the loop will terminate, and program execution will continue with the first statement after the loop body. Note how we decrement the loop counter. The right side of the assignment operator is evaluated, and once that is done, the new value is assigned to the counter.
Two rarely used variants of a while loop exist: The loop body can contain a break or a continue statement, each of which consists only of this single keyword. A break statement within the loop body stops the loop’s execution immediately, and the program execution resumes after the loop body. Alternatively, a continue statement within the loop body skips the following statements and returns to the beginning of the loop, at which point the while condition is evaluated again.
var input = ""
while input != "quit":
  input = readLine(stdin)
  if input == "":
    continue
  if input == "exit":
    break
The aforementioned code utilizes the == and != operators. The == operator tests for equality, and != tests for inequality. Both operators work for most data types like integers, floats, characters, and strings. The literal value of an empty string is written as "". In line 2, we test if the variable named input does not have the value "quit", and in line 4, we test if that variable is empty, that is, it contains no text at all.
The use of break and continue disrupts the expected flow in loops, which can make understanding loops more challenging. So we generally avoid their use, but sometimes break or continue are really helpful. For example, they can be useful when an unexpected error occurs, perhaps due to invalid user input.
Nim does not include a repeat loop as found in Pascal, which does the first check at the end of the loop when it was executed already for the first time. Repeat loops are not used that much in Pascal, and they are sort of dangerous because they check the condition after the first execution of the body, so potentially the body is executed with invalid data for the first iteration. Later, we will see how we can use Nim macros to extend Nim by a repeat loop that can be used as it would be part of Nim’s core functionality.
The block statement
The block statement can be used to create a new indented code block, creating a new scope in the same way that an if true: statement would:
block: # create a new scope
  var i = 7
echo i # would not compile, as the variable i is undefined
Blocks can be useful for structuring large code segments when no better ways are available, such as splitting the code into multiple procedures. For testing purposes, blocks can be useful too, to keep the symbols in a local scope. In fact, blocks are most useful when they are assigned names and when we use the break statement in a while or for loop to exit a nested loop:
let names = ["Nim", "Julia", "?", "Rust"]
block check:
  for n in names:
    for c in n:
      if c notin {'a' .. 'z', 'A' .. 'Z' }:
        echo "invalid character in name"
        break check
echo "we continue"
The break check statement would immediately exit the nested loops and continue with the first statement after the block, which is the last line in the code segment above. Using break in such a manner might complicate understanding the code structure, but it can sometimes be very useful.
Before Nim 2.0, it was possible to use a break statement in unnamed blocks, but this generates a warning in version 2.0 and may yield an error in future versions.
For loops and iterators
For loops can be used to easily iterate over containers, collections, ranges, and many other entities. We have not discussed the important array and seq containers yet, but we know already the string container. The characters of an ASCII string are numbered starting at 0, and we can access them using the subscript operator []. So we could print the single characters of a string in this way:
var
  s = "Nim is not always that easy?"
  pos = 0
while s[pos] != '?':
  echo "-->", s[pos]
  inc(pos)
It’s clear that the pos variable introduces some complexity here — we aim to process all the characters in the string sequentially, so the use of a position variable seems unnecessary. This method is susceptible to errors, such as forgetting to increment the pos variable within the loop (body). So most modern languages provide us with iterators for this purpose:
var
  s = "Nim is not always that easy?"
for ch in items(s):
  echo "-->", ch
This approach is notably shorter. The for construct might seem odd at first, but it’s a common pattern for writing iterations, utilized in languages like Python as well. Ruby uses something like s.each{|ch| …} instead.
For loops can be used to iterate over containers or collections, picking each element in sequence during this process. The variable following the for keyword is used to access or reference individual elements. That variable automatically has the right type, which is the type of the elements in the container and in each iteration, gets the value of the next element in the container, starting with the first element in the container and stopping when there is no element left. Items() is here the actual iterator, which allows us to access the individual characters in sequence. There’s a convention in Nim, where an items() iterator is automatically called in a for loop construct when no iterator name is explicitly given, allowing for more concise syntax such as for ch in s: in this use case.
You may recognize that the output of the above for loop is not identical to the output of the previous while loop. The while loop stops when the last character, that is '?', is reached, while the for loop processes this last character also. That is intended for the for loop, its general purpose is to process all the elements in containers or collections.
The above for loop does a read access to the string, that is, we get basically a copy of each character, and we can not modify the actual string in this way. When we want to modify the string, we can use the mitems variant:
var
  s = "Nim is not always that easy?"
for ch in mitems(s):
  if ch == '?':
    ch = '!'
Here we use mitems() instead of the plain items(), where the leading 'm' signifies 'mutable'. In the loop body, we can assign different values to the loop variable and in this way modify the container content.
We can iterate not only over containers but also over many more entities, for example, over lines of a file or integer ranges. We can use predefined iterators or create our own ones, and then use the iterator in for loops. Iterators are similar to functions, but while functions return only once, iterators can yield results multiple times. Actually, Nim currently provides two types of iterators — inline iterators, which are currently the default type, and closure iterators, which are similar to functions. Inline iterators create a hidden while loop whenever they are called. In this way, they offer the highest performance, but they have some restrictions and increase the final code size of the executable, much as an explicit while loop would do. Closure iterators are real entities, like procedures, meaning we can assign them to variables. However, in the for loop, each call generates some minimal overhead. We will learn how to create our own iterators later in the book after we have learned all the details about procedures and functions.
Objects
We have worked with basic data types like numbers, characters, and strings already. Often it makes sense to join some variables of these basic data types to more complex entities. Assume you want to build an online store to sell computers and build a database for them. The database should contain the most important data of each device type, like the type of CPU, RAM and SSD size, power consumption, manufacturer, quantity available, and actual selling price.
We can create a custom object data type with fields containing the desired data for this purpose:
type
  Computer = object
    manufacturer: string
    cpu: string
    powerConsumption: float
    ram: int # GB
    ssd: int # GB
    quantity: int
    price: float
In the first line, we use the type keyword to tell the compiler that we want to define a new custom type. Writing the type keyword on its own line begins a type section where we can declare one or more custom data types. All type declarations in a type section must be indented. In the next line, we write our type name, an equal sign, and the keyword object. This indicates that we want to declare a new object type named Computer. Here, Computer is a type name; in Nim, we use the convention that user-defined type names start with a capital letter. In the following indented block we specify the desired fields of this object, each line contains the name of a field and a colon followed by the needed data type. That is similar to a plain variable declaration.
Objects in Nim are similar to structs in C. Unlike classes in Java, Nim objects contain only the fields, sometimes also called member variables, but no procedures, functions, or methods, and no initializers or destructors as in C++. In Nim, we keep the data objects separate from the procedures, functions, methods, and also optional initializers and destructors that work with those data objects.
Now that we have defined our own new object type, we can declare variables of that type and store content in its fields.
var
  computer: Computer

computer.manufacturer = "bananas"
computer.cpu = "x7"
computer.powerConsumption = 17
computer.ram = 32
computer.ssd = 1024
computer.quantity = 3
computer.price = 499.99
Of course, in real applications, we would fill the fields not in this way, but we would maybe read the data from a file, from a terminal, or maybe from a graphical user interface.
It may look a bit ugly that we have to write computer. before each field when we access the fields. Indeed, in recent Nim versions, this is not necessary; you may use the with construct instead.
import std/with
var
  computer: Computer
with computer:
  manufacturer = "bananas"
  cpu = "x7"
  powerConsumption = 17
  ram = 32
  ssd = 1024
  quantity = 3
  price = 499.99
We can use the fields like ordinary variables:
computer.quantity = computer.quantity - 1 # we sold one piece
echo computer.quantity
As mentioned earlier, the right side of the assignment operator is evaluated first, then the result is stored in the variable on the left side. But we can also just write computer.quantity -= 1 or dec(computer.quantity).
Objects, like all other data types that we have already used, are value types, which means that when an object is assigned to a new variable, all its components are copied as well. In this way, objects behave like strings — assignment copies the content, with the entities remaining independent of each other. We will learn about reference types soon, which behave differently.
To initialize object variables, we can use the object type names as a constructor with a syntax like Foo(field: value, …). Unspecified fields get the field type’s default values:
var
  computer1 = Computer(price: 799.99, quantity: 2)
  comp2: Computer

comp2 = computer1
comp2.price = 999.00
To initialize the variable computer1, we used the constructor syntax. In line five, we use the assignment operator to copy the content of variable computer1 into variable comp2, and finally, we overwrite the price field in comp2. As both variables are distinct instances, the fields of variable computer1 are not modified this way.
Starting with Nim v2.0, object fields can have custom default values, instead of the binary zero. The syntax for the defaults is the same as the assignment for ordinary variables, as shown below:
type
  Computer = object
    freeShipping: bool = true
    manufacturer = "bananas"
    quantity: int

var c1 = Computer(quantity: 12)
echo c1.manufacturer # "bananas"
c1 = default(Computer)
echo c1.freeShipping # true
var c2: Computer # no custom default values, all fields binary zero!
echo c2.freeShipping # false
Note that custom default values for object fields are only applied, when we explicitly initialize a variable by use of an object constructor, or when we use the default() function for the initialization. A plain variable declaration like var c2: Computer initializes all fields to binary zero". This behaviour could be surprising, and perhaps it would be a good idea when the compiler gives a warning when for objects with default field values a plain declaration like var c2: Computer is used.
Typically, a computer store would offer many different types of computers, so it would make sense to store all the different devices in a container like a sequence, called short seq in Nim. In the next section, we will learn how we can do that.
Arrays and sequences
Sequences and arrays are homogeneous containers. They can contain multiple elements of the same data type, while a plain variable, such as a float or an int, only contains a single value. In some ways, we can regard objects as containers as well because objects contain multiple fields. The same holds for tuples — tuples are a very simple, restricted form of objects and also contain fields. But more typical container data types are the built-in arrays and sequences, or for example, hash tables, which are provided by the Nim standard library. Arrays, sequences, and hash tables can contain multiple elements, but all elements must have the same data type, which we call the base type.[41] The data type of the base type is not restricted; it can even be an array or sequence type again, allowing us to build multidimensional matrices in this way. Arrays have a fixed, predefined size; they cannot grow or shrink during the runtime of our program. Sequences and hash tables can grow and shrink.
Arrays and sequences appear very similar. A sequence seems even more powerful because it can change its size, i.e., the number of elements it contains, at runtime, while an array has a fixed size. So why do we have arrays at all? The reason is mostly efficiency and performance. An array is a plain block of memory in the RAM of the computer, which can be accessed very fast and needs not much care by the runtime system. Sequences require much more effort, especially when we add elements and the sequence needs to grow. When we create sequences, we can specify how many elements should fit in it at least, and the runtime system reserves a block of RAM of the appropriate size. But when our estimation was too small, and we want to append or insert even more elements, then the runtime system may have to allocate a larger block of memory first, copy the already existing elements to the new location, and then release the old, now unnecessary memory block. And this is a relatively slow operation. The reason this process may be necessary is that the initially allocated memory block may not be able to increase in size if the neighboring space in the RAM is already occupied by other data. Now, let us see what we can do with arrays and sequences:
var
  a: array[8, int]
  v = 1
for el in mitems(a):
  el = v
  inc(v)
for el in mitems(a):
  el = el * el
for square in a:
  echo square
In the second line of the code above, we declare a variable named a of array type — we want to use an array with exactly 8 elements, and each element should have the data type int. To declare a variable of array data type we use the array keyword followed in square brackets by the number of the elements, and separated by a comma, the data type of the elements. We can also specify the range of the indices explicitly by specifying a range like array[0 .. 7, int] or array[-4 .. 3, int]. The first specification is identical to the one in the above example program, and the second one would allow us to access array elements with index positions from -4 up to 3.[42]
When we declare an array instance variable, then all the contained elements get the default value binary zero. But we can also explicitly assign initial values like a: array[8, int] = [1, 2, 3, 4, 5, 6, 7, 8]. Here the expression on the right is Nim’s array constructor. Whenever we use an array constructor to initialize an array instance variable, then the number of elements that the constructor provides has to match the size of the array variable, and the element types have to match as well. To specify the element type of an array constructor, it is often enough to specify the type of the first element, so [1.int8, 2] is equivalent to [1.int8, 2.int8]. We can use for loops to iterate over all the elements of an array, in a similar way as we did it for strings. The first for loop of the above program fills our array — that is, for each of the 8 storage places in the array, we fill in some well-defined data. We use the mitems() iterator here because we want to modify the content of our array — we fill in numbers 1 .. 8. In the next for loop, we square each storage location, and finally, we print the content. In the last for loop, we do not modify the content, so a plain items() instead of mitems() would work, but we have already learned that we don’t need to write the plain items() at all in this case.
Sequences, called just seq in Nim, work very similarly to arrays, but they can grow:
var
  s: seq[int]
  v = 0
while v < 8:
  inc(v)
  add(s, v)
for el in mitems(s):
  el = el * el
for square in s:
  echo square
We start with an empty seq here and use the add() proc to append elements. After that, we can iterate over the seq as we did for the array.
In the same way as we access single characters of a string with the subscript operator [], we can use that operator to access single elements of an array or a seq, as in a[myPos]. The slice operator is available for arrays and sequences too and can be used to extract sub-ranges or to replace multiple elements. Because arrays have a fixed length, the slice operator can only replace elements in them, but not remove or insert ranges. The first element position is generally 0 for arrays and sequences. Arrays can even be defined in a way that the index position starts with an arbitrary value, but that is not used that often. Whenever you use the subscript or slice operator, you have to ensure that you access only valid positions, that is, positions that really exist. a[8] or s[8] would be invalid in our above example — the array has only places numbered 0 .. 7, and for the seq, we have added 8 values which now occupy positions 0 .. 7 also, position 8 in the seq is still undefined. We would get a runtime error if we tried to access position 8 or above, as well as if we tried to access negative positions. You might think that an assignment for a seq, such as s[s.length] = 9, is the same as s.add(9), but only the add() operation works in this case.
Note that in some languages like Julia arrays start at position 1.[43] Nim arrays can have an arbitrary integral start position, including negative start positions, but the start position as well as the highest subscript position are determined in the program source code and can not change at runtime. We say that arrays have fixed compile-time bounds. Sequences always start at position 0, we can specify an initial size, and we can always add more elements at runtime.
Arrays and sequences allow fast access to their elements: All the elements are stored in a contiguous memory block in RAM, and the start location of that memory block is well-known. As all the elements have the same byte size, it is an easy operation to find the memory location of each element. The compiler uses the start location of the array or seq, and adds the product of subscript index and element byte size. The result is the memory location of the desired element, which was selected by the index used in the subscript operator. When the array should not start at position 0, then the compiler would have to adjust the index, by subtraction of the well-known start index. This operation doesn’t take much time, but nonetheless, arrays starting at position 0 can be slightly faster. As mentioned earlier, the compiler must perform a multiplication operation between the index position and element size — a task that involves integer multiplication and is consequently quite fast. When the element size is a power of two, then the compiler can even optimize the multiplication by using a simple shift operation, which can be even faster, depending on the CPU being used.
It should not be surprising that the internal structure of sequences is a bit more involved than that of arrays. Arrays are indeed nothing more than a block of memory, generally allocated on the stack for local data or allocated in the BSS segment for global data. Don’t worry if you do not yet have an idea of what the stack, the heap, and a BSS segment are; we will learn about them soon. The Nim seq data type, having a variable size, clearly requires not just a storage location for its elements, but also a counter to track its current number of elements and another counter for its maximum capacity. The element counter must be updated when we add or delete elements, and when the counter tells that there is currently no more space available for more elements, then a new block of memory must be allocated, and the existing elements must be copied from the old location into the newly allocated memory region before the old memory region can be released.[44] Due to this additional effort appending elements to a seq by using the add() proc is not extremely fast. You may wonder why we do not have to save size information for arrays. Well arrays have fixed sizes, so it is obvious that we never have to adjust something like a size counter, simply because the size would never change. But should we store the desired initial size of the array? In a way, yes. However, it is a constant value. During the compilation process, the compiler can already catch some errors for us — if we have an array as above with size 8, then the compiler would already be able to recognize some invalid access to array elements at compile time — a[9] would surely be a compile-time error. However, at runtime, when we execute our program, access to a non-existent index position may occur, for example, with constructs like var i = 9; a[i] = 1, when the array is declared as var a: array[8, int]. For catching that type of error, the compiler has to store the fixed array size somewhere and check against that value when an array access by using the subscript operator with a non-constant argument occurs, as the a[i] above. One related remark: Accessing array elements is as fast as ordinary variable access when we use a constant value as an index; that is, a constant literal or a named constant. The reason for this is, that when the index is a constant, then the compiler just knows the exact position of that array element in memory, just as it knows the address of plain variables, so there is no need for address calculations at runtime. Indeed, to access an array element at a specific constant index position, the compiler only needs to add a constant value to the current stack pointer, given that arrays are stored on the stack. To access a constant position in a seq, the compiler would have to add a constant to the base address of the memory block that contains the seq data.
| Typically, if we need a container data type and its size is known at compile time, we use an array instead of a seq. This is because a seq has some minimal overhead and the compiler is better at detecting out-of-range access for arrays than for seqs. But there is one exception: Array instances declared inside of procedures and functions are stack-allocated, which ensures optimal performance for the allocation. However, we must remember that the stack size of a program is an OS-dependent constant and is generally not very large by default. On Linux, the default stack size is often only 8 MB, so it is clear that we cannot use arrays that are larger. We would use a seq in that case. Indeed, Linux users can use the ulimit command to increase the maximum stack size, but this is generally not recommended. Typically, very large stacks are not needed, and a restricted stack makes it easier for the OS to kill a program that does unlimited recursion due to a bug. |
We said that appending elements to sequences is not extremely fast — indeed, it is several times slower than accessing an array element by its index using the subscript operator. So, when we know that our seq will need to contain at least a certain number of elements, it can be more performance-efficient to allocate the seq with this size from the beginning and then fill in the content using the subscript operator, rather than appending all the elements one by one. Here is one example:
var s: seq[int] = newSeq[int](8)
var i: int
while i < 8:
  s[i] = i * i
  inc(i)
We use the newSeq() procedure to initialize the sequence. The content of the square brackets instructs the newSeq() proc to create a sequence with a base type of int, and the number 8 as an argument indicates that the newly created sequence should contain 8 elements, each with the default value of 0. This procedure is what is known as a generic proc, and it requires additional information, specifically, the data type of the elements. Don’t confuse the square brackets in the newSeq[int]() call with the subscript operator a[i] used for array access, as they are completely unrelated. Note that the initialization of the seq above does not restrict its use in any way, we can still use it like an uninitialized seq, that is we can use the add() operator to add more elements, we can insert or delete elements, and all that.
Deleting elements from an array or a sequence can be very slow, particularly when we use the naive approach of moving all the elements located after the element that should be removed one position forward.[45]
This would maintain the order in the container, so sometimes this is the only solution, but of course, moving all the entries is expensive for large containers. Nim’s standard library provides the delete() function for this order maintaining delete operation. A much faster way to delete an entry in a seq or array is to remove the last entry and replace the one that should be deleted with that last entry. This operation moves the last entry to replace the one that should be deleted, so the order of elements is not maintained. Nim’s standard library provides the del() function for this faster, but order-changing delete operation. Naturally, we should use del() when the order is not important. The delete() and del() functions are actually only available for sequences, as arrays have a fixed size — but in principle, we could do similar operations with arrays as well; we just have to store the actual used size somewhere. [46]
Some details
Let us investigate at the end of this section some internal details about arrays and sequences. Beginners who are not yet familiar with the concept of pointers should probably skip this subsection and perhaps come back later. We could consult the Nim language manual or the compiler’s source code to learn more details about arrays and sequences. Or we can write some code to test properties and behavior. Let us start investigating an array:
proc main =
  var a: array[4, uint64]
  echo sizeof(a)
  a[0] = 7
  echo a[0]
  echo cast[int](addr a)
  echo cast[int](addr a[0])

  var a2 = a
  a[0] = 3
  echo a2[0]

main()
When we run this program, we get this output:
32
7
140734216410384
140734216410384
7
The size of the entire array is 32 bytes, as we have 4 elements, each of which is 8 bytes in size. And the address of the array itself as well as the address of its first element are identical. Remember that the actual address values will differ with each run of our program and will be entirely different on different computers, because the OS randomly chooses the free memory area in which to run our program. This result is expected as the array is a plain block of memory stored on the stack. Indeed, the array follows copy semantics. When we create a copy called a2 and later modify a, the content of a2 remains unchanged. That’s not really surprising, so let’s investigate a sequence:
proc main =
  var dummy: int
  var s: seq[int64]
  echo sizeof(seq)
  echo sizeof(s)
  s.add(7)
  echo s[0]
  echo cast[int](addr dummy)
  echo cast[int](addr s)
  echo cast[int](addr s[0])

  var s2 = s
  s[0] = 3
  echo s2[0]

main()
When we run the above code, we get:
8
8
7
140732171249104
140732171249112
140463681433696
7
The first two lines of the output might confuse us, as a size of only 8 bytes could indicate a plain pointer value on a 64-bit system. Indeed, the sequence is not a large object that contains size and capacity fields, but only a tiny object that contains a single pointer to the data storage of that sequence. We know that it is not a plain pointer or ref because we cannot assign nil to sequences or test them for nil. (But an object which contains only a pointer is basically identical to a plain pointer, as Nim objects have no overhead as long as we do not use inheritance and when no padding to word size is needed for tiny fields like int8.) Capacity and length are stored also in the memory block that is allocated for the elements, as long as the sequence is not empty. Thus, empty sequences don’t consume much memory even when we have many of them, such as arrays or sequences of sequences (matrices). We use the dummy int variable in the code above as we know that plain ints are stored on the stack, and when we compare the addresses of our dummy variable and our sequence, then we see that the addresses indicate close neighborhoods, so the seq object is also stored on the stack. But the address of s[0] is very different, indicating that the data buffer is stored in a different memory region, which is the heap. If we continuously added elements to the seq, the address s[0] would eventually change, while the address of s would always remain the same. That is because the capacity of the data buffer would become exhausted at some point and a new data buffer with a different address would be used. Finally, we observe again that the sequence follows copy semantics, as the content of the copy s2 remains unchanged when we modify the original sequence s. We could try to discover some more details of the internals of Nim’s sequences, i.e. we could try to detect where the capacity and size are stored. However, these are internal details that might not necessarily interest us, as they could change with new compiler versions or different compilers.
However, if you still have doubts about what we have explained, let’s delve one layer deeper. We strongly believe that a seq needs a length and a capacity field. And we assume that its data type should be int. We said that both fields should be adjacent to the buffer of the seq elements, which means at the start or at the end. Obviously, we can not access the end as long as we do not know the capacity, so the capacity field should be at the start, and then the length field also. We may find out which one is which by observing the content when the seq grows. So let us write some code:
proc main =
  var
    s: seq[int64] = newSeqOfCap[int64](4)
    s2: seq[int64]
    p: ptr int

  var h = cast[ptr int](addr s2) # prove that an uninitialized seq is indeed a pointer with nil (0) value
  echo cast[int](h) # address on stack
  echo h[] # value (0)
  echo ""

  for i in 0 .. 8:
    s.add(i)
    echo cast[int](addr s[0])
    p = cast[ptr int](cast[int](addr s[0]) - 8) # capacity
    echo p[]
    p = cast[ptr int](cast[int](addr s[0]) - 16) # length
    echo p[]

main()
The output when we run the program is:
140725732630192
0

140251431497824
4
1
140251431497824
4
2
140251431497824
4
3
140251431497824
4
4
140251431506016
8
5
140251431506016
8
6
140251431506016
8
7
140251431506016
8
8
140251431510112
16
9
Don’t worry if you do not understand the program and its output yet. You will better understand it when you have read the sections about references, pointers, and memory management. The first two output lines show us that an uninitialized seq is just a pointer pointing to nil. And the remaining output lines show us the address of the first seq element, the capacity, and the length of the seq whenever we add an element. We started with a seq with an initial capacity of 4, so address and capacity are constant while we add the first 4 elements. Then the capacity of the allocated buffer is exhausted. A new buffer with a different address and doubled capacity is allocated, the already contained elements are silently copied to the start of the new buffer, and so on.
Multidimensional arrays and sequences
Nim does not support multidimensional arrays and sequences (also called matrices or tensors) as default built-in data types. However, we can create ordinary one-dimensional arrays and sequences, and each container element can be made an array or sequence again. For a two-dimensional matrix, we would then access an element with two indices like m[i][j]. To simplify element access, we can define a template for ourselves to just write m[i, j] instead. We can extend this to more than two dimensions. If you require matrices and tensors, you should also consider the use of external libraries, such as Arraymancer. Arraymancer is optimized for performance and also supports parallel operations like parallel matrix multiplication. In this section, we will present a few simple use cases for creating two-dimensional matrices and accessing their elements. This should be enough to get you started.
First, let’s create a chess board:
const
  Rows = 8
  Cols = 8

type
  Fig = int8
  Col = array[Rows, Fig]
  Board = array[Cols, Col]

var b: Board

const
  a = 0
  rook = 5 # whatever makes sense

b[a][0] = rook
echo b[a][0] # 5

# with user-defined templates we can simplify the index notation
template `[]`(b: Board; i, j: int): int8 =
  b[i][j]

template `[]=`(b: var Board; i, j: int; v: int8) =
  b[i][j] = v

b[a, 0] = rook
echo b[a, 0] # 5
Now, let’s investigate the case where one or both dimensions of the matrix can grow during program runtime, so we make those dimensions a seq instead of an array.
type
  T1 = array[4, seq[int]]
  T2 = seq[array[2, int]]
  T3 = seq[seq[int]]

var t1: T1
t1[0] = @[1, 2, 3]
t1[1].add(7)
echo t1[0][0] # 1
echo t1[1][0] # 7

var t2: T2
t2.add([1, 2])
echo t2[0] # [1, 2]

var t2x = newSeq[array[2, int]](10) # pre-allocate 10 rows
t2x[7] = [5, 6]
echo t2x[7] # [5, 6]

var t3: T3
t3.add(@[1, 2, 3])
t3.add(newSeq[int](1))
t3[1][0] = 19
for row in t3:
  echo row # @[1, 2, 3], @[19]
If both dimensions are dynamic, you can also use the newSeqWith() template from the sequtils module. We will cite the example of that module:
import std/sequtils
## Creates a seq containing 5 bool seqs, each of length of 3.
var seq2D = newSeqWith(5, newSeq[bool](3))
assert seq2D.len == 5
assert seq2D[0].len == 3
assert seq2D[4][2] == false

## Creates a seq with random numbers
import std/random
var seqRand = newSeqWith(20, rand(1.0))
assert seqRand[0] != seqRand[1]
Using seq/array types to create a matrix makes a lot of sense when the matrix is densely populated. For sparse matrices, using a hash table instead may save memory.
When iterating over matrices, keep in mind that for memory accesses such as m[i, j] and m[i, j + 1], the RAM is accessed sequentially with good cache support. However, when the first index changes, we access memory regions that are far apart, implying inadequate cache support. We should keep this in mind, as it can significantly impact performance. Sometimes we can optimize loops for matrix access by altering our iteration method - either by rows or by columns.
Slices
Nim slices are objects of type Slice with two fields, a lower bound (a) and an upper bound (b). The system module also defines the HSlice object, called a heterogeneous slice, for which the lower and upper bound can have different data types:
type
  HSlice*[T, U] = object   ## "Heterogeneous" slice type.
    a*: T                  ## The lower bound (inclusive).
    b*: U                  ## The upper bound (inclusive).
  Slice*[T] = HSlice[T, T] ## An alias for `HSlice[T, T]`.
As the Slice and HSlice objects are not built-in types, their names start with capital letters. Slices are not used that often directly, but mostly indirectly with the .. range operator, e.g. to access sub-ranges of strings and other containers.
One example of its direct use from the system module is
proc contains*[U, V, W](s: HSlice[U, V], value: W): bool {.noSideEffect, inline.} =
  result = s.a <= value and value <= s.b
Slices are used by functions of the standard library or by user-defined functions to access sub-ranges of strings, arrays, and sequences. Typically, we do not use an explicit Slice object, but we create the Slice by use of the infix .. operator, which takes two integers and returns a Slice with these bounds:
Applied to container data types, slices look syntactically like sub-ranges:
var m = "Nim programming is difficult."
m[19 .. 28] = "not easy."
echo m
echo "Indeed " & m[0 .. 18] & "is much fun!"
var s = HSlice[int, int](a: 0, b: 18)
echo "Indeed " & m[s] & "is much fun!" # the same as line four
In line two, we use the slice to replace the sub-string "is difficult.", which starts at position 19, with another string. Note that the replacement can be a longer or a shorter string, that is, the slice supports not only overwriting characters but also inserting or deleting operations. In line two, the actual Slice object is constructed by the .. operator and the two integer bounds. In line four, we use the slice to access a sub-string and create a new string from it. As we learned earlier in the Strings section already, we can use the ^ operator to access elements counted from the end of the container, so we could have also written line two as m[19 .. ^1] = "not easy.". The last two lines in the above example show that we could have instead used a real HSlice object to access the sub-string.
Slices can be used in a similar way for arrays, strings, and sequences. But we have to remember that Slices are only objects with a lower and an upper bound, so there must always be a procedure that accepts the container and the Slice as arguments to do the real work.
When we are concerned with achieving the utmost performance, we have to be a bit careful with Slices as their use can generate copies. Consider this example:
type
  O = object
    i: int

proc main =
  var
    s = newSeq[O](1000000)
  for i in 0 .. (1000000 - 1):
    s[i] = O(i: i)

  var sum = 0
  for x in s[1 .. ^1]:
    sum += x.i

main()
Here, we use the slice construction operator .. to exclude the first element from our summing operation. Unfortunately, when we use the slice operation in this way, the Nim compiler may create a copy of our sequence, which increases the run-time and memory consumption. At least for Nim versions up to 1.6, this was the case. Newer versions may use view types instead to avoid the copy. We may try to use the new toOpenArray() expression and attempt a construct like
for x in items(s.toOpenArray(1, s.high)):but that currently does not compile.
One current option is to create a custom iterator like:
iterator span*[T](a: openArray[T]; j, k: Natural): T {.inline.} =
  assert k < a.len
  var i: int = j
  while i <= k:
    yield a[i]
    inc(i)
and use
for x in s.span(1, s.high):Alternatively, we may perform the summing in a procedure and pass that proc an openArray created with toOpenArray(), as shown below:
proc sum(x: openArray[O]): int =
  for el in x:
    inc(result, el.i)
echo sum(s.toOpenArray(1, s.high))But this is a work in progress, so the situation may improve. See:
Value objects and references
We have already used different types of variables — integers, floats, characters, the custom Computer object, and some more. We said that variables are named memory regions or storage locations where the content of our variables is stored. These kinds of variables are sometimes called value types — to distinguish them from pointers and references.
Value types always imply copies when we do an assignment:
var i, j: int
i = 7
j = i
i = 3
echo i, j
Here, we have three assignments: first, we assign the integer literal 7 to the variable i; next, we assign the content of variable i to variable j; finally, we overwrite the old content of variable i with the new literal value 3. The output of the echo() statement should be 3 and 7 because, in line 3, we copy the content of variable i, which is currently the value 7, into variable j. The new assignment in line 4 in no way touches the content of variable j.
In section Objects we saw that the fields of object types like our Computer data type behave in the same way — assignments copy the content. The tuple data type, which has some similarities to objects, and which we will introduce later in the book, behaves the same. All these data types are stack-allocated, and we say that the data types have value or copy semantics. Even strings and sequences, which actually use a heap-allocated data buffer, behave in the same way in Nim.
Whenever possible, we should use this simple form of variables, as they are fast and easy to use.[47]
Perhaps that is not too surprising for you, but if we had references instead of plain variables, the situation would be different, as we will see soon. Actually, some other programming languages use reference semantics for entities like strings by default, for example in Ruby, an assignment of a string variable to another variable does not copy the content, so that both variables still use the same data buffer — when we then modify one variable, the content of the other changes too.
However, there are situations where we need some sort of indirection, and that’s when references and pointers come into play. For example, when the data entities depend in some form on each other, the elements may build linked lists, trees, or other structures. The entities may have some neighborhood relation, also called some many-to-one relation.
Indeed, value objects and references occur in real life also:
Imagine you have baked a cake for your family, and you know that your friendly neighbor loves cakes too. As you have still a lot of all the necessary ingredients and because the oven is still hot, you make one more identical cake to give it later to your neighbor. We can think of the cake as a value type, and your second cake can be considered a copy. When you give the copy to your neighbor, you still have your own, and when either you or the neighbor eats the cake, the other one still exists.
Now imagine that you know a good car repair shop. You can give the telephone number or location of that car repair shop to your neighbor, so he can use that shop too. So you gave him a reference to the shop, but you gave him not a copy. You can also give some of your other friends a reference to that shop, which requires nearly no effort for you, while baking a cake for all of them would require significant effort. But there is some danger with references: When one of your friends gets angry and burns down the car repair shop, then you and all your other friends have a serious problem.
You can regard the names of persons as some sort of reference too. Imagine you have a list with the names of all the people you intend to invite to your birthday party and another list with the names of people who owe you money. Some names may appear on both lists, indicating that they refer to the same person.
In computers, dynamic storage, called RAM, consists of consecutive, numbered storage locations, called words. Each individual word has its address, which is a number typically starting at zero and extending to a value, which is defined by the amount of memory available on your computer.[48] These addresses can be used to access the storage locations, that is, to store a value at that address, or to read the content again. Reading generally does not modify the content, you can read it many times and will always get the same value. When you write another value to that storage location, then the old content gets overwritten, and further reads will give you the new value.
Basically, for all the data that you use in your program, you need its address in the RAM in some form. Without the address, you cannot access it. But what about all the plain value object variables we have used before? We have never used addresses. That is true — we used only names to access our variables, and the compiler mapped our chosen name to the actual address of the variables in memory whenever we accessed the variable. For most simple cases, this is the best way to access variables. Now, let us assume we have such value object type of variable declared in our program, can we access it without using its name? When we have declared it, it should reside somewhere in the RAM when the program is executed. One way to access the content of the variable is by first determining its address from its name, which then allows us to access it either by name or by its memory location. Nim has the addr() function for this purpose, we give it the name of our variable as an argument and get its address. But this is rarely useful — if we can already access it by name, why should we then use its address to access it? One of these rare cases is when we want to call a C function and pass our variable, and that C function has an address parameter. Now, let us assume that we do not want to access our variable by name and that we do not know its address. Can we still access it? Well, we can search the whole RAM for the desired content. In practice, we would never do that, as it is stupid and would take very long, but we could do it. But how can we detect our variable? How can we be sure that it is indeed ours? Generally, we cannot. Even if we knew the value stored in that variable, we would only know what bit pattern it should have. Consequently, for most words of the RAM with a different bit pattern, we could say for sure that it cannot be our variable. However, whenever we find the expected bit pattern, it could just be a coincidence, as there could be many more words in RAM with that content. In some way, it is as if you would search for a person, and you know that the person lives on a long road with numbered houses. If you only know that the person wears brown shoes, but you do not know the number of the house nor the name of the person and no other unique property of that person, then you do have not much luck.
References and pointers
Introduction to pointers
In Nim, references are some form of smart or managed pointers. We will learn more about references later. The plain pointer data type is nothing more than a memory address. It is similar to an (unsigned) integer number. We say that a pointer points to an entity when the pointer contains the memory address of that entity.
Besides the pointer data type, which is just a RAM address, we also have the ptr entity. Ptr is not a datatype on its own, it is always used in conjunction with another data type:
var
 p: pointer
 ip: ptr int
Here the variable p is of type pointer, we could use it to point to some arbitrary memory address. The variable ip is of the type ptr int, which indicates that it should only point to memory addresses where a variable of data type int resides. So a ptr is a pointer that is bound to a specific data type. Generally, we speak only about pointers. Whether we are referring to an untyped pointer or a typed ptr is typically clear from the context.
When we only declare pointers but do not assign a value, then the pointers have the value nil, which indicates that they are regarded to point to nothing. Exactly speaking, a pointer can never point to anything in the same way as an integer variable can not contain any number. Just as an integer variable always contains a bit pattern, a pointer also always contains a bit pattern. But we are free to define a special pattern as nil, and whenever a pointer has this special value, then we know that it does not really point to something useful. In C instead of nil, NULL was chosen for the same purpose. In practice, nil and NULL are typically mapped to 0, that is, a word with all bits cleared. However, this is more or less an arbitrary decision.
So how can we give our pointers above a useful value?
One possibility is to use Nim’s addr() function, which provides us with the memory address of each ordinary variable.
var
 number: int = 7
 p: pointer
 ip: ptr int
echo cast[int](p)
echo cast[int](ip)
p = addr(number)
ip = addr(number)
echo cast[int](p)
echo cast[int](ip)
First, we declare an ordinary integer variable called number which will reside somewhere in memory when we execute the program, and then we use the addr() function to assign the address of that variable to p and ip. The addr() function is a low-level function provided by the compiler. It can be used to determine the memory address of variables and some other entities known to the compiler.[49] We used the echo() proc to show us the numeric decimal value of the addresses in the terminal. Since it typically doesn’t make much sense to print addresses, echo() would refuse to do so. Therefore, we have used the construct cast[int](someValue) to instruct echo() to regard our pointers as plain integers and print them. That operation is called casting. We should mostly avoid it because it destroys type safety, but for learning purposes, it’s acceptable to use it. We will learn more about casts and related type conversions later.
The first two echo statements should print the decimal value 0, as the pointers initially have the default value nil.
The echo() functions in the last two lines should print a value different from 0, as we have assigned the valid address of an ordinary variable that resides in the RAM when the program is executed. Both outputs should be identical, as we have assigned addr(number) to each of the pointers.
An interesting fact, perhaps, is that when you run the program multiple times, the outputs of the last two echo() statements print different values. But that is not really surprising — whenever you launch the program, then for our variable number, a storage location in RAM is reserved. That location can vary with each new program execution. Just like on your next holiday at the same hotel, you might get a different room. So when we have the pointer ip pointing to a valid address, can we recover the content of that memory region? Sure, we use the dereference operator [] for that purpose. Whenever we have a typed pointer x we can use x[] to get the content of the memory location where the pointer is pointing to. Note that the operator [] is not really related to the subscript operator [pos] that we used earlier for array, seq, and string access. Nim uses ASCII characters for its operators, and that set is not very large. And maybe it would even be confusing when we would have a different symbol for each operator. We can consider [] as some form of content access operator — mystring[pos] gives us the character at that position, and ip[] gives us the content of the memory location where ip points to.
var
 number: int = 7
 ip: ptr int
echo cast[int](ip)
ip = addr(number)
echo cast[int](ip)
echo ip[]
What do you expect the output of the last echo() statement to be? Note that for the last echo() statement we do not need a cast, as ip[] has a well-defined type: ip has type ptr int, so ip[] is of well-defined type int, and echo() can print the content.
Now, let us investigate how we can use pointers to modify the content of variables:
var
 number: int = 7
 ip: ptr int
ip = addr(number)
echo ip[]
ip[] = 3
echo ip[]
echo number
What do you expect for the output of the last echo() statement? Well, remember, ip points to the location where the variable number is stored in RAM. So echo ip[] gave us the content of the number. Now ip[] = 3 is an assignment, and the right side of the assignment operator is the literal number 3, which is a value type. Earlier we said that for value types an assignment is a copy operation, the right side of the assignment operator is copied into the variable on the left side. Now ip[] stands for exactly the same content as the variable number, so assigning to ip[] is the same as assigning to number.
Pointer arithmetic
In low-level programming languages, pointer arithmetic can be useful. For example, old C code often iterates with pointer arithmetic over arrays using constructs such as sum += *(myIntPtr++). This was done to maximize performance. Modern C compilers generally understand statements like sum += el[i]; i++ and generate very efficient assembly instructions for them. Therefore, pointer arithmetic is not as necessary for C as it once was.
Nim does not provide math operations for pointers directly, but we can always cast pointers to integers and do arbitrary math. And of course, we could define our own operators for that purpose, but typically we should avoid that, as it is dangerous, error-prone, and generally not necessary. As an example, let us sum up some array elements:
proc main =
  var
    a: array[8, int] = [0, 1, 2, 3, 4, 5, 6, 7]
    sum = 0
  var p: ptr int = addr(a[0])
  for i in a.low .. a.high:
    echo p[]
    sum += p[]
    echo cast[int](p)
    var h = cast[int](p); h += sizeof(a[0]); p = cast[ptr int](h)
    #cast[var int](p) += sizeof(a[0]) # this compiles but does not work currently

  echo sum
  echo typeof(sizeof(a[0]))

main()
When we do pointer arithmetic or similar math to calculate the address of variables in the computer memory, then memory addresses are used like integer numbers, and so it makes some sense that Nim’s integers have the same byte size as pointers. Note that for arrays, addr(a[0]) is identical to addr(a), because an array is just a memory block, and the address of the block is identical to the address of the first element. Actually, in the general case, we should have used addr(a[a.low]) instead of addr(a[0]), since array indices don’t necessarily have to start at position zero. For sequences and strings, addr(s[0]) is not identical to addr(a), as sequences and strings are objects, that contain not only the data buffer but also other data like the capacity. When we have to pass the data buffer of strings or sequences to C functions, we typically pass addr(s[0]), or in the case of strings, we may pass s.cstring.
References:
Allocating objects
In the previous section, we learned the basics of pointers. We used the addr() operator to initialize the pointer by assigning the address of an existing entity. However, this approach isn’t commonly used in practice and can be somewhat risky, as it’s not always guaranteed that the variable we apply addr() to will persist for the lifetime of our pointer. As a result, our pointer might eventually point to a memory location that’s already been freed or is now occupied by a completely different object. For this reason, the use of addr() is generally reserved for experienced programmers who have a firm understanding of its implications. Typically, addr() is unnecessary except in instances of low-level code, such as when interfacing with external libraries written in C. Instead of using addr() to assign a valid address to pointers, procedures such as alloc() or create() are often employed to reserve a block of memory:
var ip: ptr int
ip = create(int)
ip[] = 13
echo ip[] * 3
var ip2: ptr int
ip2 = ip
echo ip2[] * 3
dealloc(ip)
Here, the procedure create() is used to reserve a block of memory. The int parameter ensures that the block has the size of an integer value. After ip has a valid value, we can store a value in that memory location and read it again. Note that multiple pointers can point to the same memory location: We declared one more int ptr called ip2. However, for that pointer, we do not allocate a new block; instead, we assign the old block that we allocated for ip to ip2. Now both pointers point to the same object, the int value 13. We may call ip2 an alias, as it is a different way to access the same entity.
When we use alloc() or create() to allocate memory blocks, we have to deallocate them when we no longer need them. Otherwise, those memory blocks couldn’t be reused. If we continuously allocated memory blocks and never deallocated, or freed them, at some point all memory would be occupied — not only for our own program but for all programs currently running on the same computer. We would have to terminate our program - when a program is terminated, all resources are automatically freed by the OS.
The use of procedure pairs like alloc() and dealloc() is common practice in low-level programming languages like C, but it is inconvenient and dangerous: We can forget to call dealloc() and waste resources, or we may even deallocate memory blocks, but still use it by our pointers. The latter would at some point in time crash our program, as we would use memory blocks that are already released and may now be reused for other variables — from our own program or from other programs.[50] Note that in the source code above, there is only one single dealloc() call. The reason for that is we only allocated one single memory block in a single create() call; ip2 is merely another pointer that points to that block. If we had used an additional dealloc(ip2) call, then that would be a so-called double-free error.
As you can see, using pointers is inconvenient and dangerous. However, there are situations where plain value type variables do not suffice. The solution of many higher-level programming languages to this problem is a Garbage-Collector (GC). The GC does the dangerous and inconvenient task of deallocating unused memory blocks for us automatically.
To distinguish the GC-managed "pointers" clearly from the manually managed ones, we call them in Nim references, in some other languages they are called traced pointers. References are always typed like ptr, there is no equivalent to the untyped pointer type for references.
For references, we still have to allocate the memory ourselves, before we can use the references. When we are done using them, the GC automatically frees the corresponding memory block. A typical scenario is that we use references in a procedure or in an otherwise limited block of code: We declare the reference in that code block, allocate and use it. When we exit the code block, the GC automatically frees the allocated memory. You might think that the fact that we still have to allocate the memory for our references ourselves is a concern, as we could forget that step. Well, it is not that dangerous; if we forget the allocation step, we would use a reference with the value nil, which would immediately result in a runtime error. So we would notice the problem immediately. However, other pointer errors, such as missing de-allocation or use-after-free, are less obvious and more dangerous. In languages like C tools like Valgrind are used to check for errors like "use after free". Valgrind is a very helpful tool, but it can not find all errors that may occur, and its reports can be very verbose. We may use Valgrind as well when we compile our Nim program with --mm:arc and -d:useMalloc — this can be used to ensure that our program really works perfectly, maybe when we have to use C libraries, and it may help us find the cause for bugs.
With references, we can rewrite our previous example code as follows:
var ip: ref int
new(ip)
echo ip[] # zero
ip[] = 13
echo ip[] * 3
var ip2: ref int
ip2 = ip
echo ip2[] * 3
We have replaced ptr with ref, and instead of alloc() or create(), we are using the new() proc. This procedure takes an uninitialized ref as a parameter and allocates a managed memory block for it. After the new() call, ip refers to a well-defined, managed memory block that can store an integer value. The content of that memory block is cleared initially, so echo ip[] would give zero. Again, we can create another reference, ip2, and assign to it the value of the other. As a result, both now refer to the same memory block. The advantage here is that we don’t have to worry about deallocating that block; the GC will handle it when appropriate.
To verify that in the example code above, both references really refer to the same object in memory, we could add two more lines of code:
ip2[] = 7
echo ip[]
echo ip2[]
Here, we are using the reference ip2 to assign to the memory block the literal value 7. After that assignment, both echo() statements would display that new content.
Using references and pointers to store basic data types like integers isn’t very common. In most cases, we work with larger objects and establish relationships between them. We will try that in the next section.
References to objects
You might still wonder what references are really useful for — they seem to be only a more complicated version of plain value type variables.
Now, let us assume we want to create a list of things or persons, maybe a list of our previously used Computer data type, or perhaps a list of persons we will invite to our next party. We will create the party list for now, as the Computer data type we used before has already many fields, and filling all the fields would be some effort, so let us use a new Friend data type which should store only the friend’s name for the beginning — we may add more fields later when necessary. So, we might have
type
  Friend = object
    name: string
With that declaration, we could declare a few Friend variables like this:
var harry, clint, eastwood: FriendBut that is not what we want. We would need a list of all our friends that we would like to invite to our party, we would want to add friends to the list, and potentially, we might also want to delete friends. You may think we could use Nim’s sequence data type for that, and you are right. But let us assume we could not use that predefined Nim data type for some reason. Then we could create a list of linked references to Person.
type
  Friend = ref object
    name: string
    next: Friend
Now our Friend data type is a reference to an object, and the object itself has an additional next field, which is again of type Friend.
This is a sort of recursion. If this seems too strange, imagine you have some numbered paper cards, each with two fields: one labeled 'name' and another labeled 'next'. In the 'name' field, you can fill in a friend’s name, and in the 'next' field, you write the number of the next card. The last card in the chain leaves the 'next' field empty.
Now, let’s create a small Nim program. It will read the names of our friends from the terminal, create a list of all friends, and finally, print the list.
type
  Friend = ref object
    name: string
    next: Friend

var
  f: Friend # the head of our list
  n: string # name or "quit" to terminate the input process

while true:
  write(stdout, "Name of friend: ")
  n = readline(stdin)
  if n == "" or n == "quit":
    break
  var node: Friend # (1)
  new(node)
  node.name = n
  node.next = f
  f = node

var ff = f # save f for later...
while ff != nil:
  echo ff.name
ff = ff.next| 1 | The actual name for this temporary variable is arbitrary, we could have used el for element, maybe. |
This example code doesn’t seem to be that easy. But it is not really difficult, and when you have understood it, you can already call yourself a Nim programmer. Perhaps you should think about the code above for a few minutes, before reading the explanations below.
First, let’s summarize what our program should do: It’s designed to read in the names of friends whom we’d like to invite to our next party. Of course, when entering the names, we would need a way to tell that we are done. In our program, we can do this in two ways: either by entering an empty name — just pressing the return key — or by entering the text "quit" to stop the loop. Unfortunately, this means we can never invite a friend named 'quit' to our parties. When we have terminated the input loop, then the next loop prints all the entries to the terminal.
Let us start with the type and variable declarations: We use a user-defined type named Friend, which is a reference to an object, that object type has a field name of type string, and a field next, which is again a reference to the same data type.
We are using two variables: one called n of type string, to read in a name or the quit command from the terminal, and another variable called f of type Friend. While the variable f seems to represent just a single friend, its next field means it can actually represent an entire list of friends, with f as the starting point or head of that list.
In the code above, we are using a special while loop — special because the construct while true: and because the loop contains a break statement. Earlier, we said that we should avoid the break statement in loops because it interrupts the control flow and can make it more difficult to understand and prove the flow. But in this case, that form makes some sense: For the first loop, we have to first read in a name from the terminal, and then we can decide what to do, so we can not really evaluate a condition after the while statement at the top. So we use the simple constant condition true, which would never terminate the loop. We need a break inside the loop body to terminate the loop.
Let’s first investigate the second loop, as it’s relatively straightforward: We use a new variable named ff in place of f for this loop to ensure the original f remains unmodified, preserving it for further use. In the while condition, we check if the current value of ff is nil, indicating that there are no more entries in our list. In that case, we terminate the loop, as we are done. If ff doesn’t equal nil, then ff points to a valid content — i.e., there’s at least one valid name that we can access using the field access operator and print with echo ff.name. Note that in Nim the field access operator . works in the same way for value object types as well as for ref object types. For ref object types, we could also use ff[].name instead of just ff.name. This means we first apply [] to ff to get the content, then use the . operator to access the name field. In some other languages like C, we would have to use a special operator -> to access fields of pointer or reference types.
The most intriguing statement in the output loop is ff = ff.next. We assign the content of ff.next to ff and proceed with that new content. The content could be a valid reference to one more Friend object, or it could be nil, indicating that our loop should terminate.
The input loop is also not that complicated: To make the process of adding more friends to the list easy, we always add new names at the beginning. First, we ask the user to enter a name. We use write(stdout) for this, as echo() always generates a new line, but we want to read in the name on the same line. If the name is empty or has the special value 'quit', then we terminate the input loop. In the loop, we use a temporary variable called node of type Friend and allocate a memory block for it with new().[51] Then we assign the read in friend’s name n to the name field. The last two statements in the loop body can be a bit challenging to understand: First, we assign the value of f to node.next. Now, node is basically the start of our list, and its next field refers to the first element of the current list. Fine, but we said that the node variable is only a temporary variable, we do not intend to use it longer as necessary. However, node is currently the head of our list, making it very useful. On the other hand, the former starting point f is now redundant as the current f is identical to node.next. So the trick is, we just assign to f the value of node. Now, f represents the complete list, and we no longer need node. We can reuse the node variable in the next loop iteration, but we must allocate a new memory block for the node reference. The previous memory block is still in use; it contains the name we just entered and a reference to the next object in the list.
Note that we add new elements at the top of the list using this method. We’ve chosen this approach because it’s quite straightforward. For adding at the end of the list, we would have to use one more reference variable which allows us always access to the current end of the list, or we would have to traverse the list from head to tail whenever we would like to add elements at the tail.
For another exercise, let’s consider deleting entries from our list. Essentially, this operation is straightforward; we would just skip one entry. Let’s incorporate the following code into the previous program:
var f1 = f # save original f
while f1 != nil:
  write(stdout, "Name to delete: ")
  n = readline(stdin)
  if n == "" or n == "quit":
    break
  if f1.name == n:
    f1 = f1.next
  else:
    while f1.next != nil:
      if f1.next.name == n:
        f1.next = f1.next.next
        break
      f1 = f1.next
Here, we’re once again using an outer while loop to read in the names we want to delete. That loop uses the condition while f1 != nil: because, naturally, we should stop when the list is empty.
In the loop body, we have an if statement, and within the else branch of this if statement, we have another loop. The reason we need the if statement is that the case where the name to delete is the first in the list is somewhat special. Let’s examine the inner loop first. That loop operates under the assumption that there are at least two elements in the list, f1, and f1.next. We compare the name of the next entry with n. If they match, then we would have to skip the next entry. We can do that by the statement f1.next = f1.next.next. That is, we replace the reference from the current element f1 to the next list entry, that is f1.next, by the next entry of the next element, which is (n.next).next. We do not have to write the parenthesis. The n.next.next entry can be nil, in that case, it is the end of the list. If we found a matching name, then we terminate the inner loop with a break statement, and we are done. Otherwise, we assign to f1 the value of f1.next and continue the loop execution. Now to the special case where the name to delete is the first in the list. We need the first if branch for that — if already the first element matches the name to delete, then we just skip the first element by setting the head of the list to the next entry, which may or may not be nil.
This is one way to solve the task. For operations on lists, there are usually various solutions, some optimized for simple or concise code, some for performance. You may copy the code segment above to the end of the former code, and maybe add one more copy of our printing loop at the end again. Afterwards, you will have a program that reads in a list, prints the contents, asks for names to delete, and ultimately prints the updated list. Perhaps you can improve the code, or maybe you can detect special corner cases where it may fail. What happens, for example, when some of your friends have the same name? Might the program fail in that case? Or you may add more fields to your Friend data type. You could include a text field indicating 'male' or 'female', and subsequently report the male-to-female ratio. Could you potentially remove males from the list when there are more males than females?
For references to objects, the assignment operator = copies the references, but not the object. Similarly, the operator == used for equality tests compares the references, not the content of the objects to which the references point. If you want to compare the content of the objects, you can apply the dereference operator [] on both references:
type
  RO = ref object
    i: int

var
  ro1 = RO(i: 1)
  ro2 = RO(i: 1)
  ro3 = ro1

echo ro1 == ro2 # false
echo ro1[] == ro2[] # true
echo ro1 == ro3 # true| In modern Nim, we generally use the constructor syntax like var ro1 = RO(i: 1) or var computer1: Computer(price: 799.99; quantity: 2) to allocate and initialize ref objects, and avoid explicit new() calls for the allocation, followed by explicit field initialization. The constructor syntax is more compact, and the combined construction with initialization may allow the compiler to reason about the code more effectively and to produce better code. As the constructor syntax looks the same for value and ref objects, this may also simplify later changes of the program. Thus, the use of explicit new() calls is mostly considered a legacy approach and it is highly recommended to use object constructors instead. In rare instances where a complex constructor call fails to compile, one may resort to using new().[52] |
Procedures and functions
Procedures and functions, called proc and func in Nim, are used to structure the program source code. Functions, a subtype of procedures, return a value but do not modify global variables or otherwise change the state of the program. When we talk about procedures in this book, what we say applies to functions as well, unless stated otherwise.
Procedures and functions are typically used to group sequences of statements that perform a specific task.
We can pass parameters to procedures, e.g., data that the procedure should process, and the procedure can return a result. Related sets of procedures can be grouped into library modules, e.g., procs that perform various string operations. We will discuss the use and creation of modules later in the book.
The terms procedure and function were used in Pascal and other languages of Wirth already, while C uses the term function only, and Fortran uses the term subroutine instead. Finally, Python and Ruby use the rather unusual terms def and fun respectively.
Nim’s procedures are fundamentally similar, yet much more advanced than their equivalently named counterparts in the Wirthian languages or the plain functions in the C language. Nim’s procs support generics, overloading, named parameters, default values, special parameter types such as varargs and openArray, various methods of returning a result, and multiple calling conventions, including method and command calling conventions.
Introduction
We call or invoke a proc by just writing its name, followed by a parameter list enclosed in parentheses. The parameter list can be empty. When we call a proc, the program execution continues with that procedure, and when the execution of the procedure terminates, the next statement after that proc call is executed. Sometimes we say that we jump into a procedure and jump back when that procedure terminates.
In Nim, functions are a special form of procedures that return a result and do not modify the current state of the program. Modifying a global variable or performing an input/output operation would be examples of modifying the state. We have already used some predefined procedures like echo() for output operations, add() for appending single characters to strings, and readLine() for reading in textual user input. And we talked about math functions like sin(), cos(), pow() — these are functions as they accept one or two arguments and return a result, but do not change the state — calling them again with the same arguments would always give the same result. The procedure readLine(), despite its name, is not a function, as the result typically varies for each call: We pass a file variable as an argument, which might change its state for each call, possibly because the end of the file is reached. A function is only a special subtype of a procedure. The func keyword indicates to the reader of the code and to the compiler some special properties, namely, that a result is returned and that the global state is not changed. Whenever the func keyword is used, a proc would suffice as well, and in this text, we mostly speak about procedures, even when a function would suffice.
Let us start with a very simple function called sqr() for squaring.
func sqr(i: int): int =
  i * i
A procedure declaration consists of the keyword proc, a user-selected name, an optional parameter list enclosed in parentheses, and an optional colon followed by the result data type. For a function declaration, we use the keyword func instead of proc, and as functions return a result, we have to specify the result data type.
Note that this is only a declaration so far — the compiler could recognize the construct, its parameters, and its result type. We sometimes call this construct a procedure header.
Typically, we do not only declare a function, but we define it, that is, we add an equal sign to the proc header and add an indented procedure body that contains the code that is performed for each invocation.
Pure proc declarations can be necessary for rare situations, such as when two procedures call each other. In this case, the procedure defined first would call the other procedure, which is not already defined, so the compiler may complain about an unknown procedure. We could solve that problem by first declaring the second procedure so that the compiler would know about its existence. We would then define that second procedure later, closer to the end of the program file.
The sqr() proc above accepts an integer argument and returns its square, which is also of the same data type. We would call that proc as follows:
var j: int
j = 7
echo sqr(j)
Earlier in this book, we said that the compiler processes our source code from top to bottom and that the final program is executed from top to bottom too. The first statement is indeed true, for that reason, it can be necessary to declare a function at the top, and define it below, as we can not call a proc before it is declared or defined.
For the program execution, we have to know that procs are only executed when we call them. That is, when we write a proc at the top of our source code, then that proc is processed by the compiler, but it is not executed during program runtime before we call it. As the Nim compiler supports dead code removal, the code of procedures that we never call would not be included in the final executable.
Parameter lists of procedures consist of one or more lists of parameter names, separated with commas, followed by a colon and the data type of the parameters. The sub-lists with the same data type are separated by semicolons:
proc p(i, j, k: int; x, y: float; s: string)While the Wirthian languages would require semicolons to separate the parameter blocks, in Nim we could also use plain commas for that. For the data types of procedure parameters and as the result type all of Nim’s data types are allowed, including structured types, ref, pointer, and container types. Additionally, we can use the data types openArray and varargs as parameter types — these two types are not allowed for ordinary variables, and varargs is not valid as a result type. We will learn the details of all these types soon. When we call or invoke a procedure, we can pass literal values, named constants, variables, or expressions to it.
When we call a procedure with multiple arguments, we have to specify the arguments in the order in which they are listed in the proc header, separated by commas, and the arguments must have compatible data types:
var i: int = 7
var x: float = 3.1415
p(i, 13, 19, x, 2.0, "We call proc p() with a lot of parameters")
Here, compatible data types mean that for the i, j, and k parameters, which are specified as int types in the proc definition, variables of smaller int types like int16 would work. For the two parameters of the float type, we would have to pass floating-point variables or a float literal. As a special case, an int literal would also work, as the compiler knows the desired data type and automatically converts the int literal into a float for us, as long as that is possible without loss of precision. We could pass 2 instead of 2.0, but passing a very long int literal with more than 16 digits may fail at compile time:
proc p(i, j, k: int; x, y: float; s: string) =
  echo s

var
  n: int16
  m: int # int64 would not compile
  z: float32
p(n, n, m, 1234567890, z, "")
Actually, float32 types and int literals up to ten digits seem to work for float parameters, but even on 64-bit systems, the int64 data type is not permitted for int parameters. As you can see from the example above, it is possible to pass the same variable multiple times as a parameter, and empty string literals are, of course, allowed too.
Nim also supports default values for proc parameters and named parameters; that is, we can leave parameters unspecified and use the default value, or use the actual parameter names, like in a variable assignment, when we call a proc:
proc p(i: int; x: float; s: string = "") = echo i.float * x, s
p(x = 2.0, i = 3)
Here, we used named parameters when calling the proc p(). This way, we can freely order the parameters, and as parameter s has a default value, we can leave it unspecified and just use the default value.
Functions always return a result, and procedures can return a result, but they don’t have to. In the C language, function results can just be ignored, but in Nim, whenever there is a result, then we have to use it at the call site; that is, we have to assign the returned value to a variable, or we have to use it in an expression. Nim enforces this, as generally, the returned value is important. The returned value can be the actual result, as in a sin() call, or it may give us additional information, like the number of read characters when we do text processing, or perhaps an error indication, like the end of the file. For the rare conditions when we really intend to ignore the result of a function call, we can call that function as discard myProcWithResult(a, b,…). Another solution is to apply the {.discardable.} pragma to the function definition. We will learn more about pragmas later. When a procedure should not return a result, then we can use the void return type or just leave the return type out — the latter is recommended, void types are used only rarely in Nim. When the proc has no parameters at all, then we can even leave out the empty parameter list in the procedure definition:"
proc p1() =
  echo "Hello and goodbye"

proc p2 =
  echo "Hello and goodbye"

proc p3: void =
  echo "Hello and goodbye"
Calling procedures
When we call a procedure or a function, that is, when we intend to execute it, we always have to specify a parameter list enclosed in brackets, but the parameter list can be empty:
var i = myFunc(7)
var j = myF()
var p = myF # not a function call, but an assignment of the proc to variable p
Note that the last line in the above code is not a call of myF(), but an assignment of that function to the variable p. We will discuss this use case soon.
We have already learned that we can also use the method call syntax, like 7.myFunc instead of myFunc(7), that we can use the command invocation syntax like in echo "Hello", and that we should avoid putting a space between the proc name and the opening bracket, as that would be interpreted as a command call with a tuple argument. When the function or procedure expects multiple arguments, we separate the arguments with commas, and we generally put a space after each comma. For the use of the command invocation syntax, there are some restrictions: When the procedure has more than one parameter and returns a result, the command invocation syntax cannot be used:
proc p(i, j: int): int = i + j # command invocation syntax does not work
proc p2(i, j: int) = echo i * j
echo p(1, 2) # ordinary proc call
echo 1.p(2) # method call syntax
p2 1, 2 # command invocation syntax
echo p (1, 2) # argument looks like a tuple, so this would not compile
For the proc definition above, we wrote the body statement directly after the equal sign. This is possible and sometimes used for very short procedures. Indeed, here p() is a function.
In the examples above, we passed plain integers as parameters to procedures. But of course, proc parameters can have any type; we can pass strings, arrays, objects, and more. The method we use to pass the parameters to the procs is sometimes called 'pass by value', an old term introduced for the Pascal language, used to indicate that the passed parameter seems to be copied to the proc. The proc is not able to modify the original instance. In the next section, we will learn about the var parameter type, which is used when we want to allow the proc to modify the original instance. In the Wirthian languages, the procedure parameters actually get copied, so inside the proc, we could modify them, but only the copy is modified, and the original instance remains unchanged. In Nim, it’s a bit different. When we pass parameters by value to a proc, we cannot modify it at all in the proc body. If we require a mutable copy, we have to generate that copy ourselves in the proc body. This allows some optimizations: Nim does not really need to copy the proc parameters, as they are immutable, Nim can just work with pointers to the original instances internally. In fact, there are rumors that for parameters smaller than 3 * sizeof(float), Nim copies the instances, but for larger instances, Nim works internally with pointers to the original value. However this is an implementation detail — data copied to the procs stack allows the fastest access, but on the other hand, the initial copy process can be expensive, so it is a compromise.
Procedure parameters of var type
Our sqr() function above accepts only one parameter, and that parameter is a value type, which indicates that we cannot modify it in the procedure body. That fact is useful to know for the caller of a proc, as one can be sure that the passed parameter has not been modified and is available unchanged after the proc call.[53] But of course, there are situations where we may want a passed parameter to be modified. Let’s assume that we want to "frame" a passed string; for example, we might want to pass in the string "Hello" and change it to "* Hello *". Furthermore, let’s assume that we might sometimes want to use other characters instead of the asterisk, perhaps a + sign.
proc frame(s: var string; c: char = '*') =
  var cs = newString(2)
  cs[0] = c
  cs[1] = ' '
  insert(s, cs)
  add(s, ' ')
  add(s, c)

# we can call that proc like
var message = "Hello World"
frame(message)
echo messageThe frame() procedure above accepts two parameters and returns no result. The first parameter has the type string; it is not a value parameter but a var parameter, which is indicated by the var keyword between the colon and the type of the parameter. Note that we use here again the keyword var that we used earlier to declare variables. The main reason we use the same keyword again is that we do not want to use a new one — var proc parameters are different from var declarations. Parameters of var type can be modified in the procedure body, and that modification is visible after the proc call.[54] The second proc parameter is a plain value type; it is a character that has the default value '*'. To specify a default value for a parameter, we write an equal sign after the parameter type followed by the actual default value, as we would do in an assignment. Indeed, as in an assignment, we can even leave out the colon with the data type in this case, at least for the case that the compiler can infer the correct data type from the assigned default value. Default values are useful for parameters that have in most cases the same value but can be different sometimes. The advantage is that when calling that procedure, we can simply leave that parameter out. For default values, we have to be a bit careful; only value parameters can have default values. Furthermore, when we call a procedure with many parameters with default values, it may not always be clear which parameter we pass and for which parameter we want a default value.
It should be obvious that passing literals or named constants as var parameters, as in frame("Hello"), makes no sense and results in an error message from the compiler.
To generate the frame around the passed-in string, we need to insert two characters at the beginning of the string and append two more characters. Inserting in strings is not a very cheap operation, as it involves moving all the following characters. So we try not to insert two single characters, but we first create a short string consisting of the passed c character and a space character, and then insert that two-character string at the beginning of the passed string. We use the standard procedure newString() with parameter 2 to create a new string of length 2 with undefined content, and then fill in the content by using the subscript operator. We could have used the add() proc to add that two characters to an empty string, but that is a bit slower. Then we use the standard proc insert() to insert our two-character string at the front of our passed string. Finally, we add a space and the c character to the passed string. The passed string is now modified; it is four characters longer. That modification is noticeable for the caller of that procedure; in other words, echo() will print the modified version. Actually, when we think about it, we might feel that our strategy to first create the two-characters string cs is a bad idea, as the allocation may cost more time than just inserting the individual characters directly.
Our frame() procedure above modifies the passed string. Instead, we could have decided that the procedure should not modify the string, but should return a new string consisting of the frame with the passed string in the center. Generally, when creating procs, we have to decide what is more useful — modifying a passed value or returning a modified copy. At times, we also need to consider efficiency. Returning newly created large data types like strings can be expensive. A string is not a trivial structure since it contains a dynamic buffer for the string content that needs to be allocated. On the other hand, for the passed var string we inserted characters, which involves moving characters and is also not a really cheap operation, and maybe when we insert a lot, the string buffer must be even enlarged, which is again expensive. Thus, for this use case, it is unclear which approach is better — we primarily used the var parameter to introduce var parameters. Let’s investigate how a function that returns a modified string might look:
func framed(s: string; c: char = '*'): string =
  var res = newStringOfCap(s.len + 4)
  add(res, c)
  add(res, ' ')
  add(res, s)
  add(res, ' ')
  add(res, c)
  return res

# we can call that proc like
echo framed("Hello World")
echo framed("Hello World", '#')
The above code is one possible solution. We can use the keyword func instead of proc here, as we only return a result and modify no states. We pass the initial string and the character for the frame both as plain value parameters and return a newly created framed string. In the function body, we start with an optimized version of the procedure newString() from the system module, called newStringOfCap(). Like newString(), this proc creates an empty string variable, but it ensures that the data buffer of the new string has exactly the specified size. That is an optimization, which makes sense in our use case, as we know that our newly created string will have 4 characters more than the passed string. So we can avoid that the result string has to be enlarged while we add characters or the initial string, and we ensure at the same time that no space is wasted — the data buffer size of the new string will be a perfect fit for the desired result. The rest of the function body is straightforward: we just add() what is needed and return the result. As mentioned earlier, add() is not extremely fast. Therefore, if you need to frame millions of strings each day, you might consider avoiding add(), and you already know enough about Nim to do this. Just try it. You might start with a string of the right size containing undefined content created by newString(s.len + 4), and then you could copy in the required data, character by character, in a loop. Or you may use the slice operator to insert the passed string into the new string.
Click here to see a possible solution.
func framed(s: string; c: char = '*'): string =
  var res = newString(s.len + 4)
  res[0] = c
  res[1] = ' '
  res[2 .. s.high + 2] = s # we may insert the string by using the slice operator or
  # for p in 0 .. s.high: # we can use a for loop and
  #   res[p + 2] = s[p] # the subscript operator
  res[^2] = ' '
  res[^1] = c
  return res
The situation, where we may need a procedure that works on a var parameter in one case and returns a modified copy in another case, is not that rare. For example, Nim’s standard library contains a procedure called sort(), which can sort container data types in place, and a procedure called sorted(), which returns a sorted copy. This code duplication is not really that nice. Of course, sorted() is the more universal solution, as we can always replace sort(data) with data = sorted(data). However, the latter creates a temporary copy, which may not be optimal for performance. Since Nim version 1.2, a dup() macro is available from the sugar module that creates copies of variables and then applies one or more in-place procs to the copy. Thus, the procs sorted() or our proc framed() would be unnecessary. We can use dup() as in this example:
from std/sugar import dup

proc frame(s: var string; c: char = '*') =
  var cs = newString(2)
  cs[0] = c
  cs[1] = ' '
  insert(s, cs)
  add(s, ' ')
  add(s, c)

echo "Hello World".dup(frame)
echo "Hello World".dup(frame, frame)
echo "Hello World".dup(frame('#'))
Note that we apply frame() twice in the penultimate line. Similarly, we could apply a sequence of different procs. The output of the above program is
* Hello World *
* * Hello World * *
# Hello World #
Returning from a procedure and the implicit result variable
The execution of a procedure terminates once the last statement of the procedure body has been processed. We can also terminate a procedure earlier when we specify a return statement somewhere.
Functions and procedures which return a result can also terminate with the last expression of the procedure body, or earlier with a return expression like return i * i. Functions and procedures with a result automatically declare a mutable result variable for us, which is of the function’s return type, and we may use or just ignore it. So for our previous sqr() function, we have various ways to write it:
func sqr1(i: int): int =
  i * i

func sqr2(i: int): int =
  result = i * i

func sqr3(i: int): int =
  return i * i
For short and simple procedures, the first form is often used. For longer procedures, where the result is constructed in multiple steps, like some string operations, using the result variable makes sense. Finally, when multiple points exist where we may return, using return statements may make sense. One use case involves an early error check, where we might want to return -1 as a form of error indication when writing a procedure that should calculate the square root of an integer value. (Well in Nim we have other and sometimes better ways to catch errors, we will learn about that later.)
Generally, we should avoid writing something like
func sqr(i: int): int =
  result = i
  i * i
as it is unclear in this case whether the expression i * i is returned or the result variable with the value i. In Nim v2.0, we will receive a warning or an error message in such cases.
For the performance of our code, it may have a tiny benefit to only use the result variable and fully avoid return statements, as in this case for a function call like var i = sqr(j) the result variable may be just an alias for the actual result i here, so that the compiler can optimize the code and avoid temporary copies. This is a well-known optimization, called NRVO (Named Return Value Optimization), in languages like C++.[55]
Programmers often prefer to perform early checks at the beginning of a procedure to verify all parameters have valid values and to terminate the procedure execution immediately in case of invalid data by using a return statement. This approach avoids deeply nested code in the proc body for these checks. In contrast, compiler designers, such as Mr. Rumpf, prefer to avoid these return statements and instead use nested if clauses, as this approach allows for better control flow analysis and compiler optimization.
Var return type
A procedure, converter, or iterator may return a var type that can be modified by the caller. The Nim language manual provides this basic example:
var g = 0
proc writeAccessToG(): var int =
  result = g
writeAccessToG() = 6
assert g == 6
In this way, we can call a proc and immediately assign a new value to the result. In the aforementioned example, this works because the result is an alias for the global variable g.
Var return types are actually used for iterators like mitems() or mpairs(), which allow modification of the yielded results. For details about and restrictions on the var return type, you should consult the Nim language manual:
References:
Proc name overloading
Note that we used the proc names sqr1, sqr2, and sqr3 above. Using the same name with the same argument types multiple times would result in a redefinition error, as the compiler could not know what proc body should be executed when that proc name is called. Redefining existing procedures, with the same name and the identical parameter list, is not allowed in Nim.
However, Nim supports so-called procedure overloading; that is, we can use the same name when the parameter list is different, as the compiler can select which proc has to be called based on the parameters in the proc call:
func sqr(i: real): real =
  i * i
We have only changed the parameter and result data types. Now there is no conflict with the proc, having the same name, that we defined for integers. Note that Nim uses only the parameter list for overload resolution, but not the result type of a procedure or function. The reason for that is that Nim supports type inference, and this would not work if we had two procs with the same name, each accepting an int parameter, but one returning an int and one returning a float number.
Nim also supports named arguments in procedure calls; for instance, we could invoke the proc above with sqr(i = 2.0). Named arguments can be useful when procs or functions have many arguments, potentially some with default values, and when we do not remember the order of parameters or want to specify only a few.
Actually, we can use multiple procs with the same name and identical parameter list when we use named arguments for the invocation, as in
proc p(i: int): int =
  i * i

proc p(j: int): int =
  j + j

#echo p(2) # fails to compile, ambiguous call
echo p(i = 3)
echo p(j = 3)
Objects and ref objects as procedure parameters
In the previous section, we learned that we have to use var parameters when the procedure should be able to mutate the variable permanently. This also applies when the parameters are objects. When a procedure should modify fields of an object parameter, then we have to pass that object as a var parameter. In the following example, proc t1 gives a compiler error because it tries to modify a field of an object while the object instance is not passed as a var parameter. If we remove proc t1, then we can compile and run the example:
type O = object
  i: int

proc t1(o: O) =
  o.i = 7 # Error: 'o.i' cannot be assigned to

proc t2(o: var O) =
  o.i = 13

proc main =
  var x = O(i: 3)
  echo x.repr
  t2(x)
  echo x.repr

main()
The output is:
O[i = 3]
O[i = 13]
The proc t2 gets a var parameter and can modify fields of the passed object. Here we used the expression echo x.repr to print the whole object. Strings and sequences are value objects in Nim, so you have to pass them as var parameters when you want to change their length or when you want to modify elements. This code would give you compile errors unless you add the var keyword to make the procedure parameters mutable:
proc t1(s: string) =
  s.setLen(7)
  s[0] = 'x'

proc t2(s: seq[int]) =
  s.setLen(7)
  s[0] = 13
This was not really surprising. But what happens when we use a reference to an object and pass it to a procedures as a value or as a var parameter? In the code below, proc t1 gets a variable of type ref object and the procedure can modify fields of the passed instance. That can be indeed surprising. In this case, passing the ref object without the use of the var keyword means only that we can not mutate the ref value itself in the procedure, but we are allowed to modify the fields of the object. For proc t2, we pass a var parameter. As always, we can modify a var parameter in the procedure, so we can assign to it a newly created instance.
type O = ref object
  i: int

proc t1(o: O) =
  o.i = 7

proc t2(o: var O) =
  o = O(i : 11)

proc main =
  var x = O(i: 3)
  echo x.repr
  t1(x)
  echo x.repr
  t2(x)
  echo x.repr

main()
When we compile and run the above code, we get the following:[56]
ref 0x7f054a904050 --> [i = 3]

ref 0x7f054a904050 --> [i = 7]

ref 0x7f054a904070 --> [i = 11]
For a ref object, the repr() function gives us the address of the object instance in memory and the contents of its fields. The first two echo() statements show the same address, indicating that proc t1 has modified only a field of our instance, the instance itself (its address in memory) was not changed. But proc t2 has created a new instance and assigned that value to the variable x in the main() procedure. We notice this as the address of variable x has changed. The old instance variable with the address 0x7f054a904050 is now unused and will be freed by the Nim memory management.
Nim v2.0 will provide the strictFuncs pragma, which can be used to ensure that a procedure with a ref object parameter is not allowed to modify fields of that ref object. For details, see the Appendix of this book or the latest version of the Nim language manual.
Special argument types: openArray and varargs
The openArray and varargs data types can be used only in parameter lists.[57] The openArray is a type that allows passing arrays and sequences to the procedure or function. This makes sense, as both arrays and sequences store their content in a block of memory, which can be processed uniformly. Although arrays generally do not have to start with index number 0, when passed as openArray, the first element is mapped to index 0, and the index of the last element is available by using the high() function on the passed array parameter. Whenever we write a procedure that accepts an array or a sequence, we should consider using the openArray parameter type to allow passing in both data types. Strings can also be passed to procedures accepting openArrays with char base type. Note that a proc with an openArray parameter type cannot change the length of a passed seq, as sequences are handled like arrays for the openArray parameter type. Thus, in the following code, the procedure t1 generates a compiler error while t2 compiles and works fine.
proc t1(x: var openarray[int]) =
  x.setLen(7)

proc t2(x: var seq[int]) =
  x.setLen(7)
In fact, since Nim version 1.6, it is possible to use the openArray type as the result type of procs and even as local variables. However, these view types are still experimental, see https://nim-lang.org/docs/manual_experimental.html#view-types.
The varargs parameter type is similar to the openArray type, but it additionally permits the passing of an arbitrary number of single arguments. The compiler automatically collects the individual arguments into an array, allowing us to use it as an array within the procedure body, for example, by iterating over it.
proc print(s: varargs[string]) =
  for el in s:
    stdout.write(el)
    stdout.write(", ")
  stdout.write('\n')

print("Hello", "World") # compiler builds the array for us
print(["Hello", "World"]) # we generate the array ourselves
There exists a variant of the varargs argument type that performs a type conversion automatically by applying a proc on all arguments. For example, varargs[string, `$`] would apply the stringify operation on the passed arguments automatically. That is what echo() does.
Varargs arguments may only be allowed as the last argument in a parameter list.
Finally, one might wonder if it makes sense to specify a parameter of type var varargs. If we try to pass a constant string this will obviously not work, and if the compiler generates an array for us, it does also not work, the automatically generated array seems to behave like a constant array. But can we pass an array variable? Let’s try:
proc print(s: var varargs[string]) =
  s[0] = "Goodbye"
  for el in s:
    stdout.write(el)
    stdout.write(", ")
  stdout.write('\n')

var msg = ["Hello", "World"]
print(msg)
Surprisingly, this does not compile, although it works when we replace varargs with openArray.
Procedures bound to a data type
In some other programming languages, such as Python or Ruby, we can define class methods or static methods that are bound to a class or type and can be invoked as MyType.myProc. In Nim, we can achieve something similar using the typedesc procedure parameter type:
type
  Factory = object
    name: string

proc start(t: typedesc[Factory]) =
  echo "Factory.start"

Factory.start
Here, we use the method call syntax instead of start(Factory). We will learn more about the typedesc data type later.
Scoping, visibility, and locality
Scoping, visibility, and locality are important concepts in computer programming that help to keep the source code clean. Imagine if a variable that we declare at some point in our program were visible everywhere. This could generate significant confusion, even for medium-sized programs — whenever we needed a variable, we would have to carefully check which names were already in use. Furthermore, this would be detrimental to performance, as all variables declared would reside permanently in memory.
So, most programming languages, including Nim, support the concept of locality — identifiers declared inside a procedure body or inside another form of a block are only visible and usable there. We say that they are only visible in that scope. For Nim, we can say that whenever Nim’s syntax requires a new level of indentation, that is a new statement block, then all symbols declared in that block are only visible in that block and in sub-blocks of this block, but not outside that block. Nim has another important concept of visibility, which is called modules and allows the separation of our code into logically separated text files with well-defined visibility rules; we will discuss modules later.
Visibility is indeed a straightforward concept. Consider the following illustrative example:
var e: float = 2.7

proc p1 =
  var x: float = 3.1415
  if x > 1.0:
    var y = 2.0 * x
    echo y # OK
  echo x # OK
  echo y # compile error, y is not visible
  echo e # OK, e is declared globally, so it is visible everywhere

echo e # OK
echo x # ?
echo y # ?
In the first line, we declare what’s known as a global variable, which becomes visible throughout the entire program after its declaration.[58] The variables declared in the proc p1 are referred to as local variables, and they are not visible outside of proc p1. The variable x is declared at the start of the procedure body and is visible in the whole procedure everywhere, while variable y is declared in the if block and is visible only there. So, is it clear whether the last two echo() statements for x and y compile correctly? Remember that symbols that we define inside a new scope may shadow symbols that were visible outside the actual block, e.g. by defining a variable named e of arbitrary type in the proc p1 from above would shadow the global variable e, that is the global variable e would become invisible until execution of procedure p1 terminates. We have already discussed shadowing in the introductory section titled scopes, visibility, locality, and shadowing.
Related to the visibility of variables is their lifetime, that is the duration of how long they exist and how long they can store a value. Global variables exist for the entire program runtime — when you have assigned a value to it that value can be used everywhere as long as the program runs, and as long as you do not assign a different value, of course. Global variables are generally stored in a special memory region, which is called the BSS region.
Variables of value type defined locally inside a procedure or function only exist for the duration of that proc's execution. In other words, they are created when the procedure is invoked and vanish when the procedure terminates, which is when execution continues with the statement following the proc call.
Local variables declared in a procedure reside in a special memory region of the RAM, which is called the stack. The stack is nothing more than an arbitrary part of the whole RAM that is used in some clever fashion: The memory words in it are used in consecutive order. A so-called stack pointer is used to indicate the address of the first free area in that stack. So when a procedure is called, which may have n bytes of local variables, then the compiler can use the area where the stack pointer points to for that variables, and when the procedure is called then the stack pointer is increased by that size. So the stack pointer points again to the next free area of the stack, and another proc can be called in the same way from within the current procedure. Whenever a procedure terminates, the stack pointer is set back to the value that it had when the proc started execution. This method of memory management is simple and fast, but it does only work when the total amount of memory that the local variables in a procedure needs is known at compile-time so that the compiler can adjust the stack pointer accordingly. It does not work for dynamically sized data types like strings or sequences.
Note that pointers and references are value types themselves. We can regard pointers and references as plain integer variables interpreted in a special way — as memory locations. However, the memory blocks to which the pointers and references may point, and which are allocated by alloc() or new(), are different: These memory blocks are not allocated on the stack, but in the ordinary RAM, which we refer to as the heap to distinguish it from the stack.
So, why can’t the stack be used for memory blocks that alloc() or new() provide for us? An important factor for using the stack to store variables is that the total size needed by a procedure for all the static variables must be a compile-time constant. The stack pointer is adjusted by that amount when the proc starts, and all the local variables are accessed with a fixed offset to that stack pointer then. When we use alloc() or new() in a proc, then we may call that multiple times as we did in our previous list example, and for alloc() an additional fact is that the byte size that alloc() should reserve can be a runtime value. So the total amount of RAM that alloc() or new() would allocate is a runtime value, and we can not use the stack for it. Instead, alloc() and new() allocate a block of memory in a more dynamic fashion, which is basically that they ask the OS for a free block of the right size somewhere in the available RAM. That block is later given back to the OS for reuse by functions like dealloc() or automatically by the GC.
Let’s explore some special cases at the end of this section:
While in languages like C, we always have a well-defined main() function, and all program code is contained in this function or in other functions that are called from this main function, in Nim, we also have global code, as seen in scripting languages like Ruby or Python:
var i: int
while i < 100:
  var j: int
  j = i * i
  echo j
  inc(i)
It should be clear that the global variable i resides in the BSS segment. But what about the variable j declared in the body of the while loop? It is clear that this variable is only visible inside the body of the while statement. But does j reside on the stack? Since there seems to be no procedure involved, could there possibly be no stack? Could the variable j reside in the BSS segment too? This is not really clear and might vary among different Nim compilers. But why should we care about this detail at all? Well, it can be important for performance. Local proc variables allocated on the stack are generally optimal for performance, and they are usually well-optimized by the compiler. We will learn more about the reasons for that later when we discuss the data cache. For now, we should only remember that it is a good idea to avoid global code and put all code in procs. We may then have an arbitrarily named main() procedure and call it only from the global scope. At least for the current Nim v2.0, this seems to be a good idea. Potentially, later versions or other implementations will automatically move all global code into a hidden proc for us.
| For optimal performance, you should put all your code in procedures or functions, avoid global code, and, when possible, avoid global variables. |
Let’s discuss the above while loop again, but this time within the body of a proc:
proc p =
  var i: int
  while i < 100:
    let j: int = i * i
    echo j
    inc(i)
When we carefully investigate that procedure with the while loop, we may wonder about two points. First, we said earlier that we can and should use the let keyword instead of var when there is only one assignment to a variable, so the variable can be regarded as immutable. But if the loop is executed 100 times, how can we say there is only a single assignment to the variable j? The trick is that j is local to the while loop, and j is virtually newly created and initialized to 0 for each iteration. Therefore, using let is OK and the compiler does not complain.
We can test this fact with this simple program:
proc main =
  var i: int
  while i < 10:
    var a: int
    a = a + 1
    echo a
    inc(i)
main()
The output is 1 for each loop iteration because variable a is virtually recreated for each loop iteration.
We used "virtually recreated" because we cannot be sure how the compiler may handle it internally. Is storage for variable a already allocated when the procedure is invoked, in the same way that storage for the loop counter variable i is allocated on the stack when the proc is called? Or is storage for variable a reserved for each loop iteration by increasing the stack pointer at the start of the loop and resetting it at the end of the loop? We can’t be sure without reading the compiler source code, but ultimately, it doesn’t really matter, so we shouldn’t concern ourselves with it.
Generics
In the previous section, we defined a sqr() proc for ints and one for float numbers. Both procedures look nearly identical, only the data types differ. In that case, we can use so-called generic procedures.
func sqr[T](v: T): T =
  var p: T
  p = v * v
  return p

echo sqr(2)
echo sqr(3.1415)
We put a square bracket after the function name, which includes a symbolic name. That name is then used instead of concrete types in the procedure header or in the procedure body.
We can now call this proc with parameters of different types, including int and float types. You may wonder why that works — Nim is a statically typed language, so how can the parameter of function sqr() as well accept an integer and a floating-point number? Is there a hidden type-conversion involved? No, the trick is that whenever we call that generic proc with a different type, then a new procedure or function is instantiated. When we call the generic sqr() proc with an int and a float parameter, the compiler creates machine code for two separate functions during compile time: one that is called when an int is passed as a parameter, and another that is called when a float is passed. If we call this procedure again with an int or float parameter, one of the two existing procs would be used. However, for a different, otherwise unused data type like float32, a new proc would be instantiated again. In this way, generics procedures can lead to some code bloat. Note that calling the generic function with a data type like a character or a string would fail, as these types do not support multiplication with themselves.
A slightly different notation is available with so-called or types:
func sqr(v: int or float): auto =
  var p: typeof(v)
  p = v * v
  return p

echo sqr(2)
echo sqr(3.1415)
Here, we have limited the parameter types to the int or float type. We could have also defined a custom type first, like type MyNum = int or float, and used that type for the parameter type of our sqr() proc. These or types are also called type classes. Instead of the keyword or, the | character can be used for defining type classes. Again, the compiler would instantiate two separate functions for both data types. As we had not the symbolic type T available here, we have used the keyword auto as the return type, and for the type of variable p we used the macro typeof(). The type auto for the return type works as long as the function returns a well-defined type. Note that we cannot decide at runtime what type the function should return, so a construct like if cond: return 2 else: return 3.1415 would not work, at least not when the values are variables of different types. For the literal value, it may work, as the compiler might be smart enough to guess that we want to return the float literal 2.0.
A bit of care is needed when we define procedures for mutable or types:
# proc t(s: var seq[uint8] | var seq[char]) =
proc t(s: var (seq[uint8] | seq[char])) =
Here we try to define a proc called t which should accept a mutable seq[uint8] or a mutable seq[char] as a parameter. While the first line compiles fine, the seq[char] would be immutable. The correct notation is shown in the second line. This behavior was labeled "won’t fix" in the GitHub issue tracker, so we have to remember this case, see https://github.com/nim-lang/Nim/issues/15063#issue-665553657.
Let’s assume you want to define a proc that accepts two numbers of int or float type and returns a float. You may write it in one of these ways:
proc sqrsum(x, y: int | float): float =
  (x * x).float + (y * y).float

proc sqrsum2[T](x, y: T): float =
  (x * x).float + (y * y).float

proc sqrsum3[T1, T2](x: T1; y: T2): float =
  (x * x).float + (y * y).float

var i: int = 2
var x: float = 3.0

echo sqrsum(i, x)
#echo sqrsum2(i, x)
echo sqrsum2(x, 2)
#echo sqrsum2(2, x)
echo sqrsum3(i, x)
The commented-out lines would give you a compiler error. The reason for this is that the proc sqrsum2[T] defines a generic proc, but the compiler enforces that both parameters have the same type.
The expression sqrsum2(x, 2) compiles fine, as, due to the first parameter x, the compiler instantiates a proc for a sqrsum2(2, x) does not compile, as due to the first parameter, which is an integer literal, a proc for integer parameters is instantiated, and the second x parameter of float type is not compatible with the instantiated proc.
Generics can become a bit complicated, as we may use multiple different generic types for different procedure parameters. We can also use generics for object types. For example, we may create lists as we did for our names list that not only works for strings, but can also work with other data types like numbers or sequences in a very similar way. We may explain that in more detail later.
Example for the use of generics
Generics are used extensively in Nim’s standard library. Most container types, like sequences or tables, accept generic types, and generic procedures like sort() are provided that can easily sort arbitrary data types and objects. We only have to provide a cmp() proc for our user-defined data types, which sort() can call to compare the values during the sorting process.
We will demonstrate the use of generics in library modules with a few small examples: Assume we create a library that should be able to store and process arbitrary data types. The stored values may have well-defined relations, which enables ordering or much more complicated spatial relations. Triangulation of spatial data points or grouping of the data in structures like RTrees for fast point location, as well as geometric processing with algorithms like finding the convex hull, are some examples. To make our example simple and compact, we define a generic container type that can store only two values of an arbitrary data type. The container allows for the sorting of the elements by size. The following code example defines a generic container called MyGenericContainer, a proc to add() data objects into the container instance and a sortBySize() proc to sort the two elements:
type
  MyGenericContainer[T] = object
    storage: array[2, T]

proc add[T](c: var MyGenericContainer[T]; x, y: T) =
  c.storage[0] = x
  c.storage[1] = y

# sort by direct field access
proc sortBySize[T](c: var MyGenericContainer[T]) =
  if c.storage[0].size > c.storage[1].size:
    swap(c.storage[0], c.storage[1])

# a simple stringify proc for our container data type
proc `$`[T](c: MyGenericContainer[T]): string =
  `$`(c.storage[0]) & ", " & `$`(c.storage[1])

type
  TestObj1 = object
    name: string
    size: int

proc main =
  var c: MyGenericContainer[TestObj1]
  var a = TestObj1(name: "Alice", size: 162)
  var b = TestObj1(name: "Bob", size: 184)

  add(c, b, a)
  echo c
  c.sortBySize
  echo c

main()
The sortBySize() proc in the above examples accesses the size field of our data objects directly. Therefore, we can use the container for arbitrary data types, provided that the data types have a size field and a > proc is defined for the data type of the size field. In the above example, we have defined a $ procedure to convert instances of our container into a string, enabling us to call the echo() function on it. The output of our program looks like
(name: "Bob", size: 184), (name: "Alice", size: 162)
(name: "Alice", size: 162), (name: "Bob", size: 184)
We can avoid the restriction of a matching field name when we provide getter and setter procedures which the library procs can use to access the important fields:
type
  MyGenericContainer[T] = object
    storage: array[2, T]

proc add[T](c: var MyGenericContainer[T]; x, y: T) =
  c.storage[0] = x
  c.storage[1] = y

proc sortBySize[T](c: var MyGenericContainer[T]) =
  if c.storage[0].size > c.storage[1].size:
    swap(c.storage[0], c.storage[1])

proc `$`[T](c: MyGenericContainer[T]): string =
  `$`(c.storage[0]) & ", " & `$`(c.storage[1])

type
  TestObj1 = object # arbitrary field names
    name: string
    length: int

# this getter proc enables sorting
proc size(t: TestObj1): int =
  t.length

proc main =
  var c: MyGenericContainer[TestObj1]
  var a = TestObj1(name: "Alice", length: 162)
  var b = TestObj1(name: "Bob", length: 184)

  add(c, b, a)
  echo c
  c.sortBySize
  echo c

main()
In the above example, our TestObj1 data type has no field with a name that matches the sortBySize() proc. However, we define a size() proc for our data type that the library function can use. This solution is more flexible, and when we add the inline pragma to the used size() proc or when we compile with link-time optimization (LTO) enabled, then the overhead should be negligible.
Generics are typically used in library modules, which provide some functionality to client modules. For example, a library module can provide a generic sort() function, which then can be used by different client modules to sort containers with arbitrary element types. We will discuss modules later in more detail. For now, it is enough to understand that each Nim module is a separate file, and we can use the import keyword to incorporate functionality from a (library) module into our main module. One restriction is that we can actually only import symbols marked with the * export marker in the imported module.
When we divide the above example into two modules, we might end up with something like:
#module t3.nim
type
  MyGenericContainer*[T] = object
    storage: array[2, T]

proc add*[T](c: var MyGenericContainer[T]; x, y: T) =
  c.storage[0] = x
  c.storage[1] = y

proc sortBySize*[T](c: var MyGenericContainer[T]) =
  if c.storage[0].size > c.storage[1].size:
    swap(c.storage[0], c.storage[1])

proc `$`*[T](c: MyGenericContainer[T]): string =
  `$`(c.storage[0]) & ", " & `$`(c.storage[1])
import t3
type
TestObj1 = object # arbitrary field names
name: string
length: int
proc size(t: TestObj1): int =
t.length
proc main =
var c: MyGenericContainer[TestObj1]
var a = TestObj1(name: "Alice", length: 162)
var b = TestObj1(name: "Bob", length: 184)
add(c, b, a)
echo c
c.sortBySize
echo c
main()Note that all procedures in module t3 and the generic container data type are marked with the * export marker. This ensures that we can use these symbols in the main module that imports them. The example with direct field access would look for different modules like this:
# module t4.nim
type
  MyGenericContainer*[T] = object
    storage: array[2, T]

proc add*[T](c: var MyGenericContainer[T]; x, y: T) =
  c.storage[0] = x
  c.storage[1] = y

proc sortBySize*[T](c: var MyGenericContainer[T]) =
  if c.storage[0].size > c.storage[1].size:
    swap(c.storage[0], c.storage[1])

proc `$`*[T](c: MyGenericContainer[T]): string =
  `$`(c.storage[0]) & ", " & `$`(c.storage[1])
import t4
type
TestObj1 = object
name: string
size: int
proc main =
var c: MyGenericContainer[TestObj1]
var a = TestObj1(name: "Alice", size: 162)
var b = TestObj1(name: "Bob", size: 184)
add(c, b, a)
echo c
c.sortBySize
echo c
main()You may wonder why we do not have to export the size field of our TestObj1 (or maybe the object itself also) as it is used from code defined in a different module. We don’t need export markers because sortBySize(), while defined in the library module, is a generic procedure and is instantiated and executed in the application module. For the same reason, we had not to export the size() getter procedure before.
Lastly, another way to use generic library modules involves passing procedure variables to the library functions. The passed-in procedures may provide access to properties or attributes of the stored objects, or they may offer relations between the objects. The latter is often used for sorting purposes:
# module tx.nim
type
  MyGenericContainer*[T] = object
    storage: array[2, T]

proc add*[T](c: var MyGenericContainer[T]; x, y: T) =
  c.storage[0] = x
  c.storage[1] = y

proc sortBy*[T](c: var MyGenericContainer[T]; smaller: proc(a, b: T): bool) =
  if smaller(c.storage[1], c.storage[0]):
    swap(c.storage[0], c.storage[1])

proc `$`*[T](c: MyGenericContainer[T]): string =
  `$`(c.storage[0]) & ", " & `$`(c.storage[1])
import tx
type
TestObj1 = object
name: string
size: int
proc smaller(a, b: TestObj1): bool =
a.size < b.size
proc main =
var c: MyGenericContainer[TestObj1]
var a = TestObj1(name: "Alice", size: 162)
var b = TestObj1(name: "Bob", size: 184)
add(c, b, a)
echo c
c.sortBy(smaller)
echo c
main()Here, we have modified the sort() proc of our library module in a way that allows it to take an additional procedure parameter. In this case, we use a procedure signature that takes two object instances and returns a boolean value indicating if the first parameter is smaller than the second. In our application module, we define a matching procedure and pass that one to the sortBy() procedure. Again we get the desired sorted output:
(name: "Bob", size: 184), (name: "Alice", size: 162)
(name: "Alice", size: 162), (name: "Bob", size: 184)
This final method is commonly used in Nim’s standard library, for instance, for sorting sequences with custom objects. Unfortunately, this approach can introduce some performance regression because the procedure variable must be passed to the called proc. Consequently, inlining of that passed proc is not possible for the compiler.[59]
Method call syntax
A useful coding style introduced by Object-Oriented Programming (OOP) languages is the method call syntax. It was initially used in OOP for objects and later applied by languages like Ruby to all data types. In a way, Ruby regards all data as objects. Because the method-call syntax is so useful, we’ve already mentioned it a few times. But as that syntax belongs to the "procedures and functions" section, we will repeat the basic facts here:
Method call syntax means that, for example, for a variable s of data type string, we write s.add(c) instead of add(s, c). Or for an integer variable i, we may write i.abs instead of abs(i). Specifically, we place the first parameter of the proc parameter list before the procedure name, separating them with a period. The Nim compiler regards both notations as equivalent. The advantage of the method call syntax is two-fold: we can save a character, and it becomes clearer which "object" we’re working with, as it is placed before the expression.
Most OOP languages only allow this notation for a class. For instance, the string class might declare all possible operations that can be performed with strings, using the method-call syntax for these operations. One problem is that it can be difficult to add more operations that can be used in that style, as often all those operations are defined in the class scope; Ruby circumvented this limitation by permitting the so-called reopening of classes, enabling users to add more operations later on.
Like the D language, Nim generally allows this notation, but in D, it’s referred to as the Uniform Function Call Syntax (UFCS).
Procedure variables
Procedures and functions are not always fully static entities. We can assign procedures and functions to variables, pass them as parameters to other procedures or functions, and even generate and return new functions. Let’s investigate how procedure variables work:
var
  p: proc(i: int): int

proc p1(i: int): int =
  i + i

proc p2(i: int): int =
  i * i

p = p1
echo p(7)
p = p2
echo p(7)
The output of the two echo statements should be 14 and 49 — in both cases, we called the same proc variable with the same parameter, but the proc variable p was an alias for p1 in the first call and an alias for p2 in the second call. Note that when we assign a proc to a proc variable, we only write the name of the proc; there is no () involved. This is because we assign that proc to the proc variable, but we do not call the procedure in this case. Of course, when we assign a proc to a procedure variable, the proc signatures must match; this means the parameter list and the result must be compatible.
Now we use a function as a proc argument.
type
  EchoProc = proc (x: float)

proc t(ep: EchoProc; x: float) =
  echo "The value is"
  ep(x)

proc ep1(x: float) =
  echo "==> ", x

proc ep2(x: float) =
  echo x

t(ep1, 3.1415)
t(ep2, 3.1415)
A common use case for using a function as a procedure parameter is sorting. We can use the same sort procedure for different data types when we provide a cmp() proc that can compare that data type.
from std/algorithm import sort

proc cmp(a, b: int): int =
  if a < b:
    -1
  elif a == b:
    0
  else:
    1

proc main =
  var a = [2, 3, 1]
  a.sort(cmp)
  for i in a:
    echo i

main()
The sort() procedure is provided by the algorithm module. The sort() proc accepts an array or a sequence, and a cmp() proc that gets two parameters of the same type as the elements in the passed array, and that returns -1, 0, or 1 as the result of the comparison. We could easily sort other data types like strings or our custom objects by an arbitrary key, as long as we can provide a matching cmp() procedure. For the cmp() proc it is important that it returns a well-defined result based on the input, and when both parameters are equal, it should really return 0. If you were to swap the return values 1 and -1 in the cmp() procedure above, you would invert the sort order.
Nested procedures and closures
While in C, all functions must be defined in the top-level scope and nesting of functions is not permitted, Nim allows procedures to contain other procedures. A special case occurs when the sub-procedures access variables of the outer scope. In this case, the sub-procedure is called a closure:
proc digitScanner(s: string) =

  var pos = 0
  proc nextDigit: char =
    while pos < s.len and s[pos] notin {'0' .. '9'}:
      inc(pos)
    if pos == s.len:
      return '\x0'
    result = s[pos]
    inc(pos)

  var c: char
  while true:
    c = nextDigit()
    if c == '\x0':
      break
    stdout.write(c)
  stdout.write('\n')

digitScanner("ad5f2eo73q9st")
When you run this program, the output should be
52739
This program is not that easy, but when you think about it a bit, you should be able to understand it. The task is to extract from a string all the digits and ignore the other characters.
To get the digits, we use a local proc that uses the pos variable of the enclosing proc and also accesses the parameter s of the enclosing procedure. The closure nextDigit() checks if the position in the string is still valid, that is, if it is still smaller than the length of the string, and also checks whether the current character is a digit. The first check uses the standard proc len(), which returns the length of a passed string parameter, that is, how many characters the string contains. We have used the method call syntax here instead of using the ordinary procedure call len(s). The next check tests if the current character is not a decimal digit. For that test we could use a series of compares like if c == '0' or c == '1' or … or c == '9'. But to make such tests easier and faster, Nim offers one more data type, the set type. And the notin operator tests whether a value is not contained in a set constant. An important point for the expression after the while statement is, that it is processed from left to right. This fact is critical here because we have to first check if pos is still a valid position before we can use the subscript operator [] to access the current character and test if it is not contained in the set. If the check for the valid position would not come first, then we may access an invalid position in the string, and we would get a runtime range error.
While the position is still valid, but the current character is not a digit, we increase the position. The while loop can end by two conditions: Either the current character is a digit, or we have reached the end of the string, and we have to stop. For the last case, we use a special stop mark; we return a special character which we have entered in escape notation as '\x0'. That is a very special character, that is used in C to mark the end of strings. It is the first character in the ASCII table and has the decimal value 0. We said earlier, that characters are encoded in 8 bits and correspond to the unsigned integer numbers 0 up to 255. '\x0' is just a special notation for the first character, which corresponds to the integer value 0. When the end of the string is reached, we return that character. Otherwise, we return the current character. Remember, from the while condition, we know that the string end is reached or the current character is a digit. As we tested for the string end before, we can only have the case that the current character is a digit now. But can we immediately return that character now? If we did, s[pos] would be a digit, and we would get exactly the same character for the next proc call! Therefore, we have to move to the next character by incrementing pos before we return that character. For this, the pre-declared result variable is useful. We assign the current character to the result variable and then increase pos. As the last statement in our procedure is not an expression but a plain inc() statement, the content of the result variable is returned. The other while loop in the outer procedure is very simple, we just call the closure in the body of the while loop and terminate the loop when we get the special Null character.
And finally, an example where one proc returns another procedure:
proc addN(n: int): auto = (proc(x: int): int = x + n)

let add2 = addN(2)
echo add2(7)
The output of echo() would be 9 in this case. This construct is sometimes named currying.
Anonymous procedures
In the section Module sequtils in Part III of the book, we will introduce a few functions which are often used in the functional programming style, like map() or filter(). These functions take procedures as arguments, which determine how container data types are converted. We can pass a regular named procedure as a second argument to functions like map() and filter, or in simple cases, we can just pass an anonymous proc or use the ⇒ operator provided by the sugar module:
import std/[sequtils, sugar]

proc primeFilter(x: int): bool =
  x in {3, 5, 7, 13}

var s = (0 .. 9).toSeq # @[0, 1, 2, 3, 4, 5, 6, 7, 8, 9]

echo s.filter(primeFilter) # @[3, 5, 7]
echo s.filter(proc(x: int): bool = (x and 1) == 0) # @[0, 2, 4, 6, 8]

echo s.map(proc(x: int): int = x * x) # always @[0, 1, 4, 9, 16, 25, 36, 49, 64, 81]
echo s.map(x => x * x) # from sugar module
Here, we use the toSeq() template to create our initial sequence with numbers from 0 up to 9, so we don’t have to type all the numbers in; we will explain templates soon. Then we apply the filter() proc to that sequence. The filter() proc expects a function, which takes an argument of the seq’s base type and returns a boolean value, as a second argument. We can pass the named function primeFilter(), or we can just pass an anonymous proc explicitly.
In the last two lines of our example, we use the map() function to convert the data of our sequence. The map() function expects a proc, which takes a parameter of the seq’s base type and returns a result of the same type, as a second argument. In the penultimate line, we specify an anonymous proc as a parameter, while in the last line, we use the ⇒ operator from the sugar module to specify the actual conversion.
Compile-time proc execution
When a function is called with only constant arguments, the compiler can already execute it at compile time:
func genSep(l: int): string =
  debugecho "Generating separator string"
  for i in 1 .. l:
    result.add('=')

const Sep = genSep(80) # function is executed at compile-time

echo Sep
Here, we use a function called genSep() to create a string constant at compile time. When we compile the above program, we get the message "Generating separator string". As that proc is not executed at program runtime, it is not included in the final executable program. Here we had to use the debugEcho() proc instead of the ordinary echo(), because echo() is not really a pure function, and the compiler would complain when we use echo() in a pure function. The function debugEcho() is not really pure either, but the compiler ignores that fact, which is acceptable for debugging purposes. We could even make genSep() a plain proc and then use echo(), the compiler would not complain. But it would complain, if, for instance, we would access global variables from inside the genSep() procedure.
Inlining procedures
Calling procedures and functions always introduces some overhead — proc parameters may need to be put on the stack or loaded into CPU registers, some CPU or FPU registers may need to be saved, the stack pointer and the program counter have to be updated, and finally, the instruction cache has to be filled with new instructions.
Thus, for small procedures, the actual call to the proc may take more time than processing the code within the proc. To avoid this additional effort, procedures and functions can be inlined. The compiler may do this automatically for us, but we can support it by applying the {.inline.} pragma to tiny procs.[60] For inlined procs, the code is just inserted directly at the call site. This may increase the total executable size when the proc is used often. Therefore, we should use the inline pragma judiciously. Another option is to compile the entire program with link-time optimization by passing the -d:lto option to the compiler. This way, the C backend can automatically inline all proc code, even procs from imported modules One more option is to use templates instead of tiny procs — templates always do a plain code substitution, so templates can behave very similar to inline procs. We will discuss templates later. The following example shows how we can apply the inline pragma to procedures and functions:
proc max(a, b: int): int {.inline.} =
  if a < b: b else: a
Note that functions from shared libraries cannot be inlined, so calling external C functions, either directly or indirectly, can be slower than expected.
Recursion
Procedures and functions can call themselves in a repetitive manner, which is called recursion. Clearly, there must be some condition that eventually stops the recursion. Otherwise, the procedure would continually call itself, storing data on the stack for each call, including at least the proc return address. Ultimately, this could lead to a stack overflow and the program would crash. In general, recursion should be used only when it significantly simplifies the algorithm. In Part V of the book, in the section about the various sorting algorithms, we will discover some useful applications for recursion. In most cases, an iterative algorithm is faster than a recursive one, because all the overhead with many proc calls is avoided for iterative solutions. But sometimes recursive algorithms are easier to understand, or programming an iterative solution can be really complicated.
As one of the most simple algorithms, we will present here the recursive fac() function:
proc fac(i: int): int =
  if i < 2:
    1
  else:
    i * fac(i - 1)
This function should terminate, as it only calls itself again with a decreased argument. Naturally, using recursion in this case isn’t the most efficient approach. It should be relatively straightforward for you to convert the procedure into an iterative solution without recursion. It’s important to note that recursive procedures cannot be inlined!
Converters
Nim’s converters are a special variant of functions that are called automatically by the compiler when argument types do not match.
converter myIntToBool(i: int): bool =
  if i == 0:
    false
  else:
    true

proc processBool(b: bool) =
  if b:
    echo "true"
  else:
    echo "false"

var i = 7
processBool(i)
if i:
  echo "true"
else:
  echo "false"
With the above converter, we can pass an integer to a proc that expects a boolean parameter, and we can even use an integer as a logical expression in an if condition in the same way as it is done in the C language. Converters only work in a direct way, meaning automatic chaining is not supported: If we have one converter from character to integer and one from int to boolean, that does not mean that we can pass a character to a proc that expects a boolean. We would have to declare one more converter that directly converts a character to a boolean.
Whenever we consider using converters, we should think twice — converters can be confusing, may have unexpected effects, and could increase compile times.
You might have wondered why we wrote the above converter in such a verbose way. Well it was done intentionally, but you are right of course, we can write it just as
converter myIntToBool(i: int): bool =
  i != 0
Object-oriented programming and inheritance
Object-Oriented Programming and Inheritance became very popular in the early 1990s. Although OOP principles had already been introduced by languages such as Simula, Smalltalk, and many others, Java greatly popularized the OOP paradigm, which is also supported by most other popular languages, such as C++, Ruby, and Python.
The idea of OOP is that objects and procedures working on these objects are grouped into classes, and that classes can be extended with additional data fields and with additional procedures. In OOP, procedures and functions are often called methods, and data fields are called members. Sometimes the members are completely hidden and are accessed only by so-called getter and setter methods. That is called encapsulation. Encapsulation allows hiding implementation details, so that those details may change when necessary without being noticeable to users of the class, enabling them to use the class without discerning the change. Getters and setters also help to hide internal details and ensure that class instances are always in a consistent and valid state.
An important property of OOP is dynamic dispatch: When we create various subclasses of a common parent class and define methods for all these subclasses, we can have collections of instances from different subclasses. The compiler can then automatically ensure that the appropriate method for each instance is always called.
A classical example is a drawing program, where we have different geometrical shapes like rectangles, circles, and many more. All the geometrical objects are stored in some form of a list, when we want to draw all of them on the screen, we simply call a generic draw() method, and the compiler ensures that the matching draw() method is called for each shape. In Nim, that might look like
type
  Shape = ref object of RootRef

  Rectangle = ref object of Shape
    x, y, width, height: float

  Circle = ref object of Shape
    x, y, radius: float

  LineSegment = ref object of Shape
    x1, y1, x2, y2: float

method draw(s: Shape) {.base.} =
  # override this base method
  quit "to override!"

method draw(r: Rectangle) =
  echo "drawing a rectangle"

method draw(r: Circle) =
  echo "drawing a circle"

method draw(r: LineSegment) =
  echo "drawing a line segment"

proc main =
  var l: seq[Shape]
  l.add(Rectangle(x: 0, y: 0, width: 100, height: 50))
  l.add(Circle(x: 60, y: 20, radius: 50))
  l.add(LineSegment(x1: 20, y1: 20, x2: 50, y2: 50))

  for el in l:
    draw(el)

main()
The output of that program is:
drawing a rectangle
drawing a circle
drawing a line segment
Thus, we can have a sequence of the base type, add various subtype instances, and then iterate over the list to draw all these various subtypes. Of course, in the same way, we could do many more tasks like moving, rotating, or storing all the objects in one call. The compiler does the right dynamic dispatching for us; we just have to provide all the necessary methods. The need for the base method seems to be a bit strange, some other OOP languages do not need that. The base method is marked by a {.base.} pragma; we will discuss the purpose of pragmas later. In the example, we have used only one level of sub-classing, but of course, we can use many levels. For example, we can again subclass the Circle by creating a FilledCircle subclass with a color field.
The OOP coding style can be very convenient for some tasks. One important use case could be graphical user interfaces, where the graphical elements like labels, buttons, and frames build naturally a hierarchical structure. Another typical use case is a drawing application, with code similar to our basic example.
Note that the OOP style only works with ref objects, but not with value objects. The obvious reason is that we can have collections of different subtypes stored in arrays or sequences only for ref objects, as in arrays and sequences all element types have to have equal size. For references, that is the case, as references are basically pointers. But different value types would have different sizes. Linked lists would be not a better solution, as again we can not build lists with value objects.
For maximum performance, OOP code with ref objects is generally not optimal, as the dispatching itself needs some time, and the ref objects are not contained in a single block of memory. Instead, they are distributed throughout the RAM, which is not cache-friendly.
Inheritance for value-objects
type
  Person = object of RootObj # or Person {.inheritable.} = object
    name: string
  Student = object of Person
    id: int

var s1: Student
s1.name = "Alice"
s1.id = 123
var s2 = Student(name: "Bob", id: 124)
Inheritance can also be used for value objects to express some form of parent-child relation. To enable inheritance, we have to start with the RootObj data type, or we could use the {.inheritable.} pragma to mark the base type as inheritable. Inheritance is typically not used that much with value objects, but it might be useful when a set of objects have some common fields.
Copying value-objects with subtypes
Assignments between parent and child value types are not often needed, but it is good to know how these assignments behave. With the two data types, Person and Student, mentioned above, these assignments are possible:
var s1: Student
s1.name = "Alice"
s1.id = 123
var s2 = Student(name: "Bob", id: 124)

var s: Person
s = s1 # copy only the name

#s2 = s # not allowed
s2 = Student(s) # s2.id will get default value zero
s2.id = 3
Person(s2) = s # id field will keep it value!
Remember that assignments for value types copy the content; the source object does not change. A direct assignment like s = s1 from a subtype to a parent type copies the common fields only. On the other hand, a direct assignment of a parent type to a subtype is not allowed as the new content of the additional fields of the subtype would be undefined in that case. But we can use type conversions, to enable these types of assignments: We can convert the source to the subtype before the content is copied — in this case, the common fields are copied, and the other fields get the default binary zero values. Alternatively, we can convert the destination to the parent type before the copy operation is executed. Then the common fields get copied, and the other fields of the subtype are kept.
| Actually, there may still be some issues with these types of partially copied value objects. For instance, with Compiler version 1.9.3 (RC for 2.0), we got random content for the field id after the statement s2 = Student(s), instead of the expected binary zero. Furthermore, when compiling with --mm:refc, the statements s = s1 and s2 = Student(s) gave runtime errors. We will fix this example when the final version 2.0 of the compiler is available. |
Content copy of ref objects
As we already learned, assignments for reference and pointer types give us only an alias to access the data, but the content is not copied. But in some cases, we may actually need to copy the content. Assume that you have a CAD tool which shows various objects on the screen — lines, rectangles, circles, and many more. The user should be able to copy a shape to the clipboard and paste it again later. In principle, this is a difficult operation, as we would first have to determine the concrete runtime type of the selected entity, then allocate the destination instance, and finally copy the actual runtime content. Nim provides the deepCopy() procedure for this purpose, which simplifies this use case. When we use inheritance, the deepCopy() proc determines the concrete runtime type of the object, allocates the destination memory, and copies the content. Let us try that with the geometric ref types from the earlier example:
type
  Shape = ref object of RootRef

  Rectangle = ref object of Shape
    x, y, width, height: float

  Circle = ref object of Shape
    x, y, radius: float

  LineSegment = ref object of Shape
    x1, y1, x2, y2: float

proc main =
  var x, z: Shape
  var c = Circle(x: 60, y: 20, radius: 50)

  deepCopy(x, c)
  echo x of Circle
  Circle(x).radius = 33
  echo c[]
  echo Circle(x)[]

  deepCopy(z, x)
  echo z of Circle
  Circle(z).radius = 19
  echo Circle(x)[]
  echo Circle(z)[]

main()
We have defined two variables x and z of the base Shape type, and one more variable of the Circle subtype. We pass the target parameter as the first argument, and the source parameter as the second to the deepCopy() procedure. The call to deepCopy(x, c) allocates memory for x and copies the actual Circle content. Although x has the static Shape base type, it acquires the actual Circle type, which we can verify using type tests with the of keyword. We can also use additional deepCopy() calls such as deepCopy(z, x) between base types, and obtain the correct runtime types again. The fact that this is possible is indeed a bit surprising, as serialization modules, such as the json module from Nim’s standard library, cannot automatically determine the correct runtime types.
Note that the compiler option --deepCopy:on is currently required for ARC and ORC.
Other builtin data types
Tuple types
Tuples are heterogeneous container types similar to the struct type in C. As Nim’s object type creates no overhead and directly corresponds to the C struct type provided we don’t use inheritance, tuples are very similar to Nim’s objects.
The biggest advantage of tuples is that we can create anonymous tuples and Nim supports the automatic unpacking of tuple variables into ordinary unstructured variables.
Compared to objects, tuples do not support inheritance at all, all the tuple fields are always visible, and different tuple types are regarded as identical when all the field names and field data types match. Remember that two different object types are always distinct in Nim, even when the actual type definition looks identical.
We can define tuple types in the same way as we define objects, or we can use the tuple[] constructor. Additionally, we can define anonymous tuples just by enclosing their field types in round brackets. The fields of tuple types can be accessed by field names as we do with objects, or we can access the fields with constant indices starting at zero.
type
  Move = tuple # the object definition syntax
    fro: int
    to: int
    check: bool

type Move2 = tuple[fro: int, to: int, check: bool] # equivalent tuple constructor syntax

proc findBestNextMove(): tuple[dest: int; check: bool] =
  discard

proc findBestNextMove2(): (int, bool) =
  discard

let (dst, check) = findBestNextMove()

let (dst2, check2) = findBestNextMove2()
In the code example above, we show two equivalent ways to define a tuple type. However, we actually do not use that type at all, but instead, we return an anonymous tuple from our proc, which is a pair of an int and a bool.
Using automatic tuple unpacking and type inference, our dst and check variables get the data types int and bool.
Tuples are also useful when a function needs to return a value and an error state, or if it might not be able to return anything at all in specific cases. For reference types, we could return nil then, but for results of value type like int or float, we may not have a well-defined error-indicating constant, so we can return a tuple with an additional bool indicating success or error. But of course, we could use exceptions instead, or we could use Nim’s option type instead. We will learn more about that later.
Here are two examples that use a tuple as a proc parameter:
proc p1(x: tuple[i: int, j: int]): int =
  x.i + x.j

echo p1((7, 7))

proc p2(x: (int, int)): int =
  x[0] + x[1]

echo p2((7, 7))
echo p2 (7, 7)
The proc p1() creates a tuple type using the tuple constructor syntax with named fields, which allows us to access the fields by their names in the procedure body. On the other hand, proc p2() uses an anonymous tuple and thus has to access the fields by constant indices. Both procedures are invoked with an anonymous tuple parameter. The last line of above example code uses the command invocation syntax.
Object variants
Nim’s object variants, sometimes also called sum types or abstract data types (ADTs), are advanced and type-safe variants of the union type known from C. The basic idea is that we can use value types that can store similar but not identical data as elements in containers. Dynamically typed languages like Ruby or Python allow that of course, and we can do it in Nim with ref types and inheritance too, as we showed in a previous section with our Shape base type and various geometric shapes. We could store these ref types in arrays, sequences or linked lists and use dynamic dispatch for processing the various subtypes. While this is convenient, it doesn’t provide maximum performance due to dynamic dispatch at runtime and inefficient cache use. Therefore, we might want a value type with different content, allowing us to store all value types in a seq with all entities residing in a compact memory block for efficient cache use.
type
  ShapeKind = enum
    line, rect, circ

  Shape = object
    visible: bool
    case kind: ShapeKind
    of line:
      x1, y1, x2, y2: float
    of rect:
      x, y, width, height: float
    of circ:
      x0, y0, radius: float

proc draw(el: Shape) =
  if el.kind == line:
    echo "process line segment"
  elif el.kind == rect:
    echo "process rectangle"
  elif el.kind == circ:
    echo "process circle"
  else:
    echo "unknown shape"

var
  s: seq[Shape]
s.add(Shape(kind: circ, x0: 0, y0:0, radius: 100, visible: true))
for el in s:
  draw(el)
Objects variants can have common fields like the boolean state visible above, but the other fields are not allowed to have the same names. As a result, we used x0 and y0 as the names of the center coordinates in the circle variant.
As you can see, we can store all the different object variants as value objects in a sequence and iterate over it. Note that object variants may waste some storage, as all variants are silently enlarged to have the exact same size so that all variant types can be stored in arrays or sequences and can be passed as proc parameters in the same way to the same procedure. For more details about object variants please consult the Nim language manual.
Iterators
In the section For loops and iterators, we used a for loop to iterate over the individual characters of a string. For loops are useful for various iteration purposes, e.g. to iterate over container types like strings, arrays, and sequences, or over a numeric range, and other countable entities. We could do the same with a while loop, but using a for loop is often more convenient and less error-prone — we do not have to care for increasing a loop variable and for the stop condition.
Nim’s for loops are built on iterators; that is, whenever a for loop is executed, an iterator is used under the hood. Some iterators are used explicitly in for loops, e.g. countup() of Nim’s standard library, others like items() or pairs() are executed implicitly when no explicit iterator name is specified.
The creation and use of iterators is very easy in Nim. Before discussing all the details and some restrictions of iterators, as well as the important differences between inline and closure iterators, let’s look at a small example:
We have already used some of Nim’s standard iterators to iterate over the characters of a string or the content of a sequence.
In an earlier section of the book, we demonstrated a procedure that extracts all the decimal digits from a string. We can accomplish the same task using an iterator:
iterator decDigits(s: string): char =
  var pos = 0
  while pos < s.len:
    if s[pos] in {'0' .. '9'}:
      yield(s[pos])
    inc(pos)

for d in decDigits("df4j6dr78sd31tz"):
  stdout.write(d)
stdout.write('\n')
The definition of an iterator is very similar to the definition of a procedure or function. However, while a function returns a result only once to the caller, an iterator uses the yield statement to give data back to the call site multiple times, instead of returning just once.
Whenever a yield statement is reached in the body of the iterator, the yielded data is bound to the for loop variable(s), the body of the for loop is executed, and at the end of the for loop body, control returns to the iterator. In other words, execution continues directly after the yield statement. The iterator’s local variables and execution state are automatically saved between calls. The iteration process continues until the end of the body of the iterator declaration is reached and the iterator terminates.
Iterators are used in for loops to iterate over containers, ranges, or other data. After the for keyword, we specify one or more arbitrary variable names, which we then can use in the body of the for loop to access the yielded value(s). The data type of this iteration variable(s) is inferred from the iterator’s return type, and its scope is limited to the body of the for loop.
Nim’s standard library defines iterators named items() and pairs() for container types like strings, arrays, and sequences. Items() is the default name when a for loop with only one variable is used, and pairs() is the default name when two variables are used, such as the index position and the character when iterating over a string.
In Nim’s standard library, you may find items() and pairs() iterators like these two:
iterator items(a: string): char =
  var i = 0
  while i < len(a):
    yield a[i]
    inc(i)

iterator pairs(a: string): tuple[key: int, val: char] =
  var i = 0
  while i < len(a):
    yield (i, a[i])
    inc(i)

var s = "Nim is nice."
for c in items(s):
  stdout.write(c, '*')
echo ""
for i, c in pairs(s):
  echo i, ": ", c
In the example above, we specified the iterator names items() and pairs() explicitly in the for statement, but as these names are the defaults, we can just write for c in s: and for i, c in s:.
The two iterators in the example code from above use a value type as an argument and return single characters as a value type. This way, we canot modify the string content. When we intend to modify the content of a container by use of an iterator, we have to pass the container as a var parameter and return the elements as var also. By convention, for iterating over mutable containers the iterator names mitems() and mpairs() are used, where the leading m stands for mutable. We have to specify these names explicitly:
iterator mitems(a: var string): var char =
  var i = 0
  while i < len(a):
    yield a[i]
    inc(i)

iterator mpairs(a: var string): tuple[key: int, val: var char] =
  var i = 0
  while i < len(a):
    yield (i, a[i])
    inc(i)

from std/strutils import toLowerAscii
var s = "NIM"
for i, c in mpairs(s):
  if i > 0:
    c = toLowerAscii(c)
echo s # Nim
Whenever we iterate over a container, we should not delete, insert, or append elements to the container, as that may confuse the loop inside the iterator body. Iterators of Nim’s standard library check the length of the container and generate an exception when the length changes during the iteration.
Nim differentiates between inline and closure iterators. When a for loop uses an inline iterator, then the actual iterator loop is inlined in the for loop body in a way that for each yield statement in the iterator body, the body of the for loop is executed. Actually, the for c in items(s): stdout.write(c, '*') in our example from above is rewritten by the compiler into a code block like
var i = 0
while i < len(a):
  var c = a[i]
  echo c, '*'
  inc(i)
That is, the body of the for loop is inlined into the iterator’s loop.
This results in very fast code with no overhead; however, similar to the use of templates, this increases the total code size of the final executable. In fact, when the iterator uses multiple yield statements, the code of the body of the for loop is inserted for each yield statement.
Inline iterators are currently the default iterator type, so the iterators of the examples above are all inline iterators.
Closure iterators behave more like procedures; the iterator is actually invoked, which costs some performance. We can use all the iterators of the examples from above as closure iterators by applying the closure pragma as in iterator items(a: string): char {.closure.} =.
Closure iterators behave like objects; we can assign instances of closure iterators to variables and then call the instances explicitly:
iterator myCounter(a, b: int): int {.closure.} =
var i = a
while i < b:
yield i
inc(i)
for x in myCounter(3, 5): # ordinary use of the operator
echo x
echo "---"
var counter = myCounter # use of an iterator instance
while true:
echo counter(5, 7)
if counter.finished:
breakwhich gives us this output:
3 4 --- 5 6 0
Here, we have used the finished() function to check if the iterator is done.
In fact, finished() returns true only when the iterator has already failed to yield a valid value, not when the last valid value was yielded. That is why, in the example above, the last value we get is the invalid value zero.
We can avoid this behavior when we rewrite the loop as
var counter2 = myCounter
while true:
let v = counter2(5, 7)
if counter2.finished:
break # v is invalid
echo vClosure iterators are resumable functions, so one has to provide the arguments to every call. To get around this limitation, one can capture the parameters of an outer factory proc:[61]
proc mycount(a, b: int): iterator (): int =
result = iterator (): int =
var i = a
while i < b:
yield i
inc(i)
var c1 = mycount(5, 7)
for i in c1():
echo i
echo "---"
var c2 = mycount(2, 5)
while true:
let v = c2()
if c2.finished:
break # v is invalid
echo vIn this example from the Nim language manual, the proc mycount() captures the bound for the counter. When we compile and run the code above, we get:
5 6 --- 2 3 4
At the end of this section, we will list some properties of iterators: Iterators have their own namespace, so we can freely use the same names for procs and iterators. Iterators have no predefined result variable and do not support recursion. Inline iterators can be used only inside for loops and cannot be forward declared because the compiler must be able to inline an iterator. (This restriction will be gone in a future version of the compiler.) Closure iterators are not supported by the JS backend, and cannot be executed at compile time. Inline iterators are second-class citizens and can be passed as parameters only to other inlining code facilities like templates, macros, and other inline iterators. In contrast, a closure iterator can be passed around more freely.
Templates
Nim templates are a simple, parameterized code substitution mechanism, and are used similarly as procedures. The syntax to invoke a template is the same as calling a procedure. However, while procedures build a single block of code that is then called multiple times, templates work more like C macros, performing a (textual) code substitution. Wherever we invoke a template, the template source code is inserted at the call site. In this way, Nim templates have indeed some similarities to C macros. But while C macros are executed by the C pre-processor and can do only plain source text substitutions, Nim templates operate on Nim’s abstract syntax trees, are processed in the semantics pass of the compiler, integrate well with the rest of the language, and share none of C’s preprocessor macros flaws.
In some way, Nim templates are a simplified application of Nim’s powerful macro and meta-programming system, which we will discuss in detail in Part VI of the book.
In C we could use the "#define" preprocessor directive to define two simple C macros.
#define PI 3.1416
#define SQR(x) (x)*(x)The C pre-processor would then replace the symbol PI in the C source code with the float literal 3.1416 before the code is processed by the C compiler. And as the C pre-processor can recognize some simple form of parameters, it would replace SQR(a + b) with (a+b)*(a+b).
In Nim we would define a const for PI and use a generic proc or a template for SQR():
const PI = 3.1416
proc sqr1[T](x: T): T = x * x
template sqr2(x: typed): typed = x * xHere the sqr2() template uses the special typed parameter, which specifies that the parameter has a well-defined type in the template body, but that arbitrary data types are accepted. So sqr1() and sqr2() would work for all numeric types and also for other data types for which we have defined a * operation. When there is no * operator defined for the passed data type, the compiler will give an error message.
Nim templates, like procs, accept all of Nim’s ordinary data types, in addition to the abstract meta-types typed and untyped. The abstract data types typed and untyped can be used only for the types of template and macro parameters, but not for parameters of procedures, functions, iterators, or to define variables.
We will explain the differences between typed and untyped in detail later in this section. The short version of the explanation is that typed template parameters must have a well-defined data type when we pass them to the template, while untyped parameters can also be passed as undefined symbolic names.
So we can in principle replace each procedure or function definition with a template. The important difference between procs and templates is that ordinary procs are instantiated only once, generic procs are instantiated for each data type with which they are used, while templates are instantiated for each invocation of the template. The compiler creates for each defined proc some machine code, which is executed whenever the procedure is called. But for templates, the compiler does some code substitution — the source code of the template is inserted where the template is invoked. This avoids the need for an actual jump to a different machine code block when a procedure is called but increases the total code size for each use of a template. So we would typically avoid frequently used templates that contain a lot of code.
For each ordinary proc, one block of machine code instructions is generated, and when the proc is called, program execution has to jump to this block, and back when the procedure execution is done. This jumping involves some minimal overhead, which is noticeable for tiny procs called frequently. To avoid this overhead, we may either use a templates or inlined procs, which we discussed in the previous section. The proc inlining can be done automatically by the compiler when the procedure is defined in the source code file where it is used, or when we mark the proc with the inline pragma. Additionally, when we compile our program with -d:lto, the compiler can inline all procedures and functions. Generally, the compiler should know well when inlining makes sense, so in most cases, it doesn’t make much sense to just use templates instead of (small) procs merely to avoid the [proc} call overhead.
Templates can be used as a form of alias. Sometimes we have nested data structures, and would like to have a shorter alias for the access of fields:
type
Point = object
x, y: int
Circle = object
center: Point
template x(c: Circle): int = c.center.x
template `x=`(c: var Circle; v: int) = c.center.x = v
var a, b: Circle
a.center.x = 7
echo a.center.x
b.x = 7
echo b.xThe two templates simplify the access of field x, and as templates are pure code substitution, their use costs no performance. Since version 1.6, Nim also has the with macro, which can be used to save some typing. Note that in the second template, we have called the second int parameter v — calling them x would give some trouble:
Error: in expression 'b.center.7': identifier expected, but found '7'
Nim’s system module uses templates to define some operators like
template `!=` (a, b: untyped): untyped =
not (a == b)This way != is always the opposite of ==, so when we define the == operator for our own custom data types, != is available for free.
In some situations, using templates instead of procs can avoid some overhead. Let us investigate a log() template that can print messages to stdout when a global boolean constant is set to true:
const
debug = true
template log(msg: string) =
if debug: stdout.writeLine(msg)
var
x = 4
log("x has the value: " & $x)Here, log() is called with the constructed argument ("x has the value: " & $x), which implies a string concatenation operation at runtime. As we use a template, the invocation of log("x has the value: " & $x) is actually replaced by the compiler with code like
if debug: stdout.writeLine("x has the value: " & $x)So, when debug is set to false, absolutely no code is generated. For an ordinary, non-inlined procedure, the situation is different: the expensive string concatenation operation would always have to be performed, but the log() proc would immediately return if debug is false. What exactly would happen when log() is an inlined procedure may depend on the actually used compiler backend. You may wonder if, inside our template from above, we should have used "when" instead of "if". The use of "when" should be possible, as debug is a compile-time constant, but we assume that the use of "if" generates the same machine code for this use case.
Note that the delayed (lazy) parameter evaluation for template parameters can have disadvantages. When we modify the log() template like this:
template log(msg: string) =
for i in 0 .. 2:
stdout.writeLine(msg)
var x = 4
log("x has the value: " & $x)the expensive string concatenation operation would be done in principle three times in the template body.[63] In contrast, for a procedure, the already evaluated parameter would be passed. So, when we access a parameter multiple times inside a template, it can make sense to assign the parameter to a local variable and then use only that variable.
Templates can inject entities defined in the template body into the surrounding scope. By default, variables defined in the template body are not injected in the surrounding scope, but procs are:
template gen =
var a: int
proc maxx(a, b: int): int =
if a > b: a else: b
gen()
echo maxx(2, 3)
# echo aThe call echo maxx(2, 3) compiles and works, while echo a complains about an undefined symbol.
A very special property of templates and macros is that we can pass code blocks to them when we use untyped for the type of the last parameter.
template withFile(f: untyped; filename: string; actions: untyped) =
var f: File
if open(f, filename, fmWrite):
actions
close(f)
withFile(myTextFile, "thisIsReallyNotAnExistingFileWithImportantContent.txt"):
myTextFile.writeLine("line 1")
myTextFile.writeLine("line 2")The template withFile() from the above example has three parameters — a parameter f of untyped type, a filename of string type, and as the last parameter one more untyped parameter, which we called actions. For this last untyped actions parameter, we can pass an indented code block.
When we invoke the withFile() template, we pass the first two parameters in the well-known way by putting them in a parameter list enclosed in round brackets. However, instead of also passing the final actions parameter in this manner, we put a colon after the parameter list and pass the following indented code block as the last untyped parameter. In the body of the above template, we have an open() call which opens a file with the specified filename and the fmWrite mode. The template then executes the passed code block and finally closes the file. The first parameter of our withFile() template has also a special property: As we use untyped for the f parameter, we can pass the still undefined symbol myTextFile to the template. In the template body, this symbol is used as a variable name, and our two writeLine() proc calls can use it to refer to the file variable.
As Nim templates are hygienic, the instance of the file variable created in the body of our template can be used by the passed code block, but it actually exists only in the template and does not pollute the global namespace of our program.
By passing an integer and a code block to a template, we can easily create a function similar to the times() construct known from Ruby, to execute a code block n times:
template times(n: int; actions: untyped) =
var i = n
while i > 0:
dec(i)
actions
var x = 0.0
3.times:
x += 2.0
echo x, " ", x * xOf course, instead of 3.times:, we could have simply used for _ in 1 .. 3:.
We can also use templates to create new procs. An example is lifting procedures like math.sqrt() that accepts a scalar parameter and returns a scalar value, to work with arrays and sequences. The following example is taken from the official tut2 tutorial:
from std/math import sqrt
template liftScalarProc(fname) =
proc fname[T](x: openarray[T]): auto =
var temp: T
type outType = typeof(fname(temp))
result = newSeq[outType](x.len)
for i in 0 .. x.high:
result[i] = fname(x[i])
liftScalarProc(sqrt) # make sqrt() work for sequences
echo sqrt(@[4.0, 16.0, 25.0, 36.0]) # => @[2.0, 4.0, 5.0, 6.0]The template called liftScalarProc() creates a generic proc that accepts an openArray[T] as a parameter and returns a seq[T]. Well, we should be able to understand the basic ideas used in that code, but it is still fascinating that it really works.
Typed vs untyped parameters
Parameters passed to templates can be of any data type that we can use for procs, including special types such as openarray, varargs and typedesc. Additionally, we can use the symbols untyped and typed as parameter types.
The typedesc type can be used to pass type information to the template, e.g. when we want to create a variable of a special data type. The "meta-types" typed and untyped are used when we want to create a form of generic template that can accept different data types. In reality, the distinction between typed and untyped parameters is not as challenging or crucial for templates as it is for macros. In most cases, it’s evident whether we need the typed or untyped parameter type for a template, or if both will work fine. We discuss the differences between typed and untyped in much more detail in Part VI of the book, when we discuss macros and meta-programming.
The following example demonstrates the use of the untyped and the typedesc parameter:
template declareInt(n: untyped) =
var n: int
declareInt(i)
i = 3
echo i
template declareVar(n: untyped; t: typedesc) =
var n: t
declareVar(x, float)
x = 3.0
echo xSince the parameter n is untyped, the compiler allows us to pass an undefined symbol to the template. If we changed the parameter type to typed, the compiler would complain with a message like "Error: undeclared identifier: i".
For the second template, called declareVar(), we use an additional parameter of typedesc type so that the template can create a variable of the passed data type for us.
Earlier, we said that Nim’s templates are hygienic, so you may wonder why the variable declared inside of the template is visible outside. Actually, this is only the case because we pass the symbol n as a template parameter. An ordinary declaration like var h: int would create a variable that is only visible inside the template body; it could not be used after invoking the template. We can use the inject pragma to make such ordinary variables visible outside of templates. For more details, please consult the language manual.
Passing a code block to a template
In the withFile() example above, we demonstrated that a block of statements can be passed as the last argument to a template using the special : syntax. To demonstrate the difference between code blocks of typed and untyped data types, we will cite the Nim language manual. See https://nim-lang.org/docs/manual.html#templates-passing-a-code-block-to-a-template:
Usually, to pass a block of code to a template, the parameter that accepts the block needs to be of type untyped. Because symbol lookups are then delayed until template instantiation time:
template t(body: typed) =
proc p = echo "hey"
block:
body
t:
p() # fails with 'undeclared identifier: p'The above code fails with the error message that p is not declared. The reason for this is that the p() body is type-checked before getting passed to the body parameter, and type-checking in Nim implies symbol lookups. The same code works with untyped as the passed body is not required to be type-checked:
template t(body: untyped) =
proc p = echo "hey"
block:
body
t:
p() # compilesPassing operators to templates
Another use case for templates with untyped parameters involves the generation of math operations for custom data types. Let us assume that we have created a custom Vector object, for which we have to define addition and subtraction operations. Instead of writing code for both cases, we can use a template and pass the actual math operator as untyped parameter:
type
Vector = object
x, y, z: int
template genOp(op: untyped) =
proc `op`(a, b: Vector): Vector =
Vector(x: `op`(a.x, b.x), y: `op`(a.y, b.y), z: `op`(a.z, b.z))
genOp(`+`)
genOp(`-`)
echo `+`(2, 3) # 5
var p = Vector(x: 1, y: 1, z: 1)
var p2 = p + p
echo p2 # (x: 2, y: 2, z: 2)This works because mathematical operations like 1+2 can be written as `+`(1, 2), and such an operator can be passed as an untyped parameter to a template.
Advanced template use
For more advanced template topics, you should consult the Nim language manual.
This includes the symbol binding rules, identifier construction in templates, lookup rules for template parameters, hygiene in templates, use of the inject pragma, and limitations of the method-call-syntax.
All this is explained well in the language manual, so there’s no need to repeat it here. It might be more beneficial to consult the manual when you actually encounter problems with the default behavior of templates in unique situations.
Casts and type conversions
While we have various types of casts in C++, Nim only supports one type of cast and type conversions. In Nim, cast simply reinterprets the same bit pattern for another data type. For example, the boolean value false is internally encoded as a byte with all bits cleared, while true is encoded as a byte with all bits cleared except for the least significant one. We could cast a bool to an int8 of the same size and receive a number with a decimal value of 0 or 1. Casting is not a real operation at all, as nothing is really done. We watch the same bit pattern, just from a different perspective. But casting is dangerous, it violates the safe type system of the language, and it can go very wrong: Can we cast between float64 and int64? Well, they have the same size, and both are numbers. We can cast, but the result would be far away from what we may expect. While int64 has a well-known and simple value encoding, where the rightmost bit stands for 2^0, the next bit for 2^1, and so forth, the encoding of floating-point numbers is much more complex and doesn’t follow such a simple scheme. In floats, some bits represent the so-called mantissa and some bits represent the exponent. When we cast, we may again get a number, but the value is not easily predictable. We have to be very careful when we cast between types of different sizes. Nim may permit that, but we have to think about what may really happen. When we cast between a bool and an int64, in one direction 7 bytes have to be ignored, and in the other direction, padding is necessary for the 7 missing bytes. We perform a cast by writing the desired type in square brackets after the keyword cast, followed by parentheses enclosing the source variable:
var i: uint8 = cast[uint8](myBoolVar)Totally different from casting is type conversion. We can convert integers to floating-point numbers without problems, for the conversion we use the type like a proc call, that is int(myfloat) or float(myInt) — of course, we could use method call syntax like myInt.float instead. Type conversion requires some effort from the CPU, but most advanced CPUs should have fast instructions for basic conversions.
Nim generally only allows type conversions that involve not too much effort. So we should not expect something like var i: string ="1234"; echo i.int * 7 to be available. Such a conversion is expensive, at runtime it costs many CPU cycles, as we would have to extract the digits, multiply by their weight and sum them up. For that operation, functions like parseInt(), which accept a string as an argument and return an int, are available from the Nim standard library. There exist different variants of parseInt(), one may raise exceptions for invalid input, and the other may return a boolean.
Bitwise operations
All systems programming languages, and most other programming languages, have support for bit manipulation operations, which includes querying and setting individual bits of variables, and combining the bits of two or more variables. As the CPU hardware supports these operations directly, these operations are very efficient. In the C programming language, operators like &, |, <<, >>, ^, ~ are used for bit-wise and and or operations, for shifting all the bits of a variable to the left or to the right, and for the process of inverting all the bits and for applying the exclusive-or operation on the bits of two operands. Actually, for the right shift operation, we have to distinguish between a logical and an arithmetic shift: For a logical shift the bit pattern is only moved right, and the leftmost bit is always cleared. But for an arithmetic shift, the leftmost bit may stay set when it was set before, indicating a negative number in the case of a numeric variable. In C the actual behavior for a >> shift right operation can be implementation-dependent.
Nim prefers to use textual operators instead of cryptic symbols, so the logical operators and, or and not have overloads to work on the actual bit pattern of integer variables instead of on boolean values, and for logical left and right shifts the operators are called shr and shl. For shl, bits shifted in from the right are always cleared, while shr shifts in cleared bits from the left for unsigned arguments, but preserves the leftmost set bit for signed arguments, which corresponds to an arithmetic shift operation. The Nim standard library also provides an ashr() function for arithmetic shifts, but that one seems to be a legacy.
from std/strutils import toBin
var i = 1.int8 # 0b00000001
i = i shl 7 # 0b10000000
i = i shr 2 # 0b11100000 as sign is preserved
echo i.toBin(8)
var j: uint8 = 0b11111111
j = j shr 2 # 0b00111111, div 4 for unsigned int
echo j.int8.toBin(8)The bit-wise operators and, or, and not behave very similarly to the boolean ones, but the operation is performed on all the bit values instead of just two boolean operands. The shift operators require a right-hand operand specifying how many positions the bit pattern of the integer variable on the left should be moved. As the shr operator preserves the leftmost sign bit for each individual shift when applied to a signed integer argument, we get a value with the three leftmost bits set in the above example. For showing the bit pattern, we used the toBin() function in the above code, the second parameter determines how many bits are actually printed. Remember that for unsigned numbers, shifting left (shl) by one position is equivalent to multiplying by two, and shifting right (shr) by one position is equivalent to dividing by two. Negative numbers are not allowed for the number of bits to shift. Although i = i shl -1 does compile, the result is always zero. For all the shift operations, performing n shifts each by one position would yield the same result as a single shift by n positions. For most modern CPU hardware, all the bit shifting operations are very fast and generally take only one clock cycle, independent of how many positions we move the bit pattern and independent of whether it is a logical or an arithmetic shift operation.
We can use the and and or operators to extract single bits or set single bits:
var a = 3 # two rightmost bits, at position 0 and 1 are set
var b = a and 2 # extract bit 1, so b gets the value 2
b = a and 4 # extract bit 3, which is unset, so result is 0
b = a or (4 + 8) # result is \b00001111, decimal 15This information should suffice for understanding the most basic bit operations. We may not use these operations frequently, but it’s important to be aware of their existence. The overloading of the and, or, and not operators for signed and unsigned integer numbers may appear convenient, but it can sometimes lead to confusion when we intend to perform boolean operations and instead operate on bit patterns. It was suggested to call the operators bitand, bitor, and bitnot instead, and indeed the bitops module of Nim’s standard library defines operators with these names and provides additional, more useful bit operations, including counting the number of set bits in a variable or determining the number of leading zero bits. These operations are not needed that frequently, but sometimes they can be very useful, and they are supported by fast CPU instructions on modern PC hardware. Note that while we have shown these bit operations on integer numbers only, you can always cast other data types to integers and then apply these operations as well.
Exceptions
When we execute our program code, sometimes things can go wrong: we may be unable to open a file, encounter an unexpected division by zero or an overflow, or receive invalid user input. There are various strategies to handle such situations. One is to terminate our program. We may do that by a plain assert() or quit() statement. If we have absolutely no idea how to recover from an error, then that is typically our best option. The user can restart the program, or the program can be restarted by a supervisor program. For more predictable errors, some form of error indicator can be a better solution. For example, a parseInt() procedure may return a boolean value indicating success. As we have to return the numerical result for success as well, the parseInt() proc can return a tuple or can use a var parameter in which the actual integer value is returned. Whenever a procedure returns a reference, the return value nil can be used to indicate some form of error. Alternatively, we may use Nim’s Option type to allow the caller to detect if a returned value is invalid.
Another popular strategy to handle error states is the use of Exceptions. If an invalid operation is detected somewhere in the code path, that code can raise an Exception to indicate that a serious error has occurred.
This raised error might be handled elsewhere in the program. If it is not handled at all, the raised Exception will finally cause a program termination.
Let us start again with a small example:
proc charToInt(c: char): int =
if c in {'0' .. '9'}:
return ord(c) - ord('0')
raise newException(OSError, "parse error")
proc main =
while true:
stdout.write("Please enter a single decimal digit: ")
let s = stdin.readline
try:
echo "Fine, the number is: ", charToInt(s[0])
except:
if s.len == 0:
break
echo "Try again"
main()The charToInt() proc raises an Exception when the passed character is not a decimal digit. As the main program knows that charToInt() may raise an Exception, it encloses the charToInt() call in a try/except block: If code in the try block raises an Exception, then the program execution proceeds in the except: block.
The use of Exceptions seems to be a good idea to handle certain of rare errors, and most modern programming languages support some form of raising and catching Exceptions. However, there has also been some criticism: using exceptions and catching them with try/except blocks can disrupt the regular control flow of the program, making it difficult to reason about all possible code paths. For this reason, the popular Go programming language was initially released with Exception handling explicitly omitted, with the developers arguing that it obfuscated control flow. In fact, the Nim compiler can help with the management of all exceptions involved by using its effect system, which is described in detail in the Nim language manual and which we will briefly discuss in the next section. Nim’s Exception tracking is part of Nim’s effect system — we can annotate each proc with all the various types of Exceptions that it may raise, and the compiler can help us with this annotation and verify that it is correct.
Defects and catchable errors
Nim’s strategy for the handling of Exceptions has changed a bit in the last few years. Nim differentiates now between catchable errors, and defects, which may not be catchable, and are considered to be programming bugs. The prototype of a defect is the DivByZeroDefect. If we do an integer division by zero, then the most common CPUs will generate a signal and the OS will abort our program with SIGFPE. So to prevent the program abort by a possible DivByZeroDefect, we have always to ensure that for an integer division, the denominator is not zero, or we let the Nim compiler do this check by compiling with the option --checks:on, which costs performance and increases code size, as a check instruction is added for each division.
In Nim, all Exceptions types are objects that inherit from the Exception type of the system module and have public name and msg fields of string type.
Exceptions that indicate programming bugs inherit from system.Defect and can be uncatchable, as they can be mapped to operations that terminate the whole process, like a quit, trap, or exit operation. Exceptions that indicate other, catchable runtime errors inherit from system.CatchableError.
These types are further subclassed into Defects like OverflowDefect or OutOfMemDefect, and Errors like ValueError or IOError.
Raise statement
An Exception is raised using the raise statement. The raise statement expects a heap-allocated reference to an Exception object, as the lifetime of the Exception instance is unknown. Generally, we use the newException() template to create the Exception instance and set the msg field like
raise newException(IOError, "IO failed")In principle, we could also create the Exception instance like
var
e: ref OSError
new(e)
e.msg = "the request to the OS failed"
raise eIf raise is invoked without an Exception argument, the current Exception is re-raised. The ReraiseDefect Exception is raised if there is no Exception to re-raise. It follows that the raise statement always raises an Exception. Reraising an Exception can be useful in an except block (see below) when the actual Exception type cannot be handled.
Custom exceptions
Instead of raising one of the predefined Exceptions from the system module, we can also create our own variants and then raise them:
type
LoadError = object of ExceptionTry statement
In the Nim language manual, we have an example like this one:
import std/strutils
var
f: File
if f.open("numbers.txt"):
try:
let a = f.readLine
let b = f.readLine
echo "sum: ", parseInt(a) + parseInt(b)
except OverflowDefect:
echo "overflow!"
except ValueError, IOError:
echo "value or IO error!"
except:
echo "Unknown exception!"
finally:
close(f)The code tries to read two strings from a text file that is assumed to contain numeric data and to add them after conversion to integer numbers. Three errors may occur: The reading of the strings, the conversion to integers, or the addition may fail, with the last potentially causing an overflow. To catch the possible errors, we use the try/except/finally construct. The keywords try, except, and finally are followed by a colon, and each keyword marks the start of a corresponding block of instructions — after the except keyword we can list the Error and Defect types for which the following code block should be executed.
The statements in the try block are executed in sequential order until an Exception is raised. If an Exception is raised and the Exception type matched any listed in an except clause, the corresponding statements are executed. If no Exception types match and an except clause with no listed Exception types is specified, the following code block is executed. The statements following the except clauses are called Exception handlers. If there is a finally clause, it is always executed after the Exception handlers.
An Exception is "consumed" in an Exception handler. However, an Exception handler may raise another Exception or re-raise the current one, which then may be caught elsewhere or generate a program termination if it remains uncaught. If an Exception is not handled, it is propagated through the call stack. This means that often the rest of the procedure - that is not within a finally clause - is not executed (if an Exception occurs).
Try expressions
Just as we can use the if keyword as an expression, we can do the same with the try keyword. The data types of the try and the except branches have to be compatible in this case, and an optional finally branch has to return nothing (void):
from std/strutils import parseInt, parseFloat
let x = try: parseFloat("3.14")
except: NaN
finally: echo "well we tried." # always executed!
echo x # 3.14
let i = (try: parseInt("133a") except: -1)
echo i # -1Except clauses
In an except block, we can use the function getCurrentException() to get the raised Exception, or getCurrentExceptionMsg() to get only the error message. Or, we can access the current Exception in an except block using the as keyword, as shown below:
try:
# ...
except IOError as e:
# Now use "e"
echo "I/O error: ", e.msg, " (", e.name, ')'Imported exceptions
It is possible to raise and catch imported C++ exceptions. For a detailed example, see the Nim language manual: https://nim-lang.org/docs/manual.html#exception-handling-imported-exceptions
Defer statement
The defer statement can be used to ensure that special actions like closing a file or freeing resources are always executed. The defer statement is transformed by the compiler into a try/finally construct.
proc main =
var f = open("numbers.txt", fmWrite)
defer: close(f)
f.write "abc"
f.write "def"Is rewritten to:
proc main =
var f = open("numbers.txt", fmWrite)
try:
f.write "abc"
f.write "def"
finally:
close(f)Using defer is more concise, but try/finally makes it more obvious what is happening, so some people recommend not using the defer statement. Actually, tasks like closing files should soon be performed by Nim’s destructors automatically, so defer may get deprecated.
References:
Destructors
Destructors and finalizers are used for automatic resource management. For example, files can be closed automatically when a file variable goes out of scope. Similarly, when we create high-level Nim bindings to C libraries, we can use finalizers or destructors to deallocate entities of the C libraries when a corresponding Nim (proxy) object is freed. Libraries like the Gintro GTK bindings make use of this.
Finalizers are procedures that can be passed as an optional second parameter to the system new() proc. That way, the finalizer proc is attached to the data type of the variable which we pass as the first parameter to new() and that finalizer proc is automatically called whenever that variable is freed by the Nim memory management system. As finalizers are passed as a parameter to a new() call, and new() is only used for references, finalizers work only for ref data types.
Destructors do not have this restriction. We define the destructor for a value type, but it is also called for reference types by the compiler.
Starting with version 1.4, Nim introduced scope-based resource management, which is enabled when the program is compiled with --mm:arc or --mm:orc. In that case, variables are immediately deallocated when they go out of scope, and if a destructor was defined for the data type of that variable, it is called automatically.
In the C++ programming language, it is common practice for resources like files to be closed and released automatically by destructors when they go out of scope. Now, this is also possible in Nim. To make use of destructors for our own data types, we have to define a proc called =destroy which receives an instance of our data type passed as a var value object:
type
O = object
i: int
proc `=destroy`(o: var O) =
echo "destroying O"
import std/random
proc test =
for i in 0 .. 5:
if rand(9) > 1:
var o: O
o.i = rand(100)
echo o.i * o.i
randomize()
test()In the for loop, we enter a new scope when the if condition evaluates to true. At the end of the if block, we leave the scope, and the destructor is called automatically. Inside the destructor proc, we could do some cleanup tasks, close files, and release resources. Destructors are also called when ref objects go out of scope:
type
O = ref object of RootRef
i: int
proc `=destroy`(o: var typeof(O()[])) =
echo "destroying O"
import std/random
proc test =
for i in 0 .. 5:
if rand(9) > 1:
var o: O = O() # new O
o.i = rand(100)
echo o.i * o.i
randomize()
test()To use destructors, we have to compile our program with the --mm:arc or --mm:orc option; otherwise, the specified destructor procs will be ignored. In our code, we can test for working destructors with a construct like when defined(gcDestructors):.
Note that destructors do not work for plain pointer types:
type
O = object
i: int
OP = ptr O
proc `=destroy`(o: var O) =
echo "destroying O"
import std/random
proc test =
for i in 0 .. 5:
if rand(9) > 1:
var o: OP = create(O) # new O
o.i = rand(100)
echo o.i * o.i
randomize()
test()Therefore, using destructors to release data directly from C libraries is not possible. But at least for Nim >= v1.6 destructors work for distinct pointer types:
type
O = object
i: int
OP1 = ptr O
OP = distinct ptr O
proc `=destroy`(o: var OP) =
echo "destroying OP"
import std/random
proc test =
for i in 0 .. 5:
if rand(9) > 1:
var o: OP = OP(create(O)) # new O
OP1(o).i = rand(100)
echo OP1(o).i * OP1(o).i
randomize()
test()81 destroying OP 3600 destroying OP 2401 destroying OP 9025 destroying OP
So using destructors to destroy data from C libraries should be possible now.
Destructors and inheritance
When we use an object-oriented programming style with subclassing of ref objects, it’s useful to know that for subclassed ref objects, the destructor of the parent class is automatically invoked if we do not define one for our subclassed type. This also works when we import the parent type from another module, at least since Nim v1.6:
# module tt.nim
type
O1* = ref object of Rootref
i*: int
when defined(gcDestructors): # check not really needed, as =destroy call is just ignored when condition is false
proc `=destroy`*(o1: var typeof(O1()[])) =
echo "destroy O1 ", typeof(o1)# module t.nim
import tt
type
O2 = ref object of tt.O1
j: int
type
O3 = ref object
o1: tt.O1
type
O4 = object
o1: tt.O1
type
O5 = ref object of tt.O1
x: float
when defined(gcDestructors):
proc `=destroy`(o5: var typeof(O5()[])) =
echo "destroy O5 ", typeof(o5)
tt.`=destroy`(o5)
proc main =
var o1: tt.O1
new o1
echo o1.i
var o2: O2
new o2
echo o2.j
var o3: O3
new o3
new o3.o1
var o4: O4
new o4.o1
var o5: O5 = O5(x: 3.1415)
echo o5.x
main()When we compile the module t.nim with --mm:arc or --mm:orc and run it, we get this output:
0 0 3.1415 destroy O5 O5:ObjectType destroy O1 O1:ObjectType destroy O1 O1:ObjectType destroy O1 O1:ObjectType destroy O1 O1:ObjectType destroy O1 O1:ObjectType
Therefore, when our variables o1 to o5 go out of scope, the destructors are called. Module tt.nim defines a ref object type, but the destructor proc takes a var value parameter. The destructor is called when a value object or a ref object goes out of scope. Our variable o1 has type tt.O1, so it was indeed expected that its destructor from module tt.nim is called. Variable o2 is a ref object with parent O1. As we define no destructor for this type, the destructor of the parent type is called. The variables o3 and o4 are of ref object and of value object types, each with a field of type O1, and for that field, the destructor for O1 is called. Finally, for type O5, we define our own destructor, which then additionally calls the destructor from module tt.
Destructors are mostly used for library implementations, e.g., for a File data type, which is automatically closed when a file variable goes out of scope. As you may never have to use destructors yourself, it is not necessary to remember all these details. However, it is good to know that destructors behave as one might expect. If you later want to use a destructor in your own code, you can refer back to this section or, perhaps more helpfully, consult the Nim manual.
References:
Finalizers
In Nim, finalizers are procedures that we can specify as an optional second parameter when we call the system new() proc to allocate heap memory for a reference type variable. The specified finalizer procedure is then later called by the Nim memory management system when the ref variable is freed:
type
O = ref object of RootRef
i: int
proc finO(o: O) =
echo "finalize O"
proc newO: O =
new(result, finO)
proc main =
var o = newO()
var o2 = new(O)
var o3 = O(i: 7)
main()
GC_fullcollect()We added a call to GC_fullcollect() to ensure that the REFC GC is actually invoked before the program terminates. For ARC/ORC we get this output:
finalize O finalize O finalize O
But when we compile with old REFC, we get only two finalizer calls:
nim r --mm:refc t.nim finalize O finalize O
For o3, the finalizer is not called. We don’t know if that is a bug or feature of v1.9.3.
The output of the above program may be surprising at first: we only call the newO() procedure to initialize the variable o, which then calls new() by passing a finalizer proc named finO(). For o2 and o3, we allocate memory as usual, without the use of a finalizer proc. But when o2 and o3 go out of scope, even for these two variables, the finalizer procedure finO() is called. The reason for this is, that the system proc new() binds the optional finalizer procedure to the data type of the passed ref variable. This binding process occurs for the first call with a passed finalizer proc, and can not be reverted. We can later call new() without a finalizer or use the similar O() call to initialize the ref variable, but that can not undo the binding. Furthermore, using a different finalizer procedure for the same data type would not work anymore. Passing the same finalizer proc multiple times is OK and may be a common use case, but it has no real effect, as the first call did the binding already.
The behavior of finalizers in Nim can indeed be a bit confusing and prone to errors. We might pass a finalizer proc to new() somewhere in a large program and forget about it. Later, we use new () without a finalizer or use the O() notation to reserve the memory for our ref variable. Therefore, we might think that no finalizer is involved, but since a finalizer was used at least once somewhere, it is now bound to all of our allocations of that data type. That can easily lead to bugs as the unintended called finalizers may do things that they should not do with our data.
Finalizer procedures must always be defined in the same module as the type for which they will be used:
| This restriction appears to have been removed in Nim 2.0. |
# module tt.nim
type
O* = ref object of RootRef
i: int
proc fin*[T](o: T) =
echo "finalize T"
proc newO*: O =
new(result, fin)import tt
type
OO = ref object of tt.O
x: float
proc finn[T](o: T) =
echo "finalize O"
proc main =
var oo: OO
new(oo, finn)
main()We import the tt.nim module and subclass the ref object type tt.O. Although the tt.nim module defines a generic finalizer proc fin(), we cannot use that one for our subclassed type OO. Instead, we must copy it from the tt.nim module into our main module, and we might even need to use a different procedure name. Otherwise, we get the compiler message
Error: type bound operation `fin` can be defined only in the same module with its type (OO:ObjectType)
Whenever we really need a finalizer or a destructor, we should prefer destructors if we can compile our code with the compiler options --mm:arc or --mm:orc.
Modules
Modules are Nim’s way of dividing multiple source code files into clearly separated units and hiding implementation details. Nim uses a concept of modules, which is very similar to that of Modula-2 or Oberon. All the Nim standard libraries are divided into modules that collect and logically group data types and related procedures. In a sense, modules can be considered as Nim’s classes.
In Nim, each module directly corresponds to one text file. Currently, Nim does not support submodules, known from Ruby, which divide a single text file into multiple modules. Similar restrictions apply to module names as to other Nim symbols, e.g., the hyphen '-' is not allowed in module names. Typically, we use only lowercase and the extension ".nim" for the names of modules. It is strongly recommended to avoid using module names that are identical to symbol (type) names used within that module. Every text file containing Nim source code essentially constitutes a module, which can then be imported and used by other modules.
But all symbols like data types or procedures have to be exported to make them visible and usable by other modules. This is accomplished, as in Oberon, by appending an asterisk character to all symbols (names) that should be exported. These restricted exports allow for the hiding of implementation details — all symbols not exported are private to that module and can be changed and improved at any time without the importing module noticing.
Note that when we append the asterisk to the name of an object to export that type, the object’s fields are still hidden and cannot be accessed from within the importing module. You may append an asterisk to selected field names as well, or you may provide exported getter and setter procs for the field access. A read-only export, as known from the Oberon language, is currently not possible with Nim.
We can import whole modules, that is, all symbols that are marked for export by the asterisk, or we can import only the symbols that we need by specifying their names. Let us create a module that declares a single procedure to remove all characters from a string that are not letters:
# save this textfile with name mystrops.nim
proc remNoneLetters*(s: string): string =
result = newString(s.len)
var pos = 0
for c in s:
if c in {'a' .. 'z', 'A' .. 'Z'}:
result[pos] = c
inc(pos)
result.setLen(pos)We save the aforementioned text file containing our Nim source code as mystrops.nim. Note the export marker after the proc name. We can import and use that module as follows:
import mystrops
echo remNoneLetters("3h7.5g:8h")When we import modules, we generally place the import statement at the top of the importing module; this makes it easy to see what modules are imported. The imported symbols can be used in the code following the import statement. Module names should be lowercase and may as other Nim symbols only contain letters, decimal digits, and the underscore character. We can import multiple modules with a single import statement when we separate the module names with commas. Starting with Nim v1.6, it is recommended to import modules from Nim’s standard library with the std prefix as in import std/math or import std/[strutils, sequtils]. Importing the same module multiple times is not a problem, and does not increase the file size of the final executable. Note that in the import statement the module names have to be used literally, so this would not work:
const strfuncs = "stringutils"
import strfuncsInstead of importing whole modules, we can import only single symbols with the from x import y, z syntax like
from mystrops import remNoneLetters
echo remNoneLetters("3h7.5g:8h")Both forms are examples of an unqualified import; that is, we can refer to the proc by only its name. We do not need the qualified form with a module name prefix like mystrops.remNoneLetters(), as long as there are no name conflicts. But whenever we want, we can use the qualified form also.
Nim programmers tend to prefer importing entire modules and using unqualified names, though this is often considered bad style in some other languages like Python. In dynamically typed languages like Python, unqualified imports may indeed pollute the namespace and generate many name conflicts, but in statically typed languages like Nim unqualified imports seems to generate name conflicts only in very rare cases. Procedures with the same name typically have different parameter lists, so the overload resolution of the compiler can decide what proc is to be used. And when really a name conflict occurs, then the compiler will tell us, and we can easily fix it by prefixing the procedure name with its module name.
For data types, constants, or enums, the likelihood of name conflicts might not be so small, potentially necessitating the use of qualified names.
We can also enforce a fully qualified import in Nim by a notation like
from mystrops import nilIn this case, we can use all symbols from that module only in qualified form. However, this approach doesn’t always work seamlessly in Nim, given that unlike Java, Nim doesn’t have classes. Consequently, qualified use of method call syntax or user-defined or overloaded operators can be challenging. Imagine strutils.add(s, '\n'), how should that look with method-call-syntax?
For imports, we have also the except keyword, so we may do something like
import std/strutils except toUpperThe except keyword can be used to prevent possible name conflicts, without having to use qualified names.
Note that the system module is imported automatically, so we should not import it explicitly. Also, note that Nim always imports only what is truly necessary in the final executable, meaning that importing only a few symbols from a module has no code size advantage over importing the whole module. Still, it may improve the readability of your code, when you import only single symbols for the case that you are sure that you require no more. Maybe like from std/math import Pi. Note that you can even in that case access other symbols of that module by fully qualified names like math.sin().
With the growing standard library, it may occur that module names of the standard library interfere with your own module names. So Nim now allows and recommends qualified import of modules from the standard library like import std/strutils. And for external packages installed by the nimble package manager, imports in the form import package/[mod1, mod2, mod3] are permitted.
Finally, you can also import modules under a different name using the as keyword as follows:
import std/tables as mapsWith the latest Nim compiler, you can also enforce fully qualified import and use of an alternate module name by using an import statement as follows:
from std/tables as maps import nilWith this import statement, you could access symbols from the tables module only by use of the maps module prefix like maps.newTable().
Finally, with the export keyword, one library module can export other modules, which it imports itself. This may simplify the use of connected modules. As an example, when using the gintro bindings for GTK4, we import all the needed modules generally like import gintro/[glib, gobject, gtk4]. We may decide to simplify that import statement by creating one more module called gtkplus that consists only of these two lines:
# module gtkplus
import gintro/[glib, gobject, gtk4]
export glib, gobject, gtk4Then, a user of gintro could simply write import gtkplus to have access to all the modules. However, for GTK, this is not really a good idea. We will discuss the gintro module and perhaps one other Nim GUI library in the second half of the book.
Cyclic imports
Typically, we try to arrange our own modules in a tree-like bottom-up structure. A module x may define basic types and simple functions working with these types, and a higher-level module y may import all symbols from module x and extend the functionality. But in rare cases, it could be necessary for the modules x and y to import each other, as x has to use types or functions of module y, and vice versa. This case is called cyclic import and is currently not supported by Nim. Indeed, we should generally try to avoid cyclic imports when possible, as cyclic imports make the software design difficult. But sometimes we cannot really avoid these cycles. In that case, currently, the best solution is, to put all the concerned data types in a separate low-level module, which is then imported from both other modules. The planned Nim version 2.0 may permit cyclic imports, so this restriction might vanish in the future.
| We have already mentioned that the compiler only imports functions, data types, and other symbols from imported modules that are really needed. So a plain import std/math is fine, there is no need to write from std/math import sin, cos, sqrt to optimize the final executable size. The same is true when whole modules or single symbols from a module are imported multiple times: When modules a and b each import module c, and our top-level main module imports modules a and b, module c is still only imported once; there is no unneeded code duplication. The import statement is not merely an instruction to insert some code, but rather a hint to the compiler about which symbols may be needed. But remember, that the use of templates, inline iterators, generics, and inline procedures may indeed lead to code duplication, but that is by intent. |
Include
The include statement should be not confused with the import statement. Include simply inserts a text file at the position where the include statement occurs. The include statement can be used to split very large modules into smaller entities.
Part III: Nim’s Standard Library
In this part of the book, we will introduce you to some of the most essential modules of Nim’s standard library. This includes modules for common operations like the serialization of Nim data types, which allows us to write them to external nonvolatile storage and read them back into the program later, or handling command-line options and parameters for programs that are launched from a terminal window. Further, we will introduce you to important container data types such as hash tables (sometimes referred to as hash maps in other programming languages) and various kinds of set data types. We will also introduce modules for working with regular expressions, and we will show how simple modules like the times and the random module can be used. Most modules mentioned in this part will be from the Nim standard library, so you will not have to install external packages to use them. However, there may be some exceptions, such as certain external Nimble packages with very useful functionality and an easy user interface. One of these exceptions is the regex module: Nim’s standard library comes with the re and nre modules, which both use the PCRE C library. We have decided to introduce the regex module instead, which is an external package written completely in the Nim language.
Formally, Nim distinguishes between pure and impure libraries and wrappers. The majority of Nim’s standard libraries consist of pure libraries, which are modules completely written in Nim code. Impure libraries provide a high-level Nim interface and can be used like pure libraries, but use C libraries under the hood. Examples are the two modules re and nre, which both use the PCRE C library, and some database modules. Impure libraries can be used in the same way as pure ones when the underlying C library is installed. The few wrappers that are shipped with Nim only provide a low-level interface to C libraries, which may use unsafe pointers as proc parameters and may require the user to do manual memory management. Some impure modules use these wrappers and hide all the ugly stuff for us, but we generally do not use the wrappers directly.
Nim’s standard library is supported by thousands of external packages, which can easily be installed with Nim’s package managers, and then can be used in the same way as the modules of the standard library. The next part of the book will introduce you to the use of external packages and presents some of the most important ones out there.
Command-line arguments
When we launch a program from inside the terminal window, we can pass it some additional parameters, e.g. the name of a file to process or option parameters to influence the behavior of the program. We have done so already when we launched the Nim compiler or maybe a text editor from inside our terminal window. Using command line parameters is convenient when we work from inside a terminal and there are parameters that we can know in advance. A more interactive way to collect parameters is reading in input while the program is already running, as we did in Part II of the book when processing the list of our friends. We will learn some more details about this interactive processing of input in the next section.
Nim allows processing command-line arguments in the same basic way as all C programs do, but Nim’s standard library and some external packages allow also much more advanced handling of command-line arguments. For simple cases, the C-like way is sufficient. For C programs the command line arguments are even coupled very closely to the language itself, the number of arguments and the list of parameters are the two typical parameters of the C main() function and are used in this way:
// C program expecting one command line argument
// Compile with gcc t.c
#include <stdio.h>
int main( int argc, char *argv[] ) {
printf("Executing program %s\n", argv[0]);
if( argc == 2 ) {
printf("The argument supplied is %s\n", argv[1]);
} else if( argc > 2 ) {
printf("Too many arguments supplied.\n");
}
else {
printf("One argument expected.\n");
}
}Here argc is the number of available arguments, and argv is an array containing the actual arguments in the form of C strings. These values are passed to each C program by the OS when the program is launched from inside a terminal. Actually, the value of argc is the number of passed arguments plus one. This means that when we specify no arguments at all, argc still has the value of one. Additionally, argv[0] is always the name of the executed program. We need to understand that command-line arguments passed to a program are separated by white space, that is, at least one space or tab character. For this reason, we have to enclose single arguments containing white space in double quotes:
$ gcc t.c -o t $ ./t Nim two Executing program ./t Too many arguments supplied. $ ./t "Nim two" Executing program ./a.out The argument supplied is Nim two
In Nim, the same functionality is available through the paramCount() and paramStr() procs, which we need to import from the os module. But paramCount() gives us the actual number of parameters, so when we call our program on the command line without any arguments, paramCount() will return the value zero. Note that paramStr() is not a global array variable, but a procedure. ParamStr(0) gives us the name of our executable, and with arguments greater than zero we get the passed arguments as strings in ascending order. Using an index number for an argument that was not provided will cause paramStr() to raise an exception.
An argument evaluation similar to the one in our earlier C program could look like this:
from std/os import paramCount, paramStr
proc main =
echo "Executing program ", paramStr(0)
let argc = paramCount() + 1
if argc == 2:
echo "The argument supplied is ", paramStr(1)
if paramStr(1) in ["-d", "--debug"]:
echo "Running in debug mode"
elif argc > 2:
echo "Too many arguments supplied."
else:
echo "One argument expected."
main()Using this straightforward API is acceptable when we expect one or two arguments, maybe a file name and an option, like the -d or --debug parameter used in the code above. With more command-line arguments, the process can become complex quickly, as arguments can be passed in arbitrary orders and combinations. So you should try one of the available libraries for that case. One of these is the cligen package, which we will present in Part III of the book.
References:
Reading data from the terminal
While using command-line arguments is convenient for data like filenames or options that we already know when we launch a program from the terminal window, often we have to provide textual user input while the program is already running. Functions for this task are provided by the io module, a part of the system module, which we do not have to import explicitly. In one of the introductory sections of the book, we already used the readLine() and getch() procedures to read in a line of text from the terminal and to wait for a single keypress event.
For input and output operations in a terminal window, the io module defines the three variables stdin, stdout, and stderr of the File data type. Many procedures in the io module expect a File type variable as the first parameter. We can explicitly open a named file to write data to external media like the SSD, or we can just use the stdin and stdout variables to read data from the keyboard and to write text to the terminal window. Unlike other named files, we do not have to call open() or close() on stdin and stdout to open or close the files, and some other file operations like setFilePos() may not work for these file variables:
var s: string = stdin.readLine() stdout.write(s) stdout.flushFile
As previously mentioned, the readline() function allows textual user input, including spaces. It’s important to note that you must terminate your input by pressing the return key. This action passes the input string to the OS, which then forwards the input to our program. This form of input is sometimes referred to as 'blocking' because while we’re waiting for user input, our program is essentially idle; it cannot perform other tasks until the user has pressed the return key. For single-character input where pressing the return key isn’t necessary, such as for simple yes/no input, you may use the getch() function. This function is also blocking. In a later section of the book, we may show how we can use threading to actually do some useful work, while we wait for user input. In the literature stdin, stdout, and stderr are often called streams, where stderr can be used instead of stdout for writing error messages. This can be useful in special cases when we have an application where we want to redirect error messages to a file or to separate regular output and error messages. If you need more details about these stream or file variables, and the use of the stderr variable, you may consult external literature.
The io module does not provide read() functions for other basic data types like numeric or boolean types. So we should use readLine() to read the user input in string form, which we can convert by functions like parseInt(), parseFloat(), or similar functions to numeric data. Note that parsing procs like parseInt() are provided by the module strutils as well as by the module parseutils — one function raises an exception for invalid input, while the other one returns a boolean value indicating conversion success. Of course, we should handle textual user input always carefully and never just assume that the input is actually valid data. Some of the modules that can be used for converting textual input data into other data types like the strutils, parseutils and strscans modules are described in more detail at the end of this part of the book.
For advanced user input processing, like cursor movement, colored display, or displaying progress bars, you may also consult the terminal module. Finally, to create advanced textual user interfaces (TUIs), we recommend trying external packages, such as the illwill library.
References:
Writing text to the terminal window
In previous sections, we have used the echo() function to write variables of various data types to the terminal window. The echo() function accepts multiple arguments, writes the string representation of these arguments to the terminal window, and concludes by writing the \n character. This moves the cursor to the beginning of the next line in the terminal window. We have already used the write() function from the io module for the case that we want to write a single string to the terminal without a terminating newline character. The io module contains overloaded write() functions for other basic data types such as int, float, and bool. It also includes a variant with a varargs parameter and applied stringify operator, allowing write() to function similarly to echo() if we pass stdout as the first parameter. The C library function fprintf() is used for the actual output operation. Keep in mind that write operations to stdout are generally buffered. Thus, the result of write() operations might remain invisible until we write a string containing a newline character or call the flushfile() function to enforce buffer writing.
Option types
Option types can be used to encapsulate values in a way that allows marking the value as undefined. This can be especially useful for the return types of functions, which may or may not return a meaningful value.
Let’s assume we have a function called find() that searches for the first index position of a character in a string:
proc find(s: string; c: char): int =
result = -1 # not found
var i = 0
while i < s.len:
if s[i] == c:
return i
inc(i)
echo "Nim".find('i')The function returns the index position or -1 to indicate that the character has not been found. This works because we typically use signed integers in Nim, and the valid string index positions are never negative. Hence, a negative result is an obvious indication of an error. Similarly, when a function needs to return a reference or a pointer, the special value nil can be used to indicate the absence of a value. Actually, in most cases, we can just define a special value as the indication for the absence of a result or as an error indicator, for example, int.low, char(0), or NaN for float results.
Other ways to indicate failures include returning a boolean value for success and returning the actual result value as a var parameter, returning a tuple that encloses a boolean for success indication and the actual result, or returning the result(s) as a sequence that can be empty in the event of no success:
proc find(s: string; c: char; pos: var int): bool =
pos = 0
while pos < s.len:
if s[pos] == c:
return true
inc(pos)
var p: int
echo "Nim".find('i', p), ": ", pproc find(s: string; c: char): tuple[succ: bool, pos: int] =
var i = 0
while i < s.len:
if s[i] == c:
return (true, i)
inc(i)
echo "Nim".find('i')proc find(s: string; c: char): seq[int] =
var i = 0
while i < s.len:
if s[i] == c:
result.add(i)
inc(i)
echo "Nim".find('i')For a more formalized way to indicate the absence of a meaningful result, many modern programming languages provide the concept of Option types, which are sometimes also called Maybe types. Option types can encapsulate an arbitrary data type and provide functions like isSome() or isNone() to test for the existence of a valid value, and functions like get() to extract the actual value from the Option type:
import std/options
proc find(s: string; c: char): Option[int] =
var i = 0
while i < s.len:
if s[i] == c:
return some(i)
inc(i)
var res = "Nim".find('i')
if res.isSome:
echo res.getThe options module of Nim’s standard library provides the generic Option[] data type along with functions like some(), isSome(), and isNone(). These functions allow creating a new Option type encapsulating some data and checking if data is present. In the code above, we use some(i) to wrap the integer value in the Option type when we have found a match. For no match, the proc returns the default empty Option type instance. When we use the find() function with the Option[int] result, we first have to call isSome() to check if valid data is available, and then call get() to retrieve the actual data.
Nim’s Option types are based on objects. The generic Option[T] type is an object with two fields, a boolean indicating the presence of data, and a field that can store the actual data. Nim uses also an optimization: When the data type is of ref or pointer type, then the bool field is not necessary, as the absence of data is equivalent to a data entity with nil value.
The overhead of Option types is not that big — a procedure which would return a 4-byte integer would return an object instead — the additional boolean field would increase the size of the result to 5 bytes, which is generally extended by the compiler to multiples of the word size, that is 8 byte total. So, in the worst-case scenario, we have a 100% size overhead. Moreover, the loss of performance due to the encapsulation of data in Option types should not be significant in most use cases.
The options module provides some more procedures for the handling of Option types, but this short introduction should be enough to get you started. You can find an alternative implementation of a Nim Option-Type at https://github.com/arnetheduck/nim-results.
References:
Serialization — storing data permanently on external storage
When you start writing larger programs, these may generate data that you might want to permanently store on external nonvolatile storage devices, such as SSDs or traditional hard disks of your computer. For textual data, this is very easy, as you only have to write and read a stream of unstructured bytes. However, when your program deals with object instances, container data types like sequences, or references, the process becomes more complicated. Writing the data is always easy — you can just convert all the fields of your object data type to strings and write them to a stream or a file. But the reading back part is much more difficult: You would have to read in the data as strings, and then process each string — maybe converting it to a float number — and then assign it to the matching field of an object instance.
When your data consists only of value objects and no references, then you may consider just writing that data in plain binary form to a file and reading it back. This strategy seems to be simple, and it is very fast, as no type-conversion steps are involved. But at the same time, it has some drawbacks: The stored data can not be checked with tools like a text editor, it can generally not be used from other programs, and when you should change the data types used in your program, you could not read back stored files anymore.
So we will explain how you can store Nim data types in a human-readable text format first. Two popular text formats, JSON and YAML, are often used. JSON is a simple format, which is easy to parse, but not well readable for humans. YAML is more complicated, but more flexible and is very good readable for humans. Other popular data formats are XML or TOML.
For Nim, we have already many modules available, which we can use for storing data in JSON or YAML format. The Nim standard library includes the marshal and the json module. Both store the data in JSON format, but the marshal module can not separate the distinct data fields into multiple lines, which seriously restrict the human readability. So we will describe and use the json module in this section, which is also easy to use, but has a larger set of functionality and can generate real human-readable text files by use of the pretty() function.
Other available external packages for data serialization are the nim-serialization module set from (https://github.com/status-im/nim-serialization) and the very powerful but complicated NimYaml implementation (https://nimyaml.org/). We may describe these packages in Part V of the book. An alternative to the json module of Nim’s standard library is the https://github.com/treeform/jsony package, which has the advantage, that is can handle default values and missing object fields. Both are useful when we extend our software and need to process old data files.
When we have to store and read back Nim data to nonvolatile storage media, we have some serious points to consider: First, we have to handle various data types like integers, floats, strings, objects — and even the container types like sequences. And we may have to support reference types and maybe also inherited types and containers filled with heterogeneous, subclassed reference objects. The json module supports all Nim data types, including containers and references, but not heterogeneous sequences.
For our first JSON example, let us assume that we have written a small tool that let the user create some geometrical shapes, and we want to store the shapes in a file and read it back. For that, we generally use an intermediate step, which converts the data to a string, and the string back to the data object. The string is then written to a file or stream, and read back. Let’s start with the string conversion. Storing that string and reading it back from the file will be explained subsequently.
import std/json
type
Line = object
x1, y1, x2, y2: float
Circ = ref object of RootRef
x0, y0: float
radius: float
Data = object
lines: seq[Line]
circs: seq[Circ]
var
l1 = Line(x1: 0, y1: 0, x2: 5, y2: 10)
c1 = Circ(x0: 7, y0: 3, radius: 20)
d1, d2: Data
d1.lines.add(l1)
d1.circs.add(c1)
d1.lines.add(Line(x1: 3, y1: 2, x2: 7, y2: 9))
d1.circs.add(Circ(x0: 9, y0: 7, radius: 2))
let str1 = pretty(%* d1) # convert the content of variable d1 to a [.str]#string#
echo str1 # let us see how the [.str]#strings# looks
d2 = to(parseJson(str1), Data) # read the [.str]#string# back into a data instance
let str2 = pretty(%* d2) # and verify that we got back the original content
echo str2
# assert d1 == d2 would fail
assert str1 == str2When we run the program, we would get this output:
{
"lines": [
{
"x1": 0.0,
"y1": 0.0,
"x2": 5.0,
"y2": 10.0
},
{
"x1": 3.0,
"y1": 2.0,
"x2": 7.0,
"y2": 9.0
}
],
"circs": [
{
"x0": 7.0,
"y0": 3.0,
"radius": 20.0
},
{
"x0": 9.0,
"y0": 7.0,
"radius": 2.0
}
]
}
{
"lines": [
{
"x1": 0.0,
"y1": 0.0,
"x2": 5.0,
"y2": 10.0
},
{
"x1": 3.0,
"y1": 2.0,
"x2": 7.0,
"y2": 9.0
}
],
"circs": [
{
"x0": 7.0,
"y0": 3.0,
"radius": 20.0
},
{
"x0": 9.0,
"y0": 7.0,
"radius": 2.0
}
]
}
As you can see, we converted the instance d1 of type Data to a string, and then we converted that string back to the variable d2, achieving matching content. We have intentionally made Circ a ref object to demonstrate that the conversion works for both value and reference objects. In the example program, we applied the %* macro to our data instance d1 to get a JsonNode, and finally use the pretty() function to get a nice multi-line string. To fill the variable d2 with the content stored in str1, we first have to apply parseJson() on the string, and then use to() to unmarshal the JSON node into the matching object type.
Now, let us investigate what happens when we try to use the json module with a container with heterogeneous ref objects. For that, we subclass the Disc type, creating a new Arc type:
import std/json
from std/math import PI
type
Line = object
x1, y1, x2, y2: float
Circ = ref object of RootRef
x0, y0: float
radius: float
Arc = ref object of Circ
startAngle, endAngle: float
Data = object
lines: seq[Line]
circs: seq[Circ]
var
d1, d2: Data
d1.lines.add(Line(x1: 0, y1: 0, x2: 5, y2: 10))
d1.circs.add(Circ(x0: 7, y0: 3, radius: 20))
d1.lines.add(Line(x1: 3, y1: 2, x2: 7, y2: 9))
d1.circs.add(Arc(x0: 9, y0: 7, radius: 2, startAngle: 0, endAngle: PI))
echo d1.circs[1] of Arc, " ", Arc(d1.circs[1]).endAngle
let str1 = pretty(%* d1)
d2 = to(parseJson(str1), Data)
let str2 = pretty(%* d2)
echo str2
echo d2.circs[1] of ArcThe output of that program looks like this:
true 3.141592653589793
{
"lines": [
{
"x1": 0.0,
"y1": 0.0,
"x2": 5.0,
"y2": 10.0
},
{
"x1": 3.0,
"y1": 2.0,
"x2": 7.0,
"y2": 9.0
}
],
"circs": [
{
"x0": 7.0,
"y0": 3.0,
"radius": 20.0
},
{
"x0": 9.0,
"y0": 7.0,
"radius": 2.0
}
]
}
false
While our initial instance d1 contains a run-time value of Arc type, and so we can access the endAngle field, we get false as result for the of Arc test for the d2 instance. So run-time type information is lost.
When we have to store different data types in one container, then one solution is to use object variants, which should work with the json module. Another obvious possibility is to just copy the data into containers with the appropriate static type before storing them in an external medium, and copy them back when we read the data back from external storage. We will show an example of that now:
import std/json
from std/math import PI
type
Line = ref object of RootRef
x1, y1, x2, y2: float
Circ = ref object of RootRef
x0, y0: float
radius: float
Arc = ref object of Circ
startAngle, endAngle: float
Data = object
elements: seq[RootRef]
Storage = object
lines: seq[Line]
circs: seq[Circ]
arcs: seq[Arc]
const
DataFileName = "MyJsonTest.json"
var
d1, d2: Data
storage1, storage2: Storage
outFile, inFile: File
d1.elements.add(Line(x1: 0, y1: 0, x2: 5, y2: 10))
d1.elements.add(Circ(x0: 7, y0: 3, radius: 20))
d1.elements.add(Line(x1: 3, y1: 2, x2: 7, y2: 9))
d1.elements.add(Arc(x0: 9, y0: 7, radius: 2, startAngle: 0, endAngle: PI))
for el in d1.elements:
if el of Arc:
storage1.arcs.add(Arc(el))
elif el of Circ:
storage1.circs.add(Circ(el))
elif el of Line:
storage1.lines.add(Line(el))
else:
assert(false)
let str1 = pretty(%* storage1)
if not open(outFile, DataFilename, fmWrite):
echo "Could not open file for storing data"
quit()
outFile.write(str1)
outFile.close
if not open(inFile, DataFilename, fmRead):
echo "Could not open file for recovering data"
quit()
let str2 = inFile.readAll()
inFile.close
assert str1 == str2
storage2 = to(parseJson(str2), Storage)
for el in storage2.lines:
d2.elements.add(el)
for el in storage2.circs:
d2.elements.add(el)
for el in storage2.arcs:
d2.elements.add(el)
for el in d2.elements:
if el of Arc:
echo "found arc with endAngle: ", Arc(el).endAngleFor this example program, we use the object-oriented programming style and keep all the geometric object instances as references in a single sequence. Note that doing this is not always a good idea, as this OOP style with the use of references and dynamic run-time dispatch can be slower due to many small heap allocations for each ref object and due to the dynamic dispatch (if el of …) overhead. Using multiple, homogeneous sequences with value types for each of our data types can be a better solution, and in that way, you have more control whenever you process the data, for drawing them on the screen or user interaction for example. Maybe you want to draw all the lines first? But there can be situations where we really need to have all the objects as references in a single container. A typical situation is, that we use an RTree for fast object location. RTrees are data structures that can store two-dimensional or multidimensional geometric objects and their rectangular bounding boxes in a tree-like fashion for fast object location. This may be used in a drawing program so that coordinates of a user’s mouse click can be fast matched to an object. For such a use case, we would prefer having all the object instances available in a single RTree instead of using one RTree data structure for each object shape.
Our program defines an additional Storage data type, which contains homogeneous sequences for each possible geometric shape. We then copy all our ref objects from the sequence of elements in the matching sequences of the storage object using the dynamic of type query to select the exact matching sequence.
After that, we can use the already known JSON functions to serialize the storage object into a string, store the string to a file, read it back, and deserialize the data again into a different variable of Storage data type. Finally, we use a simple for loop to copy the ref objects from the temporary storage object into a Data variable called d2. For storing the data in an external nonvolatile medium, we use the File data type and the related functions open(), close(), write(), and read(). Their use should be obvious: We pass an uninitialized variable of File data type, a file name, and a file mode to open(), use write() to write the whole string, and use readAll() to read the data back. When done with each file, we use close() to close the file. The File data type is part of the io module, which is again part of the system module, so we don’t have to import these modules. We could have used as an alternative also the streams module. You will learn some more details about the File data type and the streams module in later sections of the book.
| We should mention that unfortunately, life is not always that easy, as sometimes we can not freely select the textual output format. Imagine you are creating a CAD (computer-aided design) tool that needs to be compatible with another existing tool. In this case, the textual storage format is already defined by the existing tool, and generally, that format does not match the JSON or YAML file format. Even when the format should be one of these, matching it exactly would be difficult. While writing out our own data in that foreign format is still not really difficult, as we can just write single matching strings, reading in the textual data is more complicated: Typically, we would read the input file line by line, and we would have to inspect and interpret each input string, maybe by the use of regular expressions or a custom parser. That generally includes handling missing or invalid data. |
References:
Streams and files
In the previous section, we learned how we can store structured data like a sequence of objects, in a human-readable form to nonvolatile media by use of the json module.
Text in the form of a single string, or in the form of a container holding multiple strings, constitutes a kind of unstructured data that we can write directly to nonvolatile storage media and read back later. We can do the same with containers of basic, unstructured data types like integer or floating-point numbers, and with some restrictions, we can even write tuples or objects directly as raw bits and bytes to external storage and read them back later. Of course, in this manner, the stored data becomes a binary blob, which cannot be read or modified by other tools, such as a text editor. But that may not be intended or advantageous at all, perhaps we’re conducting scientific data processing with a single tool and simply want to temporarily store the data to continue processing it later.
Files
For storing unstructured data, Nim provides the io module with the File data type and related procedures, and the streams module with the Stream data type and related procedures. While a File in Nim is currently only a pointer to a C file, the streams module operates at a higher abstraction level. Although the Nim language does not directly support interfaces, the Stream data type of the streams module is some form of an interface, which is implemented by a StringStream and a FileStream data type. Internally, this interface concept is realized by storing a set of function pointers in the Stream instance.
When we have to store unstructured data like text, it is not always clear if we better should use Files or Streams. Streams may be the better choice when we (also) want to use a string as a data source like a file or when we need the peek() functions of the streams module to access data without advancing the position in the stream.
We will use the File data type of the io module first. As the io module is part of the system module, we do not have to import it before we can use it. The principle usage of files is that we call the function open() to open a file with the given name, call some procedures to write or read data, and finally close() the file. While Nim supports destructors, when we compile with --mm:arc or --mm:orc, the io module does not yet use them, so we should actually call close() to close the file.
from std/os import fileExists
proc main =
const FN = "NoImportantData"
if os.fileExists(FN):
echo "File exists, we may overwrite important data"
quit()
var f: File = open(FN, fmWrite)
f.write("Hello ")
f.writeLine("World!")
f.writeLine(3.1415)
f.close
main()Running that program will create a text file with this content in the current working directory:
Hello World! 3.1415
At the start of our main() proc, we check if a file with that name already exists in the current working directory by using the function os.fileExists() to ensure that we do not overwrite important data.
Module io provides multiple overloaded open() procedures. Here we use a variant that returns a file and raises an exception in the unlikely case of an error. The necessary parameters are a file name and a file mode. As we want to create a new file, mode fmWrite is used.
Note that fmWrite would clear the content of an existing file, so we cannot use fmWrite to append data to an existing file. We would have to use fmReadWriteExisting or fmAppend to append data to an already existing file. As this open() proc can raise an exception, it may make sense to enclose it in a try/except block, or we could use an open() variant which returns a boolean value to indicate success instead. When the file is successfully opened, we can use procedures like write() or writeLine() to write text strings to the file. Both procs accept multiple arguments and apply the stringify operator $ on them before writing the content. WriteLine() writes a '\n' after the last argument to start a new line. When done, we call close() to close the file. The operating system will close the file for us when our program terminates, so calling close() may not seem important. However, if we open many files without closing them, we may eventually encounter errors from the operating system about too many open files, causing our program to fail or terminate.
The close() proc receives the file not as a var parameter, so it cannot set the file value to nil. When the file has the value nil, then the close() call is ignored, but when we would call close() multiple times with a non-nil argument, we get a program crash. We may use the try/finally or the defer construct to ensure that we really close the file when done.
The io module provides some procedures like writeBuffer(), writeBytes(), or writeChars(), which gives us as a return value the actual number of bytes written. This return value should generally match the requested number of bytes to write but can be smaller when the write operation fully or partially failed, e.g. because the storage medium had no capacity left.
When performance really matters, we should note that passing non-string arguments to write() or writLine() procs using their optional auto-stringify feature involves the allocation of new strings and incurs some performance cost. When we already have a string variable available in our program, it can be faster to first convert our data into that variable and then pass it to the write() or writeLine() procs.
Reading strings from a file works very similarly:
proc main =
var f: File
try:
f = open("NoImportantData", fmRead)
echo f.readLine
echo f.readLine
finally:
if f != nil: # test for nil not really necessary, close() would ignore the call for f == nil
f.close
main()The readLine() procedure reads in a line of text. The LF, CR, or CRLF line end markers are not part of the returned text string. Of course, we may get an empty string with length zero back, when we read a line that immediately starts with LF, CR, or CRLF, or we may get back a string with no visible characters but only a few spaces or tabulator characters '\t' when a line contains only white space. When our read() operations have moved the actual file I/O position to the end of the file, and we try to read more content, an exception is raised.
The io module provides a readLine() procedure that returns a newly allocated string, and another one that takes an existing string as a var parameter. The latter should be a bit faster, as it can avoid the allocation of a new buffer when the passed string has already enough capacity.
The io module provides a function called endOfFile() with a boolean result, which we can use to check if the end-of-file position is already reached. The provided functions readBuffer(), readBytes(), or readChars() return the actual number of bytes read, which can be smaller than the requested value when the end of the file is reached earlier. Currently, readChars() checks if the passed openArray[char] has enough capacity for the request, but readBytes() does no check!
We can also use the lines() iterator to iterate over the lines of a text file or use the readLines() procedure to read the content line by line.
proc main =
var f: File
f = open("NoImportantData", fmRead)
for str in f.lines: # iterator
echo str
f.setFilePos(0) # read again from start index 0
var s: string
while f.readLine(s): # proc
echo s
f.close
var sq = readLines("NoImportantData", 2) # read lines to seq of strings
echo sq
main()As iterating over the complete file line by line moves the actual file position to the end of the file, we need to call setFilePos() to return to the start position. The readLines() procedure takes a filename and the number of lines to be read as parameters, and returns a seq of strings. When the file does not contain at least the number of requested lines, an EOF exception is raised. Another provided procedure is readAll(), which reads the entire file content into a returned string variable. For readAll() to work, the actual file position has to be the start of the file. In case of an error, an exception is raised.
We can also write and read binary data directly to a file, without converting it to (human-readable) strings first:
proc main =
var f: File
f = open("NoImportantData", fmWrite)
var i: int = 123
var x: float = 3.1415
assert f.writeBuffer(addr(x), sizeof(x)) == sizeof(x)
assert f.writeBuffer(addr(i), sizeof(i)) == sizeof(i)
f.close
f = open("NoImportantData", fmRead)
assert f.readBuffer(addr(x), sizeof(x)) == sizeof(x)
assert f.readBuffer(addr(i), sizeof(i)) == sizeof(i)
f.close
echo i, " ", x
main()Of course, these are low-level, dangerous operations. While writeBuffer() should never crash our program, readBuffer() can do that easily when we specify wrong sizes or destination addresses, as that may overwrite other data unintentionally. So we would generally not use these procedures directly but write safer helper procs, when we really need or want this form of binary file access. A potential use case may be quickly storing big data sets with limited hardware resources. For example, storing a float32 only requires 4 bytes on the storage medium, and file I/O is fast. However, the same number, when represented as human-readable digits, may require more than 8 bytes (1.234567E3), and the process of converting to a string and parsing it back can be time-consuming.
In the same way, we can use writeBuffer() and readBuffer() to store tuples, objects, arrays, or sequences of these directly in binary form:
type
O = object
x: float
i: int
b: bool
proc main =
var s: seq[O]
s.add(O(x: 3.1415, i: 12, b: true))
var f: File
f = open("NoImportantData", fmWrite)
assert f.writeBuffer(addr(s[0]), sizeof(O) * s.len) == sizeof(O) * s.len
f.close
f = open("NoImportantData", fmRead)
var s2 = newSeq[O](1)
assert f.readBuffer(addr(s2[0]), sizeof(O) * s2.len) == sizeof(O) * s2.len
f.close
echo s2[0]
main()The output should look like this:
(x: 3.1415, i: 12, b: true)
But of course, this is dangerous and fragile. We present this example because beginners often inquire about it and may want to try it at least once. Obviously, this can only work when the tuples or objects contain only plain data types; that is, no strings, no references, and certainly no other nested container types like sequences or tables. And reading back data may fail when we use a different OS or a different compiler version.
The io module provides the File variables stdin, stdout, and stderr, which are the standard input, output, and error streams. Sometimes we use stdout.write() instead of the common echo() proc when we want to write something to the terminal window without moving the cursor to the next line already.
An important function of the io module is flushFile(), which is used to ensure that all buffer content of buffered files is actually written to the file. This is important when we use the stdout File variable, maybe to ask the user a question in the terminal window. We would call stdout.flushFile() to ensure that the user really sees the text on the screen immediately. The echo() proc calls flushFile() automatically after each output operation. When we close a file, flushFile() should be called automatically, but when our program is terminated without calling close(), it may depend on the actual implementation and operating system.
The io module provides more useful procedures, but we will conclude this introductory section here and continue with the streams module in the next section.
References:
Streams
A stream is an abstract interface for performing certain I/O operations, which was introduced by languages like C or Modula-2 decades ago. The streams module of the Nim standard library provides a FileStream and a StringStream implementation, which behave very similarly. Nim’s streams module provides similar functions as the io module with its File data type, but it can operate on strings instead of on Files, and it provides a set of peek() functions to access data at the current read position without moving forward. And some functions are more robust, for example, closing a stream multiple times does not crash the program, as the first close() call sets the file variable of file streams to nil so that following close() calls are ignored. Currently, the streams module does not support automatically closing streams when they go out of scope.
We can create a new FileStream by calling the overloaded procs newFileStream() with an already opened file or a filename as a parameter, or we can use openFileStream(). The latter raises an exception when the stream can not be opened, while the former procedure just return nil. We can write and read textual data with the streams module in a way very similar to how we did it with the io module and the File data type:
from std/os import fileExists
import streams
proc main =
const SN = "NoImportantData" # stream name
if os.fileExists(SN):
echo "File exists, we may overwrite important data"
quit()
var fstream = newFileStream(SN, fmReadWrite)
if fstream != nil:
fstream.write(123, ' ')
fstream.writeLine(3.1415)
fstream.setPosition(0)
let l = fstream.readLine()
fstream.close()
assert l == "123 3.1415"
main()We again test if a file with that name already exists. Then we try to create a new FileStream by using file mode fmReadWrite, so that we can write and read from that file. Finally, we write two numbers (which are automatically converted to strings), set the file position back to the beginning, and verify what we wrote by reading it again before we close the stream.
In a very similar way, we can write to and read from string streams:
import std/streams
proc main =
var stream = newStringStream()
stream.write(123, ' ')
stream.writeLine(3.1415)
stream.setPosition(0)
let l = stream.readLine()
stream.close()
assert l == "123 3.1415"
main()In the example above, we do not test if the stream variable is not nil, as newStringStream() should never fail.
For buffered streams, we can call flush() to ensure that the buffer content (of file streams) is written, similar to what we can do for plain Files of the io module. Instead of io.endofFile(), we use the procedure atEnd(), to test if the current stream position is already at the end of the stream. Functions getPosition() and setPosition() are available to query or set the actual position in the stream. While the io module with its File data type supports position modes relative to the current position or the file end for io.setFilePos(), streams.setPosition() always uses absolute values — that is, positions measured from the beginning of the stream. The streams module also provides the low-level procs readData() and readDataStr(), which read data to a memory region or into a string and returns the actual number of bytes read to indicate success. And as for the io module, a procedure readAll() is available to read all data of a stream into the returned string variable.
The procedure writeLine() always writes the passed arguments as strings. The overloaded write() procs, which accept varargs arguments, write the passed values as strings and apply the stringify operator $ if necessary. The same does the writeLine() procedure, but it writes a newline character when all passed variables have been written. One more overloaded write proc for single string parameters exists.
But for single non-string arguments, a generic write() proc is used, which writes numbers (and other data types like boolean types or single characters) directly in binary form without converting them to strings.
To read the binary numbers back, we can use functions like readFloat64() which have a well-defined return type and read a fixed number of bytes. Or we can use the generic read() proc, which accepts a var parameter that defines the data type that we intend to read in binary form. Additional to the various read() procedures, the streams module provides a set of peek() procs, which reads data without moving the actual position in the stream forward. This can be useful for parsing files, as it allows us to read the same information multiple times with ease. Internally, the peek() function uses a call of setPosition() to save the current position and one more call of setPosition() to set back the old position to the initial value, so peek() has some overhead.
import std/streams
from std/os import getFileSize
proc main =
const SN = "NoImportantData" # stream name
var fstream = newFileStream(SN, fmReadWrite)
if fstream != nil:
fstream.write("012") # write a 3 byte string
var pi: float64 = 3.1415
fstream.write(pi) # write as 8 byte binary blob
fstream.setPosition(0) # prepare for reading from start
var i16: int16
i16 = fstream.peekint16 # read first 2 bytes as int16, do not change actual position
assert i16 == '0'.ord + '1'.ord * 256
var i8: int8
i8 = fstream.readInt8 # read back one byte
# fstream.read(i8) # does work also
assert i8 == '0'.ord # char(0) has position 48 in ASCII table
assert i8 == 48
var buffer: array[2, char]
fstream.read(buffer)
let x = fstream.readFloat64 # read back in binary form
assert x == 3.1415
fstream.close()
assert buffer == ['1', '2']
assert os.getFileSize(SN) == 3 + 8 # 3 byte string and a float64
main()In the example above, we write a three-byte long string and a float64 to the file stream. We call setPosition(0), to read the stream from the beginning again, and then read in an int16 with the function peekint16() without moving the actual position forward, followed by readInt8(), which moves the actual position one byte forward. (Instead of readInt8(), we could also call read() with variable i8 as passed var parameter.) Then we read in two bytes, and finally the float64 value at the end of the stream. Finally, by using the function getFileSize() from the os module, we check if the file really has the expected size.
The streams module provides many functions, and the possible writing of data as strings or in binary form can make using that module a bit daunting at first. However, most procs have examples in the API docs, which help you to use them.
References:
String processing
String processing is a wide area. Nim’s standard library provides various pure Nim modules like strutils, parseutils, and strscans for supporting this task, and the impure re and nre modules and external packages support more advanced operations like string pattern matching with regular expressions (regex) or by use of the parsing expression grammar (PEG). We will start with the strutils module, which is one of the most used modules of the Nim standard library. Then we will introduce some more specialized modules like strscans, parsecsv, parseutils and strformat. While parsing strings with regular expressions or by use of the parsing expression grammar is very flexible and powerful, it is not that easy, not the fastest solution, and not that often really needed. So we have moved the Regex section to the end of this Part III of the book, and we introduce PEGs later in part V, where we discuss some useful external packages.
Whenever we do string processing in Nim, we should care a bit for performance, as some string operations can be slow by design. For simple tasks, we should prefer to use functions from the simpler modules such as strutils when possible, and resort to Regex or PEG only when really necessary or when performance is not critical. And even when we use elementary simple functions like a string split, it is generally good to have a feeling of how the requested operations may work. Whenever string functions return a string as a result, this implies an allocation, which takes some time and consumes some memory. An example is the split() operation, which returns a sequence of multiple strings. The split() function is easy to use, making it often the first choice when we want to process lines of text read from files. But as for each section of the split line a string is allocated, it may not be as fast as desired. In some cases, the compiler might be able to optimize the splitting process, but it is also a good idea to think about other ways to extract the data, maybe by applying procs from the strscans module, which can parse lines directly into passed var parameters, avoiding unnecessary allocations. Nim 2.0 may get support for view types, which functions like split() may use as return types to reuse slices of the initial string instead of allocating new result strings.
Basic string operations
We discussed Nim’s string data type already in Part II of the book. Remember that a string in Nim is a variable-size container for ASCII characters. Strings can be plain ASCII strings, or the bytes of the string can be interpreted as Unicode glyphs. Nim has also a cstring data type, which was initially introduced to be compatible with the character arrays used in C libraries as strings, but is now called compatible string as cstrings do also support the JavaScript backend. Nim strings can be passed directly to C libraries, as a Nim string contains a Null terminated buffer for the actual data, which is identical to a C language string. So, converting a Nim string to a C language string or passing a Nim string to a C library is free of cost, while converting a C string to a Nim string always involves allocating a new Nim string and copying the data content. Technically, for a Nim string s, addr s[0] is the C string pointer, called * char in C language. Whenever we pass strings to C libraries, we have to care for the fact that Nim’s garbage collector may deallocate the string automatically. Most C libs create copies of passed strings when the library uses the string for a longer time span. GTK, for example, does this with text for its widgets. But when the C library does not copy the string but uses it directly for a longer time, then it can occur that the Nim code frees the string, as the only Nim variable referring to the string goes out of scope, but the C library still uses the string. For that rare case, we may call GC_ref() on the string to prevent garbage collection, but that may generate memory leaks then. And when we compile our program with options --mm:arc or --mm:orc, applying GC_ref() on strings does not work anymore! In the case that C libraries create strings, they provide generally also a function to deallocate the string. When we use such a C function, it is typically the best solution, that we copy the string from the C library to a Nim string and immediately deallocate the C string by a call of the provided free()/dealloc() function. For most C libraries, there exist good high-level bindings, which do not have these issues, so we mostly can use C libs like pure Nim libs.
Nim’s system module provides already some basic string operations, like accessing single characters by the subscript operator [], accessing slices of multiple adjacent characters, or joining multiple strings with the & operator. The overloaded add() functions to append single characters or other strings to existing string variables are also provided by the system module.
var s: string = "I like"
s &= " Nim."
s[^1] = '!'
s[0 .. 4] = "We low" # result is: "We love Nim!"In the above example, we start by assigning a string literal to the string variable s, then we append one more string literal and finally replace the last character and the first five characters with another character and by another string. Note that by using the slice operator, we can not only replace character ranges, but we can also replace slices of different lengths. This way, we can also delete ranges in the string by replacing them with the empty string "".
The system module also defines the stringify operator $, which converts expressions into their string representations when placed in front of them. Procedures like echo() apply the stringify operator automatically to all their arguments when necessary. And the system module provides the contains() function, which we can use to test if a string contains a character. Instead of contains(), we can also use the in operator.
echo $7
echo "Nim".contains('i')
echo 'i' in "Nim"
The system module also provides the {promis newString() and newStringOfCap(), which are mostly used for optimizing purposes. The function newString(n) creates a string of length n with uninitialized content. We would have to assign characters to the positions 0 .. n-1 to create a valid string. The function newStringOfCap() creates a string with a length of zero, but with a buffer capacity of n characters. When we know the needed buffer capacity, or at least a lower bound of it, it makes sense to create the string with newStringOfCap() with optimal buffer size to avoid reallocations. Of course, we could still append more data; Nim would then allocate a larger buffer and copy the old content.
var s1 = newString('z'.ord - 'a'.ord + 1)
for c in items('a' .. 'z'):
s1[c.ord - 'a'.ord] = c
var s2 = newStringOfCap(32) # we intend to append not more than 32 characters, but we could do.
for c in 'a' .. 'z':
s2.add(c)
# s1, s2 is abcdefghijklmnopqrstuvwxyzFilling characters into an existing string using the subscript operator [] is faster than appending single characters with the add() function. This is because the add() function must check if the string still has enough capacity and also needs to increase the actual string length by one with each call.
Note that a single character like 'a' is very different from a string with only one character like "a". A character in Nim is nothing more than a single byte, while a string — even one with only one character or an empty one — is an opaque entity with length, capacity, and a pointer to a data buffer. When a single character is sufficient, we should use it, not a string containing a single character. A function call such as s.add("a") might produce less optimized code than s.add('a'), but the compiler might optimize the former for us. When we consider optimization, we might wonder if, in
var s = "Hello!"
echo s
s = "Bye."
echo sline 3 allocates a new string or just copies the string literal "Bye." in the existing data area. Well, we would hope for the latter, of course.
Another interesting question is whether, in
var s = "Result is: " var x = 12.34 echo s, x echo s & $x
we would be better off using line 3 or line 4. Line 3 looks more clear, and we assume that it also would produce better code, as the actual append operation is avoided.
Often used functions are len() and setLen() to query and set the length of a string. Although len() resembles a function call, it is an internal compiler function, so calls are fully optimized. So it is OK to write
for i in 0 .. s.len():
echo '*'It is not necessary to introduce a temporary variable like let l = s.len() to avoid many function calls. In C, this differs, as calling the strLen() function would not only imply a function call, but that function would also need to count all the characters up to the terminating '\x0' since C strings lack a length field. The function setLen() is mostly used to truncate strings. A call like s.setLen(0) makes s look like a newly allocated string, but its data buffer can be reused. Reusing strings is generally better for performance than allocating many new strings. The setLen() function is rarely used to increase the string length — in that case, an allocation of a larger data buffer can occur, and the string would still look the same as initially, and all the new string positions would still contain the default binary zero content. We would have to fill in actual characters by use of the [] subscript operator. In Nim version 1.6, a call of s.setLen(0) overwrites the whole old content with '\0', which can cost some performance and may be avoided in version 2.0. To get the lowest and highest character index of a string, we can use s.low and s.high. s.low should always return zero, while high() is identical to len() - 1. Therefore, high() is -1 for an empty string. Note that although calling high() and len() on a Nim string has no costs, this is not the case for cstrings, which lack a length field.
The system module provides the overloaded & operator, which we can use to concatenate chars and strings, the &= operator to append a new string to an existing string, and the add() functions to append characters or strings to an existing string. For peak performance, it is advisable to consistently employ the most straightforward, "native" operations, provided they do not compromise the clarity of our code or we have assurance that the compiler is proficient at optimizing more complex constructs.
var s = "Ni"
s = s & "m" # maybe not a good idea for optimal performance
s.add('m') # betterThe add() function can also be used to add a cstring to a Nim string, and the JS backend even allows one cstring to be appended to another one using add() calls.
The module system also exports a substr() procedure, which copies and returns a slice of a string. Overloads with an optional first index defaulting to 0 and an optional last index defaulting to s.high exist.
var s = "Hello!"
assert s.substr(2, 3) == s[2 .. 3]
s = "ABC"
echo s[0 .. 5] # fail
echo s.substr(0, 5) # index is clipped to s.high
s[0 .. 5] = "" # failOf course, == and != operators for string comparison are provided. To test if a string is empty, we can compare it with an empty string literal or test if len() is zero. The latter is guaranteed to have the best performance, but the former, though slightly shorter, should not underperform significantly. Some other languages provide an empty() test function for this; we may define our own if we deem it necessary.
if s != "":
if s.len != 0:When we pass a string to a procedure that does no operations with it, maybe it only calls echo() or stdout.write() to print it, then it may have a tiny performance advantage to pass it as cstring. This is similar to how we might pass sequences as openArray to functions, which also avoids one level of indirection. Also note that, while a Nim string is a value type and we cannot test it for nil or return nil from a procedure intended to return a string, this restriction does not apply to cstrings. Unfortunately, recent Nim versions have started to complain when we use cstrings as procedure parameters. In some scenarios, e.g. when we use Nim trampoline functions to call C libraries, these complaints may not be really justified.
Module stringutils
The module stringutils provides a set of functions (120 currently) and a few iterators for simple string operations. Using those functions and iterators is simple in most cases and mostly well explained in the API docs. Remembering which functions exist, their exact name, and the function arguments can be a bit difficult at first. We will introduce in this section some of the most used or more difficult functions, and give some warnings when the actual performance may not be as good as expected.
Performance-critical operations are generally those that have to allocate new strings or shift many characters, such as text inserting operations. Note that some functions of this module, like toUpperAscii() work only with the lower and upper ASCII letters. For Unicode operations, we may need the unicode module.
The stringutils module supports string interpolation through the use of the % operator.
import std/strutils
echo "The $1 programming language is $2." % ["best", "Nim"]
echo "The $# programming languages are $#." % ["most difficult", "C++, Rust and Haskell"]
echo "A $adj programming language is $lang." % ["adj", "low level", "lang", "assembly"]
echo "Let's learn $#" % "Nim!"
echo format("I know $# programming languages.", 2)We can use $1 up to $9 to mark positions where string n from the array should be inserted or just $ to insert the strings in the order as they appear in the array. We can also use named insert markers and specify name-value string pairs in the array. For a single string, we can omit the array and pass it just as a string, and finally, we can use the format() proc to enable stringify for the parameters.
We have already mentioned the useful but performance-critical set of split() functions:
import std/strutils
let str = "Zero, first, second, third"
var s: seq[string] = str.split(", ")
echo s
echo str.split(", ", 0)
echo str.split(", ", 1)
echo str.split(", ", 3)
echo str.split(", ", 4)@["Zero", "first", "second", "third"] @["Zero, first, second, third"] @["Zero", "first, second, third"] @["Zero", "first", "second", "third"] @["Zero", "first", "second", "third"]
We used the split() variant, which accepts a string as a split marker. This function accepts one optional parameter for the number of splits to execute and returns a sequence containing the single strings. The split marker string, also called a separator, is removed from the strings. The default value for the number of splits is -1, indicating that we want a split at each separator position. If we specify a positive number n, then only n splits are executed and the last element of the returned sequence will contain the remainder of the string. When we specify a value for the intended splits, which is larger than the number of contained split markers, then we get a full split.
The reason why this function is not very fast is that it has to allocate a sequence for the return value and a new string for each split, and one more for the last string or the remainder. For the case that we do need only the first few strings of the split, it is a good idea to specify the number of actual splits to increase performance. Nim 2.0 may fully support view types, which may avoid all the string allocations for the returned results and so improve the performance.
The strutils module provides overloaded functions that use single characters as separators or accept a set of characters as separators, so we can split at space, tabulator, comma, or semicolon with {' ', '\t', ',', ';'}. And a function splitWhitespace() is available to split at whitespace-like spaces and tabulators, which removes all the whitespace between the strings. Notice that the split() function for strings or single characters does one split for each separator, so we can get empty strings as result as in
import std/strutils
let str = "Zero___first_second__third"
let str2 = "Zero first\tsecond third"
echo str.split('_')
echo str2.splitWhiteSpace()
# @["Zero", "", "", "first", "second", "", "third"]
# @["Zero", "first", "second", "third"]An interesting behavior of splitWhiteSpace() is that whitespace at the start or end of a string is just ignored, while the split() function returns additional empty strings when the string to split starts or ends with the separator:
import std/strutils
let str = "_Zero_first_second_third_"
let str2 = " Zero first\tsecond third "
echo str.split('_')
echo str2.splitWhiteSpace()
# @["", "Zero", "first", "second", "third", ""]
# @["Zero", "first", "second", "third"]Another function is splitLines(), which splits a string at CR, LF, or CR-LF characters.
For these splitting functions also iterator variants exist, which behave like the functions with the same name. When we limit the number of splits to perform for the iterators, we may get the remaining string as the last returned value. You should consult the API docs for details if necessary
Functions named rsplit() are also available. They behave like split(), but start the splitting process from the end of the string. We can get the file extension of a filename with a command like filename.rsplit(1)[^1].
The functions removePrefix() and removeSuffix() can sometimes help to avoid expensive split operations. There are overloaded functions that remove all single characters, all characters from a set, or a single string:
import std/strutils
var s = "NNimmm Language"
s.removePrefix('N'); echo s # immm Language
s.removePrefix({'N', 'i', 'm', ' '}); echo s # Language
s.removePrefix("Langu"); echo s # age
s. removeSuffix("ge"); echo s # aOther useful functions are startsWith() and endsWith(), which accept a single character or a string and return a boolean value:
import std/strutils
var s = "Nim Language"
echo s.startsWith('N') # true
echo s.startsWith("Nim") # true
echo s.endsWith('e') # true
echo s.endsWith("Programming") # falseAn efficient function, similar to find(), is continuesWith(). It can be used like this: "Nim Language".continuesWith("Lang", 4). This tests if a string contains a substring at position n.
We can use the join() procedure to join strings in arrays or sequences to single strings with an optional glue string. Join() also works when the elements are not already strings — in this case, the stringify operator $ is applied first:
import std/strutils
var a = ["Nim", "Rust", "Julia"]
var s = a.join(", ")
echo s
echo s.split(", ").join("; ")
echo [1, 2, 3].join("; ")
# Nim, Rust, Julia
# Nim; Rust; Julia
# 1; 2; 3The overloaded find() functions accept optional start and end positions and return the index position of the first match or -1 when the search gave no result:
import std/strutils
var s = "Nim Language"
echo s.find('L') # 4
echo s.find({' ', 'a'}) # 3
echo s.find("age") # 9
echo s.find("Rust") # -1The overloaded contains() functions can be used to test if a string contains a character, a set of characters, or a substring. We can write sub in s instead of contains(s, sub). Note that the variant of this function for single character tests is defined in the system module.
The replace() function can be used to replace all occurrences of a character or a substring in a string and to return the new string. We can use replace() with an empty replacement to delete a substring. The also available delete() function is used to delete a range specified by two indices in place.
Additionally, a replaceWord() function exists, which does only replace whole words, i.e. words that are surrounded by word boundary characters like spaces, tabulators, or newlines.
The function multiReplace() is a variant, that can replace multiple substring/replacement pairs passed as tuples in one pass.
The function strip() can be used to remove multiple characters from a set at the start and the end of a string. The default character set is whitespace, and per default, strip() removes characters at both ends of the string. The function stripLineEnd() removes a single line end marker, such as \r, \n, \r\n, \f, \v, from the end of the string, but only once.
Sometimes useful is the boolean function isEmptyOrWhitespace() which checks if a string is empty or contains only whitespace. Also useful can be the function repeat() which returns a string that contains the passed character or the passed string n times, and the function spaces() which returns a string containing only n spaces.
For single-character tests, we have functions like isDigit(), isUpperAscii(), isLowerAscii(), isSpaceAscii, isAlphaNumeric(). Function isDigit() tests for characters '0'..'9', isUpperAscii() for 'A'..'Z', isLowerAscii() for 'a'..'z', isSpaceAscii() for ASCII whitespace (' ', '\t') and isAlphaNumeric() test for lower or upper case ASCII letter or a decimal digit.
Function toLowerAscii() converts all the characters 'A'..'Z' to lower case, and toUpperAscii() converts all the characters 'a'..'z' to upper case. The function argument can be a string or just a single character. With capitalizeAscii(), we can convert the first ASCII character of a string to upper case.
The overloaded count() functions can be used to count the characters or substrings in a string, while countLines() can be used to count the number of lines, where lines are defined as being separated by CR, LF, or CR-LF.
Sometimes, we may need functions like formatFloat(), formatBiggestFloat(), or formatEng() to format float numbers for output purposes. You would have to consult the strutils API docs for all the format details. An intToStr() function with an argument to specify the minimal string length is also available. The string may have leading zeros for alignment.
Finally, some important functions are the parsing functions like parseFloat() or parseInt(), which convert strings to float or integer numbers. Both raise an exception when the string does not contain a valid number.
The strutils module contains other functions that are not used as often, such as functions to convert data to hexadecimal, octal, or binary representation, or to parse numbers from these string representations back into numeric values. Other functions, like align(), center(), and indent() are available for string positioning. We will not try to describe these seldom-used functions here, as it is hard to remember the detailed behavior. You should skim the API docs and consult them when you need one of the exotic functions or when you have forgotten how to use a specific function.[64]
Module parseutils
The parseutils module provides a set of functions for efficient and fast parsing of strings. These functions avoid allocating new strings by passing back results in var string parameters and by returning the number of processed characters. The module parseutils is a good choice when we need to efficiently parse strings with a simple structure. For more complex input data, we might need to use RegEx or PEGs. Suppose we have a set of library names that include version numbers, but we need the plain names. The function parseWhile() is a good candidate for this task:
import std/parseutils
var libs = ["libdconf.so.1.0.0", "libnice.so.10.11.0", "libwebkit2gtk-5.0.so.0.0.0"]
var l = newStringOfCap(128)
for s in libs:
echo s.parseUntil(l, {'.', '-'})
echo l
echo s.parseWhile(l, {'a'..'z'})
echo lFirst, we allocate a string with sufficient capacity, allowing the parse() functions to use it without needing further allocations. As we want to receive the plain names, using parseWhile() with a charset as the last parameter appears to be a possible solution. However, as we can observe, this approach won’t work for webkit2gtk, which includes a digit in its name.
8 libdconf 8 libdconf 7 libnice 7 libnice 13 libwebkit2gtk 9 libwebkit
We can fix this by passing the extended char set {'a'..'z', '0'..'9'} to parseWhile() or by use of parseUntil() with a character set that does not belong to a name. Both functions return the number of processed characters and provide the captured string in the passed var parameter. Note that we can use the slice operator .. to specify character ranges for the charset parameter when the characters build a continuous sequence in the ASCII table.
A related function, skipUntil(), may be used when we are primarily interested in the version numbers following the name.
let p = s.skipUntil({'.', '-'})
echo s[p .. ^1]All these functions accept an optional start parameter as the last argument. A common use case is to use an integer position variable initialized with zero, which we increase by the returned value so that the parsing can continue at the current position in the string. The next example will use this strategy. For parseUntil() overloaded functions are available, which get not a charset, but a single character or a substring as a parameter. These functions stop parsing when the character or the substring is found and return that position.
Functions like parseInt() and parseFloat() can be used to extract numbers from strings:
import std/parseutils
var s = "In the year 2020 I gain 2.5 kg more fat."
var year: int
var value: float
var p = s.skipUntil({'0'..'9'})
p += parseUtils.parseInt(s, year, p)
p += s.skipUntil({'0'..'9'}, p)
p += parseUtils.parseFloat(s, value, p)
echo year, ": ", value # 2020: 2.5In the above example, we used the module prefix, as strutils contains also a parseInt() and a parseFloat() function. The functions parseBin(), parseOct() and parseHex() behave similarly. Returned is the number of processed characters. We add the returned value to the start position so that parsing can continue at the new position.
There are some more functions available in this module, which we will not discuss further. It is enough that you know that this module exists and provides some efficient parsing functions. Whenever you should really need one of these procedures, you would have to consult the API documentation for details.
Module strscans
The strscans module provides a scanf() macro, which can be used to extract substrings from textual user input. The content of the substrings is automatically converted to Nim variables of matching data types.
Processing well-defined strings is straightforward, and with user-defined matcher functions, even text inputs of less strict formats can be processed.
Let’s start with a simple example: Suppose we need to create a program that allows the user to create rectangles by entering the coordinates of two opposite corners in the format:
Rect x1,y1,x2,y2
import std/strscans
var x1, y1, x2, y2: float
var name: string
let input = "Rect 10.0,20.0,100,200"
if scanf(input, "$w $f,$f,$f,$f", name, x1, y1, x2, y2):
echo name, ' ', x1, ' ', y1, ' ', x2, ' ', y2 # Rect 10.0 20.0 100.0 200.0The first parameter for the scanf() macro is the user input string, while the second parameter is a pattern string that specifies how the input string should be processed. The following parameters are variables that get the results of the input evaluation. The second parameter has some similarities with a regular expression. The letters after the dollar sign specify the data type of the substrings, $i or $f ask to process an integer or a floating-point number, and $w requests to process an ASCII identifier. Other characters are captured verbatim, meaning the space character after $w must match a space in the input string, and the comma characters separating the $f must align with commas in the input string. The scanf() macro supports capturing some more data types, i.e. $c for an arbitrary character or $s for optional white space. The optional white space is not captured, just ignored. With the use of $s, our program already allows a more flexible input string:
let input = "Rect10.0, 20.0,100,200"
if scanf(input, "$w$s$f,$s$f,$s$f,$s$f", name, x1, y1, x2, y2):
echo name, ' ', x1, ' ', y1, ' ', x2, ' ', y2 # Rect 10.0 20.0 100.0 200.0To allow processing even more flexible input strings, it is possible to use user-definable matchers in the form of Nim procedures with a well-defined parameter signature. There are two different types of matcher procs supported — matchers to just skip a part of the input string, and capturing matchers. For the next example, we will use a procedure which can skip various separators like commas, semicolons, or white space. And we will use a capturing matcher proc for the object name.
import std/strscans
proc sep(input: string; start: int; seps: set[char] = {' ',',',';'}): int =
while start + result < input.len and input[start + result] in {' ','\t'}:
inc(result)
if start + result < input.len and input[start + result] in {';',','}:
inc(result)
while start + result < input.len and input[start + result] in {' ','\t'}:
inc(result)
proc stt(input: string; strVal: var string; start: int; n: int): int =
if input[start .. start + "Rect".high] == "Rect":
strVal = "Rect"
result = "Rect".len
var x1, y1, x2, y2: float
var name: string
let input = "Rect 10.0 ;20.0,100 , 200"
if scanf(input, "${stt(0)}$s$f$[sep]$f$[sep]$f$[sep]$f", name, x1, y1, x2, y2):
echo name, ' ', x1, ' ', y1, ' ', x2, ' ', y2 # Rect 10.0 20.0 100.0 200.0The use of our user-definable matcher sep() allows separating the four numbers with a colon or a semicolon with arbitrary leading or trailing white space, or with only white space. Multiple colons or semicolons between two numbers, resulting from a typo, would not be permitted.
The signature for this matcher proc has this shape:
proc sep(input: string; start: int; seps: set[char] = {' ',',',';'}): int =The first parameter is the string to process, while the second parameter signifies the starting position for processing. (In other words, the second parameter, of integer type, represents the actual position in the input string; this position moves throughout the capturing process from the start to the end of the input string. The end may not be reached if the capturing fails at some point.) The last parameter has always the type set[char] with a default value indicating which characters that procedure can process. Actually, a default value seems to be necessary, but the actual value seems not to matter. The procedure returns the number of characters to be skipped. A return value of zero is valid, indicating the provision for optional separators. In most cases, separators are necessary to process the input string, but we can imagine input formats where separators are optional, e.g. when an integer number is followed by a name. A name never starts with a digit, so the boundary between the two values is well-defined. This non-capturing matcher procedure is invoked using $[sep] in the pattern string.
The signature of the capturing matcher proc has this shape:
proc stt(input: string; strVal: var string; start: int; n: int): int =This procedure also takes the input string and the start position as parameters, and it must return the number of processed characters. But additionally, a var parameter of arbitrary data type is used to return the result of the capture, and the last parameter with arbitrary data type can influence the capturing process. One possible use of the last parameter is to use an integer value to limit the maximum number of characters to process. This procedure is called in the pattern string by using curly braces like ${stt(0)}.
Scanf() returns true, when all the parameters match, in that case, all the passed variables get assigned a value. Currently, scanf() does not support the capturing of optional data, as the entire process halts when a capture fails. This occurs, for instance, when $i is used to request an integer value, but the input string lacks decimal digits at the current capture position. In the same way, the whole capturing process stops when a user-defined capturing matcher returns zero, as no capturing is possible. So intermediate optional arguments are currently not supported. When the processing stops due to missing arguments, scanf() returns false, but the already processed captures still have a valid value assigned. In this way, we can use at least optional trailing arguments.
As the next example for the use of the scanf() macro, we will give a real-world example: A simple CAD (Computer-Aided Design) program has a PCB (Printed Circuit Board) mode, in which the user can create new PCB pads by entering the pad data in a text entry widget. A PCB pad is a rectangular-shaped copper field, which has an associated number and a name and maybe rounded corners. The user should be able to input two 2D coordinates, the corner radius, an optional x/y translation for the subsequent pad of the same size, the number of pads to create, and the pad number and name. That is
pad x1 y1 x2 y2 r dx dy n num name
The first five arguments are mandatory, while the rest are optional, with default values. The user should be able to separate the arguments using white space, a colon, or a semicolon. Additionally, the values x2 and y2 can be preceded with a + character to indicate that the x2, y2 tuple is not an absolute coordinate value, but the width and high of the pad.
A segment of the program to process this form of user input may look as follows:
import std/strscans
proc jecho(x: varargs[string, `$`]) =
for el in x:
stdout.write(el & " ")
stdout.write('\n')
stdout.flushfile
proc stt(input: string; strVal: var string; start: int; n: int): int =
if input[start .. start + "pad".high] == "pad":
strVal = "pad"
result = "pad".len
proc pls(input: string; plusVal: var int; start: int; n: int): int =
if input[start] == '+':
plusVal = 1 # bool
result = 1
proc sep(input: string; start: int; seps: set[char] = {' ',',',';'}): int =
while start + result < input.len and input[start + result] in {' ','\t'}:
inc(result)
if start + result < input.len and input[start + result] in {';',','}:
inc(result)
while start + result < input.len and input[start + result] in {' ','\t'}:
inc(result)
proc plus(input: string; plusVal: var int; start: int; n: int): int =
result = sep(input, start)
if input[start + result] == '+':
plusVal = 1 # bool
result += 1
var st: string
var x1, y1, x2, y2, dx, dy: float
var px2, py2: int # bool
var n: int
var number, name: string
(st, x1, y1, px2, x2, py2, y2, dx, dy, n, number, name) = ("pad", NaN, NaN, 0, NaN, 0, NaN, NaN, NaN, 0, "", "") # defaults
var res: bool
var input = "pad 10.0, 10 12 +12.0 ;20 0 8 Num Name"
# unfortunately the input start with "pad" is needed for unpatched strscan!
# using the pls matcher, this fails when there is no '+'
res = scanf(input, "${stt(0)}$[sep]$f$[sep]$f$[sep]${pls(0)}$f$[sep]${pls(0)}$f$[sep]$f$[sep]$f$[sep]$i$[sep]$w$[sep]$w", st, x1, y1, px2, x2, py2, y2, dx, dy, n, number, name)
jecho(res, st, x1, y1, px2, x2, py2, y2, dx, dy, n, number, name)
# using the plus matcher, so the '+' is optional
res = scanf(input, "${stt(0)}$[sep]$f$[sep]$f${plus(0)}$f${plus(0)}$f$[sep]$f$[sep]$f$[sep]$i$[sep]$w$[sep]$w", st, x1, y1, px2, x2, py2, y2, dx, dy, n, number, name)
jecho(res, st, x1, y1, px2, x2, py2, y2, dx, dy, n, number, name)
input = "pad 10.0, 10 12 +12.0" # test with missing optional values
(st, x1, y1, px2, x2, py2, y2, dx, dy, n, number, name) = ("pad", NaN, NaN, 0, NaN, 0, NaN, NaN, NaN, 0, "", "") # defaults
# using the plus matcher, so the '+' is optional
res = scanf(input, "${stt(0)}$[sep]$f$[sep]$f${plus(0)}$f${plus(0)}$f$[sep]$f$[sep]$f$[sep]$i$[sep]$w$[sep]$w", st, x1, y1, px2, x2, py2, y2, dx, dy, n, number, name)
jecho(res, st, x1, y1, px2, x2, py2, y2, dx, dy, n, number, name)When we compile and run this program, we get this output:
false pad 10.0 10.0 0 nan 0 nan nan nan 0 true pad 10.0 10.0 0 12.0 1 12.0 20.0 0.0 8 Num Name false pad 10.0 10.0 0 12.0 1 12.0 nan nan 0
The first scanf() call uses the sequence $[sep]${pls(0)}, which fails when the float value has no leading + sign, so this call is of no real use. The second and third scanf() call uses instead a ${plus(0)} call, where the plus() proc processes the separators as well as the optional + character, so that proc has never to return zero, and the capturing process continues. For the last scanf() call, we provide only five values as input, so scanf() returns false. However, the first five values are assigned, and the rest take on default values. One restriction of the above code is that we must always start the input string with pad; otherwise, the processing stops immediately. As scanf() does not support the capture of boolean values, we use the integer data type for the variables px2 and py2. The value zero means that there is no + prefix, and 1 indicates that there is a plus prefix.[65]
The next tiny example shows how we can use the last parameter of the user-defined matcher procedure to control the matching process:
import std/strscans
proc ndigits(input: string; intVal: var int; start: int; n: int): int =
var i, x: int
while i < n and i + start < input.len and input[i + start] in {'0'..'9'}:
x = x * 10 + input[i + start].ord - '0'.ord
inc(i)
# only overwrite if we had a match
if i == n:
result = n
intVal = x
var input = "1234"
var a, b: int
if scanf(input, "${ndigits(2)}$s${ndigits(2)}$.", a, b):
echo "Input is OK:", a, " ", bWe want to capture two integer values, each with one or two decimal digits. By passing the upper limit of digits to the ndigits() procedure, we get the intended result even when the user does not separate the two numbers with white space. Additionally, we have used $. at the end of the pattern string. The $. matches only when the end of the input string is reached, so that scanf() would return false if there are more characters in the input string left.
The latest version of the strscans module also provides a variant of the scanf() macro called scanTuple(), which returns a tuple. We could use it in this way in our example above:
let (res, a, b) = scanTuple(input, "${ndigits(2)}$s${ndigits(2)}$.", int, int)
echo res, " ", a, " ", bThus, we do not need to declare the capturing variables in advance. The final result of the scan process is returned in an additional boolean variable. When we use user-defined matchers as above, we have to specify the data types of the returned values as additional parameters after the pattern string.
Additionally, the strscans module provides a scanp() macro, which works somewhat similar to PEG or RegEx libraries. We will not try to explain the scanp() macro, as its use may be too difficult for the start of a beginner book. If we need to process text strings with regular expression grammars, we can utilize the available RegEx or PEG modules, which have no restrictions and function similarly to those in other programming languages. We will introduce the Nim RegEx and PEG modules later in the book — maybe we will compare the scanp() macro there.
Module strformat
With the fmt() macro from the strformat module, we can format and interpolate strings, similar to the use of f-strings in Python3.
import std/strformat
from std/strutils import `%`
var lang = "C"
var year = 1972
stdout.write "The programming language ", $lang, " was created in ", $year, ".\n"
echo "The programming language " & $lang & " was created in " & $year, "."
echo "The programming language $# was created in $#." % [$lang, $year]
echo fmt"The programming language {lang} was created in {year}."
# The programming language C was created in 1972.Of the four ways to print some text, the last one with fmt() is the shortest and perhaps the cleanest. As fmt() is a macro, which is processed at compile-time, there is no unnecessary run-time overhead involved. A small restriction of fmt() is that its argument is regarded as a generalized raw string literal. So, we cannot use escape sequences like "\n" in the string literal. But the strformat API docs mention various solutions for this: We can use the unary & operator instead of the fmt() call, or we can use the notations {'\n'}, fmt() or "".fmt.
import std/strformat
var lang = "Fortran"
var year = 1957
stdout.write &"The programming language {lang} was created in {year}.\n"
stdout.write fmt"The programming language {lang} was created in {year}.{'\n'}"
stdout.write fmt("The programming language {lang} was created in {year}.\n")
stdout.write "The programming language {lang} was created in {year}.\n".fmt
# The programming language Fortran was created in 1957.The fmt() macro also works with multi-line raw strings:
import std/strformat
echo fmt"""This is a {1 + 1 + 1} lines
multiline
string."""The fmt() macro accept a few directives for the formatting of integer and floating-point numbers like
import std/strformat
var pi = 3.1415
var people = 123
echo fmt"The number{pi:>8.2f} is called PI by {people:>8} people."The basic pattern is that the numeric variable is followed by a colon and the total number of desired characters. We can precede the number with a < or > to indicate left or right alignment, and for floating-point numbers, we can use a notation similar to that used for printf() in the C language: n.mf stands for a float formatted with n characters total and m decimal places. As in C, we can use e instead of f to indicate scientific notation. If the value which specifies the total number of characters starts with a zero digit, then the formatted number uses zeros instead of spaces for leading digits. And X after the colon generates hexadecimal value for integer numbers.
A useful property of the fmt() macro is that we can put an equal sign into the curly braces to get the initial expression both as a string and as an interpolated value, as in:
import std/strformat
var pi = 3.1415
echo fmt"{2 * pi = }" # 2 * pi = 6.283This is similar to the dump() macro from the sugar module and is mostly used for debugging purposes.
To use curly braces as literals in a fmt() argument, we can use character literals with a backslash as we did to include a newline character, or we can use an extended fmt() macro with two additional arguments, which specify the two characters that should be used instead of {} to mark the expression that should be interpolated:
import std/strformat
echo fmt"{2} curly braces {'\{'} {'\}'}." # 2 curly braces { }.
echo "three time three is <3 * 3>".fmt('<', '>') # three time three is 9We will not try to explain all these various formatting options in detail, as it is really hard to remember. It is enough that you know that these options exist, so you can consult the API docs for details when you would need them.
Note that we will discuss the performance of various methods for parsing strings (CSV data) in the second half of the book, see Parsing data files (in parallel).
References:
Arrays and sequences
Together with strings, arrays and sequences are the most important built-in containers for the Nim language. We have already learned that arrays, strings, and sequences have value semantics in Nim; that is, an assignment always copies the content and does not create an alias. While arrays have a fixed size defined already at compile-time, sequences are like strings of dynamic size and can grow when we append more elements. As arrays have a fixed size, they can be allocated on the stack, while for sequences due to their dynamic size, the actual data buffer has to be allocated on the heap. We explained some details about sequences already in Part II of the book. One important aspect was that sequences use a continuous data buffer with a fixed capacity to store the actual elements. When that data buffer is fully occupied, and we try to add more elements, then a new larger buffer is allocated on the heap, and the contained elements have to be copied from the old to the new, larger buffer before the old buffer can be deallocated.
When we pass arrays or sequences to procedures, then we can use the special data type openArray when we define the proc, to allow passing both arrays and sequences. Note that this is very different from generic procedures: When we define a generic proc, then the compiler creates a new proc instance for each of the generic data types that we use, so when we call a generic proc, which accepts floats and signed and unsigned integers, and we call it a few times with float and with signed integer arguments, then the compiler has to create two distinct instances of the proc. For openArray parameters, only one proc instance is necessary at all times, as sequences behave like arrays in many ways. Both use a continuous block of memory, where the elements are stored, and the position of an entry is given by the start address of this memory block and an offset given by the index multiplied by the size of an array element. So when passing the actual parameter to the proc, the compiler passes the array and the data section of the sequence in the same manner. Both can be passed by copy or by address. The compiler also passes the actual size, the lower index is always zero for openArrays. Of course, when we pass a seq as openArray, there are some restrictions, e.g. we could not add elements in the proc, as the passed variable behaves like an array.
The memory layout of sequences and strings is very similar; both have length, capacity, and a data buffer on the heap. Some procs that work on the data structure have the same names, such as add(), len(), and setlen(), and both support operators like [], &, and .. for access to single elements, and for concatenation and slicing.
Some often used functions and operators for sequences and arrays are defined in the system module, like creating new sequences, converting arrays to sequences, joining sequences, or adding elements to them. Other important functions, operators and iterators, are defined in the sequtils module, which we describe in the next section.
var s0: seq[int]
var s1: seq[int] = newSeqOfCap[int](2)
var s2: seq[int] = newSeq[int](2)
s0.add(3)
s0.add(5)
s1.add(3)
s1.add(5)
s2[0] = 3
s2[1] = 5
echo s0; echo s1; echo s2 # @[3, 5] for eachWe can initialize sequences by a call of newSeq(), newSeqOfCap(), or not at all. When we use newSeq(n), we get a seq with n elements, initialized to binary zero each, and we then can just overwrite the elements by use of the subscript operator [], which is faster than appending elements with add() to an empty seq. With newSeqOfCap() we can allocate a seq of size zero, but with a buffer size of that specified capacity. We can append elements by calling the add() function, and as long as we append no more elements than specified in the newSeqOfCap() call, we can avoid reallocations of the internal seq buffer. When performance is not that critical, we can just use an uninitialized seq and add() elements — when the default capacity is exhausted, a reallocation occurs, generally with doubled data buffer size.
We can use the overloaded add() procedure to append single elements or to append a whole array to a seq, and the & operator is available to join two sequences:
s0.add([7, 9])
s0 &= s1
s1 = s0 & s2
echo s1 # @[3, 5, 7, 9, 3, 5, 3, 5]We can use len() to query the length of a seq, and setLen() to set a new length. In most cases, setLen(n) is used to shorten a seq, that is, to keep the first n elements, but we can also use setLen() to increase the length of a seq. In that case, the new entries get the value binary zero as default, and we can use the subscript operator [] to fill in the actual content. Increasing the length with setLen() may cause a reallocation if the current capacity is not sufficient. Functions low() and high() are available to get the lowest and the highest index position of an array or a seq. As arrays can have negative indices, low() can be less than zero for arrays, but for sequences and openArray proc parameters, low() is always zero.
Module system also provides the @ array to seq operator:
var i = 7
var j = 9
var s0 = @[1, 2]
s0 = s0 & @[i, j] # don't use this variant!
s0.add([i, j]) # faster
echo s0 # @[1, 2, 7, 9, 7, 9]Note that the code in line 4 would be really slow, as it would have to allocate a temporary seq. Using add() to add a temporary array to the seq should be faster.
Slicing is also supported by the system module:
var s0 = @[1, 3, 5]
var s1 = s0[1 .. 2] # @[3, 5]
for el in s0[1 .. 2]: # may create a copy of the seq
echo elNote that line three may create a temporary copy of the sequence, which may not be that nice for optimal performance. We discussed that topic already in Part II of the book, Nim 2.0 may improve the situation further by introducing views, which create no copies. Besides the s[a .. b] slice operator which includes the elements at position a and b, there is s[a ..< b] which does not include position b and s[a .. ^b] where position b is taken from the end of the seq or array, e.g. ^1 is the last position, ^2 the second last.
For deleting elements from a sequence, we have del(), which replaces the element at the specified position with the last element of the seq and reduces the seq length by one, and the delete() function, which shifts all elements after the specified position one step forward. Obviously, the latter is slower, but it preserves the order of elements. The function pop() deletes and returns the last item of a seq. When using pop() on an empty seq, we may expect a raised exception. With insert(), we can insert an item at the specified position by moving all the elements after this position upwards. Note that del(), delete(), pop() and insert() are not available for arrays.
Comparison of two arrays or sequences by the == operator returns true when the length, as well as all contained items, match.
With the function contains(), we can test if an item is contained in a seq or an array. We can also use the operators a in b and a notin b instead. The elements are tested from the start of the container until a match is found or the last position in the container is reached, so this is an O(n) operation.
Module sequtils
This module defines some useful procedures, iterators, and templates, for working with arrays and sequences. Some functions of module sequtils use a generic openArray parameter, and so can be used for strings as well. While the max() and min() procedures are available from the system module, the minIndex() and maxIndex() procedures are provided by sequtils:
import std/sequtils
var s = @[7, 3, 5]
echo s.min, " ", s.max # 3 7
echo s.minIndex, " ", s.maxIndex # 1 0Sometimes, we may need a minmax() procedure that gives us both values, but it is currently not available. We have to create it ourselves if needed. When performance is not that critical, we can call min() and max() separately.[66]
The functions minIndex(), maxIndex(), count(), and deduplicate() can also work with strings:
import std/sequtils
var s = @[3, 5, 1, 7, 3, 3, 5]
echo s.count(5) # 2
echo s.deduplicate # @[3, 5, 1, 7]
echo "abc".maxIndex() #2The function name deduplicate() is a bit irritating, as the function does not work in place. We might expect the name deduplicated(), similar to sort() and sorted(). Other programming languages use the name uniq() instead. Deduplication is easy when the elements are sorted, as for that case we can just iterate over the seq and ignore equal adjacent items. That is why deduplicate() accepts an optional boolean parameter indicating if the seq is sorted. If the seq is not sorted, it is necessary to create a temporary set to store the already seen items, so that they can be ignored the next time when they occur again in the seq.
The function concat() can join multiple sequences (yes only sequences, it does not work with arrays currently), maybe that is more efficient than using the & operator. And insert() can insert a new value at a position by shifting the following items, and delete() allows removing a range of items from the seq when we specify two index positions:
import std/sequtils
var s: seq[int]
s = concat(@[1, 2], @[3, 4], @[5, 6])
echo s # @[1, 2, 3, 4, 5, 6]
echo @[1, 2] & @[3, 4] & @[5, 6] # @[1, 2, 3, 4, 5, 6]
s.insert(7, 2)
s.delete(3, s.high)
echo s # @[1, 2, 7]Proc repeat() is used to create a seq, which contains a single value multiple times, and cycle() repeats the items of an existing seq multiple times:
import std/sequtils
echo 2.repeat(4) # @[2, 2, 2, 2]
echo @[1, 2].cycle(3) # @[1, 2, 1, 2, 1, 2]A bit more complicated, but really useful are functions like map(), filter(), keep(), and the corresponding …It() templates:
import std/[sequtils, sugar]
var s = (0 .. 9).toSeq
echo s.map(proc(x: int): int = x * x) # always @[0, 1, 4, 9, 16, 25, 36, 49, 64, 81]
echo s.map(x => x * x) # from sugar module
echo s.mapIt(it * it)
echo s.mapIt("*" & $it & "*") # @["*0*", "*1*", "*2*", "*3*", "*4*", "*5*", "*6*", "*7*", "*8*", "*9*"]
echo s.filter(proc(x: int): bool = (x and 1) == 0) # both @[0, 2, 4, 6, 8]
echo s.filterIt((it and 1) == 0)The map variants return a new seq, with an operation performed on all items. The returned seq can have a different base type. In line 4, we used the ⇒ operator from the sugar module for a simpler notation
The filter() variants apply a proc with boolean result type on the seq items and return the items for which the result is true. It may not be easy to remember whether the elements for which the procedures gives a true result are returned or removed from the initial seq. It helps to remember that filter() behaves like the keepIf() procedures — items with positive results survive.
import std/[sequtils, sugar]
var s = (0 .. 9).toSeq
var s1 = s
s1.apply(x => x * x) # @[0, 1, 4, 9, 16, 25, 36, 49, 64, 81]
s1 = s
s1.keepIf(proc(x: int): bool = (x and 1) == 0) # @[0, 2, 4, 6, 8]In the above code, we used toSeq() with a slice argument to create an initial sequence with continuous integers from the slice. The apply() function performs a transformation operation on all the items, and keepIf() preserves only the items for which a boolean predicate evaluates to true.
The function keepItIf() is useful to delete selected items from a seq. Remember that applying the ordinary delete operations del() or delete() while iterating with a for loop over a seq does not work. You can loop over the seq as in the example below instead, or just use keepItIf():
var s = @[0, 1, 2, 3]
#[
for i, el in pairs(s):
if (el and 1) == 0: # delete the even numbers
s.delete(i) # results in a runtime error
]#
var i = 0
while i < s.len:
if (s[i] and 1) == 0: # delete the even numbers
s.delete(i) # use faster del() if order of seq does not matter
else:
i += 1
echo s
s = @[0, 1, 2, 3]
import std/sequtils
s.keepItIf((it and 1) != 0)
echo sTwo useful predicate functions, any() and all(), check if at least one item fulfills a condition or if all items fulfill a condition, respectively:
import std/sequtils
var s = (0 .. 9).toSeq
echo s.all(proc(x: int): bool = x < 10) # true
echo s.any(proc(x: int): bool = x * x == 25) # trueWith zip(), we can join the items of two sequences to tuples, and with unzip(), we can separate the tuple items again in two separate sequences:
import std/sequtils
var s = (0 .. 9).toSeq
var s1 = s.mapIt(it * it)
var z = zip(s, s1)
echo z
echo z.unzip
# @[(0, 0), (1, 1), (2, 4), (3, 9), (4, 16), (5, 25), (6, 36), (7, 49), (8, 64), (9, 81)]
# (@[0, 1, 2, 3, 4, 5, 6, 7, 8, 9], @[0, 1, 4, 9, 16, 25, 36, 49, 64, 81])Finally, sometimes the templates foldl() and foldr() can be useful for folding a sequence — that is, to generate one final value from all the items. The fold templates use the variables a and b to generate the result, a + b would sum all the items. Foldl() performs the operation from left to right, returning the accumulation and accepts an optional start value, while foldr() starts from the right, i.e. with the item at the end of the seq.
import std/sequtils
var s = (0 .. 9).toSeq
echo s.foldl(a + b, 100) # 145
echo s.foldr(a + b) #45The sequtils module contains some more procedures, templates, and macros that are not needed that often. It would not make much sense to mention all of them here, as it is already not easy to remember the ones that we have introduced above. You should skim the sequtils API docs from time to time to remember what is available.
Maybe you have missed the difference between two sequences, which some other programming languages provide:
[1, 2, 3, 4, 1, 5] - [2, 4] # [1, 3, 5]Well, that is an expensive operation, O(n^2) if implemented in a naive way, as it may iterate for all items in the second seq over the whole first seq to remove the unwanted items. A better approach is to convert the items in the second seq to a temporary (hash) set to allow a faster query:
A fast on-the-fly solution is this, as suggested by someone in the Nim forum:
import std/[sequtils, sets, sugar]
let a = [1, 2, 5, 2, 9, 7, 0]
let b = [7, 4, 1, 10, 7]
let bSet = b.toHashSet()
echo a.filter((x) => x notin bSet) # @[2, 5, 2, 9, 0]When we should need this operation frequently, we may define our own procedure like
# https://ruby-doc.org/core-2.6/Array.html#method-i-2D
# Array Difference
import std/sets
proc `-`*[T](a, b: openArray[T]): seq[T] =
let s = b.toHashSet
result = newSeq[T](a.len)
var i = 0
for el in a:
if el notin s:
result[i] = el
inc(i)
result.setLen(i)
proc `-=`*[T](a: var seq[T]; b: openArray[T]) =
let s = b.toHashSet
var i = 0
var j = 0
while i < a.len:
if a[i] notin s:
a[j] = a[i]
inc(j)
inc(i)
a.setLen(a.len - (i - j))
proc main =
let a = [1, 2, 5, 2, 9, 7, 0]
let b = [7, 4, 1, 10, 7]
echo a - b
echo b - a
var x = @a # apply the "to_seq" operator @ on array a to get a seq
x -= b
echo x
main()@[2, 5, 2, 9, 0] @[4, 10] @[2, 5, 2, 9, 0]
Note that this preserves the order in the first seq, which is often requested. If the order is not critical, then we could convert both sequences to a set, and build the set difference — but when order does not matter, we may use sets instead of sequences from the beginning.
Perhaps you also missed a shift() function, which other container types or programming languages may provide. That function would be used similarly to pop(), but it deletes and returns the first item of a seq. Well, it should be obvious why a shift() is not provided by default, and why such a function would generally be avoided — the function name gives you already a good hint. And if you should need such a function, it should be no problem to implement one, if efficiency is really not critical. But possibly, in that case, it would be better to use a different container type, maybe the double-ended queue, provided by the deques module.
References:
Random numbers
Most computer programs work fully deterministically; that is, one input data set generates exactly one well-defined output data set. This behavior is not desired when we create games or simulations: The actions of computer-controlled characters should not do exactly the same, again and again, when we restart the game, and perhaps the computer-generated landscape in the game should look differently when we restart the game too.
To generate such an unpredictable behavior, we use random number generators, which can generate sequences of random numbers of integer or float types. The most significant property of truly random numbers is that we cannot predict the next one from the sequence of all values seen before. Random number sources have no memory! Children often think they do. If a child got the number "6" in a dice game three times in sequence, it typically assumes that it is extremely unlikely that the next roll will give again this value. But as the dice have no memory, the chance to get a specific number is always 1/6, as we have 6 possible values, all with the same probability. At least when the dice are not manipulated. Another significant property of random numbers is the distribution of the possible values. For most random number sources, we would expect a uniform distribution of all possible values: For a die with numbers 1 .. 6, we would expect that we get all these numbers with nearly the same total quantity when we roll the dice for a long time again and again. However, not all random quantities are distributed uniformly. The distribution can have different shapes. An important non-uniform distribution is the Gaussian distribution, where the final result depends on many random factors. So an average value is more likely than extreme values. You may know the marble nail board, with multiple slots as an example: Marbles are thrown in at the top, and whenever they hit a nail, they get distracted to the left or right.
To build a perfect random number generator, we would have to use some physical noise sources, like photons emitted by a thermal light source falling on a light detector with single-photon resolution (Photo-multiplier), radioactive decay, thermal noise, or similar physical entropy sources. But using real physical sources for random numbers is difficult, and the random number generation is slow. So in computer programming, we generally use so-called pseudo-random-numbers, which are sequences of numbers calculated based on a given starting number. A mathematical function gets the last n numbers seen before and generates the next one from that. If that function uses a smart mathematical expression, its results look really like random numbers. For games, the generated sequences are typically good enough, for cryptographic applications, they may not be good enough. So what we need for a random number generator is a sequence of start numbers and a mathematical function with an internal state. For each call of that function, a new random number is returned and the internal state is changed so that the next call will result in a different number. When we always use the same sequence of starting numbers, then our generator would always generate the same sequence of random numbers. Sometimes this is desired, e.g., when we want a behavior that looks random but is reproducible, perhaps for debugging tasks. However, in most cases, we would use starting numbers that are different for each program start. To get well-suited start numbers, we can just use the current time with nanosecond resolution, which most computer hardware does provide.
Most simple and fast random number generators use only two integer numbers for their internal state. From these two numbers, the next random value is calculated, and then the numbers representing the internal state are modified also, to ensure that the next generated number is again different.
Nim uses in its random module an implementation of the xoroshiro128+ (xor/rotate/shift/rotate) library. A Rand object, with two integer fields, is used to store the actual state, and some simple and fast logic operations such as bit shift, logical xor, and addition are used to update the internal state and generate the next number:
when defined(js):
type Ui = uint32
const randMax = 4_294_967_295u32
else:
type Ui = uint64
type
Rand* = object # State of a random number generator.
a0, a1: Ui
proc rotl(x, k: Ui): Ui =
result = (x shl k) or (x shr (Ui(64) - k))
proc next*(r: var Rand): uint64 =
let s0 = r.a0
var s1 = r.a1
result = s0 + s1
s1 = s1 xor s0
r.a0 = rotl(s0, 55) xor s1 xor (s1 shl 14) # a, b
r.a1 = rotl(s1, 36) # cThe Rand object stores the internal state, rotl() is a helper function, which updates the state for each call, and next() is the actual generator procedure returning an uint64 value. Note that the addition used in next() does wrap around instead of giving an overflow error, as unsigned integers are used. The numbers returned by the rand() proc are the foundation for all the other random number types provided by the random module. To get integers with reduced numeric range, we can just use the modulo operation, and to get float results, we may convert the integer value to float and apply some basic mathematical operations like division for a range reduction.
The most basic functions provided by the random module are the overloaded rand() functions. Rand() called with an integer parameter n gives us integer random numbers in the range from 0 up to n, and rand() called with a float parameter x will give us random float numbers in the range 0 .. x. When we just use the rand() functions in this way, we would get the same sequence of numbers for each run of our program, as the generator always starts with the same well-defined initial state. We can call the randomize() procedure before calling rand() to initialize the generator to a different state based on the current time. Then rand() will provide us with different number sequences for each start of our program.
Generally, it is a good idea not to use the single internal global state of the random module for the generation of our random numbers but to use our own state variable instead. That way, we prevent conflicts with other modules, which may use the random module as well. Imagine that we want to get the same sequence of random numbers for each run of our program, as we are debugging our game, but another module initializes the internal state of module random with a value based on the current time.
So the module random provides overloaded rand() functions that get a state variable:
from std/times import getTime, toUnix, nanosecond
import std/random
let now = getTime()
var rstate = initRand(now.toUnix * 1_000_000_000 + now.nanosecond)
for i in 0 .. 5:
echo rstate.rand(5) + 1 # dice roll
for i in 0 .. 2:
echo rstate.rand(100.0) # float random number in range 0.0 .. 100.0Unfortunately, the initRand() call to initialize it with a current time value is a bit complicated, as we have to provide the current time value directly. Note that you typically should call initRand() only once in your program. A common mistake beginners make is to call initRand() each time directly before the rand() call. That is not only not needed and slows down the generation process, but it also can lead to strange number sequences.
At the end of this section, we will discuss the problem of filling a container with random and unique numbers. For example, assume that we want to generate a sequence of 100 random numbers in the range 1 .. 100, with the restriction that each number should occur exactly once in the sequence. Of course, a code segment like s[i] = (rand(99) + 1) would not work, as the same numbers could be generated multiple times or not at all. The obvious solution for this task is to first fill an array with consecutive numbers 1 to 100 and then exchange the initial positions with destination positions determined by rand(99) The random module provides the shuffle() function for this shaking of a container. A related function is sample(), which is used to randomly select an element from an openArray or a set.
References:
Timers
Sometimes, we may want to measure the execution time of a code segment of our program. For this, the Nim standard library provides various modules, including the larger times module, and the monotimes module. The times module provides many functions and data types for handling dates and times, while the small monotimes module is more specialized for measuring time intervals. For our first test, we will use the times.cpuTime() function and the monotimes.getMonoTime() function. The former gives us time values as seconds in float format, while the latter returns an int64 nanosecond value. To measure the execution times of code segments, we take the current time at the start and at the end of that segment and calculate the difference. Actually, we will try to measure the time needed for a float square root calculation. In the past, calculating square roots was considered a relatively slow operation, slow compared to a plain floating-point math operation like multiplication or division. But on most modern hardware, as we will see, square root calculation is actually really fast.
import std/[random, times, monotimes]
from std/math import sqrt
proc warmup =
var x: float
for i in 1 .. 1e10.int:
x += 1.0 / i.float
echo x
proc main1 =
let x = rand(3.0)
let y = rand(7.0)
let start = cpuTime()
let res = sqrt(x) + y
let stop = cpuTime()
echo stop - start
echo res
proc main2 =
let x = rand(3.0)
let y = rand(7.0)
let start = getMonoTime()
let res = sqrt(x) + y
let stop = getMonoTime()
echo stop - start
echo res
randomize()
warmup()
main1()
main2()To get meaningful results, we have to take some care: What’s most important is that the code segment we want to measure is actually executed. This may sound odd, but assume that the code produces no noticeable result at all. In that case, the compiler may just remove that code fragment from the generated executable, as it is not needed for correct program execution. Or assume that the code fragment uses only data, which is already known at compile time. Then the compiler may do all the calculations already at compile-time, and the whole code fragment is removed again and replaced by the pre-calculated values. And finally, we have to remember that our computer may execute other tasks at the same time or could be in various power-saving states, with reduced CPU clock frequency, from which it takes some time to wake up. To take care of this, we try to execute some warm-up code before our actual timing task, and we do use the rand() function from the random module to provide input values for our code that are not known during compile-time. Finally, we output the result of the calculation using an echo() statement to make it clear to the compiler that the result of the calculation is indeed needed. Now, let us compile and run this program. We compile with option -d:release or -d:danger to enable optimizations and avoid the generation of debugging code that may distort our timing. The result is still a bit surprising:
$ ./t1 23.6030665949975 4.98999998654881e-07 4.676567857718999 42 nanoseconds 8.527354349689125
Lines three and five are the results of our timing attempt. Both values are obviously too large and do not match. The reason for the wrong results is overhead by the function calls itself. That overhead seems to be much larger for the cpuTime() call, as we get a result of about 500 nanoseconds. Maybe the reason for this is, that cpuTime() works with floats internally. At least, we see that getMonoTime() can measure time intervals in the range of a few hundred nanoseconds. When we run the program a few times, the printed time intervals may vary. The reasons for that are internal processes in the CPU, like clock rate and state changes. Generally, the smallest time value of multiple program executions is the most important for us, as that is the minimal time, which is actually needed for the program execution. With this example, we have learned how we can measure time differences in our program, and that measuring really small time intervals is difficult.
Fortunately, measuring such tiny time intervals is supported by the criterion package, which we may describe in later sections of the book.[67]
For now, we will present another example program, where we measure program code with longer running times. For that, we create a loop, that is executed many times. So the offset of the timer function calls can be neglected compared to the actual running time of the loop, and due to the longer running time, the printed time values become more reliable with low variations:
import std/[random, times, monotimes]
from std/math import sqrt
proc main3 =
var s: array[64 * 1024, float]
var res: float
for i in 0 .. s.high:
s[i] = rand(100.0)
let start = getMonoTime()
for i in 0 .. s.high:
res += sqrt(s[i])
let stop = getMonoTime()
echo stop - start
echo res
proc main4 =
var s: array[64 * 1024, float]
var res: float
for i in 0 .. s.high:
s[i] = rand(100.0)
let start = cpuTime()
for i in 0 .. s.high:
res += sqrt(s[i])
let stop = cpuTime()
echo stop - start
echo res
randomize()
main3()
main4()For this example program, we first fill an array with 64k random float numbers and then sum the square root of these numbers. As the total running time of our loops is not that tiny, we do not need a special warm-up function, which is executed in front of the timed code. The output of our program shows that both timing functions match well for longer time periods:
$ ./t2 112 microseconds and 701 nanoseconds 436909.89897942 0.0001135580000000001 # 114 microseconds 437222.3001038401
The float result in line 4 is 114 microseconds, which matches well with the 112 microseconds from line two. When you run this program multiple times, you may notice that you may sometimes get much larger results for both or for only one of the two values. That is not surprising, as the computer is processing not only our program, but many more, and due to task switching, our program can get suspended for some time. When we divide that 114 microseconds by the number of loop iterations (64 * 1024) we get 1.7 nanoseconds, which is really surprisingly fast for a square root calculation. The concrete value is for a modern Intel I7 CPU. Of course, these 1.7 nanoseconds are not only the time needed for the square root calculation, but it includes the operations with the loop counter and the time needed to fetch and access the actual array elements.
As timing code segments is not an uncommon use case, there exists some external package that improves or simplifies these operations, like the criterion or benchy package. A related task is profiling our program to find the part which takes the most CPU time so that we can concentrate on these parts to improve the total performance of our program. For profiling, various tools like the Linux Perf tool are available, which we will discuss in more detail later in this book.
References:
Hash tables
A common task in computer programming is the storing and retrieving of data records. The situation is straightforward whenever each data record is directly mapped to consecutive integer numbers n0, n0+1, n0+2, …, n0+M. In that case, we can use those numbers as index keys to access the data records and store the data as objects or references to objects in a sequence, or, when the data set is small and the maximum number of entries is known at compile time, in an array.
In the past, it was common practice to assign hardware parts in a shop and even customers a unique ID number from a consecutive range, enabling storage and quick access in indexed containers. This works well when we actually use the numbers as keys. However, we typically work with data that is already labeled by names expressed as sequences of ASCII characters, such as customers in a hardware store or food in a supermarket. While it’s possible to assign ID numbers to people, they generally do not appreciate having to remember their assigned ID numbers when shopping online.
So let’s investigate how we can store and retrieve data objects without using consecutive numbers as keys. Assume we have a customer database
type
Customer = object
lastName: string
firstName: string
age: int
postalAddress: string
phone: string
credit: floatOf course, we can store the customers in a sequence, and conduct a linear search when we want to access a person by name:
var customers: seq[Customer]
# ...
var found = false
for c in customers:
if c.lastName == queryName:
found = true
echo "Person ", queryName, " has a credit limit of ", c.credit
if not found:
echo queryName, "not found"Such a plain linear search is not very fast, of course. An obvious improvement would be to sort the customers by names, as we can do a so-called binary search in that case, as we did a long time ago in printed telephone registers: Open the telephone book somewhere in the middle, and when the names on that page are all greater than our friend’s name, then continue the search in the first half of the book, otherwise in the last half. We continue the halving strategy until we find the name. Given that we halve the data set with each step in this manner, we characterize the algorithm as having a log2(N) cost, where log2 is the logarithm with base two and N represents the size of the data set.
A similar solution would be to use some form of an ordered binary tree, which has also log2(N) costs for retrieving operations. We will learn more about sorting sequences, doing a binary search in a sorted sequence, and tree structures later in the book.
Hash tables permit fast access to data records by the use of arbitrary keys. A hash table, referred to as simply table in Nim, is a homogeneous, resizable container that behaves similarly to Nim sequences, but removes the restriction that the position of an element in the sequence must be known for direct access.
The idea of a hash table is to use an arbitrary data type to directly access objects stored in a container, similarly as we can do it for arrays and sequences with integer keys. The first step is to use a so-called hash function to map key objects, which are not already of integer type, to the integer type. We would try to use a hash function that can be evaluated fast and which maps our data to integer values distributed to the whole integer value space without clustering. The integers generated by a hash() function somewhat resemble random numbers, as they are distributed over the full range of integer values without any obvious order or system. Generally, mapping arbitrary objects to integers is not difficult. For a string, an initial approach might involve treating the characters of the string in a similar way to how we calculate the value of a numeric literal: by summing up the digits, each multiplied by powers of ten, according to their position. For a string that may look like
intVal = uint(s[0]) * 256^0 + uint(s[1]) * 256^1 + uint(s[2]) * 256^2 + ...We multiply with powers of 256 as we have 256 different ASCII characters.
That wouldn’t really be a good hash function, as all short strings would map to low integer values, not distributed over the full value range. However, similar but more sophisticated hash functions are available.
So a hash function can map arbitrary data types to integers. But what we really want is a sequence of continuous integer values, which the hash functions do not provide by design. But that is no real problem: In the same way, as we can do a range reduction for a random number generator function generating random numbers using the full integer range by just applying a modulo operation, we can apply the modulo operation on the value returned by a hash function.
Range reduction by modulo yields smaller integer numbers, which could potentially serve as index values for an array or a sequence. With two restrictions: Index collisions can occur, as applying the hash function and the modulo range reduction on different strings may give us the same index value. And some index values may never be generated. The latter is not that serious, some positions in the container would remain unpopulated. Collisions are much more serious of course, we have to handle them somehow. One solution is to make each storage location in our container a sequence once again, which can store all the colliding data sets. That way, our hash table would be a sequence, where each element is again a short sequence containing all the colliding data records. For a data retrieving operation, applying the hash function with modulo data reduction would give us the position in the larger seq, and we then would have to check all the elements in the short seq to find the actual record. In the best case, the short seq contains only one entry, when no collision has occurred. For a customer database, this strategy could be indeed the best solution, as in rare cases multiple different customers may have exactly the same name. So it would be nice if for query operations in that case a list of all customers with exactly that name is returned.
In practice, a modified strategy is often applied to prevent a sequence within a sequence container type: We use only one loosely populated sequence, and whenever a collision occurs, we simply place the colliding data record at a free index position following the position determined by the hash index value. That way, data retrieving starts by the position given by the hash key and then checks the data record at that position and the following positions until a matching record or an empty position is found, the latter case indicates that the queried data record is not contained in the database. Storing data records works similarly: When the position given by the hash key is void, then the new entry is stored at that position. If the index position is already occupied, then the following positions are examined until a void one is found and the data is stored there.
Hash tables work well generally when they are not too densely populated. Typically, we make the number of available index positions double the size of the number of expected entries. The chance of collisions is then not too significant, and when a collision does occur, the probability is high that one of the subsequent positions is still unoccupied.
When the population density becomes too high due to the insertion of more and more data records, a new, larger table is typically allocated, and the data records are moved from the old table to the new one, similar to how it is done for regular sequences when all capacity is utilized.
Now, let us see how we can use the tables module of the Nim standard library to store the customer record we introduced above:
import std/tables
type
Customer = object
lastName: string
firstName: string
yearOfBirth: int
postalAdress: string
phone: string
credit: float
var customers: Table[string, Customer]
proc addNewCustomers =
var c: Customer
c = Customer(lastName: "Turing", firstName: "Alan")
c.postalAdress = "England"
c.yearOfBirth = 1912
customers["Turing, Alan"] = c
c = Customer(lastName: "Zuse", firstName: "Konrad")
c.postalAdress = "Germany"
c.yearOfBirth = 1910
customers["Zuse, Konrad"] = c
proc queryCustomer(key: string) =
if customers.hasKey(key):
echo "known customer:"
echo customers[key]
else:
echo "customer key not found in database"
addNewCustomers()
queryCustomer("Zuse, Konrad")
queryCustomer("Gates, Bill")The basic usage of Nim Tables is very similar to the use of sequences. While we have to specify only the base type for a Nim seq, we have to specify the type of the key and the type of the stored entities for a hash Table. The line var customers: Table[string, Customer] defines a variable with a generic Table type. The table uses strings as keys and stores Customer objects. We can then use the [] subscript operator to store Customer objects in the Table. As we created a Table with string key type, we have to specify strings when we use the subscript operator or other functions to access entries of our table. For the query operation, we first call the function hasKey() to check if the customer with that name is contained in the database and then use again the subscript operator to access the data record.
The tables module of the Nim standard library provides many more functions for interacting with Tables. Most are easy to understand and use. When you inspect the API docs of the tables module, you will discover that besides the Table data type also a TableRef exists. The Table type has value semantics; that is, if you copy a table instance, the entire content is copied. TableRef instances have reference semantics, the content is not copied, when you assign one instance of a TableRef to another variable.
In the example above, we called hasKey() to check if a data record is available before we accessed that record. Access with the subscript operator [] would raise an exception when an entity is not available in the table. HasKey() and [] both would have to locate the data record. A faster way to access data records, when we’re uncertain if they exist in the table, is to use the getOrDefault() procedure.
let dummy = Customer()
let query = customers.getOrDefault(name, dummy)
if query.lastName.len == 0: # we know all entries in the database have a lastName, so we got the dummy default value
echo name, "not found"
else:
process(query)A useful variant of the Table data type is the CountTable, which we can use to count data objects, e.g. words in a text:
import std/tables
var ct: CountTable[string]
ct.inc("Nim")
ct.inc("Rust")
ct.inc("Nim")
echo ct["Nim"]
for k, v in ct:
echo k, ": ", vWe will provide an extended example of using a CountTable to count words in a text file later in the CountTable section.
A Table instance stores entries not in the order of insertion. When we iterate over the table, we get the results not back in the order of insertion. If we really should need to preserve the insertion order, we may use the OrderedTable variant. Note that an OrderedTable does not sort its entries, it remembers the insertion order. Ordered Tables have some internal overhead, so we should use them only when necessary.
For all the various table variants, we can use procedures like clear(), len(), or del() to remove all entries from a table, check the number of entries, or delete specific entries. Note that some functions may throw exceptions when we try to access entries that are not available. Also, be aware that the subscript operator =[] overwrites any existing entries.
For our initial customer database, the current table implementation might not be optimal, as it’s unclear how to handle different customers with the same name. But customer databases are really special cases, in most cases, different things have different names.
User-defined hash values
The tables module uses the hashes module to calculate the hash value for the keys that we use to access table content. For many data types, the hashes module already defines a hash function. When we would like to use tuples or object data types as keys for table access, then we would have to define a hash function for that key object first. The API documentation of the tables module provides an example of this, where an object data type with firstName and lastName fields serves as the key to store salary entries in the table. While firstName and lastName are strings, and for single strings a predefined hash function is available, we have to declare another hash function for objects with two strings:
import std/[tables, hashes]
type
Person = object
firstName, lastName: string
proc hash(x: Person): Hash =
## Piggyback on the already available string hash proc.
##
## Without this proc nothing works!
result = x.firstName.hash !& x.lastName.hash
result = !$result
var
salaries = initTable[Person, int]()
p1, p2: Person
p1.firstName = "Jon"
p1.lastName = "Ross"
salaries[p1] = 30_000The hash generation is a bit cryptic: First, we mix various existing hash values using the !& operator, and finally we use the !$ operator to generate the final hash value. For details, please see the API documentation of the hashes module.
Hash tables can be seen as a way to attach arbitrary data to other data. The above example attaches a "salary" to a person object. In most cases, we would just create one more object field, when we have to store more data, but sometimes that is not easily possible. One example is when we use a low-level C library, which gives us some C objects back. Maybe we use an advanced C or C++ math library like CGAL, and we get some abstract low-level objects from it, maybe circles with center coordinates and diameter. As that objects are not Nim objects, but C or C++ entities, we can not easily subclass them to attach more properties like a color attribute. But as each entity has a unique address, we can just use a table with key type address and all the needed values, like color, as data. That would be some overhead of course, as each color lookup would imply table access, but it is a simple solution.
We can even attach properties to plain data types this way:
import std/tables
var t: Table[float, string]
let PI = 3.1415
t[PI] = "Pi"
t[2.0] = "two"
echo t[PI]
echo t[2.0]
echo t[5.0 - 3.0]For floats, a predefined hash function is available, so the code above should work. But floats as keys are a bit fragile due to the fact that float math is not really exact. So the last line in the above code may raise an exception due to access of a non-existent entry, as the difference 5.0 - 3.0 may not exactly be identical to the value 2.0.
Hash tables can be even useful containers when we already have numeric data as possible keys for indices in a sequence: In mathematics, we could have a two-dimensional array, that is an array of array in Nim, to store matrices. This is OK when the matrix is really populated, that is, most entries have meaningful non-trivial values. But for very large, loosely populated matrices, with mostly just zero or one entry, storing the complete matrix as a table using a row, column tuple as key, may save a lot of RAM.
Equality and identity
When we use objects or references to objects as keys for tables, we have to remember how Nim compares value and reference types:
import std/[tables, hashes]
type
O = object
i: int
R = ref object
j: int
proc hash(o: O): Hash = hash(o.i)
proc hash(r: R): Hash = hash(cast[int](addr(r[])))
var o1 = O(i: 7)
var o2 = O(i: 7)
var r1 = R(j: 13)
var r2 = R(j: 13)
echo o1 == o2
echo r1 == r2
var t1: Table[O, float]
t1[o1] = 3.1415
echo t1.hasKey(o2)
var t2: Table[R, float]
t2[r1] = 2.7
echo t2.hasKey(r2)The output of the above program is
true false true false
By default, the == operator compares content for value objects, but the instance addresses for references. Because of this, it makes sense to define hash functions for object types and ref object types in a compatible way: We use the hash value of the single integer field of our value object as the hash result for the entire object, and we use the address of the instance for the hash value of the reference object. As different instances of ref objects have always different addresses, the hasKey() does return false when we use as the argument a different instance variable, independent of the content of its fields.
For special use cases, we may redefine the == operator, but we have to ensure that the defined hash function matches the == operator: When a == b is true, then hash(a) has to be identical to hash(b)! The reason is, that tables first compare the hash value of the query key with the key of entities in the table, and only for a matching hash value do the comparison of the actual data content.
Performance
Hash table lookup is fast. We say that hash table lookup is an O(1) operation, which shall indicate that the time needed for doing a table lookup does not depend on the total number of entries stored in the table. The reason for this is that for a lookup, it’s necessary to calculate the hash value, do the modulo operation, and access the table content and potentially a few of the following table entries in the case that the first entry is not a match. Storing data is also an O(1) operation, as it works very similarly, as long as the table is not already too densely populated so that a recreation is necessary. In that case, the single storing operation can be very slow, but this situation occurs rarely, if at all, when a sufficiently large table is used from the beginning. Still, small tables are much faster than larger tables due to cache effects. For small tables, all data may fit into the caches of the CPU, while for large tables most data is located outside of caches in RAM, and RAM access is magnitudes slower than cache access.
However, hash table lookup is slower than an array or seq access. To access an element from an array or seq, we only need to multiply the index value with the byte size of the stored element’s type and potentially add an offset when the array does not start at index 0. For tables, we have to calculate the hash value, do the modulo operation, access some elements at the calculated position, and most importantly, compare the content at that position with the actual key data. If the key is a string, a few string comparisons (at least one) are necessary to determine if the query element is available in the table. So while array access may take less than a nanosecond on modern hardware, table lookup may take a few dozen of nanoseconds. Lookup with string keys is generally slower than for other key types like integer, as for string comparison it is necessary to compare many characters to get a result, and because strings generate some memory indirection by the fact that string content is stored somewhere in the heap outside any cache.
Tuples or other containers as keys
At the end of our introduction to hash tables, we will present a very useful, but perhaps not that obvious property of hash tables: The keys used for table access don’t have to be simple data types, but can be container types like tuples or arrays. Imagine you have a map in 2D, with a set of points on that map each presented by an x, y coordinate pair. These points could represent cities, and some cities may have a direct road connection. So, how can we test if two cities are directly connected and determine the distance between them? With a hash table using a tuple of two city coordinates as key, it is easy:
import std/[tables, math]
const
InvalidFloat = 1e30 # arbitrary marker that in not a valid value
InvalidCoord = (InvalidFloat, InvalidFloat)
type
Coord = tuple
x: float
y: float
Cities = Table[string, Coord]
Distances = Table[(Coord, Coord), float]
var cities: Cities
var distances: Distances
proc insertCity(name: string; coord: Coord) =
cities[name] = coord
proc insertDist(a, b: string) =
var (a, b) = (a, b)
if a > b: swap(a, b)
let ca = cities[a] # caution, will raise an exception if name is not a know city
let cb = cities[b]
distances[(ca, cb)] = math.hypot(ca.x - cb.x, ca.y - cb.y)
proc checkDirectConnection(a, b: string): float =
var (a, b) = (a, b)
if a > b: swap(a, b)
let ca = cities.getOrDefault(a, InvalidCoord)
let cb = cities.getOrDefault(b, InvalidCoord)
if ca == InvalidCoord or cb == InvalidCoord:
return -1 # marker when cities are unknown
result = distances.getOrDefault((ca, cb), InvalidFloat)
insertCity("aTown", (2.0, 7.0))
insertCity("bTown", (2.0, 11.0))
insertCity("cTown", (17.0, 23.0))
insertDist("aTown", "bTown")
var d = checkDirectConnection("aTown", "bTown")
if d == -1:
echo "query for unknown town"
elif d == InvalidFloat:
echo "Cities have no direct connection"
else:
echo "Distance: ", d
echo checkDirectConnection("bTown", "aTown") # 4, same as above
echo checkDirectConnection("aTown", "cTown") # 1e30
echo checkDirectConnection("aTown", "xTown") # -1For the insertDist() and checkDirectConnection() procedures, we use a trick to ensure we get the same results when we interchange the names: We sort the names alphabetically when we insert the distances, and also when we query the distances. So we get the same result. Of course, we could insert the tuple also twice instead, but as the distance is the same in both directions, sorting and inserting only once makes some sense. Note that we used tuples for the coordinate pairs in the distances tables. Maybe the more obvious data type would be an array with two entries, as the array type is a container for homogeneous data, while a tuple can also contain different data types. But currently, Nim supports tuples better in some situations, e.g. for automatic tuple unpacking. Thus, we often use tuples even when an array would be the first choice, considering that the array type offers the benefit of iteration over elements at runtime, while tuples provide the advantage of accessing elements by names and by an integer constant. For performance, array or tuple should make no difference here.
CountTable
We mentioned this data type already very briefly in one of the preceding sections, but as it really can be very useful sometimes, we should show an extended example. The CountTable data type is a variant of the ordinary Table type and is used to count instances of arbitrary data types, most often strings or integers. The CountTable can use as keys the same data types as the ordinary Table, but its value type is always an integer. Instead of using operators like []= to insert values into the table, we use the inc() procedure to increase the occurrence counter for the key. In practice, the first call of inc() adds the key to the table instance and sets its counter to one, while each subsequent call of inc() with the same key increases the counter by one. A typical use case for CountTables is to count the occurrences of words in a text file:
import std/tables
from std/strutils import split
proc main =
const FileName = "t.nim"
var t: CountTable[string]
for l in FileName.lines:
for w in l.split:
t.inc(w)
for k, v in pairs(t):
echo k, " ", v
main()When we compile and run the above program, we get for that source code this output:
Click to see it
30 main() 1 t.inc(w) 1 proc 1 split 1 const 1 main 1 var 1 in 3 strutils 1 from 1 v 2 ", 1 FileName.lines: 1 = 2 import 2 t: 1 w 1 CountTable[string] 1 "t.nim" 1 FileName 1 l 1 pairs(t): 1 k, 2 " 1 for 3 l.split: 1 std/tables 1 echo 1
Counting words in text files can help us find rare spelling errors and words that we use too frequently, such as "generally", "problem", or "course", in this book. But for that application, we would have to extend the code from the above, so that it ignores punctuation characters, and sorts the output. You should already be able to add that functionality yourself.
References:
Hash sets
The sets module provides the generic HashSet[T] data type and the related procedures and functions. HashSets behave similarly to Nim’s built-in set type, but while the base types of the built-in set type are restricted to ordinal data types of 8 or 16-bit size, there is no such restriction for HashSets. That is, HashSets can be used like hash Tables for most of Nim’s data types, including user-defined types like objects. From the implementation, HashSets are very similar to hash Tables — while a hash Table uses a key entity to access a value instance, HashSets uses only the key, e.g. to test if the key is contained in the set. A typical use of HashSets is to test if a string is contained in a collection of strings:
import std/sets
var s: HashSet[string] = toHashSet(["var", "type", "const", "while"])
var v = stdin.readLine
if v in s:
echo v, " is a Nim keyword"The functions and procedures provided by the sets module are used similarly to those of the tables module — we have excl() and incl() to remove or add elements to a set instance, and operations to create the union, intersection, or difference of two HashSets. As the basic behavior of HashSets is so similar to hash Tables, we will not try to explain the available functions — whenever you may have a concrete use case for Nim’s HashSets, you can consult the module documentation. Remember that, as with hash Tables, for data types used as keys, a hash() function and the == operator must have been defined.
A more interesting point concerns when you should use Nim’s built-in set type and when to use the HashSet. Well, Nim’s built-in set type is restricted to ordinal types of 8 or 16-bit size as the base type, that is byte, int8, uint8, bool, char, enum, int16, and uint16. For other base types, we have to use the HashSet. So, why do we not always use HashSets only? The reason is that the implementation is different. The built-in set type is internally a bit vector. To store a set with an 8-bit base type, 256 bits are needed, that is 10 bytes. For this data type, operations like union, intersection, or difference map well to basic CPU instructions like bitor and bitand and are very efficient. The same is true for the incl() and excl() operations, which map well to fast CPU instructions. So, whenever we can use the built-in set type with an 8-bit base type, we should use that and not a HashSet. For a 16-bit base type, the set already requires 8192 bytes — for a union, intersection, or difference, all these bytes have to be combined in some way. The incl() and excl() operations should be still really fast — a few math operations (div 8) give the byte location, and then a CPU instruction tests if a bit is set or sets a bit. So the built-in set type should work still fine with a 16-bit base type, and for densely populated sets the built-in type should be the best option in most cases. Here, densely populated means, that most of the provided bits are really needed and used. For sparsely populated sets, the situation is different. Imagine you have a few numbers, all smaller than int16.high+1, but some larger than int8.high. For this use case, a HashSet[int16] should consume less storage and may offer comparable performance. Just test it yourself!
Operating system services
The os module supports basic interactions with the operating system, such as accessing the file system, reading command-line arguments, executing shell commands and external processes, or retrieving environment variables. The abstractions of the os module allow us to write programs that may interact with the OS but still can be compiled and run unchanged on various operating systems including Windows, macOS, and Linux.
This module is quite large, and it would make no sense to introduce much of its content here. When you have the feeling that you may need some functionality that is related to OS services, you just should consult the API documentation of the os module.
We have already used some functions of the os module in an earlier section of the book, for example, the paramCount() and paramStr() functions to process command-line arguments, and the fileExists() and getFileSize() functions to test if a file already exists, and to get the file size in bytes. Whenever we intend to access the file system, we have to take into account the fact that the three major operating systems use different separator characters for file paths and different paths for folders like the user’s home directory. Functions such as getHomeDir() or getAppDir() make it easier to navigate in the file system structure, and functions such as joinPath() or addFileExt() help us to construct file or folder names:
import std/os
const FileName = "data"
const FileExt = "txt"
var path = getAppDir()
path = joinPath(path, FileName)
path = addFileExt(path, FileExt)
echo path
if fileExists(path):
echo "File: ", path, " already exist."
else:
path.writeFile("Testing the os module.\n")The iterator envPairs() can be used to list all the environment variables, and getEnv() can be used to get the value of a specific variable.
import std/os
for k, v in envPairs():
echo k, ": ", v
echo getEnv("USERNAME")Or we may use the walkDir() iterator to iterate over the content of a folder:
import std/os
for k, p in walkDir(getAppDir()):
echo k, ": ", pWalkDir() returns a tuple — the PathComponent enumeration like pcFile or pcDir, which gives us the type of the directory entry, and the path as a string.
The function execProcess() to run a shell command is provided by the osproc module:
import std/osproc
when defined(windows):
# var output = execProcess("cmd.exe /c ipconfig")
var output = execProcess("cmd.exe /c ipconfig" , options={poUsePath, poStdErrToStdOut, poEvalCommand, poDaemon})
else:
var output = execProcess("ifconfig")
echo outputHere we used when defined(windows): to test if the code has been compiled for Windows or for Linux/macOS so that we can use the correct command string. For Windows, flashing the console window could still be an issue; see https://forum.nim-lang.org/t/7320#46431.
Other functions of the os module that can sometimes be useful are sleep() to delay the program execution for a time period specified in milliseconds, and parseCmdLine(), which splits the command line argument string into several components. But in the next section, we will present the parseopt module, which is an advanced command-line parser, and in Part V of the book, we will present the external cligen package, which is even more powerful.
Command-line parsing
For Linux users, it is not uncommon to use a terminal window or shell to launch programs by typing in textual commands, instead of clicking on icons or pictograms. In the introductory sections of the book, we mentioned that one way to launch the Nim compiler is to type a command like nim c --mm:arc test1.nim in a terminal window.
Pure Windows users, who never use terminal windows to interact with the computer, may skip this section. For the others, we will give a short introduction to the structure of command-line arguments, and how we can process them with the parseopt module of Nim’s standard library.
Working from within a terminal window can have some benefits in some scenarios, and some simple tools may have no graphical user interface at all, so you can only use them from the terminal. From within a terminal window, we can type in command names like ls or df, and press the return key to just execute a program with that name. Or we can pass additional options and arguments to these programs, e.g. the command ls -l /tmp would list the directory entries of the /tmp folder displayed as one entry per line. Here ls is the command or program name, -l is an option, indicating that we desire an output format with only one entry per line; and /tmp is the actual argument, which is the /tmp folder. Don’t get confused by the slash character in front of the tmp directory name — the slash has no special relevance for the argument parsing, it is just that on Linux systems / is the name of the uppermost level of the file system, called the file system root, so /tmp is the folder named tmp at the file system root.
We said, that in the ls command above, -l was an option. That option indicates for the ls command, that we want the output with only one entry per line. For the ls command, some other options can be specified in a short and in a long form: The notations -s and --size can both be used to tell ls to print the file size. Short options are always introduced by a single minus character, and each following single character then stands for a distinct option, e.g. -lt asks for a single entry per line output, which included the modification time for the entry. For the long options, which start with two minus signs, only a single option name like "size" can be specified.
In addition to these plain short and long options, options with values also exist. The values are separated from the option name with a colon or an equal sign. Imagine that we have a command called "fancyPrint", which can print out text documents, and allows us to specify single pages to print instead of the whole document. That could be done with the short and long options p and page, each requiring a numeric value like fancyPrint -p:17 mydoc.pdf or fancyPrint --page:17 mydoc.pdf.
In principle, it is possible to mix short and long options with and without values and arguments freely, which can make the evaluation of command-line strings difficult. Usually, options have to be specified in front of arguments, but some programs relax this, e.g., ls /tmp -l also works. And some (older) programs recognize options without a leading minus sign, e.g. tar cf hhh.tar hhh/ specifies, that the archiving tool should create (c) a file (f) named hhh.tar with the content of folder hhh. Here the single letter c without a leading minus sign is interpreted as some form of a command, c stands for create. Similarly, the Nim compiler interprets the first single letter as a command — c for compiling with the C backend.
After this short introduction to command-line options, we will investigate how we can use Nim’s parseopt module to process the command-line string and extract the various options and parameters.
Let us start with this simple example:
import std/parseopt
var p = initOptParser()
while true:
p.next
case p.kind
of cmdEnd:
break
of cmdLongOption:
echo p.key, ": ", p.val
of cmdShortOption:
echo p.key, ": ", p.val
of cmdArgument:
echo "Arg: ", p.key, p.valWhen you compile and run this code in a terminal window, you can pass various combinations of short and long options, with and without values, and one or more arguments like file names. This call
./t -a=3 --verbose h.txt
would generate this output:
a: 3 verbose: Arg: h.txt
The first option with key a has value 3, verbose is a long option without a value, and h.txt is recognized as an argument, which can be a file name in this case.
Our program starts with a call to initOptParser(), which returns an OptParser object. We call initOptParser() without any parameter — in this case, the function constructs the command line string itself by a series of commandStr() calls of the os module. In the while true: loop, we call p.next to get the next option. Then we can access the kind field, which is an enumeration type with the possible values cmdEnd, cmdShortOption, cmdLongOption, or cmdArgument. This kind field indicates the type of the current option, and the key and val fields of the OptParser instance provide the actual option name and value when available.
Instead of this explicit while loop, we can also use the getopt() iterator:
import std/parseopt
var p = initOptParser()
for kind, key, val in getopt(p):
case kind
of cmdEnd:
assert false # break
of cmdLongOption:
echo key, ": ", val
of cmdShortOption:
echo key, ": ", val
of cmdArgument:
echo "Arg: ", key, valWhen we use this iterator, we do not actually get the kind value of cmdEnd, but we still need that case label or an else: discard branch of the case statement to cover all possible cases, otherwise the code would not compile.
In addition, the parseopt module supports passing option values without the need to separate the option name and the option value with a : or a =, e.g. a command line like -a3. To make that work, we have to tell the parser which options have values and which do not:
import std/parseopt
var p = initOptParser(shortNoVal = {'h', 'v'}, longNoVal = @["help", "verbose"])
for kind, key, val in getopt(p):
case kind
of cmdEnd:
assert false
of cmdLongOption:
echo key, ": ", val
of cmdShortOption:
echo key, ": ", val
of cmdArgument:
echo "Arg: ", key, valNow we can call our program like
./t -p13 --quality low --verbose report.pdf
and get this output:
p: 13 quality: low verbose: Arg: report.pdf
We specified for initOptParser(), that the short options h, v, and the long options help, verbose have no values but work just like a plain switch. These specifications tell that function, on the other hand, that all other options do use values, so the numeric value 13 after the p options is recognized as value, as well as the low value that follows after quality. As the verbose option has no value, report.pdf is recognized as an argument.
You may still wonder if the parseopt module supports commands, as used in nim c --mm:arc mycode.nim? Yes, this works, we would get this output:
./t c --mm:arc mycode.nim Arg: c gc: arc Arg: mycode.nim
The command c is recognized as an argument, and in our program, we would have to detect that an argument called just "c" is a command name and not a file name. To avoid ambiguity, we may have to care not only for the value of arguments, but also for its position in the command string, maybe by the use of an additional position counter, or maybe we call paramStr(1) to get the first parameter directly.
Note that all the option values are strings. You have to validate these strings yourself, and you may need to convert them to integers or other data types when required.
At the end of this section, we will sketch how an actual program might use the parseopt module. We assume that we want to create a tool capable of printing a single PDF file, either its complete content or just a specified page, with selectable print quality. So the base structure of our program may look like
import std/parseopt
proc print =
var
pages = "all" # default values
quality = "medium"
verbose = false
filename = ""
argcount = 0
var p = initOptParser(shortNoVal = {'h', 'v'}, longNoVal = @["help", "verbose"])
for kind, key, val in getopt(p):
case kind
of cmdLongOption:
case key
of "help":
echo "This tool ...."
quit(0)
of "verbose":
verbose = true
of "pages":
pages = val
of "quality":
quality = val
else:
echo "Invalid long option:", key, " with value ", val
of cmdShortOption:
echo key, ": ", val
of cmdArgument:
inc(argcount)
if argcount > 1:
echo "Too many arguments"
quit(1)
filename = key
else:
discard
if argcount == 0:
echo "missing filename"
quit(0)
echo "Printing file: ", filename
echo "pages: ", pages
echo "quality:", quality
echo "verbose mode: ", verbose
print()In this example, we left out the interpretation for the short options, which should be processed similarly to the long ones. You can see, that the actual use of the parseopt module still requires a lot of code for validation and interpretation of options and arguments. In Part V of the book, we will present the external Cligen package, which further simplifies the command line parsing.
Regular expressions
A regular expression, shortened as regex or regexp, is a sequence of characters that specifies a search pattern, which is used to find or replace parts of a string or of a whole text document, or just to validate it. It is a technique developed in theoretical computer science and formal language theory, introduced in the 1950s when the American mathematician Stephen Cole Kleene formalized the description of a regular language. The use of regular expressions became popular with Unix text-processing utilities like sed, grep, and awk, were used in early text editors like vi and emacs for pattern matching, and are commonly used in modern text editors and word processing programs in find and find and replace dialogs. Different syntaxes for writing regular expressions have existed since the 1980s, one being the POSIX standard, and another, widely used, being the Perl syntax.
To demonstrate a first simple example of the usefulness of regular expressions, we will start with a sed call that can be used to replace all snake case symbols in a text file with camel case, e.g. convert the symbolic name line_width into lineWidth:
sed -i -E 's/_([a-z])/\U\1/g' myfile.txt
Here the option -E tells the sed program to use the extended regular expressions, rather than basic regular expressions, and option -i specifies to work in place, instead of just printing the modified text in the terminal window. The pattern s/a/b tells it to substitute pattern a by expression b, and the final /g stands for global and tells sed to do substitutions in the whole file. The actual interesting part is the search pattern _[a-z], which specifies the actual underscore character followed by a single lowercase letter. Whenever such a pattern is found, it is replaced with a capitalized version of the found letter. The /U tells sed to convert to upper case, and \1 refers to the captured text segment. You may still wonder why [a-z] is enclosed in braces — well matches enclosed in braces are actually captured, so we can refer to the captured letter later, in this case, we refer to the first captured match with /1 and apply /U on it to convert it to upper case.
As you see, regular expressions are useful but difficult to understand and remember.
Some programming languages, like Perl or Ruby, have built-in support for regular expressions and others use external libraries. For interpreted languages like Perl, Python, or Ruby, it makes a lot of sense to use regular expressions for parsing strings, as the regex engines of these languages are generally written in C language, which leads to the fact that even for very basic string operations like splitting strings into single tokens or doing simple character replacements, the use of regexes can be faster than performing the same operations with multiple statements in the interpreted program code. For compiled languages like Nim, the situation is very different — using regexes is fast, but doing simple things directly in the compiled languages is still much faster. And Nim provides many other libraries like strscans, or parseutils, which can do even advanced string operations much faster than by use of regular expressions.
So actually, the use of regular expressions in Nim is very limited, in most cases, there exist other, simpler, and faster solutions. As learning the use of regexes is not that easy, and it is hard to remember all the details, we may hesitate to try it at all. But actually, for text processing tools like sed and grep, and for use in text editors and word processors, regexes are very useful, so it makes some sense to learn at least the basic use of regular expressions. And when we learn to use regexes at all, then we can use them in Nim as well.
Each character in a regular expression (that is, each character in the string describing its pattern) is either a metacharacter,[68] having a special meaning, or a regular character that has a literal meaning. For example, in the regex b., b is a literal character that matches just 'b', while . is a metacharacter, that matches every character except a newline. Therefore, this regex matches, for example, b%, or bx, or b5. Together, metacharacters and literal characters can be used to identify the text of a given pattern or process a number of instances of it. Pattern matches may vary from a precise equality to a very general similarity, as controlled by the metacharacters. For example, . is a very general pattern, [a-z] (match all lower case letters from 'a' to 'z') is less general and b is a precise pattern (matches just 'b'). The metacharacter syntax is designed specifically to represent prescribed targets in a concise and flexible way to direct the automation of text processing of a variety of input data, in a form easy to type using a standard ASCII keyboard.[69]
In this section, we will not try to explain all the details of the syntax and semantics of regular expressions, but only show you how the regex module is used in principle, and give a few examples of its use. For details, you should consult the API documentation of the regex module, and for concrete use cases, you may additionally consult the Wikipedia article and various internet resources.
The Nim standard library provides two modules for the use of regular expressions, called re and nre, which are both wrappers for the PCRE (Perl Compatible Regular Expressions) C library. Additionally, a module called regex is available as an external package, which is fully written in Nim language. These three modules are similar, but their API is different. When you intend to use re and nre, you have to ensure that the PCRE C library is also installed on your computer. As the external regex module is written in pure Nim and is of high quality, we will actually use that one for our examples — actually, if using one of the other two, it would not be easy to decide which to use. You may wonder why we present the regex module already here, as it is not part of the Nim standard library? Well, a regex library is an important part of each programming language, and re and nre are actually included in Nim’s standard library. Due to Nim’s package managers like nimble, using external packages is very easy, we just have to execute
nimble install regex
We will start to demonstrate the use of the regex module with a very simple example:
import regex
let r: Regex = re"\w\d"
let t1: string = "a1"
let t2 = "nim"
var m: RegexMatch
if match(t1, r, m):
echo "match t1"
if match(t2, r, m):
echo "match t2"We use the re() function with the search pattern as an argument to generate an instance of a Regex variable. Then we can use the match() function to match a textual string against this regex. The last argument of the match function is a variable of RegexMatch type, which captures the matched terms so that we can use them later.
In our pattern "\w\d", the \w stands for a word character that includes upper and lower case ASCII letters, and the \d stands for a decimal digit. So the string t1 matches that pattern, but the string t2 does not, as there is no decimal digit following the first letter. In the example from above, we actually check only if a string matches the pattern, but we do not capture the matches. So, we do not need the RegexMatch variable m at all, and we could call the match() function without that parameter. To actually capture a match, we would have to enclose the subpattern in braces like "\w(\d)" to capture the digit in case of a successful match.
As the next simple example, let us match a string starting with the capital letter A, followed by an arbitrary number of letters, followed by an integer number. We want to capture the integer in case of a match:
import regex
let r: Regex = re"A[a-z, A-Z]*(\d+)"
let t1: string = "Alex77"
let t2 = "nim"
var m: RegexMatch
if match(t1, r, m):
echo "captured: ", m.group(0, t1)
if match(t2, r, m):
echo "captured: ", m.group(0, t2)To understand the regex pattern, we need to know that we can use * to specify an arbitrary number of repetitions and + to specify one or more repetitions. The initial A is not a metacharacter and stands for the literal A. The content of the square brackets specifies a character class, a-z specifies the range of lower case letters, A-Z the range of upper case letters, and the following * indicates an arbitrary number of repetitions. Finally, the \d stands for a decimal digit, and + specifies one or more repetitions. As we enclosed the last subpattern in braces, that group is captured. For a successful match, we can access the capture with the group() function, where we have to specify the index number of the capture, and the actual text string that was used for the match. The fact that we have to specify the initial text may indeed seem a bit strange. For string t1, we get a successful capture with the result @["77"]. So our actual captured string is contained in a seq, which is useful when multiple (nested) strings are captured. In the code from above, we could have used groupFirstCapture() instead to get directly the first captured string.
Greedy matching
Whenever we create regex patterns, we need to consider whether sub-matches should be greedy or not. In most cases, greedy is the default, and we have to take some care when we need non-greedy behavior. Greedy means just, that the regex engine captures as many characters as possible, while non-greedy capturing stops the capturing process early. Indeed, these greedy/non-greedy capturing can be one of the most demanding tasks when we create larger and more complicated patterns. Imagine that for our above example, we would have used the pattern re"A\w*(\d+)". For the same string, "Alex77", we would then get the output @["7"]. The reason for that is, that \w* does greedy processing, eating all but the last decimal digit, which it left to satisfy /d+. From the API documentation of the regex module, we learn that we can specify \w*? instead to get non-greedy processing, so both digits are left for \d+, and we get again @["77"] as output.
Escape sequences
The use of escape sequences in regex patterns is another difficulty for beginners. The first problem can be, that the Nim compiler may process the escape sequences already itself, while we intend to leave them for the regex engine. We can avoid that when we use Nim’s raw strings, e.g. we can use triple quotes when we construct the pattern from individual strings, as done in our next example. In a regex, we can use escape sequences to specify special literal characters; for example, we may use \t for a literal tabulator. And finally, we may have to escape some punctuation characters like *, + or ?, that have a special meaning for the regex engine when we intend to use that character as an ordinary literal. For example, to match a letter followed by a question mark, we have to use a pattern like "[a-z]\?" or "[a-z][?]". Inside a square bracket, we can use the punctuation characters without the need to escape them.
As the next example, let us assume that we have to process a text file in which all lines start with a name consisting of lowercase letters, followed by three decimal numbers. The name and the three numbers can be separated by spaces, or by commas or semicolons:
import regex
let h = """\s*[,;]?\s*(\d+)"""
let r: Regex = re("[a-z]+" & h & h & h)
let t1: string = "nim 12;8 , 17"
var m: RegexMatch
if match(t1, r, m):
echo "captured: ", m.group(0, t1), " ", m.group(1, t1), m.group(2, t1)To understand the pattern that we use in the above code, we have to know that we can use \s for a white-space character, so \s matches a single space or a tabular character. We could have used just a space literal instead, or the [ ] character class containing just a single space. And we have to know that we can use ? to specify an optional entity. We have split the total pattern into two parts, where the variable called h stands for the sequence of any number of white space, followed optionally by a single comma, or a single semicolon, followed again by any amount of white space, that is finally followed by at least one decimal digit. As we want to capture the decimal numbers, the sequence of decimal digits is enclosed in round brackets. The total regex pattern is constructed by the subexpression [a-z]+ for at least one letter, followed three times by the integer pattern with the allowed separators. Note that we allow any amount of spaces or tabulators, but only a single comma or semicolon between the different entities. Also note that the match() function of the regex module always does a full match, so a single space at the beginning or end of the text string would make the match fail. We could compensate for that by starting and ending the regex pattern with "\s*". Or we could use instead of match() the find() function, which searches through the string looking for the first location where there is a match. When we use find(), we may use the special characters ^ and $ to match the start or end of the string, that is, with find() and re"\s+$", we could find all the strings, which have trailing white-space. Note that find(text, re"^regex$", m) is the equivalent to the match() function.
The regex module also provides us with two replace() functions, which we can use to replace matched patterns with literal strings, or captured and modified strings. The first replace() function uses as a third argument a string, which is used for replacements and in which we can refer to captured groups with the symbols $N, where N is the index of the captured group starting at one. The second replace() function uses a function as the third argument. This function gets an instance of the RegexMatch type as the first parameter and returns the string replacement. We will use both variants of the replace() function to create a tiny app that we can use to fix typos in program and text files: Text files can contain typing errors, which include two or more spaces between adjacent words, unneeded trailing white space at the end of lines, and the use of a instead of an in front of words starting with a vocal. Program source code may also use snake case for names instead of camelCase, e.g., line_counter instead of lineCounter. We will create a tool that can fix these four issues, ignoring the fact that an actual a/an replacement might corrupt the program’s source code. To demonstrate the four issues, we have created this small test file — line three contains two unneeded spaces, and the last line has some unwanted trailing white space:
# this is a example var line_width: int echo line_width
We will fix these four issues independently of each other, so we will try to find a regex that matches each issue and then use the replace() function to fix it.
import regex, std/strutils
let fileName = "test.nim"
let trail = re"\s+$"
let aan = re"a(\s+[AEIOUaeiou])"
let space = re"(\S\s)\s+(\S)"
let snake = re"_([a-z])"
proc toUpper(m: RegexMatch, s: string): string =
when defined(debugThis):
echo "a: ", s
echo "b: ", m.group(0)
echo "c: ", m.group(0)[0]
echo "d: ", s[m.group(0)[0]]
echo "e: ", strutils.toUpperAscii(s[m.group(0)[0]])
return strutils.toUpperAscii(s[m.group(0)[0]])
for l in filename.lines:
var h = l.replace(trail, "")
h = h.replace(aan, "an$1") # caution, this is for text files!
h = h.replace(space, "$1$2")
h = h.replace(snake, toUpper)
echo hWe process our file with the issues line by line, using the lines() iterator, to which we pass a file name and which gives us the individual lines of the file. We will start with the simplest task, which is removing trailing white space. The search pattern for this issue is obviously "\s+$", which matches at least one whitespace character at the end of a line; we need to replace this with an empty string. So we pass this regex pattern called trail and an empty string literal to the replace() function. Replacing a by an is also easy — we search for an a followed by white space and a vocal, for which the regex pattern is the aan variable in the above code. In this case, we have to preserve the actual white space and the vocal, so we enclose these in brackets to capture it. The replacing string is "an$1", where $1 stands for the captured white space and the captured vocal. Replacing too much inter-word space is a bit more difficult. The actual issue is one whitespace followed by one or more white-space, for which a possible match pattern is "\s\s+". But actually, we do not want to remove all white space consisting of more than one character, but only white space between words. So multiple white-space at the beginning of a line should be preserved. One solution is, that we use the metacharacter \S, which matches all non-whitespace characters, and then use this search pattern: "(\S\s)\s+(\S)". The pattern starts with a non-whitespace character, followed by a whitespace, then at least one more whitespace character, and finally a non-whitespace character. We capture the two first characters, and the last one. This way, we can replace the whole match with the two captures, and we are done. Finally, we have to replace underscore characters followed by a lowercase letter with a capitalized letter. Some tools like sed provide the \U to capitalize a capture, but this is not available for the regex module. So we use the replace() variant, which uses a procedure as the last parameter — to that proc the capture and the original string is passed, and that function should return the replacement string. The capture which we have to use to catch a snake element is obvious, just "_([a-z])". We call the converter proc toUpper(), its parameters, and its return type is specified by the regex API docs. But unfortunately, the actual structure of the passed RegexMatch instance is not that detailed described. So, we created some conditional echo() statements inside the body of our toUpper() procedure to examine the structure of the parameters. When we compile our program with the -d:debugThis option, and run it, we get this output:
nim c -d:debugThis t.nim $ ./t test.nim # this is an example a: var line_width: int b: @[9 .. 9] c: 9 .. 9 d: w e: W var lineWidth: int a: echo line_width b: @[10 .. 10] c: 10 .. 10 d: w e: W echo lineWidth
So the last string parameter is always the whole string that was passed as the first argument to replace(), and m.group(0) is a sequence of slices for the first capture. We need only the first element of this seq, as we have only one capture, and we use that slice to extract the captured sub-string by use of s[m.group(0)[0]]. Finally, we apply strutils.toUpperAscii() on this sub-string to capitalize it and return that result.
When you run the above program, you should get a text file with all issues fixed. You may redirect the output to a file with "\.t test.nim > newtest.nim" and load newtest.nim into an editor to prove that the trailing white space is removed as well.
Final remarks
The use of regular expressions is not that easy and makes in most cases not much sense in Nim. Perhaps the largest problem with regular expressions is, that it is hard to understand patterns that we created some years ago, or that have been created by other people. And it is difficult to modify those patterns later. Maybe you should play a bit with regexes yourself now, and come back to this topic when you think that you need them. In this book, we were only able to provide a brief introduction to the subject — you will have to carefully study the API docs of the regex module and a lot of other resources on the Internet should you seriously intend to use them. We should also mention, that while regexes are very powerful, for some tasks they do work not that well, e.g. parsing math expressions with nested braces, or just skipping nested comments in some source code, which can be very difficult or even impossible.
References:
Part IV: Some Programming Tasks
In this section, we will present a few simple programming exercises.
Permutations
A collection of n distinguishable elements can be grouped in n! (factorial) distinct arrangements. (We can select an arbitrary element from the collection and place it in any of the n possible positions. Then, we choose the next element and can select from the remaining (n-1) unoccupied positions, and so forth.) For the three letters A, B, and C, this gives these 6 possible permutations:
'A', 'B', 'C' 'A', 'C', 'B' 'B', 'A', 'C' 'B', 'C', 'A' 'C', 'A', 'B' 'C', 'B', 'A'
A simple strategy to create all the possible permutations is the Steinhaus–Johnson–Trotter algorithm: We assume that we know already all the possible permutations of n - 1 elements. Then we can just insert the next new element at all possible positions. As an example, let us create all possible permutations of the numbers 1, 2, and 3. Obviously, the set of numbers 1 and 2 allows only the arrangements 12 and 21. For both of them, we can add the next item at the beginning, in the middle, and at the end, resulting in
312 132 123 321 231 213
For practical purposes, this method may not be very useful, as its simplicity comes from storing all the permutations, thereby allowing us to easily add new elements at all possible positions. The algorithm can be used without storing all arrangements, but then it is not that simple. Another very simple algorithm to generate all possible permutations is Heap’s algorithm, which exchanges only two elements in a clever order to generate the next permutation. You can find detailed explanations of these two and many more algorithms for the generation of permutations on the Internet and in textbooks.
The Steinhaus–Johnson–Trotter algorithm and Heap’s algorithm generate the permutations without following a special order. But often we have a set of orderable items, like numbers, characters, or strings. And in this case, we may want to create the permutation in ascending or descending lexicographic order. The linked Wikipedia article describes in the informal textual form how we may create the next ordered permutation from an existing one:
-
Find the largest index k such that a[k] < a[k + 1]. If no such index exists, the permutation is the last permutation.
-
Find the largest index l greater than k such that a[k] < a[l].
-
Swap the value of a[k] with that of a[l].
-
Reverse the sequence from a[k + 1] up to and including the final element a[n].
This description is enough to create a Nim procedure for this purpose, but let us first try to really understand why this algorithm actually works. We will investigate the strategy using the four decimal digits: 1, 2, 3, and 4. Our task, starting with an arbitrary existing order, is to find the next permutation of these digits that represents the next larger number. We start by investigating the existing digits from the right, that is with increasing power of decimal places. Remember that the value of a decimal number like 56 is 5 * 10^1 + 6 * 10^0. When we regard the decimals starting from the right, then we move to the left, until we detect a digit that is smaller than the right neighbor. We call this position k. When we have found such a position k, then we select the rightmost digit that is larger than the digit at position k, and we swap the two digits. The result is a larger number, and we are nearly done. But actually, this is not yet the smallest possible larger number. We have still to sort all the digits at positions greater than k in ascending order. Note, that sorting a group of digits in ascending order gives the smallest numerical value. In actuality, sorting is not really necessary; simply reversing that sub-range suffices. The reason for this is, that we know, that all the digits right to position k are in descending order, so reversing them gives us the desired ascending order. Let’s investigate the starting value 4231 as an example. The leftmost digit, at position 0, has a value of 4, and the rightmost digit, at position 3, has a value of 1. Starting from the right, we discover that digit 2 at position k == 1 is the first that is smaller than the right neighbor. Starting again at the right, we find that digit 3 at position 2 is the rightmost one that has a value greater than the digit at position k. So we exchange the digits at positions k == 1 and position 2 and get the number 4321. Sorting or reversing the positions k + 1 and k + 2 gives us the final result of 4312.
Creating a Nim procedure from our informal description is an interesting, not-too-difficult task, which teaches us some details about the construction of loops used to iterate over containers. Below is one possible solution, which we will discuss in the next paragraph:
proc nextPermutation*[T](a: var openArray[T]): bool =
var k = a.high - 1
while k >= 0 and a[k] >= a[k + 1]:
dec(k)
if k >= 0:
var l = a.high
while a[k] >= a[l]:
dec(l)
swap(a[k], a[l])
a.reverse(k + 1, a.high)
return trueWe created a generic procedure with the name nextPermutation() and a single argument a of type openArray[T]. We made the proc generic to allow us to use it with all orderable base types – that is, with types for which the < operator is defined, like various numeric types, as well as enumeration types, characters, or strings. We use the parameter type openArray[T], which allows us to pass arrays, strings, and sequences. The procedure has a boolean result type, which indicates if creating a permutation with a larger value is possible. For the number 4321, this is not the case, as that is already the permutation with the largest numeric value. Our procedure starts by investigating digits at positions k and k + 1, starting at the rightmost position a.high. As we are looking for the condition a[k] < a[k+1], we execute the while loop as long as the condition not (a[k] < a[k+1]) is true, which is identical to a[k] >= a[k + 1]. Additionally, we have to ensure that k is always greater or equal to zero, otherwise, we would access an invalid array position. If this loop is terminated by the condition k < 0, then no larger permutation is possible, and the procedure would return the default result false. Otherwise, we use the second while loop, again starting at the right at position a.high, to find a position l with a digit that is larger than the digit at position k. Note that such a position always exists. Finally, we swap the digits at positions k and l and reverse the array positions k + 1 up to a.high. For the reversal, we use the reverse() procedure from Nim’s standard library’s algorithm module. Of course, accomplishing this reversal with a plain while or for loop is also possible – you may try that as a small exercise. Indeed, using a custom loop for reversal might slightly enhance the performance, as invoking reverse() could incur a small overhead. But in most cases, the actual creation of the permutations is not a critical operation, as we typically use the generated values for something, and that may take much longer.
As an exercise, you may create a proc with signature prevPermutation*[T](a: var openArray[T]): bool that creates the permutations in descending order so that calling first nextPermutation() and then prevPermutation() cancel each other. That procedure will look quite similar to our example. You may start with a number like our value 4312 and investigate how you can find the next smaller permutation, which should be our 4231 from above.
Click to see a possible solution
proc prevPermutation*[T](a: var openArray[T]): bool =
var k = a.high - 1
while k >= 0 and a[k] <= a[k + 1]:
dec(k)
if k >= 0:
var l = a.high
while a[k] <= a[l]:
dec(l)
swap(a[k], a[l])
a.reverse(k + 1, a.high)
return trueWe can use our functions directly, or we can use them to create an iterator like
iterator orderedPermutation*[T](input: openArray[T]): seq[T] =
var a = input.sorted
while true:
yield a
if not nextPermutation(a):
breakThat iterator starts by sorting the input argument to get the smallest arrangement and yields that value and all the available permutations. Note that a very similar nextPermutation() proc is available in Nim’s algorithm standard library. And you may find the procs from above and some related procedures and iterators in a Nim GitHub package called combinatorics at https://github.com/StefanSalewski/combinatorics.
References:
Combinations
In mathematics and computer science, combinations refer to the selection of items from a set without regard to the order in which they are arranged. The number of ways to choose r items from a set of n items (with r <= n) without repetition and without order is denoted by (n over r) and is calculated using the formula n! / (r! * (n - r)!), where ! denotes the factorial operation.
Creating a proc or an iterator to generate all the combinations with r elements from a set of n elements is an interesting task which can be solved by various strategies. In the previous section about permutations we started with a formal description of an algorithm found at Wikipedia, tried to understand it, and finally converted it to Nim code. Of course, we could do the same for creating combinations: search for an algorithm description or code written in C or another popular language in text books or the Internet, and convert that to Nim. In this section, we will initially try instead to solve the task without a template, as an exercise with medium difficulty. We will develop recursive and iterative solutions, and finally compare them to solutions from Rosetta-Code.
We will start our investigation with a concrete example provided by the Wikipedia article (https://en.wikipedia.org/wiki/Combination), which shows all the possible combinations of the five digits from 1 to 5 when we select 3 digits each. The columns on the right display a mask built with characters '_' and 'x' to indicate which digits are selected:
12345 123 xxx__ 124 xx_x_ 125 xx__x 134 x_xx_ 135 x_x_x 145 x__xx 234 _xxx_ 235 _xx_x 245 _x_xx 345 __xxx
We have a set of n distinct numbers, and select sets of r elements from these. Each selection should contain only unique elements without repetitions, and ordering of the elements should not matter. Typically we try to generate the combinations in ascending order. Some algorithms for creating combinations might work with all data types, while others may work only for numeric data, which provides the + and < operators.
Before you continue reading this section, we suggest you think for a few minutes about the problem and try to create at least one solution yourself. You could start with a procedure or iterator called combinations() with three parameters: a seq or array with n distinct numbers, and an int parameter called r which tells how many elements we should pick each. The iterator would yield a seq of ints, with r elements, and a proc would return a seq containing all these sequences, or just print them. To further simplify the task, you may start with constant n and r values, called N and R. As a simplified case, you may create an algorithm, which uses always the first n natural numbers as input data, instead of a container data type. Of course, the procedures or iterators may use additional parameters, for example for the recursion depth in case of a recursive proc, or the last created value. Remember that Nim’s iterators do not support recursion, so when you start with a recursive function, you would have to convert it into a non-recursive entity to be used as an iterator. To solve the task, you may even use some of the procs from the preceding sections, but you should be able to do without them. To create the algorithm, we might study the two columns of the above example: The scheme shows the three selected digits on the left, and the mask structure is displayed on the right. The order in which the printed numbers or the mask layout changes, gives us some hints how our algorithm might process the input data.
Using mask permutations
We will start with a simple, but slow solution. The mask in the right column has n == 5 entries, with three elements of value 'x' indicating a selected number, and 2 entries with value '_' denoting the unselected numbers. When we use for the mask an array of five integers, with value 1 indicating a selection and 0 an omission, we can create the ordered permutations of it and get a representation of the desired mask. For each mask value, we can then select a set of 3 items from the n input values and print or return it. So we have this first solution:
import combinatorics
iterator combinations[T](d: openArray[T]; r: int): seq[T] =
var res: seq[T]
assert(r in 0 .. d.len)
var mask = newSeq[int](d.len)
for i in 0 ..< r:
mask[i] = 1
for p in reversedPermutations(mask):
res.setLen(0)
for i, c in p:
if c == 1:
res.add(d[i])
yield res
for t in combinations([1, 2, 3, 4 , 5], 3):
echo tAs our combinations() iterator should return as first result a seq with the r leftmost elements, we use a mask sequence that starts with r 1’s, and default zeros for the other positions. Then we use the reversedPermutations() iterator from the combinatorics module of the previous section to permute the mask in descending order. For each iteration, we append an element from the input array d to the res result variable when the mask contains a 1. The advantage of this solution is that the iterator works for all kind of input data. However, it is slow, and we will present better solutions in the next sections. Note that instead of the iterator reversedPermutations() we could have used orderedPermutations(), if we had filled the mask with -1 values instead of 1. Also note that in our first code listing we used the statement assert(r in 0 .. d.len) to ensure that the selection has a valid size. In our further code examples, we will leave out this test for brevity. As the set size r has to be always positive, we could have used the data type Natural instead of int, but that would still require the test r <= d.len. Further, for orderable input data, we will assume that our procedure or iterator is called with an input sorted in ascending order, so we can avoid an explicit call to system.sort().
Using recursion
When we study the generated sequence of numbers, we can see that the left column starts with six elements each with value 1, following with three times value 2, and finally a 3. For each row, the second and third element are combinations of all the other values. So an obvious strategy is to pick one value and keep it, and generate the combinations for all the other possible values. This results in a simple recursive procedure, with a few necessary conditions: Each combination has to be ordered, and we need a stop condition when no more ordered combinations can be created. For the first column in our example, that means that only values 1, 2, and 3 are allowed, because for a combination starting with value 4, the sequence would need values 5 and 6 to continue, but value 6 is not contained in the input data. As Nim does not support recursive iterators, we can only create a proc that returns a seq containing all the possible combinations, or we just print all the possible combinations to the terminal window, as in the following code:
proc comb(d: openArray[int]; o: var openArray[int]; ip, op: int) =
var ip = ip
let r = o.len
while ip < d.len:
if r - op > d.len - ip:
break
o[op] = d[ip]
inc(ip)
if op + 1 == r:
echo o
else:
comb(d, o, ip, op + 1)
proc combinations(d: openArray[int]; r: int) =
var o = newSeq[int](r)
comb(d, o, 0, 0)
combinations([1, 2, 3, 4, 5], 3)In the while loop body, we use the assignment o[op] = d[ip] to copy an entry from the input data to the output. The positions ip and op both start at index zero. While ip is explicitly increased in the while loop body, op is increased by using increased arguments for the recursive proc call. The condition ip < d.len after the while keyword terminates the proc when all input elements have been used, and the condition if op + 1 == r in the loop body prints all selected elements whenever the index has reached the maximum value r. Otherwise, the proc recurs with the increased variable ip and the value op + 1. The test r - op > d.len - ip in the loop is not really necessary, but without it we have a few loop iterations, which cannot reach the value op + 1 == r and so would not generate output.
First iterative solution
It is known that recursive functions can be transferred into iterative functions, when a stack variable is used to temporarily store further processing steps. This transformation is typically easy, when the recursive call is at the end of a procedure, which is called tail recursion. For tail recursion, often compilers can even do the conversion automatically. An example for tail recursion is the recursive quicksort() function, which we will discuss in one of the following sections. For our above recursive procedure, the conversion is not that easy, because the recursive call is embedded in the while loop body.
Typically, for converting a recursive proc to an iterative form, we employ a stack variable, which can store the proc parameters. We then push the initial parameters to the stack variable, and in a loop we pop the topmost parameter from the stack, and push modified parameters onto the stack, as long as we are not done. For the recursive procedure from above, we copy one element from the input data to the output and immediately recur as long as the output position op + 1 == r is not reached. This is some form of "depth first" recursion. A plain substitution of the recursive comb() call with a stack.push() call to push the parameters onto the stack variable can not directly simulate this behaviour. But we can use a trick: we push the arguments (ip, op + 1) from the recursive comb() call onto the stack, and additional the values (op, ip) to continue the loop. By inverting the order, the outer loop pops first the value (ip, op + 1) from the stack and proceeds with that tuple in a depth first manner, and after that pops (ip, op) to continue. This leads to the code example below:
iterator combinations0(d: openArray[int]; r: int): seq[int] =
type El = object
ip, op: int
var stack: seq[El]
var o = newSeq[int](r)
stack.add(El(ip: 0, op: 0))
while stack.len > 0:
var el = stack.pop
var op = el.op
var ip = el.ip
assert op == stack.len # in this case, we don't need the op field
while ip < d.len:
o[op] = d[ip]
inc(ip)
if op + 1 == r:
yield o
else:
stack.add(El(ip: ip, op: op))
stack.add(El(ip: ip, op: op + 1))
break
for el in combinations0([1, 2, 3, 4, 5], 3):
echo elWe have used a seq variable as a stack, as it supports the add() operation which is our actual push(), and the pop() operation to remove the topmost element. As our recursive proc comb() used two arguments called ip and op, our stack is built of an object data type with these fields. The iterator starts with a seq storing only one element with fields ip == 0 and op == 0. The outer while loop fetches an element from the stack until it is empty, and the inner loop processes all the elements of the input data. When the maximum depth is reached, a result is yielded, otherwise the next data set is stored onto the stack.
Simplified solution
The code above has the special property that the current stack length is always identical to the value op stored in the topmost stack element. See the assert() statement in the code above. We can use this condition to simplify the code. We have to store only the value ip on the stack, so we can use a plain seq[int] as stack, and do not require the object type El. This results in the following code:
iterator combinations[T](d: openArray[T]; r: int): seq[T] =
var stack: seq[T]
var o = newSeq[T](r)
stack.add(0)
while stack.len > 0:
var ip = stack.pop
var op = stack.len
while ip < d.len:
o[op] = d[ip]
inc(ip)
if op + 1 == r:
yield o
else:
stack.add(ip)
stack.add(ip)
break
for el in combinations([1, 2, 3, 4, 5], 3):
echo elThe two identical stack.add(ip) statements look a bit strange, but actually this is only a way to pass two different values op encoded by the actual stack size. We will not further discuss this solution, but present a similar, better algorithm soon.
Counting upwards
Our concrete data example starts with combinations '123', '124', '125'. This is some form of upcounting, with overflow when at a position the maximum value of the input data is reached, and the additional conditions that the output always has to be ordered without repetitions, so values like '132' would be invalid. A possible solution for such an algorithm is the code below:
iterator combinations(i: openArray[int]; r: int): seq[int] =
var o = newSeq[int](r + 1)
o[0 ..< r] = i[0 ..< r]
o[r] = i[^1] + 1
dec(o[r - 1])
while true:
var i: int = r
while i > 0:
if o[i] - o[i - 1] > 1:
inc(o[i - 1])
break
dec(i)
if i < 1:
break
while i < r:
o[i] = o[i - 1] + 1
inc(i)
yield o[0 .. (r - 1)]
for el in combinations([1, 2, 3, 4, 5], 3):
echo elWe take the leftmost r elements from the input data, and append a dummy element. Then we start from the right, trying to increase an element. After that, we still have to fix the elements on the right, to ensure that the output is ordered and contains no repetitions. Our solution contains three while loops, and has the disadvantage that it works only for numeric data. In the next two sections, we will finally present two better textbook solutions, which we found at Rosetta Code.
Stack-based solution
The website https://rosettacode.org/wiki/Combinations has a nice stack-based algorithm provided as C# example, which we can easily understand and translate into the Nim language:
# idea based on c# example from https://rosettacode.org/wiki/Combinations#C#
# see also https://rosettacode.org/wiki/Combinations#Nim
iterator combinations[T](d: openArray[T]; r: int): seq[T] =
var stack: seq[int]
var o = newSeq[T](r)
stack.add(0)
while stack.len > 0:
var ip = stack.pop
var op = stack.len
while ip < d.len:
if r - op > d.len - ip: # not necessary, early exit of loop
break
o[op] = d[ip]
inc(ip)
inc(op)
stack.add(ip)
if op == r:
yield o
break
for el in combinations([1, 2, 3, 4, 5], 3):
echo el
for el in combinations("ABCDE", 3):
echo elThis algorithm is similar to our earlier solution, but it avoids the ugly pushing of two items on the stack each time. The main difference between this textbook algorithm and our own attempt is that in the inner while loop the position indices op and ip are both increased. This leads to the fact, that for our initial example with n == 5 and r == 3 the seq o is constructed as '1', '12', and '123'. For '123', the condition op == r is true, so that value is yielded, and the inner loop terminates. The outer loop continues with ip == 3 and op == 2, generating the value '124' for o, which is again yielded, and so forth. So this stack based solution is a depth-first algorithm as desired. In the inner loop, we use again the optional test if r - op > d.len - ip: to exit the loop early when it is clear that we could not reach the condition op == r for an yield. This textbook solution is short and simple, and works for all input data, so it may be the best choice.
An iterative solution without a stack
Rosetta-Code has another nice solution, which is similar to our own upcounting variant, and is available as C code. A possible translation to the Nim language is provided below:
# idea based on C example from https://rosettacode.org/wiki/Combinations#C
# see also https://rosettacode.org/wiki/Combinations#Nim
from std/sequtils import toSeq
iterator combinations[T](d: openArray[T]; n: int): seq[T] =
var res = newSeq[T](n)
var c = toSeq(0 ..< n)
block comb:
while true:
for i in 0 ..< n:
res[i] = d[c[i]]
yield res
var i = n - 1
if c[i] < d.high: # optional fast path
inc(c[i])
continue
while c[i] >= d.len + i - n:
dec(i)
if i < 0:
break comb
inc(c[i])
while i < n - 1:
c[i + 1] = c[i] + 1
inc(i)
for el in combinations([1, 2, 3, 4, 5], 3):
echo el
for el in combinations("abcde", 3):
echo elThe idea behind the algorithm is easy to understand when we assume that it works by shifting the 1's items of the abstract mask pattern shown at the beginning of this section. For an arbitrary numeric output value, e.g., '134' with corresponding mask value 'x_xx_', we try starting from the right to shift an 'x' further to the right, to get the next larger numeric value. Here, the symbolic mask shift just means that we increase the numeric value at an index position of our output data. That might result in the tuple (135 x_x_x). When we have shifted one mask position to the right, we have to shift all positions to the right of it to the left, to ensure that our generated value is the next larger one. You may compare the mask patterns from the beginning of this section to verify this strategy. This combinations() algorithm uses internally input data that is a sequence of integers starting at zero, and that is created with the statement c = toSeq(0 ..< n) at the beginning of the iterator. The iterator uses an outer while true loop, with two inner while loops. The first of these tries to find a number in the current output that can be increased (shifted to the right). If no candidate is found, the iterator terminates, and otherwise that value is increased. After that, the second inner while loop shifts all positions on the right fully to the left, which just means that these positions all get the value of the direct left neighbor plus one to create the smallest allowed value. The test if c[i] < d.high: is an optimization: If rightmost item can be increased, we are already done, we don’t have to execute the two inner while loops.
This algorithm has the advantage that no stack variable is needed, but the disadvantage that it works internally only for sequences of numbers starting with zero. To allow using it with arbitrary data, we use the intern numeric data as an index for our actual data array d. The for loop after the while true expression copies the matching data values into the res seq, which is then returned by a yield statement.
References:
Sorting
Sorting a sequence or an array of numbers is typically a component of each computer programming course. While we would not typically code a sorting algorithm for the actual software that we write, instead using the generic sorting algorithm from the standard library, learning about sorting algorithms can teach us some basic programming skills. When we sort a small number of items manually, we would typically use selection or insertion sort intuitively: For selection sort, we pick the smallest element and move it to position one, then pick the next smallest item and move it to position two. This strategy is easy to implement and works not badly for small quantities. For larger containers, an algorithm like QuickSort or MergeSort gives better performance.
Selection sort
#[ <--s.len
5
7 <-- i
4 <-- k, x == 4
6 <-- j
3
2 first three entries are already sorted
1
]#
proc selectionSort(s: var seq[int]) =
var i: int # used to step through the still unsorted range
var j = 0 # lower bound for still unsorted range
var k: int # position of currently smallest candidate
var x: int # and its value
while j < s.len: # while there is an unsorted section left
i = j # start with i one above the already sorted range
x = s[i]; k = i # assume first element is the smallest
inc(i) # continue with next one in the still unsorted range
while i < s.len: # while there are unchecked candidates
if s[i] < x: # that one is smaller than current candidate
x = s[i] # remember its value
k = i # and remember its position
inc(i) # examine next candidate
swap(s[j], s[k]) # exchange smallest value with the one currently at position k
inc(j) # sorted range increased by one
import std/[random, sequtils]
proc main =
var s = newSeqWith(10, rand(100))
s.selectionSort
echo s
main()The comment at the top of the previous example shows a partially sorted list of 7 integer numbers. The lowest three positions already contain the sorted numbers 1 to 3. The next four positions are still unsorted. For the sorting process, we need the three indices i, j, k, and the variable x to store an actual value for the comparison. The index j is the lower bound for the still unsorted range, j starts at zero, obviously. The variable x stores the currently smallest value of the still unsorted range, and k is the index position of that value. Finally, i is a counter that is used to step through all the values of the unsorted range. The outer loop is executed as long as j is smaller than the length of the sequence that we want to sort. We set i to the value of j, k to the same value, and assume initially that s[i] is the smallest value from the still unsorted range. That value is stored in x. Then we execute the inner while loop until we have processed all elements of the still unsorted range. Whenever we find an element, that is smaller than x, we store that position in k, and the value in x. When the inner loop has finished, we exchange the smallest value with the first element of the still unsorted range. This way, the sorted range increases, and the unsorted range decreases by one.
To test our sorting procedure, we generate some random numbers, sort them, and print the result. The time complexity of selection sort is said to be O(n^2), where n is the number of values to sort. So the effort increases quadratically with the number of values. This is because we have to test all the still unsorted values just to increase the number of sorted values by one. Selection sort has a natural behavior, that is, for an already sorted array the test s[i] < x would be always false, and we would have to do no movement of values in that case. So performance is best for an already sorted or partly sorted list, and the sorting is stable in the sense, that we do not move elements when it is not really necessary. In one of the following sections, we will discuss the QuickSort algorithm, which is not a stable sorting method: Elements with equal values may be moved with QuickSort. For simple numbers, this doesn’t impact the result, as numbers are indistinguishable. But when we sort objects, maybe persons by age, persons of the same age would be exchanged by QuickSort, which may not be desired.
Note, that the code above is not really optimized for performance yet. One possible improvement is to iterate the two loops not from zero to s.len, but in the opposite direction. In that way, a comparison of loop indices with a constant value, zero in this case, could be used to terminate the loop. Comparison with constants can be faster than comparison with actual variables, and comparison with zero is generally the fastest. Note that we compared indices with s.len() in the previous code, which isn’t too bad, as len() is a property of the seq data structure, so the compiler should be smart and replace s.len with just a field access without proc call overhead.
Insertion sort
Insertion sort is another simple sorting method, that some card players like to use: They hold two sets of cards in their hand, one unsorted set, and one sorted set, which is initially empty. They pick one card from the unsorted set and insert it at the right position in the already sorted set. That action is repeated until the unsorted set is empty. For our next example, we sort our data not in place, as we did in the previous example, but we generate a new sorted copy:
#[
unsorted sorted
<-- k
4
7 3 <-- result.high
5 2
6 1
]#
proc insertionSort(s: seq[int]): seq[int] =
var j: int # current position in the new, sorted range
var k = s.len # index one above the still unprocessed range
var x: int # the value we have to insert next
while k > 0: # as long as we have still unprocessed entries
dec(k)
x = s[k]
j = result.high # top of sorted range
result.setLen(result.len + 1) # reserve space for one more entry
while j >= 0 and x < result[j]: # move the already sorted entries up
result[j + 1] = result[j]
dec(j)
result[j + 1] = x # insert x
import std/[random, sequtils]
proc main =
var s = newSeqWith(10, rand(100))
echo s.insertionSort
main()The commented code preceding the program code shows the still unsorted numbers on the left, and 3 already sorted numbers on the right. For the sorting process, we need two index variables j and k, and one variable, called x, to store the actual value that we have to insert. The variable k is used as the index of the top entry of the still unsorted range. To insert the value x in the already sorted result, we first reserve space for one more entry by calling setLen(), and then iterate over the sorted values and move them one place to the top. We do that, moving to the top, as long as we have not already reached the bottom of the sorted range and as long as the current entry is larger than the value x, which we want to insert. We take the values from the top of the unsorted range, as that is convenient, but of course, we could pick an arbitrary element from the unsorted range.
Insertion sort has O(n^2) cost, as for each element, that we take from the unsorted range, we have to iterate over the sorted range to insert it. As we have to move elements before we can insert an element, insertion sort is slow for larger containers. Selection sort, which also has an O(n^2) complexity, should be faster, as it does not involve an expensive shift of many elements.
When you look at the example code, you may immediately find two possible improvements: We do not really need the variable x, as we can just use s[k] instead. The compiler should optimize the code so that the subscript operator is not executed multiple times for the same index k, so the use of s[k] or x should make no difference to the performance. And we call setLen() in the outer loop to increase the capacity of the result sequence by one each. Of course, setting capacity only one time to the value of s would suffice, as obviously, the result has the same length as our input data. Another possible optimization would be to take advantage of the fact that the destination sequence is sorted so that we would not have to do a linear search to find the insertion position, but we could use a binary search. But that would be more complicated and the benefit would be not large.
Quick sort
As the name implies, this sorting method is one of the fastest. We will explain it in some detail with various variants, as it can teach us two important concepts: Recursion and avoiding recursion by use of a stack container.
The idea of the QuickSort algorithm is simple, and the code is also simple and short, but we have to care for some details, like exact index stop positions. Generally, sorting seems to be an O(n^2) operation, at least from the two traditional sorting methods, Insertion- and Selection-Sort, it seems to be the case. So, doubling the container size seems to increase the required sorting time by a factor of four, which is detrimental for large arrays or sequences. The trick of QuickSort is, that instead of sorting a container with n elements, we just sort the first half and the second half separately, each with approx n / 2 entries. This would be faster, as 2 * (n/2)^2 is only half of (n)^2. And we do apply this trick in a recursive manner on each halved range until the range is reduced to only one or two entries. But to make this work, we have to partition the full range in the first half r1, so that all entries of range r1 are smaller or equal to a median value x, and so that all entries in the second half r2 are all greater or equal to the median x. Let us consider an example with six numbers:
5 3 2 8 1 7 1 3 2 8 5 7
To partition that set of numbers, we only need to exchange the numbers 5 and 1, using the values 5 or 4 as a possible median. Exchanging numbers in an array or a seq is a fast O(n) operation, we have to iterate the container only once. The problem is finding the median. For picking a perfect median, we would need a sorted container, so that we could pick the center entry. However, our container is unsorted. If it were sorted, our work would already be done. Note, that even summing up all entries and dividing by n would give only the average value, not the median. Average and median can be very different, e.g. for many small numbers and a few very large ones. But in practice, picking an estimation for the median, maybe picking one by random from the full range, or picking the center entry is good enough. That choice will not really halve the whole range in each step, but on average it splits the range into two parts, with not too different sizes. This works really well when the input data looks like random numbers, but it may work badly in some unlikely cases when all the input numbers are equal or are already sorted. Already sorted can indeed occur — for that case, picking the center elements of the range gives the perfect median, so we will choose that strategy.
Partitioning the full range is basically very simple: We move from left to right with index i and stop when we find a value s[i] that is not smaller than our median x. And we do the same from the right to the left, with index j, until we find a value, that is not greater than median x. After we have done that, we can just exchange the values at s[i] and s[j] and continue. We continue until i is close to j. The difficult part is to handle this terminating condition exactly, that is, to stop exactly at the right position so that the first half really contains all entries with values less or equal to median x, and that the second half contains only entries with values equal or greater than median x. To make it more clear: Such a partition decouples the two ranges. Sorting the whole range would result in the same state as sorting the first and second ranges on their own.
To write our actual sorting function, we utilize the fact that Nim, like most modern programming languages, supports recursion, meaning a function can call itself again. We saw at the beginning of the book a few examples of that. So we can pass to our function the initial full container, then the function can partition the container in the first and second half and call itself again on the two parts. This way, the actual size of the ranges to sort decreases, and finally recursion stops when the range contains only one or two elements. For size one we have to do nothing at all, but for size two we may have to exchange the two elements if the order is wrong.
A naive implementation might create two new sequences for each function call to handle the two parts, partition the initial sequence by inserting the values into one of the new shorter sequences, call itself on both parts, and finally join the parts and return the result — either directly or as a var parameter. But that would be really slow. A much simpler and faster solution is when we work all the time on the same container, and just tell the function, which ranges the function has to work on. So, we pass the entire sequence and two integers, a and b, to the function. These integers specify the range to process: s[a], s[a +1] .. s[b].
from std/algorithm import isSorted, sort
import std/monotimes
proc qsort(s: var seq[int]; a, b: int) =
assert a >= 0 # a .. b is the range that we have to sort
assert b < s.len
assert b - a > 1 # it may work for smaller intervals, but this is the intended use case
let x = s[(a + b) div 2] # use element from center of range
# var x = s[a] div 2 + s[b] div 2 # bad, x can be smaller than smallest entry in range
# x = s[a .. b].min # worst case test!
var i = a
var j = b
while true:
while s[i] < x:
inc(i)
while s[j] > x:
dec(j)
if i < j:
swap(s[i], s[j])
inc(i)
dec(j)
else:
break
dec(i)
inc(j)
assert i >= a
assert j <= b
if i - a > 1: # still more than 2 entries
qsort(s, a, i)
elif i - a > 0: # two entries
if s[i] < s[a]: # wrong order
swap(s[i], s[a])
if b - j > 1: # and the same for the other half
qsort(s, j, b)
elif b - j > 0:
if s[b] < s[j]:
swap(s[b], s[j])
proc quickSort(s: var seq[int]) =
if s.len == 2 and s[0] > s[1]: swap(s[0], s[1])
if s.len > 2:
qsort(s, 0, s.high)
import std/random
proc main =
var s: seq[int]
var start: MonoTime
randomize() # give us different random numbers for each program run
for i in 0 .. 1e5.int:
s.add(rand(1e8.int))
for i in 0 .. 9:
s.shuffle
s.quickSort
assert(isSorted(s))
for i in 0 .. 1e7.int:
s.add(rand(1e8.int))
start = getMonotime()
s.quickSort
echo getMonotime() - start
assert(isSorted(s))
s.shuffle
start = getMonotime()
s.sort()
echo getMonotime() - start
main()The function qsort() does the entire work. It is called from the function quicksort() passing it the whole sequence and the interval to sort. For the first call, the interval is the complete content of the seq, from s.low to s.high. Function qsort() first asserts that the range is valid, that is that b > a and that both indices are valid positions in the sequence s. That check makes it easier to find stupid errors, the assert is automatically removed, when we finally compile with -d:release. We set the iterating indices i and j to the interval boundaries a and b, and enter an outer loop. In that outer loop, we let run i and j to the center of the interval, as long as the actual entry at the position i or j belongs in the range. If both inner loops have stopped, we swap the entries at positions i and j. As positions i and j contain now again valid entries, we can move both indices one step further to the center. If i and j become the same, we are done. Unfortunately, both may stop too late, so we move both one position back after the outer loop has terminated. You may create a small example with pen and paper, to recognize how the indices behave in detail, and why a fix by one is necessary. The remainder of the qsort() proc is really easy: For both partitions, we check if the interval size is still larger than two entries, in that case, we call qsort() again, to continue with partitioning and sorting. But if the size is two entries, then we just swap() them, if the order is wrong. If the size of the range is just one, we have nothing to do at all.
We test our quicksort() procedure by calling it from another procedure called main(). In that main() function, we fill a seq with random integer values, and shuffle() and sort() it a few times. Shuffle() reorders the entries by random. After our call of quicksort(), we call isSorted() from Nim’s standard library to check the success of our sorting. After these tests, which do some warm-up of the CPU for us, we add more random entries, and again sort and test it, while we record the needed time with module monotimes, as we did before in the Timers section. To get a feeling about the performance of our sorting procedure, we shuffle() again and sort this time with the sort() proc from Nim’s algorithm module. Sort() from algorithm module uses currently another sorting method called merge sort, which has the advantage, that it is a stable sorting algorithm, but it could be a bit slower than QuickSort. And sort() from the algorithm module may pass a cmp() procedure around, which may cost some performance, while our plain, non-generic proc, compares entries directly with the < and > operators. So it is not surprising that our procedure is a bit faster.
You may wonder if it is really necessary to pass the sequence s for each call of qsort(), as for all times the same seq is used. Indeed, Nim supports nested procedures, so we could just make the qsort() proc local to the quicksort() proc, and let qsort() work (as a closure) on the s variable of proc quicksort(). However, this currently does not compile, as sequences cannot be used by closure procedures. But actually passing the sequence to the qsort() procedure should be only a minimal overhead.
One general concern of QuickSort is that the sort is not stable. When we sort an already sorted sequence again, entries with the same value may move. For plain numbers, this is not really an issue, we do not really notice it, as we can’t mark a number in some way, plain numbers are indistinguishable just as elementary particles like electrons and protons are. But when we sort a container with objects by some field, then we notice that objects with the same value for sorting may move. The other concern of QuickSort is a general problem of a recursive algorithm: Each new call of a procedure generates some stack usage, as proc parameters are typically passed on the stack and because the proc may allocate its local data variables on the stack. So many nested calls may need a very large stack, and the program may fail with a stack overflow error. Typically, we have no real troubles with stack overflow, as for each partition, the size of the two new partitions is nearly halved, so that process stops soon. But imagine someone prepares a special data set for our sort proc. That data could be prepared in such a fashion, that at the center of each range, where we pick the estimated median value from, always an extreme value is stored. So our partition would work very badly, in each step we would get a new range with only one element, and one with n - 1 elements. So the recursion depth would go very deep, and the performance would be very bad also. Preparing such a data set would be difficult, but possible in theory. One way to protect us from that attack would be to select the median by random. But unfortunately, all strategies different from picking the leftmost, the center, or the rightmost entry as median are not very fast and make the whole sorting significantly slower. Note, that the strategy of not picking a single element as the median, but calculating a median value, works generally, but has some shortcomings: s[a] div 2 + s[b] div 2 would not work when both values are odd, as we then would get a value that can be smaller than all of our entries and our function would fail. We would have to add one to the average value when both summands are odd, and that fix does again cost performance. And calculating the average by (s[a] + s[b]) div 2 could generate an overflow when both summands are large.
Because of the stack size restrictions, we have a good motivation to show how we can replace recursion with plain iteration when we provide a "buffer" variable that acts as a data stack. For each new partition of our data, we have to put only the two bounds a and b on that data stack, which is not as much as a recursive proc would put on the real computer stack. The modifications to our code from above are tiny.[70]
from std/algorithm import isSorted, sort
import std/monotimes
proc qsort(s: var seq[int]) =
var stack: seq[(int, int)]
var maxStackLen: int
stack.add((s.low, s.high))
while stack.len > 0:
if stack.len > maxStackLen:
maxStackLen = stack.len
var (a, b) = stack.pop
assert(a >= 0 and b < s.len and b - a > 1)
let x = s[(a + b) div 2]
var (i, j) = (a, b)
while true:
while s[i] < x:
inc(i)
while s[j] > x:
dec(j)
if i < j:
swap(s[i], s[j])
inc(i) ; dec(j)
else:
break
dec(i); inc(j)
# assert(i >= a and j <= b) caution, this is not always true!
if i - a > 1:
stack.add((a, i))
elif i - a > 0:
if s[i] < s[a]:
swap(s[i], s[a])
if b - j > 1:
stack.add((j, b))
elif b - j > 0:
if s[b] < s[j]:
swap(s[b], s[j])
echo "Max Stack Length: ", maxStackLen
proc quickSort(s: var seq[int]) =
if s.len == 2 and s[0] > s[1]: swap(s[0], s[1])
if s.len > 2:
qsort(s)
import std/random
proc main =
var s: seq[int]
var start: MonoTime
randomize()
for i in 0 .. 1e5.int:
s.add(rand(1e8.int))
for i in 0 .. 9:
s.shuffle
s.quickSort
assert(isSorted(s))
for i in 0 .. 1e7.int:
s.add(rand(1e8.int))
start = getMonotime()
s.quickSort
echo getMonotime() - start
assert(isSorted(s))
s.shuffle
start = getMonotime()
s.sort()
echo getMonotime() - start
main()We added a variable called stack, which is a seq that stores integer tuples. The qsort() proc first stores the borders of the whole seq on the stack and then executes a loop that, in each iteration, takes a set of two borders from the stack and processes that range. It may sound a bit strange that we start by putting the entire range onto the stack and then take it from the stack immediately at the start of the loop. But that makes more sense when we look at the bottom of the qsort() proc. Instead of recursively calling qsort() again, we just put the borders of the two new partitions on the stack and continue. The whole process terminates when the stack becomes empty, as then all partitions are processed. Note that the actual partition code and the main() procedure are still unchanged. We added a maxStackLen variable to get a feeling of how large our stack has to be. Actually, not that large, as the partition size shrinks in a logarithmic way. So we could replace the seq, that we use now as a stack, with a plain array, as sequences have some overhead and the add() is slower than plain index access. But, how can we prepare for worst-case scenarios? Indeed, there exists a simple solution: The worst case occurs, when we first put a tiny one-element range on the stack, and then the large one, as we would continue with the large one in the same way in the next loop iteration. The other way round would be fine. If we put the tiny range on the stack last, the next iteration would pick that one, and the iteration would stop immediately, or at least very soon, as the ranges drop to two or one entry. When an iteration for a range stops, all ranges pushed to the stack are removed already again, so the total stack size will never become large. So the trick is to just sort the partitions in a way that we put the larger partition first on the stack and the smaller partition second. So the next iteration picks the smaller ones and the whole process stops soon. This way a stack array of 64 entries should be enough, as the maximum needed stack size to sort a {seq] with 2^64 entries should be log2(2^64).
from std/algorithm import isSorted, sort
import std/monotimes
proc qsort(s: var seq[int]) =
var stack: array[64, (int, int)]
var stackPtr: int
var maxStackLen: int
stack[0] = (s.low, s.high)
while stackPtr >= 0:
if stackPtr > maxStackLen:
maxStackLen = stackPtr
let (a, b) = stack[stackPtr]; dec(stackPtr)
assert(a >= 0 and b < s.len and b - a > 1)
let x = s[(a + b) div 2]
var (i, j) = (a, b)
while true:
while s[i] < x:
inc(i)
while s[j] > x:
dec(j)
if i < j:
swap(s[i], s[j])
inc(i); dec(j)
else:
break
dec(i); inc(j)
# assert(i >= a and j <= b) caution, this is not always true!
var c, d: int
for u in 0 .. 1:
if (i - a > b - j) == (u == 0):
(c, d) = (a, i)
else:
(c, d) = (j, b)
if d - c > 1:
inc(stackPtr) # inc before push!
stack[stackPtr] = (c, d)
elif d - c > 0:
if s[c] > s[d]:
swap(s[c], s[d])
echo "Max Stack Length: ", maxStackLen
proc quickSort(s: var seq[int]) =
if s.len == 2 and s[0] > s[1]: swap(s[0], s[1])
if s.len > 2:
qsort(s)
import std/random
proc main =
var s: seq[int]
var start: MonoTime
randomize()
for i in 0 .. 1e5.int:
s.add(rand(1e8.int))
for i in 0 .. 9:
s.shuffle
s.quickSort
assert(isSorted(s))
for i in 0 .. 1e7.int:
s.add(rand(1e8.int))
start = getMonotime()
s.quickSort
echo getMonotime() - start
assert(isSorted(s))
s.shuffle
start = getMonotime()
s.sort()
echo getMonotime() - start
main()Instead of processing the two new partitions at the end of the qsort() procedure each, we apply only one processing code block now, which we execute in a loop, that is executed twice. At the start of that loop, we assign the actual interval boundaries to the variables c and d. That assignment depends on the actual loop index u so that we push the larger range always first on the stack. You may modify the condition u == 0 to u != 0 and observe what happens to the maximum used stack depth. We could write that condition also with a boolean loop variable and a xor operator like
for u in [false, true]:
if (i - a > b - j) xor u:We should not believe everything we think
This is true even for what seems to be correct. Our non-recursive function seems to be fine, and indeed inverting the == (u == 0) condition makes a difference for random data, so is it correct? Well, when we think about it again the next day, we might start having doubts. The outer loop pops one entry from the stack, but in the loop, we may push two new entries. Pushing the smaller interval helps, as we continue with the smaller interval in the next iteration and so remove it from the stack. But the net effect is still that we push one interval onto the stack for each iteration, and in the worst case, that interval shrinks only by one in each iteration. So, it should still not work.
Well, there are rumors that solutions exist. When we think about it, we may ask ourselves if we can just continue with one interval in a loop and push only the other one on the stack. And indeed, that is possible, and this time we did testing for the worst-case scenario:
from std/algorithm import isSorted, sort
import std/monotimes
proc qsort(s: var seq[int]) =
var stack: array[64, (int, int)]
var stackPtr: int = -1 # empty
var maxStackLen: int
var a = s.low
var b = s.high
while true:
if b - a == 1: # done with actual interval, but we may have to swap()
if s[a] > s[b]:
swap(s[a], s[b])
if b - a > 1: # interval has still more than two entries, so continue
discard
elif stackPtr >= 0: # get next interval from stack
(a, b) = stack[stackPtr]; dec(stackPtr)
else:
break # all done
if stackPtr > maxStackLen:
maxStackLen = stackPtr
assert(a >= 0 and b < s.len and b - a > 1)
let x = s[(a + b) div 2]
# let x = s[a .. b].max # worst case test! Slow, test with smaller container size.
var (i, j) = (a, b)
while true:
while s[i] < x:
inc(i)
while s[j] > x:
dec(j)
if i < j:
swap(s[i], s[j])
inc(i); dec(j)
else:
break
dec(i); inc(j)
# assert(i >= a and j <= b) caution, this is not always true!
if (i - a < b - j): # put large interval on stack and cont. directly with the small
swap(i, b)
swap(a, j)
if i - a > 1: # interval has more than two entries, needs further processing
inc(stackPtr) # inc before push!
stack[stackPtr] = (a, i)
elif i - a > 0: # two entries, we may have to swap()
if s[a] > s[i]:
swap(s[a], s[i])
(a, b) = (j, b) # the smaller interval, we continue with that one
echo "Max Stack Length: ", maxStackLen
proc quickSort(s: var seq[int]) =
if s.len == 2 and s[0] > s[1]: swap(s[0], s[1])
if s.len > 2:
qsort(s)
import std/random
proc main =
var s: seq[int]
var start: MonoTime
randomize()
for i in 0 .. 1e5.int:
s.add(rand(1e8.int))
for i in 0 .. 9:
s.shuffle
s.quickSort
assert(isSorted(s))
for i in 0 .. 1e7.int:
s.add(rand(1e8.int))
start = getMonotime()
s.quickSort
echo getMonotime() - start
assert(isSorted(s))
s.shuffle
start = getMonotime()
s.sort()
echo getMonotime() - start
main()The modifications to the code are again tiny. We use an outer while true: loop, which continues with the interval a .. b until its size is less than three entries. Then it pops() a new interval from the stack. At the end of that outer loop, we only put one interval on the stack and directly continue with the other interval. But which interval should we push on the stack, and which one should we process directly further in the outer loop? The solution is to process the smaller interval further in the outer loop, as we are soon done with it. For processing that smaller interval, we may push more ranges onto the stack, but we soon reach interval sizes of less than three, and then we start popping intervals from the stack. And when we are done with that, we pop the larger interval again from the stack. This way, the worst case, where we pick each time a min or max value as median, has the smallest stack consumption, that is one entry. We push the large interval with size n - 1 on the stack and continue with the tiny one-entry range, which signals that we are done with that interval in the next loop iteration, and so the just pushed n - 1 interval is popped from the stack again. This continues in this way, slow but with minimal stack consumption.
From the above code, it becomes clear that for our initial recursive qsort() function, changing the order in which we process the partitions would not really help, as we continue the recursion until all is processed. There is no intermediate pop() involved.
Perhaps you still wonder why the tiny inner loops use the conditions while s[i] < x: and not while s[i] <= x:, as we said that both partitions are allowed to contain the median element. Well, with <=, there would be no guaranteed stop condition for the interval, so indices could run out of the interval. Using an additional condition like and i <= b would make it slower. Another possible modification would be to not use inner while loops at all. Tiny while loops with only one simple termination condition are fast, but the inner while loops would always terminate fast for random data. So we may try instead something like
while true:
if s[i] < x:
inc(i)
elif s[j] > x:
dec(j)
else:
if i < j:
swap(s[i], s[j])
inc(i); dec(j)
else:
break
dec(i); inc(j)You may try that variant yourself, or perhaps look for other variants in internet sources or textbooks. The intention in this section was not to present a perfect sorting function, but rather to teach you some basic coding strategies and related traps.
Merge sort
Initially, we did not intend to discuss the actual MergeSort algorithm at all, as it is a bit more complicated, and whenever we may have seen a sketch of it somewhere, it is generally not easy to remember details.[71] But MergeSort is indeed an important algorithm; it is used by default in Nim’s standard library, and as we have discussed QuickSort already in some detail, we should be prepared for MergeSort now. When we regard the name Merge, which is some form of joining multiple sources to one destination, we may begin to remember the idea of MergeSort: The trick of QuickSort was, that we tried to split, in a recursive manner, the set of all container elements into two subsets, which we can process separately. That improves performance, as sorting is basically an O(n^2) process, and 2 * (n/2)^2 is only half of n^2. For QuickSort, we partitioned the initial range into two ranges a and b, where all elements of range a are less or equal to a median element x, and all elements of range b are greater or equal to the median x. That way, we decoupled the two ranges, we can sort a and b independently, and get a fully sorted range. MergeSort starts also by splitting the full range into two parts, but it really only splits, without any form of rearrangement. Then it continues with sorting each part independently. That sounds strange at first, as we get two sorted parts a and b, but of course, we can not simply append one to the other. The idea of the whole algorithm becomes clear immediately when we think about how we can find the smallest elements of the joined content from a and b. That one is obviously the smallest value of a or the smallest value of b, min(a, b) = min(min(a), min(b)). But when a and b are already sorted, then the minimum value of each is the first element, and so one of these elements at index position zero is the smallest one for a and b joined. And this condition holds even when we pick and remove the smallest element from a or b.
So the basic algorithm is this: Split the entire container into parts a and b and sort them separately. Then create a new, sorted container by iteratively picking the first elements from a or b, whichever is actually the smaller one.
Unfortunately, it seems impossible to sort the initial container in place in this way, as we would always take elements from the front of both and put them at the front of the destination, so those newly inserted elements could overwrite still unprocessed elements. So, we will try to give a sketch of a very slow, unoptimized algorithm, which creates and returns a new sorted container first, to learn the fundamental idea of the algorithm:
proc msort(s: seq[int]; a, b: int): seq[int] =
assert(b - a >= 0)
if b - a == 0:
result.add(s[a])
return
elif b - a == 1:
var (a, b) = (s[a], s[b])
if a > b:
swap(a, b)
result.add(a)
result.add(b)
return
result = newSeq[int](b - a + 1)
var sl = result.len
assert b - a > 1
var m = (a + b) div 2
assert m >= a
assert m < b
var s1, s2: seq[int]
s1 = msort(s, a, m)
var (i, j) = (a, m)
s2 = msort(s, m + 1, b)
assert s1.len + s2.len == result.len
var (k, l) = (m + 1, b)
var l1 = s1.high
var l2 = s2.high
while sl > 0:
dec(sl)
if l1 >= 0 and l2 >= 0: # merge
if s1[l1] > s2[l2]:
result[sl] = s1[l1]
dec(l1)
else:
result[sl] = s2[l2]
dec(l2)
else: # plain copy
while l1 >= 0:
result[sl] = s1[l1]
dec(sl); dec(l1)
while l2 >= 0:
result[sl] = s2[l2]
dec(sl); dec(l2)
proc mergeSort(s: seq[int]): seq[int] =
if s.len < 2:
return s
msort(s, s.low, s.high)
import std/[random, algorithm]
proc main =
var s, st: seq[int]
randomize()
for i in 0 .. 9:
s.add(rand(100))
st = s
echo s.mergeSort
assert(s.mergeSort == st.sorted)
main()The example above is indeed not very complicated. The most daunting task is to get all the indices right. Due to the involved recursion, and the fact that we have to sort the two parts first before we can join them, debugging would not be easy. So we added many asserts to early find stupid errors.
The function mSort() starts by checking if the range to sort has only one or two entries, and handles this simple case directly. Then we allocate the result sequence, find the center position m of the interval a and b, and sort the intervals a .. m and m + 1 .. b each into a new sequence s1 and s2. We have decided that we will merge s1 and s2 into the result sequence from the back, starting with the largest elements. This way, we can count down to zero, which is a bit faster and simpler. We do an actual merging, as long as s1 and s2 have still elements left. As we do the merge from end to start, we have to always pick the largest element from s1 or s2. If we have used all the elements from at least one of the sequences s1 or s2, then there is nothing more to merge, we can just copy the remaining elements from the other seq, that has elements left. Of course, the above example is very slow, as we allocate the result and additional the sequences s1 and s2, and we have to copy many elements.
When we reconsider the problem, we realize that allocating three sequences is excessive. When we regard both, in-place sorting and sorting with a return value, we may discover, that in-place sorting allows us to partly reuse the passed container, and we have only to allocate one additional seq with half the size of the passed container. We copy the second half of the passed container into a newly allocated seq and then can merge values from the new seq and from the first half of the passed seq to positions starting at the end of the passed seq, without overwriting values we still have to process.
This way our code becomes even shorter and basically simpler — we just need to ensure we use the correct index positions.
proc msort(s: var seq[int]; a, b: int) =
assert(b - a >= 0)
if b - a == 0:
return
elif b - a == 1:
if s[a] > s[b]:
swap(s[a], s[b])
return
var m = (a + b) div 2
assert(m >= a and m < b and b - a > 1)
var sh: seq[int] = s[(m + 1) .. b]
var ls = b + 1
msort(s, a, m)
msort(sh, sh.low, sh.high)
var lh = sh.high
var lm = m
while ls > a:
dec(ls)
if lh < 0:
assert ls == lm
break
elif lm < a:
while lh >= 0:
s[ls] = sh[lh]
dec(ls); dec(lh)
else:
if sh[lh] > s[lm]:
s[ls] = sh[lh]
dec(lh)
else:
s[ls] = s[lm]
dec(lm)
proc mergeSort(s: var seq[int]) =
msort(s, s.low, s.high)
import std/[random, algorithm, monotimes]
proc main =
var s: seq[int]
var start: MonoTime
randomize()
for i in 0 .. 1e5.int:
s.add(rand(1e8.int))
for i in 0 .. 9:
s.shuffle
s.mergeSort
assert(isSorted(s))
for i in 0 .. 1e7.int:
s.add(rand(1e8.int))
var st = s
start = getMonotime()
s.mergeSort
echo getMonotime() - start
start = getMonotime()
st.sort()
echo getMonotime() - start
assert s == st
main()For the merging process, we first test if one of the source areas is already exhausted. If all entries from the newly allocated seq sh are consumed, then we can just stop because continuing would only copy elements of the passed container with identical index positions.
And if all elements from the first half of the passed container are consumed, we can just copy the elements from sh into the passed var container. Only if both sources have elements to process left, then we have to do the actual merging.
When we run the program above, we may find that it is about 50% slower than our QuickSort functions. The reason for that may be, that we have to allocate the temporary seq sh, fill it with values, and merge it back. And the total memory consumption is high, our recursive function calls consume for the buffers sh totally the same amount as the initial container. The advantage of MergeSort is, that there is no worst-case as for QuickSort, as we do not have to select a median, but can split the range just at the center, and that the sort is stable, that is merging does not exchange the position of elements with the same value.[72]
Upon further reflection on the algorithm above, and perhaps sketching the recursive steps for a short sequence with pencil and paper, we deduce that the additional buffer sh is only needed for the merging step, and as the merging process occurs from bottom to top, (containers with only one or two entries are returned immediately, which are merged to a larger section, and these larger sections are again merged …) a single buffer could be used. Therefore, we have modified our example again. Now the mergesort() procedure allocates the buffer seq with half the size of the actual data container, and we pass that buffer recursively to the msort() proc for merging only. We call recursively msort() on the first and second half of the full range that we have to sort, then copy the sorted second half into the buffer, and merge the first half and the buffer into the final location.
proc msort(s, sh: var openArray[int]; a, b: int) =
assert(b - a >= 0)
if b - a == 0:
return
elif b - a == 1:
if s[a] > s[b]:
swap(s[a], s[b])
return
var m = (a + b) div 2
assert (m >= a and m < b and b - a > 1)
msort(s, sh, a, m)
msort(s, sh, m + 1, b)
var ls = b + 1
var lh = b - m - 1
var lm = m
#sh[sh.low .. lh] = s[m + 1 .. b]
for i in 0 .. lh: # a bit faster
sh[i] = s[m + 1 + i]
while ls > a:
dec(ls)
if lh < 0:
assert ls == lm
break
elif lm < a:
while lh >= 0:
s[ls] = sh[lh]
dec(ls); dec(lh)
else:
if sh[lh] > s[lm]:
s[ls] = sh[lh]
dec(lh)
else:
s[ls] = s[lm]
dec(lm)
proc mergeSort(s: var seq[int]) =
if s.len == 0: return
var sh = newSeq[int](s.len div 2)
msort(s, sh, s.low, s.high)
import std/[random, algorithm, monotimes]
proc main =
var s: seq[int]
var start: MonoTime
randomize()
for i in 0 .. 1e5.int:
s.add(rand(1e8.int))
for i in 0 .. 9:
s.shuffle
s.mergeSort
assert(isSorted(s))
for i in 0 .. 1e7.int:
s.add(rand(1e8.int))
var st = s
start = getMonotime()
s.mergeSort
echo getMonotime() - start
start = getMonotime()
st.sort()
echo getMonotime() - start
assert s == st
main()An additional tiny performance improvement results from the fact, that we now pass the seq s and the buffer sh as openArrays. This is generally a good idea, as we can so sort arrays also with the same sorting procedure, and it improves performance, as this way the actual data buffer is directly passed to the qsort() proc, while passing a seq means, that we pass the opaque seq structure, which contains a pointer to the actual data. In the example above, we do not only call isSorted(), to prove our result, but we really sort a copy of our data with a sorting routine from Nim’s standard library to ensure that our result is not only sorted data but that it is indeed based on the actual values. That is a good idea because although the algorithm is simple, getting some indices wrong may give us wrong results.
Our recursive merge sort routine is really not that bad. It does a fast, stable sort, and needs only a single buffer of half the size of our actual data. As the interval size is halved in each recursion step, the max recursion depth should be only 64 for a gigantic container with 2^64 elements. As the recursion occurs in a dept first fashion, that is msort() calls itself until range size is only one or two elements, then recursion continues in other branches of the whole sorting three, there should be never more than log2(n) actual recursion steps stored on the CPU stack. Non-recursive, iterative merge sort algorithm exists, but converting the recursive algorithm into an iterative one is not as simple as for the QuickSort case. The reason is, that msort() has first to partition the input range, then call msort() on both subranges and finally do the merging. We will not try to present in this book an iterative msort(), which you may find in textbooks, or somewhere on the Internet, as that would be a bit too much for an introducing course.
We did the QuickSort and the MergeSort in a top-down fashion, that is we split the initial container into two subpartitions, and continue in this way until we have only ranges with one or two entries, and then do the merging from bottom to top. For MergeSort, we could just start from the bottom, joining single adjacent elements to sorted tuples of two entries, and when done with that, merging the tuples of two to sorted tuples of 4, and so on. This would work really well when the initial number of elements in our container is a power of two, and it would work well iterative without recursion. Unfortunately, in most cases, the container size is not a power of two, so such a bottom-up merge sort needs some math to get all the range sizes right. But the bottom-up process has a big disadvantage on modern hardware, as it has no locality for element access operations: We would iterate repeatedly over all the container entries in sequential order, so the CPU cache can not support our element access operation that well.
Other known sorting algorithms are the easy, funny, and slow BubbleSort, or Shell- and Shaker-Sort. But these are not used in practice. As an exercise, you can try to make our QuickSort or MergeSort generic and pass a cmp() proc, and make it work for sorting in ascending and descending order. Or, you may try to fall back to selection sort, when the partitions become small. In theory, SelectionSort is faster for ranges of only a few dozen elements, but when we have to do a decision about which one to use inside the qsort() or msort() procedure, then this decision compensates generally for the advantages again so that the net benefit is tiny. Of course, we would have to test all of our sorting procedures for special cases, that is for seqs of length 0, 1 or two, and for sequences with all entries equal, all inversely sorted, or presorted. And we would have to check how performance is when we sort not containers containing plain data like numbers, but containers whose elements are objects, strings, or again arrays, or sequences. String sorting is special for various reasons: strings in Nim are opaque objects, with a pointer to the actual data. This is some indirection, and the actual data can be located somewhere in the RAM in a cache-unfriendly manner, so the actual comparison process can be slow. Swapping of strings is also special, as swap() generally just does a pointer exchange for the data areas, and does not have to copy the actual data. For sorting containers, where each entry is an array (of characters), the swap would have to copy the data content.
Finally, we should mention that the Python language uses a complicated sorting algorithm called TimSort, which is a smart mix of various sorting algorithms.
References:
Iterative merge sort
In the preceding section, we said that an iterative merge sort algorithm might be difficult, and has no significant advantages compared to the recursive version. Actually, after our detailed discussion of various strategies to convert recursive algorithms to iterative ones in the Combinations section — and some vacation — it is obvious how we can convert our recursive merge sort algorithm with only some tiny fixes to an iterative one. Before you continue reading, you should think about a possible solution yourself for a few minutes as an exercise.
There might be no real benefit of an iterative algorithm, but at least it is some fun to create it. And an iterative solution might be a good starting point, in the case that we ever should have the demand for a parallel sorting algorithm using all available CPU cores.
Recall that the recursive merge sort halves the data set size in each recursive step, so the maximum recursive depth is lg(datasetsize), where lg() (log2()) is the binary logarithm and datasetsize is the length of our array or seq to sort. As all possible data set sizes are smaller than 2^64 bytes in size on a 64-bit system, the maximum recursion depth, or the corresponding size of a stack buffer variable for an iterative solution, is never larger than 64.
The merge sort algorithm has the special property, that the full dataset range is first divided into two partitions, which are both first sorted again, and finally merged. So an iterative algorithm might look not that straight forward. But when we think about it a bit longer, there is one easy solution: we need to store just two different actions in our stack variable -- a true sort action of an interval and a merge action only. So we would start by placing the interval boundaries for a full sort action onto the stack, pop() that data, and then push the data for the next full sort action of the two new partitions onto the stack. Afterward, we’d push the data for a plain merge action. For the two different action types, we might create an object type, containing a boolean or an enumeration field specifying the action type, and two integer fields holding the data range to process. But actually, we do not need an object or tuple type. The two boundaries of the data range to process are always indices of an openArray type, so both values are never negative, and the first value should be never larger than the second. So we can leave the boundaries as they are for a full sort action, but exchange them, or make at least one value negative, to indicate that only a merge action is required. In the following code, we exchanged the two boundaries to indicate the merge action:
proc msort(s, sh: var openArray[int]; a, b: int) =
type R = tuple[a, b: int]
var stack: seq[R]
stack.add((a, b))
while stack.len > 0:
var (a, b) = stack.pop
var m = (a + b) div 2
if a <= b: # regular interval
assert(b - a >= 0)
if b - a == 0:
continue
elif b - a == 1:
if s[a] > s[b]:
swap(s[a], s[b])
continue
assert (m >= a and m < b and b - a > 1)
#imsort(s, sh, a, m)
#imsort(s, sh, m + 1, b)
# note that we push intervalls onto stack in inverted order!
stack.add((b, a)) # merge only
stack.add((m + 1, b)) # sort
stack.add((a, m)) # sort
else: # merge only
swap(a, b) # we have to swap, because we pushed the interval to merge inverted onto stack!
var ls = b + 1
var lh = b - m - 1
var lm = m
#sh[sh.low .. lh] = s[m + 1 .. b]
for i in 0 .. lh: # a bit faster
sh[i] = s[m + 1 + i]
while ls > a:
dec(ls)
if lh < 0:
assert ls == lm
break
elif lm < a:
while lh >= 0:
s[ls] = sh[lh]
dec(ls); dec(lh)
else:
if sh[lh] > s[lm]:
s[ls] = sh[lh]
dec(lh)
else:
s[ls] = s[lm]
dec(lm)When you compare this modified iterative msort() procedure with the one in the code example from before, you will notice that the changes are tiny. You can directly replace the recursive msort() proc from the last example in the preceding section with this one, and compile and run the program. We have created a tuple type R, which stores the two integer boundaries of the range to sort, and used a local seq with the base type R as stack. The iterative msort() procedure starts by pushing the initial interval parameters a and b onto the stack, indicating that a full sort is required. In the while loop, we pop() a range from the stack, and test if it is a regular interval, or an inverted interval. For a regular interval, we test for the trivial cases with interval sizes 1 or 2 first. If the interval is larger than two elements, we halve it, and push() the two halved intervals onto the stack along with the full, inverted interval. Note the order in which we push these intervals onto the stack: We put the full inverted interval first, so it is popped last, keeping the original processing order. For the case that an inverted interval was popped from the stack, we invert it again to recover the original values, and proceed exactly as in the recursive case.
As expected, this first iterative solution is not faster than our recursive version, but a bit slower. One reason might be that we use as stack an ordinary seq data type with its relatively slow add() operation. As the size of the stack variable is always limited by 64 entries, we can use a plain array instead. But we have to simulate the push() and pop() operations by updating an explicit stack index variable for that case.
Optimized generic iterative merge sort
proc mergeSort[T](s: var openArray[T]; ascending = true) =
type R = tuple[a, b: int]
var sp: int = -1
var stack: array[64, R]
template add(r: R) =
inc(sp)
stack[sp] = r
template pop: R =
let res = stack[sp]
dec(sp)
res
if s.len == 0: return
var sh = newSeq[T](s.len div 2)
add((s.low, s.high))
while sp >= 0:
var (a, b) = pop
let m = (a + b) div 2
if a <= b: # regular interval
assert(b - a >= 0)
if b - a == 1:
if ascending and s[a] > s[b] or not ascending and s[a] < s[b]:
swap(s[a], s[b])
elif a != b:
assert (m >= a and m < b and b - a > 1)
add((b, a)) # merge only
add((m + 1, b)) # sort
add((a, m)) # sort
else: # merge only
swap(a, b) # we have to swap, because we pushed the interval to merge inverted onto stack!
var ls = b + 1
var lh = b - m - 1
var lm = m
for i in 0 .. lh:
sh[i] = s[m + 1 + i]
while ls > a and lh >= 0:
dec(ls)
if lm < a:
while lh >= 0:
s[ls] = sh[lh]
dec(ls); dec(lh)
else:
if sh[lh] > s[lm] == ascending:
s[ls] = sh[lh]
dec(lh)
else:
s[ls] = s[lm]
dec(lm)We have unified the two distinct procedures mergeSort() and msort(), and made them generic. Further, we use as stack an array instead of a seq, supported by our own push() and pop() templates. As another minor optimization, we replaced the if lh < 0: break statement with the additional while condition lh >= 0. Finally, we have introduced a boolean proc parameter, called ascending, with default true value, to optionally sort in descending order. In the procedure body, we have to watch for this parameter at two places. In the merging part, we modified the condition to if sh[lh] > s[lm] == ascending:, which should cost nearly no performance. If we were to use a similar test as the actual swap() condition, we would get swaps for equal values, which is always the case for a == b. So, we now test for the condition b - a == 1 first, and then use the longer condition if ascending and s[a] > s[b] or not ascending and s[a] < s[b]: as the actual swap() condition. Due to short-circuit evaluation, this should have no significant impact on performance.
As an exercise, you could create a procedure variant that use a passed cmp() proc instead of the > operator. That should not be difficult, but the use of a passed cmp() procedure makes the sorting slower, as that proc can not be inlined.
Iterative merge sort variant with internal loop
For our iterative quicksort() algorithm, we created a variant which popped only one interval onto the stack, and continued directly with processing of the other interval. We did that to avoid a very large stack size for worst-case data. It is easy to do the same for our iterative merge sort procedure. For the case where an actual sort action is required, and not just a merge, we can directly continue with one of the two intervals in an internal while loop. You may try it yourself, before looking at the following code:
proc mergeSort[T](s: var openArray[T]; ascending = true) =
type R = tuple[a, b: int]
var sp: int = -1
var stack: array[64, R]
template add(r: R) =
inc(sp)
stack[sp] = r
template pop: R =
let res = stack[sp]
dec(sp)
res
if s.len == 0: return
var sh = newSeq[T](s.len div 2)
add((s.low, s.high))
while sp >= 0:
var (a, b) = pop
var m = (a + b) div 2
if a <= b: # regular interval
assert(b - a >= 0)
while true:
if b - a == 0:
break
elif b - a == 1:
if ascending and s[a] > s[b] or not ascending and s[a] < s[b]:
swap(s[a], s[b])
break
else:
assert (m >= a and m < b and b - a > 1)
add((b, a)) # merge only
add((m + 1, b)) # sort
#add((a, m)) # sort
b = m
m = (a + b) div 2
else: # merge only
swap(a, b) # we have to swap, because we pushed the interval to merge inverted onto stack!
var ls = b + 1
var lh = b - m - 1
var lm = m
for i in 0 .. lh:
sh[i] = s[m + 1 + i]
while ls > a and lh >= 0:
dec(ls)
if lm < a:
while lh >= 0:
s[ls] = sh[lh]
dec(ls); dec(lh)
else:
if sh[lh] > s[lm] == ascending:
s[ls] = sh[lh]
dec(lh)
else:
s[ls] = s[lm]
dec(lm)This version has no actual benefit, but it is always good to know that it exists. The careful reader may wonder whether our selected size for the stack array of 64 elements is really large enough, as we pushed always three items at once on the stack. Indeed, theoretically the stack variable should have three or at least two times that used size of 64. But 2^64 bytes is the theoretical maximum memory size of a 64-bit computer, from which the available devices are far removed. Typical desktop computers have no more than 64 GB RAM, which is only 2^36 bytes. And current CPUs have typically only a 40-bit width data bus, so that only 2^40 bytes can be physically addressed (1 TB). As a conclusion, we might indeed increase the stack variable size to 80 elements to be on the safe side. At the end of this section, there’s an interesting observation: When we compile our test program from above, where we use the sort() function of Nim’s standard library as well, with the option -d:lto, the performance of that sort() function doubles, and is close to our own merge sort. So with the gcc 13.2.1 backend and LTO, the C compiler seems to be able to inline the cmp() function used by Nim’s standard library’s sort() proc.
Reading CSV files and other data
We discuss the reading of CSV files (comma-separated values) and other data files in Part VI of the book, labeled "Advanced Nim". Not because it is difficult, but because we compare the performance of various processing techniques, including RegEx and PEG matching, and finally show how we can distribute the parsing work across multiple CPU cores. The PEG (Parsing-Expression-Grammar) is introduced in Part V of the book, which discusses some interesting external packages. If you are interested in CSV reading and parsing, you may already read section Parsing data files (in parallel) now; just skip the sections about PEGs and parallel parsing.
Some small exercises
Removing adjacent duplicates
Removing duplicates from containers is a common programming task. When we know in advance, that we do not want to store the same data value more than once, and that the order of the stored values does not matter, then we may consider using some form of sets or hash sets. If insertion order matters, then the standard library may provide some form of ordered or sorted sets for us. But for this exercise, we will assume that we have values stored in a sequence, and we want to remove the adjacent duplicates. A typical use case for that is when we have stored a path of 2D or 3D positions. When we insert, move or delete a position value, it may occur that we get duplicates, with zero spatial distance between the two neighbored positions. In that case, it is generally desired to remove the duplicate. A similar use case is a text file stored as a sequence of words, where adjacent duplicated words may indicate a typo. To keep our example short and simple, we will use as data type a seq[int]. Using other data types or creating a generic procedure should be not difficult for the reader.
# [1, 4, 4, 2, 5, 5, 5, 1] ==> [1, 4, 2, 5, 1]
Before you continue looking at our provided example code, you may think about this task yourself, perhaps take a piece of paper and a pencil and sketch the algorithm. It is really not difficult, maybe too easy for you, when you have carefully studied the preceding sections of the book, or when you have already some programming experience. When we create a procedure for this task, we have to first decide if the procedure should work in-place on the passed seq or if it should return the processed result and leave the original data unchanged. Often returning a copy is easier, but for our task, the common use case seems to be more of an algorithm that works in place. So we will provide the in-place algorithm here and leave the version returning a processed result as an optional exercise for the reader. Note that returning a processed copy needs to allocate the seq for the result, and potentially later the memory management system has to free the result data again, which is some additional effort. So we may guess that the in-place proc is faster, as long as we do not really need the copy. When needed, we can use the dup() macro of the sugar module to use our in-place procedure as one, that works on a copy and returns this copy, without modifying the input.
The basic idea of our algorithm is, that we iterate through the whole seq and pick an element at the current location only if it is not identical to the preceding element. For the case that our seq is empty or contains only one single element, we have obviously nothing to do and can return immediately. So our code may look like:
proc deTwin(s: var seq[int]) =
if s.len < 2:
return
var i, d: int # d is the position where we copy the elements that we want to keep
while i < s.high:
inc(i)
if s[d] != s[i]:
inc(d)
s[d] = s[i]
s.setLen(d + 1)
var h = @[1, 4, 4, 2, 5, 5, 5, 1]
detwin(h)
echo h # [1, 4, 2, 5, 1]We use two positions, the actual position in the input data denoted as i, and the destination position d. Both start with the default value of zero. To keep full control over the iterating process, we do not use a for loop in this case, but a plain while loop for the index of the actual position. In the while loop body, we compare the value at the current index position s[i] with the value that we picked before, which is s[d]. If the values are not identical, we pick the current value s[i], otherwise, we just skip it. By picking a value, we mean that we copy it from index position i to index position d. Of course, this can only work, when d is never larger than i, as otherwise, we would destroy our still unprocessed input data at positions s[i + 1]. The loop body is really simple, but getting the indices right needs some care: We have to ensure that i and d start at the right positions, that we increase i and d when necessary, and that the loop terminates when all input data is processed. Obviously, the first comparison should compare s[d == 0] with s[i == 1]. So d and i can both start with the initial value of zero, with i being increased each time at the start of the loop. The destination position d starts with zero, as we always accept the first element, and d increases only when we have accepted one more element. The loop is executed as long as i is less than s.high. Finally, we have to set the new length of s to d + 1. The value d + 1 results from the fact, that we always accept the first element, and for each more accepted element d is increased, so the total number of accepted elements is d + 1. The careful reader may wonder, if the first two lines of the procedure, where we test for the trivial case, are really necessary, or if these cases can be covered by our while loop already. Well, generally it is a good idea to avoid unnecessary tests for trivial cases when possible, as those tests may increase the code size and marginally affect performance. But in this case, we have two trivial cases — empty seq and seq with only one element, which can not be covered well with a loop with only one simple termination condition. And of course, we should try to simplify the condition of the while loop as much as possible, avoiding additional boolean conditions with and or or operators to achieve the best performance. Further, you may wonder if our picking strategy is really optimal, as, for a seq with no adjacent duplicates, we still copy all the elements. Yes indeed, but for the general case, with duplicates, we have to do the copy, and such a copy operation is really fast. Additional tests with an if condition could impact performance. Maybe we could have used two loops in the procedure body, one that just accepts elements without a copy operation, as long as no duplicates are found, and a second loop like the one from above, which then has to do copy operations to move the elements to the front. You may try that yourself, and measure the performance for various input data.
Array difference
The difference of two arrays or sequences A and B is the collection (A - B) of values that are contained in A but not in B.
[1, 2, 5, 2, 9, 7, 0] - [7, 4, 1, 10, 7] == [2, 5, 2, 9, 0]
Actually, such a difference of array or seq containers isn’t frequently needed, which may be why the Nim standard library doesn’t provide this function.[73] Building such kinds of differences is much easier and faster with sets or hash sets, so whenever possible, we should use these containers from the beginning when we know in advance that we have to build differences. But sometimes we just have arrays or sequences, and then we may notice that we require the difference. When the order of the elements does not matter, we may just convert both containers to sets or hash sets, build the set difference, and then possibly convert that difference back to a seq. But there are use cases, where we really want to work with array or seq containers, maybe because we want to iterate over the container, want that values can be contained multiple times, or always keep the insertion order.
So let’s create an algorithm to do this task. A naive strategy would be to iterate over container A and delete each element that is also contained in B. But that would be slow, and may not work at all, as deleting elements while we iterate over the seq does generally not work at all. We will create a proc called `-` which can be used as an operator to build the difference of two arrays or sequences and which returns the difference as a new seq, and a `-=` procedure, which removes the elements of b from a in place and is also used as an operator.
import std/sets
proc `-`*[T](a, b: openArray[T]): seq[T] =
let s = b.toHashSet
result = newSeq[T](a.len)
var i = 0
for el in a:
if el notin s:
result[i] = el
inc(i)
result.setLen(i)
proc `-=`*[T](a: var seq[T]; b: openArray[T]) =
let s = b.toHashSet
var i, j: int # both start with default value zero
while i < a.len:
if a[i] notin s:
a[j] = a[i]
inc(j)
inc(i)
a.setLen(j)
proc main =
let a = [1, 2, 5, 2, 9, 7, 0]
let b = [7, 4, 1, 10, 7]
echo a - b # @[2, 5, 2, 9, 0]
echo b - a # @[4, 10]
var x = @a
x -= b
echo x # @[2, 5, 2, 9, 0]
main()To make the lookup for elements contained in b fast, we convert b to a hash set, for which lookup time is in principle independent of the size of the container, which is known as O(1) in Big O notation. We make the two procedures generic and use the data type open array for the two passed arguments so that our procs can be used for arrays as well as for sequences. An exception is the first var parameter of the `-=` proc, which must be a seq, as arrays have a fixed size and cannot shrink. For the `-` proc, we pre-allocate the returned result variable with a size of a.len, so that we can avoid re-allocations. Then we iterate over a with a for loop, copying the current element to the result seq if its value is not contained in the hash set. We use the subscript operator [] to copy the picked elements at position i in the result seq, which is faster than starting with an empty result seq and appending the picked elements. Since we initialize the result seq with the size of container a, we must finally call result.setLen(i) to shrink the size to the number of selected elements. The presented `-=` procedure is a bit more complicated, as we process seq a in place. We use an approach similar to what we did in the deTwin() procedure in the previous section, that is, we use two index positions i and j, and copy elements from the current position i to position j if the value is not contained in the lookup set. Finally, we need to set the size of seq a to match the number of selected elements.
While the two presented procedures can be quite useful in some cases, they are primarily presented as an exercise here. As a smart user of the Nim forum showed us, we can get a very similar behavior by use of the filter() proc in combination with the => operator of the sugar module:
import std/[sequtils, sets, sugar]
let a = [1, 2, 5, 2, 9, 7, 0]
let b = [7, 4, 1, 10, 7]
let bSet = b.toHashSet()
echo a.filter((x) => x notin bSet)References:
Binary search
Perhaps you can recall that, some decades ago, your parents used phone books and dictionaries made of paper sheets, filled with printed text sorted alphabetically? Well, that alphabetical ordering was done with a purpose: When searching for a name or a word, we could just open the book somewhere in the middle. If the name or word that we searched for was ordered alphabetically before the content of the current page, then we continued searching for that term in the lower half, otherwise in the upper half. That procedure continued until the desired entry was found or until it became clear it was not available. This type of search in an ordered data set is called binary search, half-interval search, logarithmic search, or binary chop. As each repetition halves the remaining data set, it is much faster than a linear search in unordered data.[74]
To use this type of search strategy on a computer, we store our sorted data in an array or a seq. Creating a procedure to do the search is basically very easy, but we have to care for some details:
# 1 2 3 4 5 6 7 8 # search for v == 7
# a p b
# a p b
proc binarySearch(s: openArray[int]; v: int): int =
var a, b, p: int
a = s.low
b = s.high
while a <= b:
p = (a + b) div 2
if v > s[p]: # continue search in the upper partition
a = p + 1
elif v < s[p]: # continue search in the lower partition
b = p - 1
else: # we have a match
return p
return -1 # indicate no match
var d = [1, 3, 5, 7, 11, 13]
for i in 0 .. 15:
let res = binarySearch(d, i)
if res >= 0:
echo "Found value ", i, " at position ", resTo keep our example code as simple as possible, we do our search on an ordered array or seq of integers. The value we are searching for is passed as the second integer argument to the proc called binarySearch(). The first three lines of the example program show some example data consisting of the ordered numbers 1 .. 8. Here we use a consecutive sequence of numbers, but the specific numbers are completely arbitrary, as long as the sequence is sorted in ascending order. Let a be the index of the lowest number in the seq, and b be the index of the largest number. If the number we search for is contained in the seq, then that number must be located at an index position greater or equal to a and an index position less or equal to the index position b. For the index position p near the center, the obvious choice is (a + b) div 2. For our example, we assume that we search for a value of 7. The first index position of p is (0 + 7) div 2, which is 3 containing value 4, which is lower than the searched value 7. So we would have to continue our search in the upper half, setting the new lower bound of the range to search to p or p+1. The upper boundary remains unchanged for this case, and we continue with a new value p = (a + b) div 2.
The program code follows this strategy straightaway. We start with a == s.low and b == s.high, and the loop continues as long as a <= b. Note, that we use as new boundaries not the value of p, but p + 1, if we continue with the upper half, and p - 1 when we continue with the lower half of our data. We can use this offset of one, as we have already investigated position p. This offset of one does not only speed up things, as the new interval is smaller by one this way, but actually guarantees that the interval size permanently shrinks and the algorithm terminates always. Without that offset, in the case where b == (a+1), we would get a value p == (a + a + 1) div 2, which equals a, and we might then set the new a to p, which would be the same as the previous a. So the range would not always shrink, and our algorithm would not really terminate for some data values. You may test that yourself when you remove the offset — the algorithm would not terminate for some data. Finally, try making the procedure generic and then possibly search for a word in an ordered list of words.
Click to see a possible solution
proc binarySearch[T](s: openArray[T]; v: T): int =
var a, b, p: int
a = s.low
b = s.high
while a <= b:
p = (a + b) div 2
if v > s[p]: # continue search in the upper partition
a = p + 1
elif v < s[p]: # continue search in the lower partition
b = p - 1
else: # we have a match
return p
return -1 # indicate no match
var d = ["Algol", "Basic", "C", "D", "Elexir", "Erlang", "F#", "Haskell"] # sorted!
for i in ["Oberon", "Nim", "Basic", "Ada", "Erlang"]:
let res = binarySearch(d, i)
if res >= 0:
echo "Found value ", i, " at position ", resReferences
Integer to string conversion
Have you ever asked yourself what actually happens when we print the value of an integer variable on the screen, perhaps using the echo() procedure? Before echo() can print the value, the integer has to be converted to a text string somehow. Some people may think that this conversion is trivial. However, as we already know, all data in our computers is stored in abstract binary form, so we know better. But could there be some magic available to do this task? Well, when we regard the existence of C libs or the Nim standard library as that magic solution, then the answer is yes. But in this section, we will assume that we will not use a C library or a function of the Nim standard library for the conversion of integers to strings, but do it ourselves. Indeed, this conversion task is an interesting exercise, from which we can learn a lot, much more than from using a gaming lib and moving some sprites over the screen. Even if you already know how to do it, you might learn something new. We will start by asking how we can convert an int i with a numeric value 0 <= i <= 9 to a single character digit matching this value. Then, we will present a first procedure to convert larger integers to strings. After that, we will try to improve the initial solution, make the procedure generic, and investigate potential issues that might occur on restricted hardware like small microcontrollers and embedded systems.
Since there’s no magic involved, let’s recall how to print the characters 0 .. 9: Well, first, we have to remember that the 256 ASCII characters map directly to the integers 0 .. 255, e.g. the character A is mapped to the integer value 65. We can use the conversion functions int() or ord(), and char() to convert between the two data types, where these conversion functions do no real work at all, the content of the variable is just interpreted as a different type. In other words, a plain cast would achieve the same result:
var i: int8 = 65
echo char(i)
echo cast[char](i)
var c: char = 'A'
echo ord(c)
echo int8(c)
echo cast[int8](c)A A 65 65 65
Of course, the same conversions work for all 256 ASCII characters, which include the decimal digits '0' .. '9'. So one way to print the 10 digits is
var startPos = int('0')
var i: int
while i < 10:
stdout.write(char(startPos + i))
inc(i)
stdout.write('\n')This works because the 10 decimal digits follow each other in the ASCII table. As we may not remember the position of the digit '0' in that table, we get the position by int('0'). Note that int('0') and ord('0') are basically the same here; we don’t have a strong preference and use both interchangeably. The ord() function is generic, always returns an int, and works for ordinal types, enums with holes, and distinct ordinal types, while the int() functions have the advantage of being available in different sizes, like int8(), and also for unsigned results. We strongly hope that you understand the difference between the int value 0 and the decimal character digit '0' — if not, you may read again the section about characters in Part II of the book, see Characters.
With these introductions, you may already have an idea of how we can get the decimal digit for the lowest decimal place of an arbitrary integer value v: char(v mod 10 + ord('0')). This works, because v mod 10 is the numeric value of the lowest decimal place, that is a value between 0 and 9, and when we add ord('0') we get the corresponding position in the ASCII table. Finally, we use char() to convert that numeric value to a char data type, which is only a plain cast, the compiler reinterprets the bit pattern as a character. So we are mostly done. To get the following digits, we just divide the initial integer value by ten to move all one position to the right, and then we continue with the initial step. We use integer division, ignoring the remainder. We repeat that until the division by ten gives zero, then we are done. That division by ten may still be confusing for you — we know that in the decimal notation, a division by ten is a shift right, but why does that work for a number that is stored in binary form in the computer memory? Indeed, it is a bit confusing. The division by ten works, because it is a purely mathematical, abstract division operation, fully independent of the actual representation of the number. Imagine you have a two-digit number in the range 00 .. 99. Now divide that number by ten. Independent of how the number is stored, we will get a new number in the range 0 .. 9, and we can convert that value to a digit with the method shown above.
So following this strategy, we may get a first intToStr() procedure that may look like this one:
proc intToStr(a: int): string =
var v = a
while true:
result.add(char(v mod 10 + ord('0')))
v = v div 10
if v == 0:
break
echo intToStr(0)
echo intToStr(1234)
echo intToStr(12345678901234.int)
echo intToStr(int.high)As output, we would get
0 4321 43210987654321 7085774586302733229
Not too bad, but unfortunately, we get the digits in reverse order. And for negative numbers, it would not work yet. But that can be easily fixed. What the above code does should be obvious from the discussion before: We copy the passed integer argument a into a local variable v of the same data type so that we can modify it, and in the while loop body, we extract the lowest digit and then divide the value by ten to shift it down to the right. We have to use a while true: loop with a break statement, because we need at least one loop execution to get at least one digit, but Nim does not support repeat-until loops as found in languages like Pascal. In the loop body, we apply the discussed operation to get the digit of the lowest place, then divide the actual value by ten, and continue, as long as that value is not already zero. When it is zero, we can leave the loop, as we do not intend to print leading zeros.
It is straightforward to create a proc that prints the digits in the correct order and can handle negative values:
proc intToStr(a: int): string =
if a == int.low:
return "-9223372036854775808"
var v = a.abs
var i: int
var res: array[20, char]
while true:
res[i] = char(v mod 10 + ord('0'))
v = v div 10
inc(i)
if v == 0:
break
if a < 0:
res[i] = '-'
inc(i)
result = newString(i)
let j = i - 1
while i > 0:
dec(i)
result[j - i] = res[i]
echo intToStr(0)
echo intToStr(1234)
echo intToStr(int.high)
echo intToStr(-0)
echo intToStr(-1234)
echo intToStr(int.low + 1)
echo intToStr(int.low)We use an array of characters for temporarily storing the decimal places, and finally, copy the digits into the result string. We pre-allocate the string with the correct size and use the subscript operator [] instead of add() to insert the digits for performance reasons. Initially, we create a copy v with a positive sign of the passed integer argument a, and when the argument was initially negative, then we add an additional minus sign to the temporary array, which is finally also copied to the result string. All this is not difficult, we have only to care that we get all the indices right. A minor issue is that when the passed integer argument has the value low(int), applying abs() would generate an overflow error, see section Binary numbers in Part II of the book if you forgot it. We fix that by returning just the correct string for that unique negative value for now.
The above procedure isn’t bad, but perhaps we can improve it. Can we avoid the temporary array? The actual difficulty is that we don’t know how many total digits the integer argument will require in advance, making it impossible to position all the digits correctly in the result string. A possible solution is to use a function that gives us the number of decimal places of an integer number. Indeed, we have such a function available, it is math.log10(). Remember, log10(1) is zero, log10(10) is one, log10(100) is two, and so on. So basically what we need. The logarithm function isn’t particularly slow on modern desktop computers, so it should be acceptable to use it. At the end of this section, we will consider how we may replace it for tiny microcontrollers which do not provide an FPU. The improved intToStr() procedure may look like this one:
import std/math
proc intToStr(a: int): string =
if a == int.low:
return "-9223372036854775808"
var v = a.abs
var i, j: int
if v > 0:
i = math.log10(v.float).int
if a < 0:
j = 1
inc(i)
result = newString(i + 1)
result[0] = '-'
while i >= j:
result[i] = char(v mod 10 + ord('0'))
v = v div 10
dec(i)This proc is very similar to the previous one. We call log10() to get a measure for the number of needed digits. Remember that the logarithm is undefined for the argument value zero, we use the default value i == 0 for that. Actually, in all cases i + 1 is the total number of digits that we have to generate — in the case where we have to generate a minus sign, we increase i by one. We pre-allocate a result string with i + 1 positions and put a minus sign at position zero, which is overwritten in the while loop when the argument was not negative. As we know the total number of digits of our number, we can use the variable i to put the digits at the correct positions in the while loop. The careful reader may wonder if log10(v.float).int will definitely work for all integer arguments of v, or if we should better round the argument like log10(v.float + 0.5).int. Indeed, with that rounding, we should be safe.
The next task is to avoid the initial test for int.low. We should really remove that special case as we prepare to make the procedure generic later. A possible solution is to work with uint64 instead of int in the proc body, as in
import std/math
proc intToStr(a: int): string =
var v: uint64
if a == int.low:
v = uint64(-(a + 1)) + 1
elif a < 0:
v = uint64(-a)
else:
v = uint64(a)
var i, j: int
if v > 0:
i = math.log10(v.float + 0.5).int
if a < 0:
j = 1
inc(i)
result = newString(i + 1)
result[0] = '-'
while i >= j:
result[i] = char(v mod 10 + ord('0'))
v = v div 10
dec(i)When we add 1 to int.low, then we can invert the sign, and convert the value to unit64. We have to add 1 again to the uint64 value to get the initial sequence of digits. And now we can make the procedure generic:
import std/math
proc intToStr(a: SomeInteger): string =
var v: uint64
when a is SomeSignedInt:
if int(a) == int.low:
v = uint64(-(a + 1)) + 1
elif a < 0:
v = uint64(-a)
else:
v = uint64(a)
else:
v = uint64(a)
var i, j: int
if v > 0:
i = math.log10(v.float + 0.5).int
when a is SomeSignedInt:
if a < 0:
j = 1
inc(i)
result = newString(i + 1)
result[0] = '-'
while i >= j:
result[i] = char(v mod 10 + ord('0'))
v = v div 10
dec(i)
echo intToStr(0)
echo intToStr(1234)
echo intToStr(int.high)
echo intToStr(-0)
echo intToStr(-1234)
echo intToStr(int.low)
echo intToStr(0.uint8)
echo intToStr(123.uint8)
echo intToStr(uint8.high)
echo intToStr(0.uint64)
echo intToStr(123.uint64)
echo intToStr(uint64.high)
echo intToStr(0.uint)
echo intToStr(123.uint)
echo intToStr(uint.high)We use as parameter type SomeInteger, which allows signed and unsigned ints of all byte sizes, and in the proc we test with is SomeSignedInt: if we have to care for the sign and in case of value int.low for overflow. The advantage of this proc is that it works for all integer types, both signed and unsigned. But one disadvantage is that the data type uint64 is always used, which may not be available on microcontroller CPUs. Let’s see how a procedure for only unsigned types might look:
import std/math
proc intToStr(a: SomeUnsignedInt): string =
var i: int
var v = a
if v > 0:
i = math.log10(v.float + 0.5).int
result = newString(i + 1)
while i >= 0:
result[i] = char(v mod 10 + ord('0'))
v = v div 10
dec(i)
echo intToStr(0.uint8)
echo intToStr(123.uint8)
echo intToStr(uint8.high)
echo intToStr(0.uint64)
echo intToStr(123.uint64)
echo intToStr(uint64.high)
echo intToStr(0.uint)
echo intToStr(123.uint)
echo intToStr(uint.high)That one is really simple and short, so maybe it would indeed make sense to use this one for the unsigned types. And we do not need the uint64 type, so on a system with no native 8-byte integers, that procedure should work fine.
All the previous examples have used log10() to determine the number of digits for the passed argument value. On microcontrollers, log10() may not be available at all or can be very slow. So, let’s investigate, at the end of this section, how we can replace it. The basic idea is that we repeatedly divide the argument by ten, until we get the result of zero, counting the number of needed divisions. An equivalent approach is to start with a variable with a value of one and multiply by ten until the result is larger than our function argument. As division is generally slower than multiplication and a native div operation might not be available at all on microcontrollers, we will try to use multiply operations. So we may start with a procedure like
proc digits0(i: int): int =
assert i >= 0
result = 1
var d = 10
while d <= i:
d *= 10
inc(result)Can you see the problem? What will happen when we pass int.high as an argument?
So a working proc is this:
proc digits(a: SomeInteger): int =
assert a >= 0
var i: uint64 = a.uint64
result = 1
when sizeof(a) == 8:
const c = 10
if i >= c:
i = i div c
result = 2
var d: typeof(i) = 10
while d <= i:
d *= 10
inc(result)We do the math with an uint64 type in the proc. For the case that the argument is an 8-byte type, we may get an overflow in the while loop, which we prevent by doing one division before the loop already. Actually, for improved performance, instead of a division by ten, we may do a division by a larger power of ten, and fix the start value for the result accordingly. One disadvantage of that generic procedure, again, is that a uint64 type is used for the math, which is fine on a desktop PC, but may work badly on restricted hardware. So this variant seems to be a better solution:
proc digits(a: SomeInteger): int8 =
assert a >= 0
var i = a
result = 1
if i >= 10:
i = i div 10
result = 2
var d: typeof(i) = 10
while d <= i:
d *= 10
inc(result)
echo digits(0)
echo digits(9)
echo digits(10)
echo digits(99)
echo digits(int.high)
echo digits(0.int8)
echo digits(int8.high)
echo digits(0.uint8)
echo digits(uint8.high)
echo digits(0.uint)
echo digits(uint.high)Here, we do a single div operation if the argument is larger than 9, but do all the math with the same type as the argument type. The div operation may still be slow on a microcontroller, but our intToStr() procedure has also used div operations. Indeed, doing intToStr() conversions on a tiny 8-bit microcontroller is not really a good idea.
For determining the number of digits of integer numbers, you will find many more solutions on the Internet. Sometimes, this operation is referred to as log10() for integer numbers. Some functions try to use the logarithm with base 2, which is related to finding the highest set bit of a number, some other functions use tabular data or a sequence of if or case statements. As the performance of that functions depends on the actual hardware, there exists not really the best solution for all cases.
For the intToStr() function, you should also find very good solutions in Nim’s standard library. Note that it was not our goal in this section to present a perfect solution; the idea was more to show you how such a task can be solved in principle, how we can improve or modify solutions, and how we can use Nim’s generics to get one function for multiple data types. Note that the presented procedures are only minimally tested and have been tested only on a 64-bit desktop OS. So they may not work on systems where Nim’s int type is 32 bit, or for microcontrollers and embedded systems. However, you have learned enough now to be able to fix it for these cases.
As possible exercises for the reader, we suggest creating a similar procedure called strToInt() that converts a numeric string to an integer number or converts between strings and float numbers. The first one is easy, you would build the int value by continuously multiplying the digit value with its correct power of ten, matching its position in the string. The float conversion is more difficult, in one weekend you may get some working code, but perfect solutions like the ryu or dragonbox algorithm are very complicated.
Minimum spanning tree
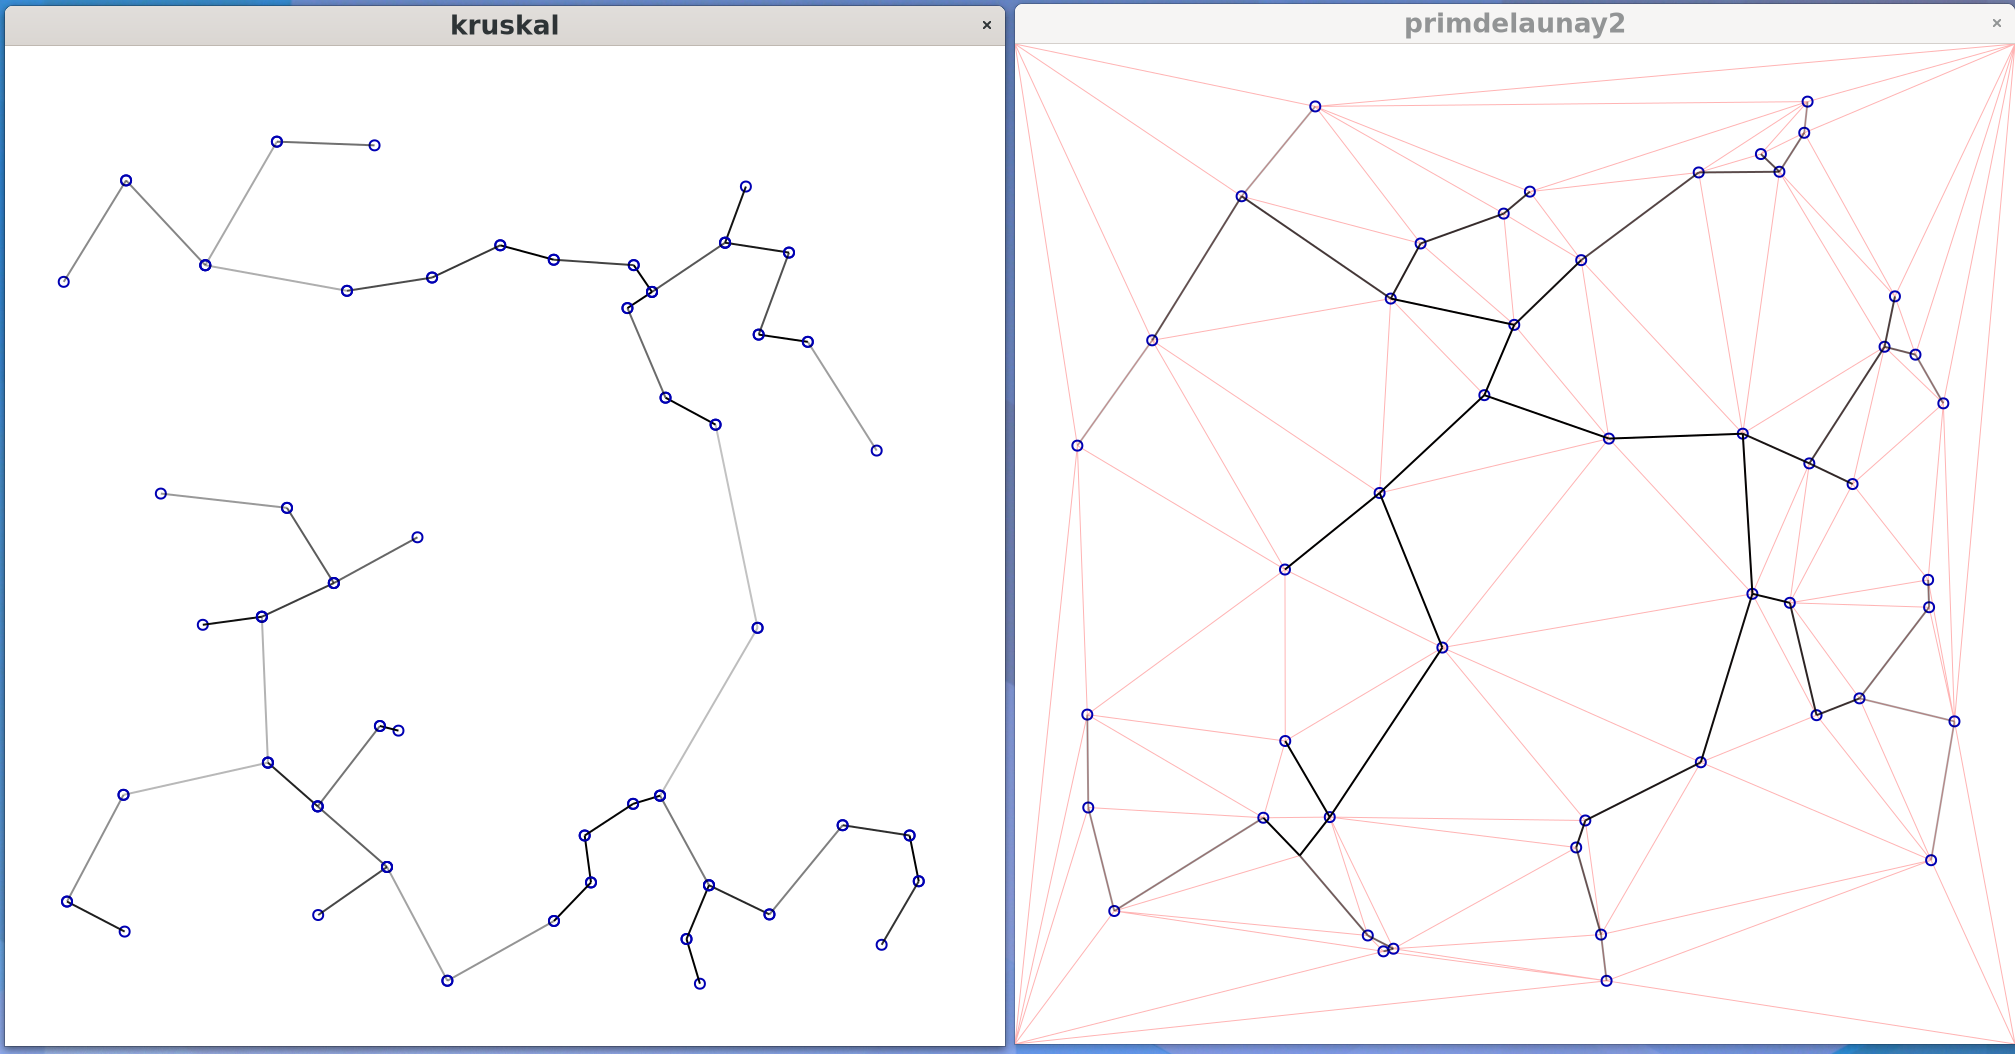
As one more example, we will present a few different ways to find a minimum spanning tree (MST) of a set of points in the plane. An MST is a graph that connects a set of points (in 2D) by minimizing the total path length. Instead of the Euclidean distance of the points to each other, other cost functions can be used as well. Typical applications for the use of MSTs are all sorts of connection problems, e.g., connecting electrical signals on a printed circuit board (PCB) or a schematic, or connecting the electric power supply, water supply, or Internet cable between a set of buildings. Related but different from the MST problem is the traveling salesman problem, which is visiting a number of cities with the shortest possible path, which is typically addressed by the famous Dijkstra algorithm (https://en.wikipedia.org/wiki/Dijkstra%27s_algorithm). The MST problem may look a bit exotic. At first, you may get the feeling that studying this section of the book may not have that much benefit for you. Well, if this section is too boring for you, just skip it; you will not miss any important foundations. We decided to present the MST problem here for various reasons: The problem is easy, but not too simple, so you should be able to understand it quickly in full detail. By using two popular strategies for solving the problem, the Prim’s algorithm and Kruskal’s algorithm, you learn how problems can be solved by different strategies, each with its own drawbacks and benefits, including the behaviour of performance for large data sets. And both the presented algorithms allow you to start with a simple solution and then improve and refine it through the use of advanced data structures (Delaunay triangulation, heap-queue, and the disjoint set data structure) to improve the performance or to simplify the code.
To allow a visual inspection of the generated trees, we will use the GTK GUI and the Cairo library to draw the final path to the computer screen. If you have already some experience with other GUI toolkits, it should be easily possible for you to replace GTK and Cairo with other libraries that you may prefer.
For the initial set of points in the 2D plane that we have to connect by an MST, we need to consider two cases. A case from real life is the connection of cities by streets, where each city has only a small set of direct neighbors. The other case is a set of points where we can, in principle, connect each point to every other point, like points drawn on a sheet of paper or the electric signal and power supply paths on a PCB. The latter case is in principle O(n^2) because for a set of n points, there are (n-1) other points for possible direct connections. For our examples, we actually use this last case. The reason is that we can use as input data a plain set of random points and that it is more demanding due to a large number of possible connections. Reducing this general case to input data with only a limited set of direct connections is not hard.
To minimize the connection graph of n points, we need a cost function for each possible connection. In our simple case of n points in the plane, this is just the distance between the points, and the solution to this special case is called Euclidean minimum spanning tree, see https://en.wikipedia.org/wiki/Euclidean_minimum_spanning_tree. For real-world problems like street construction, the cost function can be much more complex, as it can be necessary to avoid passing rivers, hills, and other barriers.
The Prim algorithm
Prim’s algorithm is a simple greedy algorithm that simply connects the closest unconnected point to the existing tree. The process starts by selecting an arbitrary point of the input data set as the first point of the tree, and then successively connects the nearest one from the other points, until all the points are connected. You can find the formal description of the Prim algorithm at https://en.wikipedia.org/wiki/Prim%27s_algorithm.
import std/[random, times]
from std/math import `^`, Tau
const
WindowWidth = 1000
WindowHeight = 1000
BorderDist = 50
DataRange = float(1000 - 2 * BorderDist)
Points = 50
type
Vertex = ref object
x, y: float
friend: Vertex
dist: float = Inf
var
vertices: seq[Vertex]
forest: seq[Vertex]
proc init =
randomize()
for i in 0 ..< Points:
vertices.add(Vertex(x: rand(DataRange) + BorderDist, y: rand(DataRange) + BorderDist))
proc createForest =
var last = vertices.pop() # arbitrary start point, assume that we have at least one available
while vertices.len > 0: # while there are more, still unconnected points available
var nearest = Inf
var pos = -1
for p, v in vertices: # all vertices that are not yet part of the tree
let d = (v.x - last.x) ^ 2 + (v.y - last.y) ^ 2 # squared distance
if d < v.dist: # update distances, as last is a new point in tree
v.dist = d
v.friend = last
if v.dist < nearest: # remember nearest point
nearest = v.dist
pos = p
last = vertices[pos] # and pick nearest,
forest.add(last) # add it to forest and
vertices.del(pos) # delete it from the still unconnected vertex set
init()
let start = cpuTime()
createForest()
echo "elapsed: ", (cpuTime() - start) * 1e3, " ms"
import gintro/[gtk4, gobject, gio, cairo]
proc draw(d: DrawingArea; cr: cairo.Context; w, h: int) =
cr.setSource(1, 1, 1)
cr.paint # white
cr.setSource(0, 0, 0)
for i, el in forest:
cr.setSource(0, 0, 0.7) # rgb
cr.newPath
cr.arc(el.x, el.y, 5, 0, math.Tau)
cr.stroke
cr.setSource(0, 0, 0, 1.2 - i.float / Points.float)
cr.moveTo(el.x, el.y)
cr.lineTo(el.friend.x, el.friend.y)
cr.stroke
proc activate(app: gtk4.Application) =
let window = newApplicationWindow(app)
let d = newDrawingArea()
d.setSizeRequest(WindowWidth, WindowHeight)
d.setDrawFunc(draw)
window.setChild(d)
window.show
proc main =
let app = newApplication("org.gtk.example")
app.connect("activate", activate)
let status = app.run
quit(status)
main()In the above program, we first define a Vertex data type, which is a point with x, and y coordinates in the plane, which has additionally a friend, and a dist field. Friend denotes a direct neighbor, and dist is the squared distance to this neighbor point. In all of our examples, we use squared distances, as this avoids the square root calculations and gives the same results. We made Vertex a reference type because our graph uses references to neighbors. Note that defining a value Vertex type like above in this way would not work, as value types can not contain their own type as fields — that would generate an infinite recursive type, like a box that contains itself, again and again. But we could have actually used value types if we used for the friend field not a pointer, but an integer index to the position in the sequence of input data. For some applications, using indices may have advantages, but for our current task, the use of references seems to be OK. Note that we used in our type definition a new feature introduced with Nim 2.0: Default values for object fields. With dist: float = Inf we initialize that field to math.Inf, instead of the default zero value. In the init() procedure, we create a sequence of random input vertices. Then, in the createForest() procedure, we pick an arbitrary starting vertex from the input data set and assign that value to a variable called last. This value is the starting point of our MST for now, and later, variable last is always the point that we just added to the tree. Whenever we add one more point to the tree, the tree grows, and the distance to all the still unconnected points may shrink. So we have to update all the distances when they have decreased. As point last is the one which actually grows the tree, we have to check only the distances of all the still unconnected points to this last point, as the rest of the tree has not changed.
While we still have unconnected points available, we iterate over them, check distances to last, and update the dist and friend fields if the distance has become shorter. If the currently evaluated distance is a minimum, we store that minimum value and the position of the vertex with the minimum distance in the sequence. When we have processed all vertices this way, the integer variable pos is the index of the closest vertex. We add this vertex to the forest, remove it from the seq of still unconnected vertices, and also store it in variable last for the next iteration. Note that we use the del() procedure to delete values from the sequence. Del() performs the deletion by actually moving the last value from the seq to the position to remove. This avoids expensive shifts of elements but does not preserve the order of elements in the sequence. For our sequence of input data, this is OK, as the data has no special order. You might be wondering why we named the container instance for the collected points forest rather than tree. Well, in principle, the MST algorithm may generate a set of distinct trees instead of only one, i.e., when there are barriers, such as the Great Wall of China. The Kruskal algorithm, which we will discuss next, always starts with many distinct trees, which may finally get connected if there are no barriers.
To display the result graphically, we have used the GTK toolkit together with the Cairo graphics library. To actually run the program, you would need a computer with properly installed GTK and Cairo. For Linux boxes, this should be typically no problem, for Windows or Mac, you may have to install them, or you may use other toolkits or just delete the graphical output routines from the above program. Additionally, you would need the Gintro Nim GTK bindings, which you may install with the command nimble install gintro@#head if not already available. Then you can run our program with the command "nim r prim.nim" and should get a GUI window displaying the constructed path. Our program contains a main() and an activate() proc, which are typically used in modern GTK to launch an app. The activate() proc creates a window with a drawingarea widget in which we can use Cairo functions to draw lines, circles, and much more. To do that, we need a draw() function, which we set for our drawingarea widget, so it is called automatically when needed, e.g., for program startup or when we resize or uncover the main window. In the draw() function, we iterate over the vertices of our forest, draw small circles to indicate the vertex positions, and connect each vertex in the forest with its friend. In case you are interested in more details about the use of the GTK GUI and the Cairo library with Nim, you may consult the Nim GTK companion book. Or, just use one of the more than 20 other GUI toolkits available for Nim, and modify the above program accordingly.
When you compile the program with the -d:release option and run it, the displayed execution time for createForest() should be around 15 microseconds for an input set of 50 points on modern hardware. That may look reasonably fast, but when you modify the program constant Points = 50 to value 500, the execution time rises to 1 ms already. So the execution time increases nearly quadratically with the size of the input data set. This was expected, as for each point that we added to the existing tree, we iterate over the whole set of still unconnected points to update the distances and select the closest one. For small point sets, this algorithm is indeed a good solution, but for really large input data sets, we may hope for the existence of better solutions. At the end of this section, we will present one. But first, we will present a different algorithm, which works on edges instead of points.
Kruskal algorithm
The Kruskal algorithm works on edges. The strategy is to repeatedly find the shortest edges and add them to the forest when they do not create cycles. Here, cycles mean connecting two vertices that are already connected by a path. If A is already connected to B, and B is connected to C, then we would skip connection A-C. This algorithm is again simple, but managing the information about already existing connections is not that easy. Note that the construction process typically generates many subtrees consisting of short edges first, which then later gets connected by longer edges. A disadvantage of the Kruskal algorithm is that the number of edges is n^2 when there are no restrictions for possible connections, as in our Euclidean example with plain points in a plane. You can find a formal description of this algorithm at https://en.wikipedia.org/wiki/Kruskal%27s_algorithm. We will start our explanation with a simple and stupid variant, where we store the information if a vertex is already part of a subtree in an ordinary Nim bitset.
import std/[random, times, sets]
from std/math import `^`, Tau
from std/algorithm import sort, SortOrder
const
WindowWidth = 1000
WindowHeight = 1000
BorderDist = 50
DataRange = float(1000 - 2 * BorderDist)
Points = 50
type
Vertex = ref object
x, y: float
id: int16
fs: ref set[int16]
type
Edge = object
v1, v2: Vertex
proc cmp(a, b: Edge): int =
let d1 = (a.v1.x - a.v2.x) ^ 2 + (a.v1.y - a.v2.y) ^ 2
let d2 = (b.v1.x - b.v2.x) ^ 2 + (b.v1.y - b.v2.y) ^ 2
return -(d1 < d2).int + (d1 > d2).int
var
vertices: seq[Vertex]
edges: seq[Edge]
forest: seq[Edge]
proc init =
randomize()
for i in 0 ..< Points:
vertices.add(Vertex(x: rand(DataRange) + BorderDist, y: rand(DataRange) + BorderDist, id: i.int16))
proc createForest =
assert(vertices.len > 1)
for v1 in vertices:
for v2 in vertices:
if cast[int](v1.addr) < cast[int](v2.addr):
edges.add(Edge(v1: v1, v2: v2))
edges.sort(cmp, SortOrder.Descending)
while edges.len > 0:
let e = edges.pop
if e.v1.fs == nil and e.v2.fs == nil:
let s = new set[int16]
s[].incl(e.v1.id)
s[].incl(e.v2.id)
e.v1.fs = s
e.v2.fs = s
forest.add(e)
elif e.v1.fs == nil or e.v2.fs == nil:
if e.v1.fs == nil:
e.v1.fs = e.v2.fs
incl(e.v1.fs[], e.v1.id)
else:
e.v2.fs = e.v1.fs
incl(e.v2.fs[], e.v2.id)
forest.add(e)
else:
if e.v1.fs != e.v2.fs:
e.v1.fs[] = e.v1.fs[] + e.v2.fs[]
for v in vertices:
if v.id in e.v1.fs[]:
v.fs = e.v1.fs
forest.add(e)
init()
let start = cpuTime()
createForest()
echo "elapsed: ", (cpuTime() - start) * 1e3, " ms"
import gintro/[gtk4, gobject, gio, cairo]
proc draw(d: DrawingArea; cr: cairo.Context; w, h: int) =
cr.setSource(1, 1, 1)
cr.paint # white
for i, e in forest:
cr.setSource(0, 0, 0.7) # rgb
cr.newPath
cr.arc(e.v1.x, e.v1.y, 5, 0, math.Tau)
cr.stroke
cr.newPath
cr.arc(e.v2.x, e.v2.y, 5, 0, math.Tau)
cr.stroke
cr.setSource(0, 0, 0, 1.2 - i.float / Points.float)
cr.moveTo(e.v1.x, e.v1.y)
cr.lineTo(e.v2.x, e.v2.y)
cr.stroke
proc activate(app: gtk4.Application) =
let window = newApplicationWindow(app)
let d = newDrawingArea()
d.setSizeRequest(WindowWidth, WindowHeight)
d.setDrawFunc(draw)
window.setChild(d)
window.present
proc main =
let app = newApplication("org.gtk.example")
app.connect("activate", activate)
let status = app.run
quit(status)
main()We will not discuss the above code in much detail, as it is really ugly, and we will present a better implementation soon. We have attached to the Vertex data type a 16-bit integer id and a set of these ids. Our Edge data type has two fields of Vertex type each. The seq[Edge] variable stores all the initial edges, and is filled in a nested loop iterating over the vertices. The test cast[int](v1.addr) < cast[int](v2.addr) is necessary to avoid including each edge twice in the sequence of input edges. Actually, as our vertices have unique ids, we could use the same test on the id fields instead on the memory address in this case. As we intend to sort all our edges by length, we have to define a cmp() proc for two edges, which we pass to the sort() proc. After we have sorted all the edges in descending order, we remove the shortest one with pop() from the container and investigate, in which sets the two vertices of that edge are contained. If at least one vertex of the edge still has a set reference with a value of nil, then we join both vertices into one set. If both vertices are contained in different sets, then we join the two sets and for all the vertices that have an id indicating membership in the joined set, we set the fs ref to point to the joined set. All this is really slow, as we have to iterate over all the edges and have to copy the sets. And the sets are large entities, consuming a lot of storage. When we study the Wikipedia article about the Kruskal algorithm, we learn that a much better implementation for our needed set membership test exists. We will discuss that data type in the next section.
Disjoint-set data structure
For the Kruskal algorithm, we have to test if edges are already part of other edge sets. So we need a data structure, which is some form of a container of many sets, with functions to join sets (build the union) and to test if elements are included in the same subset. As elements of the subsets, we can use plain integers, which poses no restriction, as we can assign to each edge an integer id to identify it, and we can use the integer ids as array indices to access edges in containers.
The Disjoint-set data structure offers a surprisingly simple and efficient way to present disjoint sets of integer numbers. This data structure provides only three basic operations: Creating a set of n disjoint subsets, where subset n contains initially only the value n. Testing whether two numbers i and j belong to the same subset, and finally joining the subsets of two elements i and j. The data structure for initially n subsets is actually only a plain array or seqquence of n integer numbers with indices 0 .. n-1. When we create the data structure, the index position i is initialized with the value i for all positions, that is s[i] == i for each i in the range 0 .. n-1. For the Disjoint-set data structure, each subset is represented by a single integer, and it is said that two elements are in the same subset, when they have the same representing number. Initially, for each element i, s[i] == i. Whenever for an element the value stored at position i is i, that indicates that element i is in subset i. So initially the container holds n disjoint subsets and each subset i contains the value i only. Joining the subsets of the numbers i and j is very easy, we just can set s[i] = j or s[j] = i. Now s[i] and s[j] are identical, indicating that i and j belong to the same subset. When we now want to join the subsets of elements i and k, we just set s[i] = k or s[k] = i. This can continue until all the n subsets are joined. For testing whether the subsets of numbers i and j are joined, we test the content at array positions i and j in a recursive manner: If the value stored at index position i is identical to i, then this is already the result. But if s[i] is k and k != i, then we have to investigate s[k] and so on, until at some index position finally, the content is identical with the index position. Then this is the final representing value, and when this final value is the same for two initial numbers, then the two numbers belong to the same subset. Explaining this data structure is much more complicated than the actual implementation. You can find a formal description at https://en.wikipedia.org/wiki/Disjoint-set_data_structure, and we will sketch the very simple Nim implementation here:
import std/sequtils
type
Subsets = object
parent: seq[int]
rank: seq[int]
proc init(s: var Subsets; n: int) =
s.parent = toSeq(0 ..< n)
s.rank = newSeq[int](n)
proc find(s: var Subsets; i: int): int =
if s.parent[i] != i:
s.parent[i] = find(s, s.parent[i])
return s.parent[i]
proc union(s: var Subsets; i, j: int) =
let i = find(s, i)
let j = find(s, j)
if i != j:
if s.rank[i] < s.rank[j]:
s.parent[i] = j
elif s.rank[i] > s.rank[j]:
s.parent[j] = i
else:
s.parent[i] = j
inc(s.rank[j])
var s: Subsets
s.init(8)
s.union(3, 5)
echo s.find(3)
echo s.find(5)The Subset data structure uses the parent field to store the n initial disjoint subsets. Additionally, a rank field, also with n positions, is used, which controls the union() joining operations and improves performance. The recursive find() proc does a path compression operation, which replaces a longer recursive path with the direct result.
Kruskal with disjoint-set
Using the disjoint-set data structure drastically beautifies the Kruskal algorithm.
import std/[random, times, sequtils]
from std/math import `^`
from std/algorithm import sort, SortOrder
### Subsets implementation
type
Subsets = object
parent: seq[int]
rank: seq[int]
proc init(s: var Subsets; n: int) =
s.parent = toSeq(0 ..< n)
s.rank = newSeq[int](n)
proc find(s: var Subsets; i: int): int =
if s.parent[i] != i:
s.parent[i] = find(s, s.parent[i])
return s.parent[i]
proc union(s: var Subsets; i, j: int) =
let i = find(s, i)
let j = find(s, j)
if i != j:
if s.rank[i] < s.rank[j]:
s.parent[i] = j
elif s.rank[i] > s.rank[j]:
s.parent[j] = i
else:
s.parent[i] = j
inc(s.rank[j])
###
const
WindowWidth = 1000
WindowHeight = 1000
BorderDist = 50
DataRange = float(1000 - 2 * BorderDist)
Points = 50
type
Vertex = ref object
x, y: float
id: int
type
Edge = object
v1, v2: Vertex
proc cmp(a, b: Edge): int =
let d1 = (a.v1.x - a.v2.x) ^ 2 + (a.v1.y - a.v2.y) ^ 2
let d2 = (b.v1.x - b.v2.x) ^ 2 + (b.v1.y - b.v2.y) ^ 2
return -(d1 < d2).int + (d1 > d2).int
var
vertices: seq[Vertex]
edges: seq[Edge]
forest: seq[Edge]
s: Subsets
proc init =
randomize()
s.init(Points)
for i in 0 ..< Points:
vertices.add(Vertex(x: rand(DataRange) + BorderDist, y: rand(DataRange) + BorderDist, id: i))
proc createForest =
assert(vertices.len > 1)
for v1 in vertices:
for v2 in vertices:
if cast[int](v1.addr) < cast[int](v2.addr):
edges.add(Edge(v1: v1, v2: v2))
edges.sort(cmp, SortOrder.Descending)
while edges.len > 0:
let e = edges.pop
if s.find(e.v1.id) != s.find(e.v2.id):
s.union(e.v1.id, e.v2.id)
forest.add(e)
init()
let start = cpuTime()
createForest()
echo "elapsed: ", (cpuTime() - start) * 1e3, " ms"
import gintro/[gtk4, gobject, gio, cairo]
proc draw(d: DrawingArea; cr: cairo.Context; w, h: int) =
cr.setSource(1, 1, 1)
cr.paint # white background
for i, e in forest:
cr.setSource(0, 0, 0.7) # rgb
cr.newPath
cr.arc(e.v1.x, e.v1.y, 5, 0, math.Tau)
cr.stroke
cr.newPath
cr.arc(e.v2.x, e.v2.y, 5, 0, math.Tau)
cr.stroke
cr.setSource(0, 0, 0, 1.2 - i.float / Points.float)
cr.moveTo(e.v1.x, e.v1.y)
cr.lineTo(e.v2.x, e.v2.y)
cr.stroke
proc activate(app: gtk4.Application) =
let window = newApplicationWindow(app)
let d = newDrawingArea()
d.setSizeRequest(WindowWidth, WindowHeight)
d.setDrawFunc(draw)
window.setChild(d)
window.show
proc main =
let app = newApplication("org.gtk.example")
app.connect("activate", activate)
let status = app.run
quit(status)
main()But when we compile and run it, we notice that it is still slow. The obvious reason for this is that we consistently work with n^2 edges, which we first have to create, then sort, and finally, we iterate over all of them. In the next section, we will use a Delaunay triangulation, to attach to each vertex a small set of direct neighbors, and we will then use a set of edges that connect only direct neighboring vertices.
Kruskal with disjoint-set and Delaunay triangulation
To create the Delaunay triangulation, we use the cdt2 module, a variant of the initial, textbook-based cdt module, but with an API that is a bit more OOP-like, with support for subclassing of vertices. The cdt modules would work well for the following code, but for our last two examples, the Prim algorithm based on Delaunay data, the cdt2 module is easier to use. So we use cdt2 here as well. You may install it with the command nimble install https://github.com/stefansalewski/cdt2.git. The cdt and cdt2 modules support very advanced operations, including fully dynamic insertions and deletions, not only for data points but also for constraining edges. For our current use case, a simpler variant would work as well, but as we have these modules freely available, we should use them. For the program below, we need from the cdt2 module only the function initDelaunayTriangulation() to create an outer rectangle for all of our data points, the insertPoint() function to add points, and finally the iterator unconstrainedEdges() to iterate over the edges of the triangulation. With e.org and e.dest, we can access the endpoints of an edge, where org is short for the origin, and dest for the destination.
import std/[random, times, sequtils]
from std/math import `^`
from std/algorithm import sort, SortOrder
import cdt2/[dt, vectors, edges, types]
### Subsets implementation
type
Subsets = object
parent: seq[int]
rank: seq[int]
proc init(s: var Subsets; n: int) =
s.parent = toSeq(0 ..< n)
s.rank = newSeq[int](n)
proc find(s: var Subsets; i: int): int =
if s.parent[i] != i:
s.parent[i] = find(s, s.parent[i])
return s.parent[i]
proc union(s: var Subsets; i, j: int) =
let i = find(s, i)
let j = find(s, j)
if i != j:
if s.rank[i] < s.rank[j]:
s.parent[i] = j
elif s.rank[i] > s.rank[j]:
s.parent[j] = i
else:
s.parent[i] = j
inc(s.rank[j])
###
const
WindowWidth = 1000
WindowHeight = 1000
BorderDist = 50
DataRange = float(1000 - 2 * BorderDist)
Points = 50
type
Vec = object
x, y: float
id: int
type
E = object
v1, v2: Vec
id: int
type
Forest = seq[E]
proc cmp(a, b: E): int =
let d1 = (a.v1.x - a.v2.x) ^ 2 + (a.v1.y - a.v2.y) ^ 2
let d2 = (b.v1.x - b.v2.x) ^ 2 + (b.v1.y - b.v2.y) ^ 2
return -(d1 < d2).int + (d1 > d2).int
var
forest: Forest
s: Subsets
cdt = initDelaunayTriangulation(Vector2(x: 0, y: 0), Vector2(x: WindowWidth.float, y: WindowHeight.float))
candidates: seq[E]
proc init =
randomize()
s.init(Points + 4) # we get four additional points from the outer rectangle of the delaunay triangulation
for i in 0 ..< Points:
discard cdt.insertPoint(Vector(x: rand(900.0) + 50.0, y: rand(900.0) + 50.0))
proc createForest =
for e in unconstrainedEdges(cdt):
#if e.org.id.int > 3 and e.dest.id.int > 3: # ignore the first 4 points of the Delaunay rectangle, use this or
if e.org.point[0] > 0.0 and e.org.point[0] < 1000.0 and e.dest.point[0] > 0.0 and e.dest.point[0] < 1000.0:
candidates.add(E(v1: Vec(x: e.org.point[0], y: e.org.point[1], id: e.org.id.int), v2: Vec(x: e.dest.point[0], y: e.dest.point[1], id: e.dest.id.int)))
candidates.sort(cmp, SortOrder.Descending)
while candidates.len > 0:
let e = candidates.pop
if s.find(e.v1.id) != s.find(e.v2.id):
s.union(e.v1.id, e.v2.id)
forest.add(e)
init()
let start = cpuTime()
createForest()
echo "elapsed: ", (cpuTime() - start) * 1e3, " ms"
import gintro/[gtk4, gobject, gio, cairo]
proc draw(d: DrawingArea; cr: cairo.Context; w, h: int) =
cr.setSource(1, 1, 1)
cr.paint # white background
cr.setSource(1, 0.7, 0.7)
cr.setLineWidth(1)
for e in unconstrainedEdges(cdt): # first draw the whole Delaunay triangulation
cr.moveTo(e.org.point[0], e.org.point[1])
cr.lineTo(e.dest.point[0], e.dest.point[1])
cr.stroke
cr.setLineWidth(2)
for i, e in forest:
cr.setSource(0, 0, 0.7) # rgb
cr.newPath
cr.arc(e.v1.x, e.v1.y, 5, 0, math.Tau)
cr.stroke
cr.newPath
cr.arc(e.v2.x, e.v2.y, 5, 0, math.Tau)
cr.stroke
cr.setSource(0, 0, 0, 1.2 - i.float / Points.float)
cr.moveTo(e.v1.x, e.v1.y)
cr.lineTo(e.v2.x, e.v2.y)
cr.stroke
proc activate(app: gtk4.Application) =
let window = newApplicationWindow(app)
let d = newDrawingArea()
d.setSizeRequest(WindowWidth, WindowHeight)
d.setDrawFunc(draw)
window.setChild(d)
window.show
proc main =
let app = newApplication("org.gtk.example")
app.connect("activate", activate)
let status = app.run
quit(status)
main()Applying the Kruskal algorithm to the small set of edges in the triangulation improves the performance drastically. In the next section, we will see how much the Delaunay triangulation can improve the Prim algorithm.
Prim with Delaunay triangulation
We can combine the Prim algorithm with a Delaunay triangulation to get neighbor relations for our initial point set. For this variant, it is important that we use the cdt2 module, not the cdt one. The cdt2 module supports a more OOP-style API, so we can subclass the vertices of the triangulation. This way, we can add fields like dist, friend, and done, directly to the vertex instances. Without subclassing, we would have to attach this information in other ways, perhaps by storing it in a separate sequence and accessing it through the id field of the CDT vertex instances. We use a pool sequence, which holds copies of our vertices. This is necessary, as we have to remove elements from the pool, without touching the cdt itself. For this variant, we only need to update the direct neighbors of the last point that we add to the forest. But still, we have to iterate over the whole pool, to select the next nearest point. In the next section, we will finally learn how we may avoid this iteration by using a priority queue.
import std/[random, times, tables]
from std/math import `^`
import cdt2/[dt, vectors, edges, types]
type
DVertex = ref object of Vertex
dist: float = Inf
friend: DVertex
done: bool
proc allocV(): Vertex =
DVertex(dist: Inf)
const
WindowWidth = 1000
WindowHeight = 1000
BorderDist = 50
DataRange = float(1000 - 2 * BorderDist)
Points = 50
var
cdt: DelaunayTriangulation
forest: seq[DVertex]
pool: seq[DVertex]
proc init =
randomize()
cdt = initDelaunayTriangulation(Vector2(x: 0, y: 0), Vector2(x: WindowWidth.float, y: WindowHeight.float),
vertexAllocProc = allocV)
for i in 0 ..< Points:
let v = DVertex(dist: Inf)
discard cdt.insertPoint(Vector(x: rand(DataRange) + BorderDist, y: rand(DataRange) + BorderDist), v = v)
pool.add(v)
proc createForest =
var last: DVertex = pool.pop
last.done = true
while pool.len > 0:
for v in last.neightbors:
if not DVertex(v).done:
let v = DVertex(v)
let d = (v.point.x - last.point.x) ^ 2 + (v.point.y - last.point.y) ^ 2
if d < v.dist:
v.dist = d
v.friend = last
var nearest = Inf
var pos = -1
for p, v in pool:
if v.dist < nearest:
nearest = v.dist
pos = p
last = pool[pos]
last.done = true
forest.add(last)
pool.del(pos)
init()
let start = cpuTime()
createForest()
echo "elapsed: ", (cpuTime() - start) * 1e3, " ms"
import gintro/[gtk4, gobject, gio, cairo]
proc draw(d: DrawingArea; cr: cairo.Context; w, h: int) =
cr.setSource(1, 1, 1)
cr.paint # white background
cr.setSource(1, 0.7, 0.7)
cr.setLineWidth(1)
for e in unconstrainedEdges(cdt): # first draw the whole Delaunay triangulation
cr.moveTo(e.org.point[0], e.org.point[1])
cr.lineTo(e.dest.point[0], e.dest.point[1])
cr.stroke
cr.setLineWidth(2)
for i, el in forest:
cr.setSource(0, 0, 0.7) # rgb
cr.newPath
cr.arc(el.point.x, el.point.y, 5, 0, math.Tau)
cr.stroke
cr.setSource(0, 0, 0, 1.2 - i.float / Points.float)
cr.moveTo(el.point.x, el.point.y)
cr.lineTo(el.friend.point.x, el.friend.point.y)
cr.stroke
proc activate(app: gtk4.Application) =
let window = newApplicationWindow(app)
let d = newDrawingArea()
d.setSizeRequest(WindowWidth, WindowHeight)
d.setDrawFunc(draw)
window.setChild(d)
window.present
proc main =
let app = newApplication("org.gtk.example")
app.connect("activate", activate)
let status = app.run
quit(status)
main()Prim with Delaunay triangulation and priority queue
A priority queue is a data structure that allows us to extract the smallest element quickly (O(1)), and to insert more elements while preserving the order. Textbooks sometimes advertise the famous Fibonacci heap, which is a form of a priority queue, for which not only extraction of the smallest value, and insertion of more elements is of O(1), but which allows also very fast updating of the value of already contained elements. However, the Fibonacci heap is complex and often not as fast in practice as it is in theory. And for Nim, we currently have no Fibonacci heap implementation available. What is available for Nim is the simple heap-queue module of Nim’s standard library. However, as our Prim algorithm requires distance updates, which the heap-queue does not support, we might think that Nim’s heap-queue cannot be used in our use case. But there is a trick available, with which we can circumvent this restriction — the trick is sometimes mentioned in textbooks when Dijkstra’s algorithm for shortest path search is discussed, see https://en.wikipedia.org/wiki/Dijkstra%27s_algorithm.
The trick is that instead of updating the priority field of elements already stored in the queue, we just add a copy with an updated priority field, and ignore the old elements for the extraction process. This results typically in a good performance, as the updating is not that often needed at all, and we always extract the updated copies before the old, invalid elements, which we just ignore. To use this strategy, we need a way to detect old, invalid elements. In fact, ref object instances do not work for this case. We need value types for this, which we can copy and modify without modifying the original. Since the Delaunay triangulation works internally with ref objects, we create a wrapper object for our vertices:
type
DVertex = ref object of Vertex
dist: float = Inf
friend: DVertex
done: bool
Container = object
dv: DVertex
pri: floatWe subclass the Vertex data type of the cdt2 Delaunay triangulation module by adding a distance field and a friend field, which stores the other endpoint of a vertex in the tree, and a boolean done field, which is used to remember if a vertex instance is already part of the tree or is still unprocessed.
Our value data type, Container, has two fields: a reference to a Vertex instance and a pri field, which is initially identical to the dist field of the Vertex. When distances change, we update the dist field of our vertex and add a new Container instance to the priority queue. Then, for the old Container instance, dist and pri differ, indicating that the container instance is invalid and should be ignored.
import std/[random, times, heapqueue, tables]
from std/math import `^`
import cdt2/[dt, vectors, edges, types]
const
WindowWidth = 1000
WindowHeight = 1000
BorderDist = 50
DataRange = float(1000 - 2 * BorderDist)
Points = 50
type
DVertex = ref object of Vertex
dist: float = Inf
friend: DVertex
done: bool
type
Container = object
dv: DVertex
pri: float
proc `<`(a, b: Container): bool = a.pri < b.pri
proc allocV(): Vertex =
DVertex(dist: Inf)
var
cdt: DelaunayTriangulation
hq: HeapQueue[Container]
forest: seq[DVertex]
proc init =
randomize()
cdt = initDelaunayTriangulation(Vector2(x: 0, y: 0), Vector2(x: WindowWidth.float, y: WindowHeight.float),
vertexAllocProc = allocV)
for i in 0 ..< Points:
let v = DVertex(dist: Inf)
discard cdt.insertPoint(Vector(x: rand(DataRange) + BorderDist.float, y: rand(DataRange) + BorderDist.float), v = v)
proc createForest =
var last: DVertex = DVertex(cdt.subdivision.vertices[4]) # arbitrary start point, but not the first four!
last.done = true
while true:
for v in last.neightbors:
if not DVertex(v).done:
let v = DVertex(v)
let d = (v.point.x - last.point.x) ^ 2 + (v.point.y - last.point.y) ^ 2
if d < v.dist:
v.dist = d
v.friend = last
hq.push(Container(dv: v, pri: d))
if hq.len == 0:
break
let h = hq.pop
if h.pri == h.dv.dist and h.dv.id.int > 3: # h.dv.point.x != 1000 and h.dv.point.x != 0: # let us
last = h.dv # ignore the corners of outer cdt rectangle
last.done = true
forest.add(last)
init()
let start = cpuTime()
createForest()
echo "elapsed: ", (cpuTime() - start) * 1e3, " ms"
import gintro/[gtk4, gobject, gio, cairo]
proc draw(d: DrawingArea; cr: cairo.Context; w, h: int) =
cr.setSource(1, 1, 1)
cr.paint # white background
cr.setSource(1, 0.7, 0.7)
cr.setLineWidth(1)
for e in unconstrainedEdges(cdt): # first draw the whole Delaunay triangulation
cr.moveTo(e.org.point[0], e.org.point[1])
cr.lineTo(e.dest.point[0], e.dest.point[1])
cr.stroke
cr.setLineWidth(2)
for i, el in forest:
cr.setSource(0, 0, 0.7) # rgb
cr.newPath
cr.arc(el.point.x, el.point.y, 5, 0, math.Tau)
cr.stroke
cr.setSource(0, 0, 0, 1.2 - i.float / Points.float)
cr.moveTo(el.point.x, el.point.y)
cr.lineTo(el.friend.point.x, el.friend.point.y)
cr.stroke
proc activate(app: gtk4.Application) =
let window = newApplicationWindow(app)
let d = newDrawingArea()
d.setSizeRequest(WindowWidth, WindowHeight)
d.setDrawFunc(draw)
window.setChild(d)
window.present
proc main =
let app = newApplication("org.gtk.example")
app.connect("activate", activate)
let status = app.run
quit(status)
main()Before we can use the heap queue, we must define a < relation for our Container data type. We populate the Delaunay instance with our random points. At the beginning of our createForest() procedure, we pick a random starting point from the cdt instance — actually not one of the first four, as these are points of the outer rectangle, which we intend to ignore. Then we use the iterator last.neighbors() to iterate over the neighbors of the point that we added last to our forest. After the distances have been updated, we can use hq.pop to extract an element with the lowest priority from the heap-queue, and add that vertex to our forest. You may wonder why we need the done field in the Vertex object. Well, without it, we would modify the existing forest, destroying the existing neighborship relations! You may compile the above code with the -d:release option for the default 50 points, and for 500 points. The runtime should be approximately 30 and 300 microseconds on modern hardware, which is not bad, and shows that the runtime increases linearly with the number of points, so the algorithm is nearly O(n) in big O notation. Also note that for all the presented MST algorithms, we can modify the cost or distance function to tune the resulting graph shape. For instance, instead of the (squared) Euclidean distance, we may use an expression like let d = (v.point.x - last.point.x) ^ 2 + (v.point.y - last.point.y) ^ 2 + max((500 - v.point.x).abs, (500 - v.point.y).abs) ^ 2. Here, we add to the Euclidean distance the distance of the new point from the center of the graph (500), so that points close to the center are preferred, resulting in a star-shaped graph. For some applications, like power supply traces (on a PCB) such a layout may be preferred.
References:
GUI toolkits
Explaining only one of the more than 20 available GUI toolkits in some detail would be far too much for this book. So we can only give a list of some of the available toolkits with a short description and a link to it. For the Gintro GTK bindings, you may also consult the GTK-Programming companion book by the same author, which is still in an early stage (perhaps 25% done). However, note that GTK is not as popular these days, and the Gintro package has currently very few users. The reasons are obvious: GTK is coded in C, which makes its further development a pain, bindings to other languages always imply some overhead, a high maintenance effort, and never work perfectly. But even Rust, with its much larger community and many bright developers, has similar problems: Native Rust GUI toolkits like Droid, Iced or Xilem are in early development states, and people often use still GTK-rs instead.[75]
- Winim
-
Nim’s Windows API and COM library (https://github.com/khchen/winim)
- nimqt
-
Qt bindings for nim (https://github.com/jerous86/nimqt)
- wNim
-
Nim’s Microsoft Windows GUI Framework (https://github.com/khchen/wNim)
- wxnim
-
Nim wrapper for wxWidgets (https://github.com/PMunch/wxnim)
- Fidget
-
Fidget - A cross-platform UI library for nim (https://github.com/treeform/fidget)
- Fidgetty
-
Widget library built using a fork of Fidget written in pure Nim and OpenGL rendered. (https://github.com/elcritch/fidgetty)
- Figuro
-
Experimental UI Library for Nim (https://github.com/elcritch/figuro)
- Owlkettle
-
A declarative user interface framework based on GTK 4 (https://github.com/can-lehmann/owlkettle)
- NiGui
-
Cross-platform desktop GUI toolkit written in Nim (https://github.com/simonkrauter/NiGui)
- GenUI
-
This is what might become a really kick-ass cross-platform native UI toolkit (https://github.com/PMunch/genui)
- nimx
-
Cross-platform GUI framework in Nim (https://github.com/yglukhov/nimx)
- WebGui
-
Web Technologies based Cross-platform GUI Framework with Dark theme (https://github.com/juancarlospaco/webgui)
- nimgui
-
cimgui bindings for Nim (https://github.com/zacharycarter/nimgui)
- nfltk
-
Nimized Fast Light Toolkit (https://github.com/Skrylar/nfltk)
- IUP
-
iup wrapper for Nim. Used to be part of the stdlib, now a Nimble package. (https://github.com/nim-lang/iup)
- NimQML
-
Qt Qml bindings for the Nim programming language (https://github.com/filcuc/nimqml)
- ui
-
Beginnings of what might become Nim’s official UI library (https://github.com/nim-lang/ui)
- uing
-
A fork of ui that wraps libui-ng instead of libui (https://github.com/neroist/uing)
- uibuilder
-
UI prototyping with Glade (https://github.com/ba0f3/uibuilder.nim)
- sciter
-
Nim bindings are a work in progress (https://sciter.com/forums/topic/nim-bindings-for-sciter/)
- nim-nanovg
-
Nim wrapper for the NanoVG vector graphics library for OpenGL (https://github.com/johnnovak/nim-nanovg)
- rdgui
-
A modular GUI toolkit for rapid (https://github.com/liquidev/rdgui)
- nodesnim
-
The Nim GUI/2D framework, based on OpenGL and SDL2 (https://github.com/Ethosa/nodesnim)
- neel
-
A Nim library for making Electron-like HTML/JS GUI apps (https://github.com/Niminem/Neel)
- mui
-
microui, a tiny immediate-mode ui library (https://github.com/Angluca/mui)
- Nimforms
-
A simple gui library for Nim programming language based on Windows API (https://github.com/kcvinker/Nimforms)
Some of these bindings may currently not compile with the latest Nim compiler or may not support the new ARC memory management. Most of the above bindings are hosted at GitHub, you can use GitHub, Google, or Nimble search, to locate the packages.
There exist also two interesting other GUI-related packages:
-
NimForUE:: Nim plugin for UE5 with native performance (https://github.com/jmgomez/NimForUE)
-
godot-nim:: Nim bindings for Godot Engine (https://github.com/pragmagic/godot-nim)
No game programming?
No, not yet. We know that for many people, game programming is the initial motivation to start with computer programming, so a larger section about this topic would make indeed some sense. However, there are some reasons why we currently do not have this section. The most important reason is, that we try to present in this book that stuff, that is very fundamental and that is not presented in other freely accessible places in a beginner-friendly fashion. And there is a lot of this, which seems to be more essential than games. The other reason is, that for a section about games, we would have to make a lot of decisions in advance: 2D or 3D game, action game, or strategy game. Using a game engine, or only a simple library like cairo, sdl2, raylib, or godot? When using a game engine, the decision of which one we should use, and which set of Nim bindings to use, is not a simple one, and we should try to ensure that the bindings are actively developed and so should work in a few years with Nim 2.0 still. And finally, there are already some nice tutorials for game programming available, see for example
-
https://github.com/jmgomez/NimForUE (Nim plugin for UE5 with native performance)
-
https://hookrace.net/blog/writing-a-2d-platform-game-in-nim-with-sdl2/
Actually, game programming is not that difficult, when we have a nice library with a good tutorial available. Game programming can be much fun, which is great, but actually, we do not learn much when we move some sprites over the screen. On the other hand, advanced game programming, by using a big library like Godot, doing all with basic libs like SDL2 or Raylib, or developing your own game engine based on OpenGL or Vulkan, is a very demanding task.
So maybe, we will add a section about game programming at the end, when the rest of the book is done, or maybe when the next edition of the book is published.
Part V: External Packages
In this part of the book, we will present you with some external packages, which can easily be installed with Nim’s package manager(s).
For packages registered in the Nimble database, executing the nimble install command
nimble install packageName
is sufficient, and you can also install unregistered packages, hosted at github.com or another platforms, with a command like
nimble install https://github.com/user/packageName
Note, that we call nimble commands like install generally as an ordinary user, not as admin or root with administrator privileges. We told you already in the introduction to this book, that we do not intend to discuss the detailed use of nimble in this book, at least not for the first edition. The Nimble package manager is described in detail in https://github.com/nim-lang/nimble, and also in the Manning book. There you can also learn how you can create Nimble packages yourself, and how you can register your own packages in Nimble’s database so that other people can find them easier. While Nimble is Nim’s default package manager, which is currently used by the majority of the user base, there exists also the alternative implementation https://github.com/disruptek/nimph, and some lesser-known ones like Nimp, Slim or Nifty. And there are rumors, that A. Rumpf has also started developing one more package manager called Atlas.[76]
We have already a few thousand external packages for Nim — you may use commands like nimble list or nimble search to list all registered packages or to search in the database for entries, or you can use https://nimble.directory/ or the GitHub online search to find more packages. You can also consult the list of curated Nim packages at https://github.com/xflywind/awesome-nim.
While the use of external packages is really easy, there are some critical points to consider: External packages are not audited by the Nim core team, so the quality of external packages can vary, and in principle, external packages can even contain malicious code, which may damage your computer, when you install and use that package. Well, as we use the nim and nimble commands as a plain user without administrator privileges, there is no real danger that the computer OS can be damaged — only our own user data may get corrupted or damaged. But as we back up all of our important data regularly, there is not that much danger, a SSD hardware crash seems to be more likely. A more serious issue with external packages arises from the fact, that the packages may get outdated and abandoned, and may stop working with recent versions of the Nim compiler, or even may get totally removed from the internet without prior announcements. So when you should create a larger software project that depends on external packages, then you should save a local copy of that package, or you may even consider creating a private fork of that GitHub package.
Some programming languages like Python are shipped already with a very large collection of libraries so that external packages are not that often required at all. Other languages like C++ come basically without any packages or a language-specific package manager, so we would use the package manager provided by the operating system to install important C++ packages like Boost or CGAL, or install needed libraries manually. Nim is between these two extremes — it provides already a large collection of modules with its standard library but has also a lot of external packages. Both, internal core modules, and external packages have their merits. We mentioned already some disadvantages of external packages, but actually, they have also benefits: They can be developed, updated, and improved very fast, as they are not strongly coupled to compiler release updates and one external package can easily be replaced by another similar one. A large set of internal packages can, on the other hand, be a large maintainment burden for the language core team — the packages have to be tested and maybe fixed for each new compiler version, and replacing or removing legacy internal core packages can lead to a lot of problems.
In this part of the book, we will present a very small set of external packages only. This is mostly done to tell you about the existence and usefulness, and for some packages because the currently available documentation is not really beginner-friendly.
We will start with a powerful package for the use of the Parsing Expression Grammar (PEG), which is an alternative to the use of regular expressions for parsing tasks.
Parsing expression grammars
Parsing whole text files or single strings is a common programming task, e.g. to process textual user input or to extract data from HTML or CSV files. Traditionally, this is often done by the use of regular expressions — in Part III of the book we show, how it can be done by use of the regex module.
PEGs, or Parsing Expression Grammars, are another formalism for recognizing patterns in texts by use of a set of rules. A PEG can be used as an alternative to regular expressions for parsing, pattern matching, and text processing. The Parsing Expression Grammar was introduced by Bryan Ford in 2004 and is closely related to the family of top-down parsing languages introduced in the early 1970s. PEGs are a derivative of the Extended Backus-Naur Form (EBNF) with a different interpretation, designed to represent a recursive descent parser.
PEGs are not unlike regular expressions, but offer more power and flexibility, and have fewer ambiguities. For example, a regular expression inherently cannot find an arbitrary number of matched pairs of parentheses, because it is not recursive, but a PEG can.
As PEGs can be constructed in a hierarchical way from individual rules, it can be easier to create or understand them, compared to regular expressions.
While the use of regular expressions is very similar in different programming languages or external tools like sed and grep, the API for PEG libraries can be very different, and even the actual syntax for building parsing rules can differ.
Nim’s standard library already includes a simple pegs module, but we will use the more advanced external NPeg package of Ico Doornekamp instead. NPeg is a pure Nim library, that provides macros to compile PEGs to Nim procedures, which can parse strings and collect selected parts of the input.
In this section, we will try to explain the basic concepts of PEG use and give some examples. For a more formal and complete description, you should refer to the linked Wikipedia article and consult the API documentation of the npeg module.
Formally, a parsing expression grammar consists of a starting expression, a set of parsing rules, and finite sets of terminal and nonterminal symbols.[77]
Each parsing rule has the form A ← e, where A is a nonterminal symbol, and e is a parsing expression. An (atomic) parsing expression consists of terminal or nonterminal symbols or an empty string. New parsing expressions can be constructed from existing ones by concatenation (sequence), an ordered choice, by repetitions (zero-or more, one-or-more, optional) of an existing expression, and by use of the and and not predicate. The and-predicate expression &e invokes the sub-expression e, and then succeeds if e succeeds and fails if e fails, but in either case, never consumes any input. The not-predicate expression !e succeeds if e fails and fails if e succeeds, again consuming no input in either case. Because these two predicates can use an arbitrarily complex sub-expression to "look ahead" into the input string without actually consuming it, they provide a powerful syntactic look-ahead and disambiguation facility, in particular when reordering the alternatives cannot specify the exact parse tree desired.
NPeg is a pure Nim pattern-matching library. It provides macros to compile patterns and grammars (PEGs) to Nim procedures, which will parse a string and collect selected parts of the input. In this way, npeg is an alternative to the use of the regex module, but npeg does not support the optional replacement of matched patterns. You can install the npeg package with the command
nimble install npeg
As understanding and using the PEG is really not that easy, and as most readers may never have heard about PEG at all, we will start with a few very simple examples. First, let us parse just a few decimal digits:
import npeg
let p = peg("str"):
str <- +{'0'..'9'}
echo p.match("123").okThe npeg module defines a few macros for processing PEG patterns. One of them is the peg() macro. We pass a starting expression in the form of a string as an argument, and it creates and returns a Parser object. In the body of the peg() macro, we have to define all the grammar rules that our PEG is built upon. For our example, we only need one simple rule which is a repetition of the decimal digits zero to nine.
The npeg module uses as terminal symbols single characters enclosed in single quotes or strings enclosed in double quotes.
In the original PEG syntax, a pair of square brackets is used to specify character ranges like ['a'..'z'] for the lowercase letters of the alphabet, but the npeg module uses curly braces instead.
So in the npeg syntax {'0'..'9'} stands for a single decimal digit, and the leading + indicates one or more repetitions. In the original PEG syntax, we would use square brackets instead and put the + after the closing square bracket, that is ['0'..'9']+. We can also list the characters of a character class separated by commas, e.g. {'a', 'z'} for 'a' or 'z'. The symbol ← assigns the parsing rule to the nonterminal symbol str, which is already identical to the starting expression.
The peg() macro returns a Parser object, which we can pass together with a string that should be parsed to the match() function. The function match() returns an instance of a MatchObject — we use the ok field of this object to check if the match was successful.
In the next example, we will create a PEG pattern that can match a simple mathematical term built from decimal digits and the two operators + and - for addition and subtraction:
import npeg
let p2 = peg("term"):
term <- dig * *(op * dig)
dig <- +{'0'..'9'}
op <- {'+', '-'}
echo p2.match("1+23").okWe said that the symbol * is used to indicate zero or more repetitions of an expression. But for the npeg module, this * is used at the same time to construct sequences of expressions, that is to say, to concatenate expressions. In the code above, we pass the string "term" as the starting expression to the peg() macro. In the macro body, we define three rules, each of which assign an expression to the nonterminal symbols term, dig, and op. In the expression dig * *(op * dig) the second * in front of the opening brace indicates an arbitrary number of repetitions of the expression enclosed by the round brackets, while the first and third * indicate the sequence or concatenation operation. The following two rules just define a sequence of one or more decimal digits and the operator for addition or subtraction.
Capturing data
The npeg module offers plain string captures, and more flexible code block captures.
String captures
Let us assume that we want to split a line of text into words:
import npeg
let p = peg("line"):
line <- +(space * >word)
word <- +{'a'..'z'}
space <- *' '
let m = p.match(" one two three ")
if m.ok:
echo m.matchLen
echo m.captures16 @["one", "two", "three"]
The MatchResult returned by the peg() macro has the exported fields matchLen and captures, which we can read out in case of a successful match. The field matchLen tells us how many characters of the string have been captured, and captures is a seq[string], containing the captured strings.[78]
Code block captures
Code block captures offer the most flexibility for accessing matched data in NPeg. This allows you to define a grammar with embedded Nim code for handling the data during parsing.
When a grammar rule ends with a colon :, the next indented block in the grammar is interpreted as Nim code, which gets executed when the rule has been matched. Any string captures that were made inside the rule are available to the Nim code in the injected variable capture[] of type seq[Capture]. Capture is an object with field s containing the captured string, and field si containing the index position of the capture inside the original string.
The total sub-string matched by the code block rule is available as capture[0], and the individual captured strings are available with indices > 0. In the indented code block, we can also use $n instead of capture[n].s and @n instead of capture[n].si.
We could use the seq of captures to print the captured strings or to copy them into some global variable. To avoid the need for global variables, we can pass to the peg() macro a second argument, which is a name and a data type separated by a colon, like peg(name, identifier: Type). The second parameter is then available as an ordinary variable in the code block.
For our next example, we will assume that we have written a plain CAD tool, that allows the user to enter textual commands like moveTo(x, y).
import npeg, std/tables
type T = Table[string, string]
let p = peg("command", t: T):
command <- >com * '(' * >pos * ',' * >pos * ')':
# echo $1, $2, $3
t["action"] = $1
t["x"] = $2
t["y"] = $3
com <- "moveTo" | "lineTo"
pos <- +{'0'..'9'}
var input: T
if p.match("moveTo(12,20)", input).ok:
echo input["action"], ": ", input["x"], ", ", input["y"]To keep the example simple and short, we assume that we have to process only two different commands, moveTo() and lineTo(), each accepting x and y coordinates in integer form. We pass a second argument to the peg() macro, which is the name and the data type of a Table instance. We have chosen the string data type for the key and value type of that table, as we want to store the command name as well as the x/y coordinates, so an integer value type would not work. The macro body defines three rules — command, com, and pos. For the command rule, we use an expression, which starts with the command name, followed in round brackets, by the x/y coordinate pair. We put the > operator in front of the nonterminal symbols com and pos to capture these values. We put a colon after the command rule and can access the captured values in the indented block, by using the $N symbol. For the com rule, we specify the literal terminal symbols "moveTo" and "lineTo" as ordered choices using the | operator. Finally, the expression for the pos rule is just a sequence of one or more decimal digits.
Simple patterns
For simple patterns, it might not be necessary to define multiple parsing rules. In that case, we can use the patt() macro instead of peg() and pass just a single one-line pattern as an argument.
For example, the pattern below splits a string by white space:
import npeg
let parser = patt *(*' ' * > +(1-' '))
echo parser.match(" one two three ").capturesWe took this example from the npeg API documentation verbatim. Here, the patt() macro uses Nim’s command invocation syntax, so there are no outer brackets after the macro name. The innermost bracket uses the notation (1-' ') to match everything but a space, and the content of the outer bracket starts with an arbitrary number of uncaptured spaces.
"Look ahead" operators
The PEG syntax also defines the two non-capturing and and not syntactic predicates, which uses the symbols & and ! and provides a powerful syntactic look ahead and disambiguation facility. A common use of the ! predicate is to terminate a parsing expression with !1. Here the 1 matches everything, and !1 would only match when there is nothing left to match, that is, the string end is reached.
We will end our introduction to the parsing expression grammar and the use of the npeg module here. To learn all the details about PEG, like restrictions, performance, and memory consumption, you should consult the Wikipedia article or other dedicated literature. And for advanced uses of the npeg module, including the use of back-references, and all the available syntax elements, you have to study its API documentation carefully. The section [Parsing data files in parallel] in Part VI of the book has one more example of the use of PEGs. There we compare various parsing strategies and present a program that parses a larger CSV file in parallel.
References:
Cligen command line interface generator
In Part III of the book, we presented the module parseopt of Nim’s standard library, which can help us to parse the command line string — for programs launched from within a terminal window, by typing the command name followed by a set of options and arguments. There we also explained the difference between short and long option names and options with and without values. If you can not remember these terms, you should read that section again, or maybe skip this section completely, in the case that you are not interested in creating tools that are used from within a terminal window.
In that [Command line parsing] section, we said that with the external package Cligen the processing of options and parameters for command-line tools can be significantly simplified. The basic idea of the Cligen package is that the parameter list of Nim procs already provides a valuable specification for parameters: It provides names, data types, and optional default values for a set of parameters, in a form, which is already familiar to the Nim user. The cligen module allows us to just create a top-level proc with a parameter list, which can be invoked directly from the command line, with all the parameters being passed in automatically. We only have to call the dispatch() macro on that procedure; this macro does all the work for us. If you want to try this package, you can install it with the Nimble package manager with this command:
nimble install cligen
At the end of the [Command line parsing] section, we provided a sketch of a tool called fancyPrint, that could be used to print files. That tool had options to select single pages to print and to specify the print quality. With cligen, we only have to create the proc definition, and call dispatch() on it:
import cligen
type
Quality = enum
low, medium, high
const
AllPages = -1
proc fancyPrint(page = AllPages; quality = medium; verbose = false; files: seq[string]) =
if files.len == 0:
echo "Missing names of files to print!"
quit()
if verbose:
if page == AllPages:
echo "We print all the pages of the specified files!"
else:
echo "We print page ", $page, " only"
echo "Print quality: ", quality
for f in files:
echo "Printing ", f, " ..."
# insert the real code here!
dispatch(fancyPrint)When you have installed cligen already as suggested above, you can compile and run this code:
nim c fancyprint.nim ... ./fancyprint -p12 --quality:high --verbose file1.pdf file2.pdf ... We print page 12 only Print quality: high Printing file1.pdf ... Printing file2.pdf ...
Long and short option names, with and without values, are supported, you can use = or : to separate option names from their values, and leave out the separator as in -p12, when there is no ambiguity. Long options can be abbreviated, if there is no ambiguity, i.e. we could call our app like ./fancyprint --p12 --qual:high --verb file.pdf.
By default, the letter for the short option is the first character of the long option name, but that can be customized. As option values, most basic Nim data types can be used, this includes numeric types, enumeration types, and boolean types. For boolean options, instead of giving the short or long option name without a value to activate that option, it is also possible to use values like false, true, on, off, 0, 1, to switch that option off or on. When in the proc parameter list, a value has no default value, then it will become mandatory. We can call the tool also with -h or --help, to get an informative overview of the intended use:
Usage: fancyprint [optional-params] [files: string...] Options: -h, --help print this cligen-erated help --help-syntax advanced: prepend,plurals,.. -p=, --page= int -1 set page -q=, --quality= Quality medium select 1 enum Quality -v, --verbose bool false set verbose
You can also display a summary of the cligen syntax with the parameter help-syntax. The cligen module offers some more advanced features, which we will not discuss here in detail: We can use a command mode, to support app calls like nim c …, where the first argument selects which command is called. Or you can specify that a different letter than the first one of the long option name is used as a short option. Or, instead of directly calling a procedure, we can use cligen to initialize an object instance, which is then passed as a parameter to a proc. It is even possible to use other data types as values than the primitive Nim types when we define converter procs for that data types.
References:
Part VI: Advanced Nim
In this part of the book, we will try to explain the more difficult parts of the Nim programming language: Macros and meta-programming, asynchronous code, threading, and parallel processing, and finally the use of Nim’s concepts. We will start with macros and meta-programming, as that seems to be a really stable part of Nim’s advanced features. Nim’s concepts just got a redesign, and for the use of asynchronous code, threading, and parallel processing, there exists currently various implementations and all that may change again when the Nim core devs should decide to actually use the CPS (Continuation-Passing Style) based programming style for the implementation of this.
Macros and meta-programming
Introduction
In computer science, a macro (short for "macro instruction") is a rule or pattern, that specifies how a certain input should be mapped to a replacement output. Meta-programming is a programming technique, in which computer programs have the ability to treat other programs as their data. It means, that a program can read, generate, analyze, or transform other programs, and even modify itself while running.
Legacy programming languages, like C or assembly languages, support already some form of macros, which typically work directly on the textual representation of the source code.
A common use of textual macros in assembly languages was to group sequences of instructions, like reading data from a file or from the keyboard, to make those operations easily accessible. The C programming language uses the #define preprocessor directive to introduce textual macros. Macros in C can be either single-line or multi-line text substitutions, which are processed by a pre-processor program, before the actual compiling process. Some examples of common C macros are
#define PI 3.1415
#define sqr(x) (x)*(x)The basic C macro syntax is, that the first continues character sequence after the #define directive is replaced by the C preprocessor with the rest of that line. The #define directive has some basic parameter support, which was used for the sqr() macro above. C macros have the purpose to support named constants and to allow simple parameterized expressions like the sqr() from above, avoiding the need to create actual functions. The C pre-processor would substitute each occurrence of the symbol PI in the C source file with the float literal 3.1415, and the term sqr(1+2) with (1+2)*(1+2).
Self-modifying assembly code, which was used in a few games on home computers in the 1980s, computer viruses and related malicious code with the ability to modify themselves at runtime, and JIT-Compilers (Just-In-Time) are a very special variant of metaprogramming. Nim allows the use of macros and metaprogramming only at compile-time, so unpredictable and possibly dangerous code modifications at program runtime can not occur. But as Nim’s macros and metaprogramming capacities are very powerful, they can make it more difficult to understand and reason about the source code. So metaprogramming should be used with some care, and in some very sensitive areas, metaprogramming may be restricted.
A Nim macro is a code block, that is executed at compile-time, and transforms a Nim syntax tree into a different tree. The transformation is supported by Nim’s type introspection abilities, e.g. to examine the type or properties of objects and other entities. This can be used to add custom language features and implement domain-specific languages (DSL). While macros enable advanced compile-time code transformations, they cannot change Nim’s syntax.
The macro keyword is used similarly to proc, func, and template to define a parameterized code block, which is executed at compile-time and consists of ordinary Nim code, and meta-programming instructions. The meta-programming instructions are imported from the macros module and are used to construct an Abstract Syntax Tree (AST) of the Nim language. This AST is created by the macro body at compile time and is returned by the macro as an untyped data type. The parameter list of macros accepts ordinary (static) Nim data types, and additionally the data types typed and untyped, which we already used for templates. We will explain the differences between the various possible data types for macro parameters later in more detail after we have given a first simple macro example. Note, that Nim macros are hygienic by default, that is, symbols defined inside the macro body are local and do not pollute the namespace of the environment. Since macros are executed at compile-time, their use may increase the compile time, but it does not impact the performance of the final executable. In fact, clever use of macros can sometimes improve the performance of the final program.
To verify that macros are really executed at compile time, we will start with a tiny macro, that contains only an echo statement in its body:
import std/macros
macro m1(s: string): untyped =
echo s
proc main =
echo "calling macro m1"
m1("Macro argument")
main()When we compile the above code, the compiler prints the message "Macro argument" as it processes the macro body. When we run the program, we get only the output "calling macro m1" from the main() proc, as the macro m1() does only return an empty AST. The careful reader may wonder why the echo() statement in the macro body above works at all, since the parameter of macro m1() is specified as an ordinary string, not as a static[string]. So the type of s in the macro body should be a NimNode. Well, perhaps an echo() overload exists, that can work with NimNodes, or maybe, as we pass a string constant to macro m1(), in this concrete case s is indeed an ordinary string in the macro body. Possibly we should have used s: static[string] as the parameter type, which would give us the exact same results.
As macros are executed at compile time, we cannot really pass runtime variables to them. When we try, we would expect a compiler error:
import std/macros
macro m1(s: string): untyped =
echo s
proc main =
var str = "non static string"
m1(str)
main()But with the current compiler version 1.5.1, that code compiles and prints the message "str", which is a bit surprising. To fix this, we can change the parameter type to static[string], which guarantees that we can indeed pass only compile-time constants.
Now, let us create macros, which actually create an AST, which is returned by the macro and executed when we run our program. For creating an AST in the macro body, we have various options: we can use the parseStmt() function or the "quote do:" notation, to generate the AST from regular program code in text form, or we can create the syntax tree directly with expressions provided by the macros module, e.g. by calls like newTree() or newLit() and such. The latter gives us the best control over the AST generation process, but is not easy for beginners. The good news is that Nim now provides a set of helper functions like dumpTree() or dumpAstGen(), which show us the AST representation of a Nim source code block as well as the commands we can use to create that AST. This makes it much easier for beginners to learn the basic instructions necessary to create valid syntax trees and to create useful macros.
We will start with the simple parseStmt() function, which generates the syntax tree from the source code text string, which we pass as an argument. This seems to be very restricted, and maybe even useless, as we can write the source code just as ordinary program text outside the macro body. That is true, but we can construct the text string argument that we pass to the parseStmt() function with regular Nim code at compile time. That is similar to having one program that generates a new source code string, saves that string to disk, and finally compiles and runs the created program. Let us check with a fully static string, that parseStmt() actually works:
import std/macros
macro m1(s: static[string]): untyped =
result = parseStmt(s)
proc main =
const str = "echo \"We like Nim\""
m1(str)
main()When we compile and run the above program, we get the output "We like Nim". The macro m1() is called at compile-time with the static parameter str, and returns an AST which represents the passed program code fragment. That AST is inserted into our program at the location of the macro call, and when we run our program, the compiled AST is executed and produces the output.
Of course, executing a fully static string this way is useless, as we could have used regular program code instead. Now, let us investigate how we can construct some program code at compile time. Let us assume that we have an object with multiple fields, and we want to print the field contents. A sequence of echo() statements would do that for us, or we may use only one echo() statement when we separate the field arguments each by "\n". The with module may further simplify our task. But as we have to print multiple fields, not an array or a seq, we can not directly iterate over the values to process them. Let us see how a simple text string based macro can solve the task:
import std/macros
type
O = object
x, y, z: float
macro m1(objName: static[string]; fields: varargs[untyped]): untyped =
var s: string
for x in fields:
s.add("echo " & objName & "." & x.repr & "\n")
echo s # verify the constructed string
result = parseStmt(s)
proc main =
var o = O(x: 1.0, y: 2.0, z: 3.0)
m1("o", x, y, z)
main()In this example, we pass the name of our object instance as a static string to the macro, while we pass the fields not as a string, but as a list of untyped values. The passed static string is indeed an ordinary Nim string inside the macro, we can apply string operations on it. But the field names passed as untyped parameters appear as so-called NimNodes inside the macro. We can use the repr() function to convert the NimNodes to ordinary strings so that we can use string operations on them. We iterate with a for loop over all the passed field names and generate echo() statements from the object instance name and the field names, each separated by a newline character. Then, all the statements are collected in a multi-line string s and are finally converted to the final AST by the parseStmt() function. In the macro body, we use the echo() statement to verify the content of that string. As the macro is executed during compile-time, we get this output when we compile our program:
echo o.x echo o.y echo o.z
And when we run it, we get:
1.0 2.0 3.0
Well, not a really great result for this concrete use case: We have replaced three echo() commands with a five-lines macro. But at least, you’ve got a sense of what macros can do for us.
The parseStmt() function is not actually used that often, as string construction is inconvenient, and avoiding issues like namespace collisions can be difficult. In the following sections, we will introduce the quote do: construct and the genast() macro, which allows easier AST generation from textual code blocks. And later, we will learn how we can create macros directly by manually AST manipulation.
Types of macro parameters
As Nim is a statically typed programming language, all variables and procedure parameters have a well-defined data type. There is some form of exception to this rule for OR-types, object variants, and object references: OR-types are indeed no real exception. Whenever we use an OR-type as the type of a proc parameter, multiple instances of the proc, with different parameter types, are created when necessary. That is very similar to generic procedures. Object variants and object references indeed form some kind of exception, as instances of these types can have different runtime types that we can query with the case or of keyword at runtime. Note that object variants and references (the managed pointers themselves, not the actual data allocated on the heap) always occupy the same amount of RAM, independent of the actual runtime type. (That is why we can store object variants with different content or references to objects of different runtime types using inheritance in arrays and sequences.)
For the C sqr() macro from the beginning of this section, there is no real restriction for the argument data types. The sqr() C macro would work for all numeric types that support the multiply operation, from char data type over various int types to float, double and long double. This behavior is not really surprising, as C macros are only a text substitution. Actually, the C pre-processor would even accept all data types and even undefined symbols for its substitution process. But then the C compiler would complain later.
Nim macros and Nim templates do also some form of code substitution, so it is not really surprising that they accept not only well-defined data types, but also the relaxed types typed and untyped.
As parameters for Nim’s macros, we can use ordinary Nim data types like int or string, compile-time constants denoted with the static keyword like static[int], or the typed and untyped data types. When we call macros, then the data types of the parameters are used in the same way for overload resolution as it is done for procedures and templates. For example, if a macro defined as foo(arg: int) is called as foo(x), then x has to be of a type compatible with int.
What may be surprising at first is that inside the macro body, all parameter types do not have the data type of the actual argument we have passed to the macro. Instead, they have the special macro data type NimNode, which is defined in the macros module. The predefined result variable of the macro has the type NimNode as well. The only exceptions are macro parameters which are explicitly marked with the static keyword to be compile-time constants like static[string], these parameters are not NimNodes in the macro body but have their ordinary data types in the macro body. Variables, that we define inside the macro body, have exactly the type that we give to them, e.g. when we define a variable as s: string, then this is an ordinary Nim string variable, for which we can use the common string operations. But of course, we have always to remember that macros are executed at compile time, and so the operations on variables defined in the macro body occur at compile time, which may restrict a few operations. Currently, macros are evaluated at compile-time by the Nim compiler in the NimVM (Virtual Machine), and so share all the limitations of the NimVM: Macros have to be implemented in pure Nim code, and can currently not call C functions, except those that are built into the compiler.
In the Nim macros tutorial, the static, typed, and untyped macro parameters are described in some detail. We will follow that description, as it is more detailed than the current description in the Nim language manual. As these descriptions are very abstract, we will give some simple examples later.
Static macro parameters
Static arguments are a way to pass compile-time constants not as a NimNode, but as an ordinary value to a macro. These values can then be used in the macro body like ordinary Nim variables. For example, when we have a macro defined as m1(num: static[int]), then we can pass it constant values compatible with the int data type, and in the macro body, we can use that parameter as an ordinary integer variable.
Untyped macro parameters
Untyped macro arguments are passed to the macro before they are semantically checked. This means that the syntax tree, that is passed down to the macro, does not need to make sense for the Nim compiler yet, the only limitation is, that it needs to be parsable. Usually, the macro does not check the argument either but uses it in the transformation’s result somehow. The result of a macro expansion is always checked by the compiler, so apart from weird error messages, nothing bad can happen. The downside of an untyped argument is that it does not play well with Nim’s overloading resolution. The upside for untyped arguments is, that the syntax tree is quite predictable and less complex compared to its typed counterpart.[79]
Typed macro parameters
For typed arguments, the semantics checker runs on the argument and does transformations on it before it is passed to the macro. Here identifier nodes are resolved as symbols, implicit type conversions are visible in the tree as calls, templates are expanded, and probably most importantly, nodes have type information. Typed arguments can have the type typed in the arguments list. But all other types, such as int, float, or MyObjectType, are typed arguments as well, and they are passed to the macro as a syntax tree.[80]
Code blocks as arguments
In Nim, it is possible to pass the last argument of a procedure, template, or macro call as an indented code block, following a colon, instead of an ordinary argument enclosed in the parentheses following the function name. For example, instead of echo("1 + 2 = ", 1 + 2), we can also write
echo("1 + 2 = "):
1 + 2For procedures, this notation makes not much sense, but for macros, this notation can be useful, as syntax trees of arbitrary complexity can be passed as arguments.
Now, let us investigate in more detail, which data types a macro accepts. This way we hopefully get more comfortable with all these strange macro stuff. For our test, we create a few tiny macros, each with only one parameter, doing nothing more than printing a short message when we compile our program:
import std/macros
macro m1(x: static[int]): untyped =
echo "executing macro body"
m1(3)This code should compile fine, and print the message "executing macro body" during the compile process, and indeed, it does. The next example is not that easy:
import std/macros
macro m1(x: int): untyped =
echo "executing macro body"
echo x
echo x.repr
var y: int
y = 7
m1(y)This compiles, but as the assignment y = 7 is executed at program runtime, while the macro body is already executed at compile-time, we should not expect that the echo() statement in the macro body prints the value 7. Instead, we get just y for both echo() calls. Now, let us investigate what happens when we use typed instead of int for the macro parameter:
import std/macros
macro m1(x: typed): untyped =
echo "executing macro body"
echo x
echo x.repr
var y: int
y = 7
m1(y)We get the same result again, both echo() statements print y. The advantage of the use of typed here is, that we can change the data type of y from int to float, and our program still compiles. So the typed parameter type just enforces that the parameter has a well-defined type, but it does not restrict the actual data type to a special value. The previous macro, with int parameter type, would obviously not accept a float value.
Now, let us see what happens when we pass an undefined symbol to this macro with typed parameter:
import std/macros
macro m1(x: typed): untyped =
echo "executing macro body"
echo x
echo x.repr
m1(y)This will not compile, as the macro expects a parameter with a well-defined type. But we can make it compile by replacing typed with untyped:
import std/macros
macro m1(x: untyped): untyped =
echo "executing macro body"
echo x
echo x.repr
m1(y)So untyped macro parameters are not only the most flexible but also the most commonly used. However, in some situations, it is necessary to use typed parameters, e.g., when we need to know the parameter type in the macro body.
Quote and the quote do: construct
In the section before, we learned about the parseStmt() function, which is used in a macro body to compile Nim code represented as a multi-line string to an abstract syntax tree representation. Macros use as a return type the "untyped" data type, which is compatible with the NimNode type returned by the parseStmt() function.
The quote() function and the quote do: construct have some similarity with the parseStmt() function: They accept an expression or a block of Nim code as an argument and compiles that Nim code to an abstract syntax tree representation. The advantage of quote() is, that the passed Nim code can contain NimNode expressions from the surrounding scope. The NimNode expressions have to be quoted using backticks.
As a first very simple example for the use of the quote do: construct, we will present a way to print some debugging output.
Assume we have a larger Nim program, which works not in the way that we expected, so we would add some echo() statements like
var currentSpeed: float = calcSpeed(t)
echo "currentSpeed: ", currentSpeedInstead of the echo() statement, we would like to just write show(currentSpeed) to get exactly the same output. For that, we need access not only to the actual value of a variable, but also to its name. Nim macros can give us this information, and by using the quote do: construct, it is very easy to create our desired showMe() macro:
import std/macros
macro show(x: untyped): untyped =
let n = x.toStrLit
result = quote do:
echo `n`,": ", `x`
import std/math
var a = 7.0
var b = 9.0
show(a * sqrt(b))When we compile and run that code, we get:
a * sqrt(b): 21.0
In the macro body, we use the proc toStrLit() from the macros module, which is described with this comment: "Converts the AST n to the concrete Nim code and wraps that in a string literal node" So our local variable n in the macro body is a NimNode, that now contains the string representation of the macro argument x. We use the NimNode n enclosed with backticks in the quote do: construct. It seems, that writing this macro was indeed not that difficult, but actually, it was only that easy because we have basically copied the dump() macro from the sugar module of Nim’s standard library.
Let us investigate our show() macro in some more detail, to learn more about the inner working of Nim macros. First, recall that macros always have a return value of data type untyped, which is actually a NimNode. The quote do: construct gives us a result which we can use as the return value of our macro. Sometimes, we may see macros with no result type at all, which is currently identical to the untyped result type. As the macro body is executed at compile-time, the quote do: construct is executed at compile-time as well, that is that the code block which we pass to the quote do: construct is processed at compile-time and the quoted NimNodes in the block are interpolated at compile-time. For our program from above, the actual echo() statement in the block is then finally executed at program runtime. To prove how this final echo() statement looks, we may add as the last line of our macro the statement "echo result.repr" and we would then get the string "echo "a * sqrt(b)", ": ", a * sqrt(b)", when we compile our program again.
You may wonder why the construct "quote do:" is used instead of only "quote:". The "do notation" is an overloaded feature of the Nim language and offers two things:[81]
-
A different way to pass anonymous procs/closures to a procedure
-
A way to pass two code blocks to a template.
We will not try to explain the magic of "do" here in more detail, because there have been suggestions to modify its use and meaning, and because modern Nim provides the new genAst() macro, which can replace "quote do" and is preferred by many people now. We will present that macro in the next section. When you are really interested in the details of the "do" notation, you may read these two forum posts:
The genast() macro as a replacement for quote do:
The genasts module provides the genAstOpt() macro and the genAst() template as a drop-in replacement for the "quote do:" construct. Like quote do:, genAst() accepts an expression or a code block and returns the AST that represents it. Within the quoted AST, we are able to interpolate NimNode expressions from the surrounding scope. While for quote do: quoting is done using backticks (or other user-defined delimiters), we pass to genAst() a list of the variables to capture, and can then use these variables in the body of genAst() without explicit quoting. Using genAst(), our show() macro from above becomes:
import std/[macros, genasts]
macro show(x: untyped): untyped =
let n = x.toStrLit
genAst(x, n):
echo n, ": ", x
import std/math
var a = 7.0
var b = 9.0
show(a * sqrt(b))GenAst() captures (interpolates) parameters of the surrounding macro and local macro variables when we specify them as parameters to genAst(). A macro local procedure is automatically captured and does not have to be included in the capture list explicitly. This behavior can be modified, when instead of the plain genAst(), the genAstOpt() macro is used, which has a set of options as a first parameter. You can find some more details about the genasts module and two larger examples for its use in the API documentation of that module.
References:
Building the AST manually
In the three sections before we used the functions parseStmt(), quote() and genAst() to build the AST from a textual representation of Nim code. That can be convenient, but is not very flexible. In this section, we will learn how we can build a valid AST from scratch by calling functions of the macros module. That is not that easy, but this way we have the full power of the Nim meta-programming available.
Luckily, the macros module provides some macros like dumpTree() and dumpAstGen(), which can help us get started. We will create again a macro similar to the show() macro, that we created before with the quote do: construct, but now with elementary instructions from the macros module. This may look a bit boring, but this plain example is already complicated enough for the beginning, and it shows us the basics to construct much more powerful macros later.
The core code of our debug() macro would look in textual representation like
var a, b:int
echo "a + b", ": ", a + bThat is for debugging we would like to print an expression first in its string representation, and separated by a colon, the evaluated expression. The dumpTree() macro can show us how the Nim syntax tree for such a print debug statement should look:
import std/macros
var a, b: int
dumptree:
echo "a + b", ": ", a + bWhen we compile this code, we get as output:
StmtList
Command
Ident "echo"
StrLit "a + b"
StrLit ": "
Infix
Ident "+"
Ident "a"
Ident "b"
The Nim syntax tree for the previously mentioned echo() statement is a statement list consisting of an echo() command with two string literal arguments and a last argument which is built with the infix + operator and the two arguments a and b. We can see how the AST, which we would have to construct, should look, but we still do not know how we could construct such an AST in detail. Well, the macros module would contain the functions that we need for that, but it is not easy to find the right functions there. The dumpAstGen() macro can list us exactly the needed functions:
import std/macros
var a, b: int
dumpAstGen:
echo "a + b", ": ", a + bCompiling that code gives us:
nnkStmtList.newTree(
nnkCommand.newTree(
newIdentNode("echo"),
newLit("a + b"),
newLit(": "),
nnkInfix.newTree(
newIdentNode("+"),
newIdentNode("a"),
newIdentNode("b")
)
)
)
This is a nested construct. The most outer instruction constructs a new tree of Nim Nodes with the node type statement list. The next construct creates a tree with node kind command, which again contains the ident node with name echo, which again contains two literals and the infix + operator.
We can use the output of the dumpAstGen() macro directly to create a working Nim program:
import std/macros
var a, b: int
#dumpAstGen:
# echo "a + b", ": ", a + b
macro m(): untyped =
nnkStmtList.newTree(
nnkCommand.newTree(
newIdentNode("echo"),
newLit("a + b"),
newLit(": "),
nnkInfix.newTree(
newIdentNode("+"),
newIdentNode("a"),
newIdentNode("b")
)
)
)
m()When we compile and run that code, we get the output:
a + b: 0
So the AST from above is fully equivalent to the one-line echo() statement. But now we would have to investigate how we can pass an actual expression to our macro, and how we can use that passed argument in the macro body — first, print its textual form, and then the evaluated value, separated by a colon. There is one more problem: the previously mentioned nested macro body is not really useful for our final dump() macro, as we would like to be able to construct the NimNode that is returned by the dump() macro step by step: Add the echo() command, then the passed expression in string form, and finally the evaluated expression. So let us first rewrite the above macro in a form where the AST is constructed step by step. That may look difficult, but when we know that we can call the newTree() function with only one node kind parameter to create an empty tree of that kind and that we can later use the overloaded add() proc to add new nodes to that tree, then it is easy to guess how we can construct the macro body:
import std/macros
var a, b: int
#dumpAstGen:
# echo "a + b", ": ", a + b
macro m(): untyped =
nnkStmtList.newTree(
nnkCommand.newTree(
newIdentNode("echo"),
newLit("a + b"),
newLit(": "),
nnkInfix.newTree(
newIdentNode("+"),
newIdentNode("a"),
newIdentNode("b")
)
)
)
macro m2(): untyped =
result = nnkStmtList.newTree()
let c = nnkCommand.newTree()
let i = nnkInfix.newTree()
i.add(newIdentNode("+"))
i.add(newIdentNode("a"))
i.add(newIdentNode("b"))
c.add(newIdentNode("echo"))
c.add(newLit("a + b"))
c.add(newLit(": "))
c.add(i)
result.add(c)
m2()First, we create the three empty tree structures of node kinds statement list, command, and infix operator. Then we use the overloaded add() proc to populate the trees, using procs like newIdentNode() or newLit() to create the nodes of matching types as before. When we run our program with the modified macro version m2(), we get again the same output:
a + b: 0
The next step to create our actual dump() macro is again easy — we pass the expression to dump() as an untyped parameter to the macro, convert it to a NimNode of string type, and use that instead of the previously mentioned newLit("a + b"). In our second macro, where we used the quote do: construct, we applied already toStrLit() on an untyped macro parameter, so we should be able to reuse that to get the string NimNode. Instead, we would have to apply the stringify operator additionally on that value. But a simpler way is to just apply repr() on the untyped macro argument to get a NimNode of string type. And finally, to get the value of the evaluated expression in our dump() macro, we add() the untyped macro parameter directly in the command three — that value is evaluated when we run the macro generated code.
import std/macros
var a, b: int
macro m2(x: untyped): untyped =
var s = x.toStrLit
result = nnkStmtList.newTree()
let c = nnkCommand.newTree()
c.add(newIdentNode("echo"))
c.add(newLit(x.repr))
#c.add(newLit($s))
c.add(newLit(": "))
c.add(x)
result.add(c)
m2(a + b)Again, we get the desired output:
a + b: 0
So, our dump() macro, still referred to as m2(), is complete and can be used to debug arbitrary expressions. Note, that this macro works for arbitrary expressions, not only for numerical ones. We may use it like
m2(a + b)
let what = "macros"
m2("Nim " & what & " are not that easy")and get the output
a + b: 0 "Nim " & what & " are not that easy": Nim macros are not that easy
Now, let’s extend our debug() macro so that it can accept multiple arguments. The needed modifications are minimal; we simply pass an argument of type varargs[untyped] to the debug macro instead of a single untyped argument, and iterate in the macro body with a for loop over the varargs argument:
import std/macros
macro m2(args: varargs[untyped]): untyped =
result = nnkStmtList.newTree()
for x in args:
let c = nnkCommand.newTree()
c.add(newIdentNode("echo"))
c.add(newLit(x.repr))
c.add(newLit(": "))
c.add(x)
result.add(c)
var
a = 2
b = 3
m2(a + b, a * b)When we compile and run that code, we get:
a + b: 5 a * b: 6
The assert macro
As one more simple example, we will show how we can create our own assert() macro. The assert() has only one argument, which is an expression with a boolean result. If the expression evaluates to true at program runtime, then the assert() macro should do nothing. But when the expression evaluates to false, then this indicates a serious error and the macro shall print the expression which evaluated to false and then terminate the program execution. This is basically what the assert() macro in the Nim standard library already does, and the official Nim macros tutorial contains such an assert() macro as well.
Arguments for our assert() macro may look like "x == 1 + 2", containing one infix operator, and one left-hand, and one right-hand operand. We will show how we can use subscript [] operators on the NimNode argument to access each operand.
As a first step, we use the treeRepr() function from the macros module, to show us the Nim tree structure of a boolean expression with an infix operator:
import std/macros
macro myAssert(arg: untyped): untyped =
echo arg.treeRepr
let a = 1
let b = 2
myAssert(a != b)When we compile that program, the output of the treeRepr() function shows us that we have passed an infix operator with two operands at index positions 1 and 2 as an argument.
Infix Ident "!=" Ident "a" Ident "b"
Now, let us create an assert() macro, which accepts such a boolean expression with an infix operator and two operands:
import std/macros
macro myAssert(arg: untyped): untyped =
arg.expectKind(nnkInfix) # NimNodeKind enum value
arg.expectLen(3)
let op = newLit(" " & arg[0].repr & " ") # operator as string literal NimNode
let lhs = arg[1] # left hand side as NimNode
let rhs = arg[2] # right hand side as NimNode
result = quote do:
if not `arg`:
raise newException(AssertionDefect,$`lhs` & `op` & $`rhs`)
let a = 1
let b = 2
myAssert(a != b)
myAssert(a == b)The first two function calls, expectKind() and expectLen(), verify that the macro argument is indeed an infix operator with two operands, that is, the total length of the argument is 3. The symbol nnkInfix is an enum value of the NimNodeKind data type defined in the macros module — that module follows the convention to prepend enum values with a prefix, which is nnk for NimNodeType in this case. In the macro body, we use the subscript operator [0] to access the operator and then apply repr() on it to get its string representation. Further, we use the subscript operators [1] and [2] to extract the two operands from the macro argument and store the result each in a NimNode lhs and rhs. Finally, we create the quote do: construct with its indented multi-line string argument and the interpolated NimNode values enclosed in backticks. The block after the quote do: construct checks, if the passed arg macro argument evaluates to false at runtime, and raises an exception, in that case, displaying the reconstructed argument.
We have to admit that this macro is not really useful in real life, as it is restricted to simple boolean expressions with a single infix operator. And what it does in its body doesn’t make much sense: The original macro argument is split into three parts, the infix operator and the two operands, which are then just joined again to show the exception message. But at least we have learned how we can access the various parts of a macro argument by using subscript operators, how we can use the treeRepr() function from the macros module to inspect a macros argument, and how we can ensure that the macro argument has the right shape for our actual macro by applying functions like expectKind() and expectLen() early in the macro body.
Pragma macros
All macros and templates can also be used as pragmas. They can be attached to routines (procedures, iterators, etc.), type names, or type expressions. In this section, we will show a small example, of how a proc pragma can be used to print the proc name whenever a procedure annotated with that pragma is called:
import std/macros
dumpAstGen: # let us see how the NimNode for an echo statement has to look
proc test(i: int) =
var thisProcName = "test"
echo thisProcname
echo 2 * i
macro pm(arg: untyped): untyped = # a pragma macro
expectKind(arg, nnkProcDef) # assert that macro is applied on a proc
let node = nnkCommand.newTree(newIdentNode("echo"), newLit($name(arg)))
insert(body(arg), 0, node)
result = arg
proc myProc(i: int) {.pm.} =
echo 2 * i
proc main =
myProc(7)
main()We start with the dumpAstGen() macro applied to a test() proc, which contains an echo() statement. So when we compile that code, we get an initial idea of how a NimNode, which should print the proc name, should look. To use pragma macros, we annotate the proc with the macro name enclosed in the pragma symbols {..}. The annotated procedure is then passed to the pragma with that name in the form of a syntax tree. Our goal is to add a NimNode to this tree, which prints the procedure name of the passed AST. To do that, we have to know two important points: For the proc that is passed as an untyped data type to our macro, we can use the function body() to get the AST representation of the body of the passed proc, and we can use name() to get the name of that proc. The functions body() and name() are provided by the macros module of Nim’s standard library. In our macro pm(), we first verify that the passed argument is really of node kind ProcDef. Then we create a new NimNode, which calls the echo() function with the procedure name as a parameter. And we insert that node at position 0 into the body of the passed proc. Finally, we return the modified AST.
When we run our program, we get this output in the terminal window:
$ ./t myProc 14
Pragma macros for iterators
Let’s assume we have an object type with some fields, all of which are sequences with the same base type, and we need an iterator to iterate over all the container elements. Indeed, this may happen when the different seqs contain subclasses of the same parent class, as in
type
Group = ref object of Element
lines: seq[Line]
circs: seq[Circ]
texts: seq[Text]
rects: seq[Rect]
pads: seq[Pad]
holes: seq[Hole]
paths: seq[Path]
pins: seq[Pin]
traces: seq[Trace]
iterator items(g: Group): Element =
for el in g.lines:
yield el
for el in g.rects:
yield el
for el in g.circs:
yield el
....Perhaps we do not want to write all the for loops in the iterator body manually. One solution is to create a pragma macro, which creates the for loops in the iterator body for us:
import std/macros
type
O = object
a, b, c: seq[int]
macro addItFields(o: untyped): untyped =
const fields = ["a", "b", "c"]
expectKind(o, nnkIteratorDef)
# echo o.treeRepr
# echo o.params.treeRepr
let objName = o.params[1][0]
for f in fields:
let node =
nnkStmtList.newTree(
nnkForStmt.newTree(
newIdentNode("el"),
nnkDotExpr.newTree(
#newIdentNode("o"),
newIdentNode($objName),
# newIdentNode("b")
newIdentNode(f)
),
nnkStmtList.newTree(
nnkYieldStmt.newTree(
newIdentNode("el")
)
)
)
)
insert(body(o), body(o).len, node)
result = o
#echo result.repr
iterator items(o: O): int {.addItFields.} =
discard
#dumpAstGen:
# iterator xitems(o: O): int =
# for el in o.a:
# yield el
var ox: O
ox.a.add(1)
ox.b.add(2)
ox.c = @[5, 7, 11, 13]
for l in ox.items:
echo lWe start again with a dumpAstGen() call, which shows us the shape of the for loop node. In that node, we only have to replace two newIdentNode() calls so that the field names can be provided by iterating over an array of strings, and the object name is taken from the iterator parameter. To get the object name, we first use o.treeRepr, to see the whole parameter structure, and then params.treeRepr, to get the structure of the parameters passed to our iterator. Using subscript operators, we get the actual object name. We insert each new node, that we create in the for loop with a call of insert(body(o), body(o).len, node), as the new last node in the body of the iterator. We can create a more flexible variant of our above macro when we pass the actual field names as additional parameters to the pragma macro:
import std/macros
type
O = object
a, b, c: seq[int]
macro addItFields(fields: openArray[string]; o: untyped): untyped =
expectKind(o, nnkIteratorDef)
let objName = o.params[1][0]
for f in fields:
let node =
nnkStmtList.newTree(nnkForStmt.newTree(newIdentNode("el"),
nnkDotExpr.newTree(newIdentNode($objName),newIdentNode($f)),
nnkStmtList.newTree(nnkYieldStmt.newTree(newIdentNode("el")))))
insert(body(o), body(o).len, node)
result = o
iterator items(o: O): int {.addItFields(["a", "b", "c"]).} =
discard
var ox: O
ox.a.add(1)
ox.b.add(2)
ox.c = @[5, 7, 11, 13]
for l in ox.items:
stdout.write l, ' 'When we run this macro or the one before, we get
1 2 5 7 11 13
Macros for generating data types
As one more exercise for the use of macros, we will create some data types in this section. In the previous section, we had a data type like
type
Group = ref object of Element
lines: seq[Line]
circs: seq[Circ]
texts: seq[Text]
rects: seq[Rect]
pads: seq[Pad]
holes: seq[Hole]
paths: seq[Path]
pins: seq[Pin]
traces: seq[Trace]Here, the individual fields have a well-defined shape — all members are sequences of other data types, and the field names are derived from the type names. We may wonder if creating the fields with some form of a macro would make sense. Let’s investigate this.[82] Let us assume that we need a reference object with some fields that are sequences of the base types int, float, and string. Again, we start by using the dumpAstGen() macro. We don’t have to understand its output in detail. It is enough to recognize that each of the three actual fields of our ref object was created by a nnkIdentDefs.newTree() statement, and that these three statements are surrounded by a nnkRecList.newTree() call. So we start by producing an empty RecList with a call of nnkRecList.newTree(), and then iterate over an array with the three type names, create the IdentDefs with nnkIdentDefs.newTree() and add them to the RecList. Finally, we call nnkStmtList.newTree() passing our RecList as a parameter. Mostly this is just copy&paste, with the only exception that we have to remember that our rfn variable, which we use to iterate over the type names, is not a string, but a NimNode inside the macro, so we have to apply the stringify operator $ on it when we pass it as an argument to newIdentNode():
type
O = ref object of RootRef
ints: seq[int]
floats: seq[float]
strings: seq[string]
import std/macros
#[
dumpAstGen:
type
O1 = ref object of RootRef
ints: seq[int]
floats: seq[float]
strings: seq[string]
]#
#[
nnkStmtList.newTree(
nnkTypeSection.newTree(
nnkTypeDef.newTree(
newIdentNode("O1"),
newEmptyNode(),
nnkRefTy.newTree(
nnkObjectTy.newTree(
newEmptyNode(),
nnkOfInherit.newTree(
newIdentNode("RootRef")
),
nnkRecList.newTree(
nnkIdentDefs.newTree(
newIdentNode("ints"),
nnkBracketExpr.newTree(
newIdentNode("seq"),
newIdentNode("int")
),
newEmptyNode()
),
nnkIdentDefs.newTree(
newIdentNode("floats"),
nnkBracketExpr.newTree(
newIdentNode("seq"),
newIdentNode("float")
),
newEmptyNode()
),
nnkIdentDefs.newTree(
newIdentNode("strings"),
nnkBracketExpr.newTree(
newIdentNode("seq"),
newIdentNode("string")
),
newEmptyNode()
)
)
)
)
)
)
)
]#
const RecFieldNames = ["int", "float", "string"]
macro genO1(): untyped =
var recList = nnkRecList.newTree()
for rfn in RecFieldNames:
recList.add(nnkIdentDefs.newTree(newIdentNode($rfn & 's'),
nnkBracketExpr.newTree(newIdentNode("seq"),
newIdentNode($rfn)), newEmptyNode()))
result = nnkStmtList.newTree(nnkTypeSection.newTree(nnkTypeDef.newTree(newIdentNode("O1"),
newEmptyNode(), nnkRefTy.newTree(nnkObjectTy.newTree(newEmptyNode(),
nnkOfInherit.newTree(newIdentNode("RootRef")), nnkRecList.newTree(recList))))))
genO1()
var o1 = O1(ints: @[1, 2, 3], floats: @[0.1, 0.2, 0.3], strings: @["seems", "to", "work"])
echo o1.ints
echo o1.floats
echo o1.stringsWhen we compile and run the above code, we get an output that seems to make some sense. But can we really trust our macro? Well, we can replace var o1 = O1 with var o1 = O and compile and run again: At least we get the same file size, and the same output, so our macro should be fine.
Macros to generate new operator symbols
Earlier in the book, we have already learned how we can define new procs and templates, which can be used as operators. In this section, we will learn how we can create a macro that does not only create an operator that can work on existing variables, but also can be used to create new variables. In Nim, we use the var or let keyword to create new variables. Some other languages allow creating new variables on the fly by using just "=", ":=", or "!=" for the assignment.
import std/macros
dumpAstGen:
var xxx: float
macro `!=`(n, t: untyped): untyped =
let nn = n.repr
let tt = t.repr
nnkStmtList.newTree(
nnkVarSection.newTree(
nnkIdentDefs.newTree(
# newIdentNode("xxx"),
newIdentNode(nn),
# newIdentNode("float"),
newIdentNode(tt),
newEmptyNode()
)
)
)
proc main =
myVar != int
myVar = 13
echo myVar, " ", typeof(myVar)
main()Again, dumpAstGen() shows us the structure of the needed AST. We use repr() to get the string representation of the two macro arguments, and in the dumpAstGen() output, we replace the arguments of the newIdentNode() calls with those values. When we compile and run the above program, we get
$ ./t 13 int
In the case that we should really intend to use such a macro in our own code, we should of course add some code to the macro, to check that the passed arguments have the correct content.
References:
Process execution
In this section, we will discuss how we can use multiple threads or Nim’s async/await framework, to avoid blocking IO (input/output) operations, and to enable parallel code execution on multiple physical CPU cores. The various forms of not strictly linear and sequential program execution are also called multitasking or multi-threading. Threading is generally the splitting of one path of actions into various sub-parts, which can be processed in parallel, or concurrently. On a CPU with multiple physical cores, threads can be distributed between them, while on a CPU with only one core, all threads have to run obviously alternating on that single core, which is called concurrency. Parallel processing requires always dedicated physical hardware, that is multiple CPUs, or a multicore CPU, which consists of two or more independent units known as cores.
As the CPUs of recent desktop computers often already have a few dozen cores, and GPUs may have thousands of them, it has become more and more important to distribute computing tasks between all these cores to gain optimal performance. Dedicated programming languages like Chapel or Pony have been developed for this task, and most modern programming languages support it. For older languages like C, extensions like OpenMP for threading support have been developed.
The various forms of asynchronous operation were introduced due to the fact that some input and output operations and network requests can be very slow compared to the data processing rate of the CPU. It would be very wasteful if the CPU had to remain idle while a slow network data transfer or a floppy disk operation is performed. Actually, the asynchronous operation was already done long before the first multicore CPUs were available.
While Nim has already good support for threading and asynchronous and parallel processing, all this is still some work in progress, so things may further improve in the future.
When we launch a computer program on our desktop PC, then the operating system creates an instance of a new process, sometimes also called a task, to execute the application. Each process is strongly separated from other processes that may also be running on the computer, each process has its own memory regions (RAM) that it may use, and when one process should crash for some reason, other processes are not concerned. Processes can have various states defined by the OS, this includes some form of running, idle, ready, waiting, or halted. A process executes one or multiple threads, which can run concurrent, or parallel on multiple physical CPU cores. All the threads of one single process can use common resources and access common variables, which enables data exchange between threads, with some restrictions. Data exchange between different, separated processes is not that easy, but it is also possible with the use of inter-process-communication protocols. Early PC operating systems executed only one process at a time, sometimes the user was able to switch between multiple launched processes. Modern operating systems do a fast switching between all the ready processes so that the user gets the feeling, that all of them are running in parallel, even when the CPU has only one physical core. The fast switching between processes is called multitasking or concurrent execution. Unfortunately, these two terms are a bit misleading, as they seem to imply true parallel execution on multiple physical CPU cores. But the term concurrency actually only indicates the fast switching process — for a few micro-second one process is executed, then an automatic task switch occurs, which includes saving and restoring all the CPU registers and states, and the next process is executed again for a few micro-seconds. This form of concurrency was already big progress for the desktop PC, as it was possible to run processes with a heavy workload, like a compiler, while the user was still able to use his text editor or web browser without noticing serious delays for key and mouse input or display updates. Concurrency is typically supported by smart hardware, which can interrupt the current work of the CPU to temporarily execute a different code segment. Hardware like disc controllers, or network cards, have its own data buffers or can access parts of the RAM directly by DMA (Direct Memory Access), and notice the CPU by so-called interrupt signals when a buffer is full (or empty) or when another condition is met, e.g. when new network data are available. This interrupt system can drastically improve performance and throughput, as active waiting in polling busy loops for new network or disk data can be avoided — the CPU is free to process one of the other waiting processes until interrupt signals indicate filled/empty data buffers or other conditions that require active CPU intervention.
This form of (hardware interrupt-driven) concurrency needs generally some software support, e.g. the Linux kernel may use the epoll system for I/O event notifications. Initially, it was a common practice to connect so-called callback functions to interrupt-driven signals, e.g. a callback function was invoked whenever some network data package arrived. Some C programs and system libraries work still this way, for example, the glib library of the GTK GUI toolkit. But the use of callbacks can become difficult and confusing for large applications, sometimes it was called a "callback hell". So languages like Java, JavaScript, or Python introduced a framework called async/await to simplify the process of writing non-blocking asynchronous software. The async/await framework actually hides the use of callbacks or use of system functions like epoll from the user. This asynchronous programming style has gained some popularity due to the fact that many programs perform a lot of network communication, where data is transferred often slowly, compared to the processing power of the CPU. The Nim standard library provides an async/await framework, which can be used similarly to that of Python, and the external Chronos package of Status corp. offers one more similar package. Additionally, there was a discussion among some Nim developers to support or replace the async/await framework with a more flexible CPS-based one. We should mention, that async/await has its drawbacks — its internal working is difficult, its usage is not always easy, and the user has to be careful when using asynchronous and synchronous functions together. Async/await was definitely the best option when desktop PCs had only one single CPU core, but with the arrival of multicore CPUs, the importance of asynchronous operations has become less important, as using many threads running in parallel has become an alternative solution. It is said, that asynchronous program execution has less overhead than just using parallel processing on multiple cores, which could be one reason, why asynchronous programming is still very popular.
For Nim, we have many different ways to do parallel program execution, and for the async/await framework of Nim’s standard library, the Chronos alternative implementation is available. Creating new threads, which are executed in parallel, when the CPU has multiple physical cores, is supported by the threads module. Additionally, the Nim standard library provides the threadpool module, which can create a pool of threads, which may be used by the spawn construct or the parallel keyword. Furthermore, external packages, like weave, can be used for high-performance parallel processing. And finally, when we use the C compiler backend, we may also use the parallel construct of the OpenMP C library.
Some other programming languages like Lua or Go offer also virtual (green) threads, or coroutines and fibers, and some languages use the CPS system for a very flexible parallel and asynchronous framework. Maybe Nim will support that also in the future.
The biggest problem of high-performance parallel data processing is the exchange of data between threads, which has to be performed with much care to avoid data corruption by uncoordinated random access or race conditions. For this, mutexes, locks, and atomic operations can be used to control the access of common variables, or Channels can be used to send data from one thread to another one. Another problem for parallel thread execution can result from the Garbage Collector. For a system design, where a single GC accesses all data of a process, it can be necessary to stop all the threads of a process while the GC does its work. Nim is using for each thread a separate heap area and a thread-local GC, so other threads can continue their work while the GC cleans up the data of one single thread. The concern of passing data between threads still exists, but the new ARC/ORC memory management system may further improve the situation.
In the following sections of the book, we will first demonstrate a few ways to use multiple threads, which will run in parallel, when there is more than one physical CPU core available. After that, we will investigate basic async/await operations, and show how we can send data from one thread to another by use of the channels module.
Module threadpool
Creating new threads is always some overhead, so it can make sense to create a pool of threads, which we then can use to execute parts of our program.
Using spawn to execute a proc by one thread of the pool
As a first, very simple example, we will show how we can use the spawn procedure of the threadpool module to request the execution of a regular procedure. This way, we create not really a new thread, but we add our proc to a list of procs to execute. When one of the threads in the pool is idle, then our procedure is immediately executed by a thread, otherwise, the execution of our proc is delayed until a thread is ready to execute it. All the threads of the pool are distributed among the physical cores of the CPU, so we can really execute procs in parallel. We have to compile the code using spawn() with the --d:threads=on option:
import std/threadpool
proc sum(i: int): int =
var j = 0
while j < i:
inc(j)
result += j
proc main =
var a: FlowVar[int] = spawn sum(1e7.int)
var b = spawn sum(1e7.int)
echo ^a , " ", ^b
main()The spawn() function executes an ordinary Nim function by a thread of the pool. Note that syntactically, we do not pass a function and the function’s arguments to spawn, but an expression which is the actual call of the proc! Spawn() immediately returns a variable of FlowVar[T] type, which is a container type that can store the result of our passed function. In the example above, we used FlowVar[int], as our proc sum returns an integer value, but of course, the generic FlowVar[T] type works for other data types as well, including sequence and object types. As the instances of FlowVar[T] type are immediately returned by spawn(), these container variables may be empty initially. We may then use functions like isReady() from the threadpool module, to test if the FlowVar[T] variable contains already the result data, or we can do a blocking wait for the result of our proc with the ^ operator. The ^ operator applied to the FlowVar[T] variable waits for the thread to finish the execution of our proc and then returns the actual result. If the thread is already finished when we apply the ^ operator, we get the result immediately. As ^ does a blocking wait, it may look as if there would not be many benefits, but of course, we can launch a number of threads with spawn, which can be processed in parallel, and then we wait with ^ on all the results.
In the example above, we use a plain procedure, which sums up the first i natural numbers, very similar to our very first example program in Part I of the book. We use spawn() to launch two instances of that procedure, and then wait for the results with the ^ operator applied to the flowvar. If your PC has more than one physical CPU core, then both procedure instances should be running in parallel, taking only the total time of one single run. You may compile and launch the above code with nim c --threads:on t.nim; time ./t to see the execution time. Then, comment out the second spawn call as well as the echo() call for FlowVar b and compile and run again. Times should be nearly identical, when your PC has at least two CPU cores, indicating true parallel execution. Of course, launching multiple times the same procedure with the same data makes not much sense, but in real life, we could launch it with different data, or we could use different procedures.
As one more example of the use of spawn(), let us investigate, how we can avoid the blocking behavior of the readLine() procedure, that we used earlier in the book. Without special care, a call of readLine() blocks the main thread of our process, so our program would not be able to do some useful work or update the display until the user terminates his textual input request by pressing the return key. One possible option to avoid a blocking request for user input could be the use of the async/await framework, but that may not work well for the current Nim implementation. So let us just use spawn to execute readLine() on one of the threads of the pool:
import std/threadpool
from std/os import sleep
proc doSomeWork =
echo "not really working that hard..."
sleep(1000) # sleep 1000 ms
proc main =
var userInput: FlowVar[string] = spawn readLine(stdin)
while not userInput.isReady:
doSomeWork()
echo "You finally entered: ", ^userInput
main()In this example, we use spawn() to execute the readLine() function of Nim’s standard library by a thread of the threadpool module. We use the function isReady() to test if the user input is already available, and call a worker procedure if there is no input yet. As we have no real work to do, that proc just echos a message and calls os.sleep() to create a delay. Note that we use the echo() call in doSomeWork() only to show what is going on — it is obvious that the repeated printed message would interfere with the user input echoed by the terminal window. Actually, this example is not really that nice, but it shows you the use of isReady() and at least one possible way to request user input without blocking the whole app.
The parallel statement
With the parallel statement, the threadpool module offers one more way to use threads to process data in parallel. While the parallel statement is already available in Nim for many years, it was recently labeled as an experimental feature, so we have to use the {.experimental.} pragma to use it. And the detailed description is currently only available in the experimental section of the manual: https://nim-lang.org/docs/manual_experimental.html#parallel-amp-spawn-parallel-statement
With the parallel statement, it is easily possible to process large data, e.g. arrays or sequences, in parallel. The compiler proves the data access for us, to avoid data races or otherwise invalid operations. As a very simple example, we will sum up the elements of an integer array by use of two threads running in parallel — when more than one physical CPU core is available:
import std/threadpool
{.experimental: "parallel".}
proc sum(i, j: int; a: array[8, int]): int =
for k in i .. j:
result += a[k]
proc main =
var a: array[8, int]
for i in a.low .. a.high:
a[i] = i
var s1, s2: int
parallel:
s1 = spawn sum(0, 3, a)
s2 = spawn sum(4, 7, a)
echo s1, " + ", s2
main()Inside the parallel block, we again use spawn to launch a function that is then executed by a thread of the threadpool. The sum() function in our example code sums up a range of array elements. When spawn() is used inside a parallel block, its semantic use is different: Instead of a FlowVar[T], spawn() now returns directly the result of the called proc. We can save these results in ordinary variables, and access them freely after the parallel block. In the above case, we would finally sum up the individual results to get the total sum of all the array elements.
Our example code above is kept very simple by intent, to clearly show the principal use. You may try to modify it to work on sequences with arbitrary runtime sizes instead of a fixed-sized array, and to use more than two threads. For all the details of the threadpool module, you should consult its documentation.
As a direct replacement for the threadpool module, you may also try the external taskpools package. Or you may try the much more advanced weave package. Recently, two more modules for threading support, called Malebolgia and Constantine, have arrived.
Using the threads module to create new threads
If for some reason we cannot use the threadpool module, or if we need more control over the various threads, we can create our own threads:
proc sum(i: int) {.thread.} =
var j, result: int
while j < i:
inc(j)
result += j
echo result
proc main =
var th1, th2: Thread[int]
createThread(th1, sum, 1e7.int)
createThread(th2, sum, 1e7.int)
joinThreads(th1, th2)
main()The createThread() procedure is provided by the threads module, which is part of the system module — for that reason, we do not have to explicitly import it. The proc that we want to execute in its own newly created thread must be annotated with the {.thread.} pragma and use a single parameter. We pass the generic Thread[T] variable, the proc to execute, and the proc parameter to createThread(). The Thread variable must have the same generic type as the parameter of the proc that we want to execute. In our example, that parameter type is a plain integer, but of course, we can use other data types including objects, tuples, or container types like sequences.
Since createThread() does not return a result, we call echo() in our sum() procedure to show what is going on. Actually, calling echo() from within a procedure running as a thread may not be a good idea, as multiple echo() calls from different threads may interfere. We may use the locks module to make the output operation atomic, but to keep our example short and simple, we ignore that problem for now. The code above creates two newly created threads, which in our case run the same procedure with the same data. If more than one CPU core is available, the two threads should be executed in parallel by the OS. After launching our new threads, we can use the joinThreads() procedure to wait for the termination of all threads — we should generally do that before our app terminates itself.
Using channels for data exchange between threads
When we use the threadpool and spawn() to execute a function by one of the threads of the pool, we get immediately the result of the executed function back, when the work of the function is done.
Threads created with the createThread() function of the threads module do not directly return a result but can be executed for a long time period, often for the whole lifetime of the main process. Typically, it is necessary to exchange messages and data between these types of threads — among multiple child threads themselves, or among them and the process’s main thread. For this exchange of messages and data, Channels can be used. Nim’s Channels use internally a queue for sending data from one thread to another thread. A queue is a first-in-first-out (FIFO) data structure — items put in first will also be extracted first. That way, the receiving thread will receive the items in the same order as the sending thread has sent them.
The generic Channel[T] data type, and the functions to use it, are provided by the system module, so we do not need to import them. Channels should be used only for Threads of the threads module, but not for the hidden threads of the threadpool module. Channels allow sending messages and data only in one direction, for bidirectional communication we would need two separate channels. Variables of the Channel data type are generally defined at the global scope, to avoid problems with the thread-local garbage collector, and the generic type of the Channels determines the data type of the messages that we can send through the Channel. The Channel deeply copies the sent data, which may not be particularly efficient for large data packages.
In the code below, we will present a very simple example for the use of one single Channel. The sum() procedure sums up again the first n natural integer numbers, but this time the function sums up the numbers in chunks, and sends the sum of each chunk over the Channel to the parent thread:
var ch: Channel[int]
proc sum(i: int) {.thread.} =
var j, res: int
while j < i:
inc(j)
res += j
if j mod 4 == 0:
ch.send(res)
res = 0
ch.send(res) # send the remainder
ch.send(0) # send zero to indicate termination
proc main =
var th: Thread[int]
ch.open()
createThread(th, sum, 10)
while true:
let r = ch.recv()
if r == 0:
break
echo "Received: ", r
joinThreads(th)
ch.close()
main()# Expected output: Received: 10 Received: 26 Received: 19
The proc sum() continuously sums up 4 more numbers and then sends the partial sum into the channel. The generic Channel[int] variable ch is defined in the global scope. In the main() procedure, we create the child thread, open the Channel, and read the Channel data with calls to recv(), until we receive a zero value as a terminating condition. Finally, we call joinThreads() to ensure that the child thread was indeed terminated, and we call close() on the channel to close it. Note, that in sum(), we use an additional send() call to send the last partial sum, which may have less than 4 summands, and so may not have been sent. Instead of this additional send() call in the while loop, a condition like if j mod 4 == 0 or i == j: could be used, of course. When we are done, we send the zero value to indicate to the parent thread, that we are done. This way, the parent thread will not wait for more data that never got sent. In the main() procedure, we use recv() to read the data from the Channel. Recv() would block if data is not yet available. Instead, we could use tryRecv(), which returns a tuple, with the field dataAvailable indicating if there is already something to read available. The open() function accepts as a second optional argument the number of items that can be buffered in the internal items queue of the channel. If that limit is reached, further calls to send() would block until the reading thread has read the next item. If we restrict the maximum number of items in the Channel, we may use instead of send(), which may block when the channel is full, trySend(), which just returns false for this case, without blocking.
Of course, the above code example doesn’t make much sense, as no useful work is done in parallel and there’s no reason for sum() not to sum up all the elements immediately. But the example should show you the basic use of Channels, including the need for having a terminating condition.
Race conditions
A race condition may occur when two or more threads attempt to read and write to a shared resource at the same time. Such behavior can result in data corruption or unpredictable results, that are difficult to debug. Let’s consider this small example, where two threads increase the value of a global integer variable:
var counter: int
proc incCounter(i: int) {.thread.} =
for j in 0 ..< i:
var local = counter
local += 1
counter = local
const N = 1000
proc main =
var th1, th2: Thread[int]
createThread(th1, incCounter, N)
createThread(th2, incCounter, N)
joinThreads(th1, th2)
main()
echo N, ": ", counterIn the code above, the two threads run concurrently and in parallel when your CPU has at least two physical cores. Each thread increases the global counter variable N times, so one may expect a final result of 2 * N. But at least, when the threads are running in parallel, the actual result will be a random value between N and 2 *N. The problem is, that the threads do not increase the global counter in one atomic step, but create a local copy, increase the value of the copy, and write the value back. When the other thread had modified the global counter variable in between, that modification is overwritten. When the two threads would run not in parallel, but concurrent on only one CPU core, then the actual result may depend on the way how the OS does the actual task switching.
These kinds of problems are sometimes called race conditions because the actual behavior is determined by the order in which the various threads access the data. In the example code, the actual issue results from the copying into the local variable, and later copying the value back — a plain inc() executed on the global variable may work. We used the local copy here, to make the problem visible. Whenever we would work in such an unordered way onto more complicated data like strings or objects, we would get corrupted data. This example should raise your awareness to all the concerns, which may occur when multiple threads access global data in an uncontrolled way.
We have already learned about Channels, which provide a way to exchange data between threads without the use of global variables. Other methods to protect global variables from uncontrolled access, which can lead to corrupted states, are locks, mutexes, or semaphores. We will give an example to do access control through the use of locks in the next section. In the example above, we used as global data a primitive value data type. Even more problems may occur when we try to use global reference data types: In the past, the Nim standard library provided special functions like allocShared() to allocate pointer and reference data types that can be accessed from multiple threads. But as Nim’s thread handling may change and improve in the future further, we will not try to discuss all these details here. It should be enough that you have a feeling for the concerns, that may arise from executing multiple threads with shared data — for the details, you should consult the documentation of Nim’s standard library and the language manual.
Guards and locks
While Nim’s Lock data type and the corresponding functions are defined in the locks module of the standard library, that module contains only minimal explanations, so we have to consult the experimental section of the language manual.
In computer science, a lock or mutex (from mutual exclusion) is a synchronization primitive that enforces limits on access to a resource when there are many threads of execution. Before that resource is accessed, the lock is acquired, and after the resource is accessed, it’s released. The simplest type of lock is a binary semaphore. It provides exclusive access to the locked data. Following this definition from Wikipedia, Nim’s locks seem to be actually binary semaphores.
Nim’s Locks are generally used together with the guard pragma, which we can attach to a global variable, that is accessed from more than one thread. With the guard pragma attached, each thread must first acquire the lock before it is allowed to access that variable. If the lock is already acquired by another thread, acquire() blocks until that other thread releases the lock to indicate that it is done with its access. Of course, this possible blocking can decrease the total performance, so each thread should acquire the lock only, when it really needs access to the protected data, and release the lock as soon as possible.
We can use the template withLock to access the guarded global variable within a block — withLock() acquires the given lock and then releases it at the end of the block. Accessing a guarded variable outside a withLock() block would give a compile-time error.
import std/locks
var lock: Lock
var counter {.guard: lock}: int
proc incCounter(i: int) {.thread.} =
for j in 0 ..< i:
withLock lock:
var local = counter
local += 1
counter = local
const N = 1000
proc main =
var th1, th2: Thread[int]
createThread(th1, incCounter, N)
createThread(th2, incCounter, N)
joinThreads(th1, th2)
main()
echo N, ": ", counterWhen you now run the above code, the counter should always have the desired value 2 * N. Note that replacing the withLock with a plain acquire() and release() pair seems not to work for locks that are used as guards — but actually, there is no reason to do that, the withLock block is easier to use and ensures that acquire() and release() is always used in matching pairs.
Exceptions in threads
Whenever a procedure that is running as its own thread raises an uncaught exception, the whole process is terminated and a stack trace with the corresponding error message is displayed in the terminal window. This applies not only to the threads of the threads module but also when the spawn() function is applied to run functions by one of the threads in the pool.
Malebolgia
We already mentioned a few external packages for parallel code execution, including Weave, Taskpools, and Malebolgia. While Malebolgia is not yet part of Nim’s standard library, it was created by Nim’s main developer Mr. Rumpf, so we can expect that it works with Nim 2.0 and ARC/ORC memory management, and may continue to work in the future. Internally using a pool of threads, Malebolgia supports structured concurrency with data parallelism, and ensures synchronization using barriers. It can be used similar to the legacy parallel statement of the threadpool module to process the content of seq and array containers in parallel. Mr. Rumpf already provides a few examples, like parMap(), parApply(), parReduce(), and parFind(), for processing of container content in parallel. Additionally, Malebolgia also supports spawning recursive procedures, and provides methods to cancel parallel code execution or to specify timeouts. Finally, the package is advertised to be energy efficient and compact, allowing its use also for embedded systems with restricted resources. In fact, the malebolgia.nim module has fewer than 300 lines of source code.
As a first, very simple example, we will present a way to sum up in parallel some numbers stored in a sequence. By utilizing the spawn and awaitAll features, the program distributes the workload across multiple threads:
import malebolgia
import std/sequtils
const Cores = 8
proc sum(d: openArray[int]; a, b: int): int =
for i in a .. min(b, d.high):
result += d[i]
proc main(s: openArray[int]) =
var sums = newSeq[int](Cores)
var b = s.len div Cores + 1
var m = createMaster()
m.awaitAll:
for i in 0 ..< Cores:
m.spawn sum(s, i * b, (i + 1) * b - 1) -> sums[i]
var res: int
for el in sums:
res += el
echo res
main(toSeq(1 .. 100))As Malebolgia is not yet part of Nim’s standard library, we would have to use Nimble or the newer Atlas tool to install it. For Nimble, a 'head' install with nimble install malebolgia@#head is recommended, as last time we tried, the nimble file of that project was not properly updated, so that we got a very old package version.
Malebolgia uses a so-called master object, which is created by a call of createMaster(), to synchronize the parallel code execution. Our code example creates such a master object, and then uses it to construct an awaitAll block in which spawn is used in a for loop to execute a user defined proc in parallel. The parallel executed subroutines can have ordinary value parameters and return an optional result, which is stored by use of the -> operator in ordinary variables.
In our example code, we assume that we have eight CPUs available. So we split the full sequence into eight equally sized blocks, and pass the block ranges to the spawned sum() proc. After all the in parallel executing sum() procedures have finished their work and so the awaitAll block has been terminated, we only have to sum up the eight partial sums and can print the result.
When we test our program with a longer sequence, for example with ten millions values, and measure the execution time with the shell time command, we might notice that the execution time is longer than what a plain summing for loop would take. That is not too surprising, as for such simple tasks the memory bandwidth of our computer and the cache use are important. So the use of more cores may not really improve the performance. Perhaps passing our seq as an openArray parameter to the sum() proc causes data copies, so data passing as a ptr UncheckedArray as done in the examples provided by the package may give better performance.
Malebolgia supports even some form of recursion. Because a master object can not be passed to subroutines, we can use the function createHandle() to create a master handle, which we may pass and use for further recursive spawn calls. The Malebolgia readme file has a simple example for that, where the subroutine just prints some texts. Master handles can be used for further spawns, but they do not support the awaitAll() operation.
Note that using a recursive call of procs that return a result can not work:
proc fac(m: MasterHandle; i: int): int {.gcsafe.} =
var res: int
if i < 2:
result = 1
else:
m.spawn fac(m, i - 1) -> result
result *= i
proc factorial(i: int): int =
var m = createMaster()
m.awaitAll:
m.spawn fac(m.getHandle, i) -> result
echo factorial(5)We have not yet managed to convert the Pi approximation code from https://github.com/status-im/nim-taskpools#example-usage or the https://github.com/mratsim/weave#task-parallelism example to Malebolgia.
In the awaitAll block, we can call cancel() on the master object to cancel the execution of all spawned threads. The createMaster() function supports additionally an optional timeout parameter for the thread execution. The cancellation on timeout does not occur automatically, but the function canceled() can be called on the master object to check if a timeout is reached. Actually, this timeout seems to work as a plain timer with no additional functionality. The Malebolgia readme file has simple examples for the use of timeouts and the cancel operation, so we will not repeat that here.
Lockers
The package supports the shared access and mutation of data structures like hash tables. To make that work, the instance variable is wrapped by an initLocker() call, and can then be passed to the spawned subroutine, where a protecting lock() statement allows its mutation. The readme file has a simple code example for this.
Exception handling
If a spawned task raises an exception, that exception is automatically re-raised after the awaitAll block.
Mutable parameters
The spawned subroutines currently do not allow the use of var parameters. However, we can take the address of a variable declared outside of the awaitAll block and pass it as a pointer to spawned subroutines. Inside that subroutine, that variable has typically to be protected with a lock, for which the Malebolgia package provides a convenient TicketLock data type. The readme file has an example for its use.
Parallel processing of container content
A typical use case of the Malebolgia package seems to be the parallel processing of seq-like data types. As an example, we will investigate the parMap() template from the src folder of the package:
template `@!`[T](data: openArray[T]; i: int): untyped =
cast[ptr UncheckedArray[T]](addr data[i])
template parMap*[T](data: var openArray[T]; bulkSize: int; op: untyped): untyped =
proc worker[Tin, Tout](a: ptr UncheckedArray[Tin];
dest: ptr UncheckedArray[Tout]; until: int) =
for i in 0..<until: dest[i] = op(a[i])
var m = createMaster()
var result = newSeq[typeof(op(data[0]))](data.len)
m.awaitAll:
var i = 0
while i+bulkSize <= data.len:
m.spawn worker(data@!i, result@!i, bulkSize)
i += bulkSize
if i < data.len:
m.spawn worker(data@!i, result@!i, data.len-i)
resultThis template behaves similarly to the map() proc or the mapIt() template from the sequtils module of Nim’s standard library, but performs the work in parallel on all available CPU cores. The template has the familiar structure with the waitAll block and the spawn calls on the master object. The input and output data is passed as ptr UncheckedArray to the worker proc, using the helper template @! to cast the data. The bulksize parameter controls the number of used threads. Typically that value might be data.len div NumCPUs.
A typical use case for the parMap() template could be the mapping of integer numbers to corresponding strings, as that should be an operation which is not too trivial and requires at least a few CPU cycles:
import std/monotimes
import sequtils
import Malebolgia, Malebolgia/[paralgos]
proc main =
var start: MonoTime
var s = toSeq(0 .. 9999)
var r: seq[string]
start = getMonotime()
r = s.mapIt($it)
echo getMonotime() - start
echo r[^1]
start = getMonotime()
r = s.parMap(s.len div 8, `$`)
echo getMonotime() - start
echo r[^1]
main()However, for our test the performance of the single-threaded and the parallel version are very close.
Parsing data files (in parallel)
As a practical application for parallel code execution, we will finally present an example of the process of parsing textual data files to extract some information. A commonly used file format to store data in files is a comma-separated value (CSV) file. Each line of the file is a data record, consisting of one or more fields, separated by commas from each other.
An example can be a file, which stores the population and total area (in km^2) of all the districts of our county, like
#District,Country,State,Vehicle registration,Area,Population # Stade,Germany,Lower Saxony,STD,110.03,47611 Cuxhaven,Germany,Lower Saxony,CUX,161.91,48326 Berlin,Germany,Berlin,B,891.7,3769495
Perhaps we want to find the district with the highest or lowest area or population, or the one with the highest or lowest population density?
Generate the input file
As we don’t have any real data files available for this task and should avoid generating unnecessary Internet traffic by downloading test files just for our experiments, we will generate a dummy CSV file as a first step.
import std/[random, strformat]
from std/os import fileExists
from std/strutils import join, toUpperAscii
const
Lchars = {'a' .. 'z'}
Uchars = {'A' .. 'Z'}
Lines = 1e6.int
FileName = "csvdata.txt"
proc rstr(l: int): string =
let len = rand(l) + 1
result = newString(len)
result[0] = sample(Uchars)
for i in 1 ..< len:
result[i] = sample(Lchars)
proc main =
if os.fileExists(FileName):
echo "File exists, we may overwrite important data"
quit()
var f: File = open(FileName, fmWrite)
f.writeLine("#District,Country,State,Vehicle registration,Area,Population\n#")
for i in 0 ..< Lines:
let dist = rstr(12)
let count = rstr(8)
var state = rstr(14)
for i in 2 .. state.high - 2:
if rand(7) == 7: # in rare cases name may enclose a space
state[i] = ' '
state[i + 1] = toUpperAscii(state[i + 1])
break
let vreg = rstr(3)
let area = fmt"{rand(28.0 .. 1e6):1.2f}"
let pop = $rand(500 .. 5e6.int)
let res = [dist, count, state, vreg, area, pop].join(",")
f.writeLine(res)
f.close
main()There is no reason to further explain the above code here, as all that was explained already in previous sections of the book. The usual strategy for parsing CSV files is, that we read the file line by line, and process the data fields of each line. We will start by processing the CSV data with various single-threaded programs, using different functions and modules from Nim’s standard library (strutils split(), parseutils, strscans, parsecsv, memfiles) or the external packages regex and ngegs. After we have compared the performance of all these solutions, we will use a fast one with code executed in parallel on all available CPU cores to optimize the processing speed.
Using regular expressions
The first choice of people coming from other languages may be to use regexes for separating the components of each line. Regexes allow a very flexible parsing of strings, but regex parsing is not very fast, and as our file has a very simple format, where the different fields are cleanly grouped by separating commas, other methods for extracting the data fields can be faster and simpler. But as regexes are indeed useful for more complicated data extraction tasks, we will start with a small regex code example. Regex matching gives us only the substrings but does not convert strings containing floating-point or integer numbers to numeric values. We will leave this conversion out for now — later we can use parseInt() or parseFloat() to get the numeric values.
The code for our first regex solution is straightforward, we have introduced all the needed functions in earlier sections of the book:
import regex
from std/strutils import repeat
const
FileName = "csvdata.txt"
P = """([^,]+)"""
r = re(repeat(P & ',', 5) & P)
proc main =
var m: RegexMatch
for l in Filename.lines:
if l[0] != '#': # skip first two and all other comment lines
if match(l, r, m):
when true: # debug
discard
else:
for i in 0 .. 5:
stdout.write(m.group(i, l))
stdout.write(' ')
echo ""
else:
assert false
main()You might wonder about the regex pattern: We have used [^,] to create a character class. The ^ has a special meaning if used in square brackets: It inverts the characters, that is [^,] actually matches all characters that are not a comma. This is logical in our case, as our data fields are separated by commas. The pattern P = """([^,]+)""" matches one or more characters that are not commas. The outer round brackets indicate, that we want to capture the match. We build our final pattern by the concatenation of pattern P followed by a comma, repeated five times, and a final P. In the for loop, we skip all lines starting with a hash character. We have commented out the printout of the actual captures to measure the time for pure regex parsing later.
Using PEGs
As one more possible solution, we may try PEG parsing:
import npeg
const
FileName = "csvdata.txt"
const p = peg("line"):
line <- (>data * sep)[5] * >data
data <- +(1 - ',')
sep <- ','
proc main =
for l in Filename.lines:
if l[0] != '#':
let m = p.match(l)
when false: # only for debugging
if m.ok:
echo m.matchLen
echo m.captures
else:
assert false
main()This solution should not be surprising for you again, as we have discussed the npeg module in some detail in Part V of the book. We used +(1 - ',') as a pattern to grep the data fields, that is one or more repetitions of any character that is not a comma. The [5] indicates exactly five repetitions. It may be a bit surprising that we have to put this expression after the pattern expression, while operators like *, + and ? have to be placed in front for the npegs module.
Using split()
The third, and maybe most obvious solution, is to just use split() of the strutils module:
import std/strutils
const
FileName = "csvdata.txt"
proc main =
for l in Filename.lines:
if l[0] != '#':
let res = l.split(',')
when false:
assert res.len == 6
echo res
main()For this use case, split() is the simplest solution, and it should be faster than the regex and PEG solutions. But for each call, split() returns a seq with six strings, which have to be newly allocated for each call. So even faster solutions could be possible.
Using parseutils
So let us try the parseutils module now:
import std/parseutils
const
FileName = "csvdata.txt"
proc main =
for l in Filename.lines:
if l[0] != '#':
var i: int
var dist, count, state, vreg: string
var area, pop: string
#var area: float
#var pop: int
i += parseUntil(l, dist, ',', i) + 1
i += parseUntil(l, count, ',', i) + 1
i += parseUntil(l, state, ',', i) + 1
i += parseUntil(l, vreg, ',', i) + 1
i += parseUntil(l, area, ',', i) + 1
i += parseUntil(l, pop, ',', i) + 1
# i += parseFloat(l, area, i) + 1
# i += parseInt(l, pop, i) + 1
when false:
echo dist, ";", count, ";", state, ";", vreg, ";", area, ";", pop
main()As we discussed the parseutils module in great detail in Part V of the book, you should easily understand the above code. For extracting the area and population data, we will use string parsing only for now and avoid the also available parseFloat() and parseInt() functions, as we want to compare the performance of the four solutions before we continue.
Using strscans
In Part III of the book, in the section about String processing, we introduced the module strscans, which can be convenient when we have to parse data with a strict, well-defined format. But that module has some restrictions, which can make its use difficult or impossible for some parsing tasks. The provided scan() macro supports, with the parameter types $i, $f, and $w, the processing of integers, floats, and ASCII identifiers. Here, ASCII identifier stands for valid Nim symbols, indicating that the $w identifier is not allowed to start with a digit or contain spaces. But actually, we intentionally designed our generator program that generated our test CSV file so, that it may insert spaces in the name strings in rare cases to make the data more realistic. To allow us to experiment with the strscans module, we can patch our generator program from Generate the input file to use an expression like if false: instead of if rand(7) == 7:. After doing that, and compiling and running the generator program to get a test data set without spaces, we can test the following program:
# our input file format
#[
#District,Country,State,Vehicle registration,Area,Population
#
Ghhgkedmqua,Gircc,J,Ylmd,517582.67,3113635
]#
import std/strscans
const
FileName = "csvdata.txt"
Debug = false
proc main =
var
district, country, state, vehiclereg: string
area: float
pop: int
for l in Filename.lines:
if l[0] != '#':
if scanf(l, "$w,$w,$w,$w,$f,$i", district, country, state, vehiclereg, area, pop):
when Debug:
echo district, ' ', country, ' ', state, ' ', vehiclereg, ' ', area, ' ', pop
else:
assert(false)
main()As described in Part III of the book (Module strscans), we use the scanf() macro to process each line. The $w parameters parse an identifier each; the ',' character in the format string stands for itself; and $f and $i parse a floating-point number and an integer number, respectively. Compiling the program with the option -d:release and executing it results in run-times of 260 ms when compiled with --mm:orc and 240 ms for --mm:refc. That is really fast and comparable to the times for the parseutils module. Note that strscans not only gives us the unprocessed string for area and pop, but already the numeric value!
The following table lists the run-times for the five different ways of parsing the CSV data into strings. Additionally, in row 6 of the table, we have used parseutils to parse the area and population directly into numeric variables. The CSV data has been generated with our program from the start of this section, and we compiled our parsers with -d:release, using both --mm:arc and --mm:refc. The time shell command was used to measure the program run-times. All programs are run on a modern AMD Ryzen 9 5900HX (8-core) machine and have been compiled with Nim v1.9.3 with option -d:release and gcc 12.2.1 on a 64-bit Linux box.
| Method | Runtime refc | Runtime arc |
|---|---|---|
regex |
1881 ms |
4905 ms |
npeg |
1315 ms |
1176 ms |
split() |
408 ms |
429 ms |
parseutils |
263 ms |
302 ms |
parseutils float/int |
245 ms |
282 ms |
strscans |
240 ms |
260 ms |
As expected, regex parsing is the slowest, and it becomes even slower with --mm:arc. Using strscans or parseutils results in the fastest times, and we get the float and int values for free. The performance with the option --mm:orc is typically close to --mm:arc.
Can we further improve the performance? Indeed, for the concrete data format, and when we are only interested to find numeric extreme values, then actually parsing the first four strings is not really necessary:
import std/parseutils
const
FileName = "csvdata.txt"
proc main =
for l in Filename.lines:
if l[0] != '#':
var i: int
var dist, count, state, vreg: string
var area: float
var pop: int
i = l.high
while l[i] != ',':
dec(i)
dec(i)
while l[i] != ',':
dec(i)
inc(i)
i += parseFloat(l, area, i) + 1
i += parseInt(l, pop, i) + 1
when false:
echo dist, ";", count, ";", state, ";", vreg, ";", area, ";", pop
main()This reduced the runtime with --mm:arc to 128 ms. Parsing the two numeric values is enough to find the line with the extreme value — we can then just return the whole line string, from which the other fields can then be extracted. But this optimization is a bit dangerous; for corrupted data, our backward scanning loops may run before the start of the line string, generating a runtime error.
Using parsecsv
The above program versions that use the parseutils module are already fast. But as the processing of CSV files is a very common operation, the Nim standard library does provide a specialized module for exactly this purpose, which is called parsecsv. It is very fast, at least as long as we consider only the reading of the file, and ignore stuff like parsing numbers, which is typically part of real-world data processing. This module is also very easy to use, so it should be the first choice whenever we have to read CSV files:
import std/parsecsv
const
Debug = false
proc main =
var parser: CsvParser
parser.open("csvdata.txt")
while readRow(parser):
for val in items(parser.row):
when Debug:
stdout.write val, ", "
else:
discard
when Debug:
stdout.write('\n')
parser.close()
main()The parsecsv module provide a CsvParser data type. We use a variable called parser for this data type, call open() on it with a specified file name, and then iterate over the lines of the CSV file with readRow(). Then we can access the fields of that row with the ordinary items() iterator. The API documentation has more examples of using the module, including an example in which a CSV header is read first and then used as a reference for item access. The API documents also describe how we can use different field separators or how we can apply custom quoting characters. Quoting is needed when the fields may contain the separator character or newlines. Note that currently only single separator characters are allowed, so separator strings like "; " are not supported. One reason why the reading performance of this module is very high is that it avoids string allocations. Each row of the CSV file is read into a pre-allocated row field of the string data type. For our test of the pure file read performance, we set the constant Debug to false to avoid slow output operations. To test whether our program actually does what we expect, we can set Debug to true and run the program with terminal output.
Before we actually investigate how we can make file parsing parallel, we will introduce another interesting and very fast method of file access: memory-mapped files.
Memory-mapped files
A memory-mapped file is a technique where a file on disk is mapped directly into a program’s memory space, allowing the file to be accessed and manipulated as if it were an array in memory. This enables faster and more efficient file operations, as it reduces the need for separate read/write calls and allows the operating system to manage file access and caching more effectively.[83]
Using memory-mapped files can increase the I/O performance for large files, may allow accessing very large files by using small amounts of RAM using a technique called "lazy loading", and may avoid unnecessary copying of data. Typically, the memory mapping process is handled by the virtual memory manager of the operating system.
The following code uses module memfiles to read our CSV data file:
import std/[memfiles, parseutils]
from std/strutils import startsWith
const
Debug = false
template toOpenArrayChar(s: MemSlice): untyped =
toOpenArray(cast[ptr UncheckedArray[char]](s.data), 0, s.size - 1)
proc main =
var f = memfiles.open("csvdata.txt")
var r: MemFile
var dummy: int
for line in memSlices(f):
r.mem = line.data
r.size = line.size
var index = 0
for val in r.memSlices(','): # iterator memSlices() has no pairs() variant, so we use index variable
when Debug: # this whole debug construct is a bit ugly :-)
stdout.write val, ", "
if ($val).startsWith('#'): # val is not a string, but a MemSlice. Maybe better use the lines() iterator?
break # skip pure comment lines with str[0] == '#'
inc(index)
if index == 6: # the population field
var j: int
assert(parseInt(val.toOpenArrayChar, j) == val.size) # test the template
echo "::: ", j
else:
inc(dummy) # ensure the loop body is not optimized out
echo dummy
close(f)
main()The pure I/O performance of this code is very high, but drops significantly, as expected when real data processing like parsing of numbers is involved. To be sure that the inner loop body is not completely removed by the compiler, we have added the dummy variable. And still, we get running times of only 32 nanoseconds! The example is based on a code snippet provided by Mr. C. Blake in the Nim forum.[84] The toOpenArrayChar() template uses the experimental toOpenArray() function to convert the memslice to an open array with char base type, which can be processed by the string processing functions of Nim’s standard library. In the example, actually two memSlices are used: First, we read the lines of a file into a slice, and then we copy that slice into a local slice variable called r to iterate over the comma-separated fields. We will not try to explain the details of the above code. When you should really need extreme I/O performance, and the task is not already restricted by actual data processing operations like parsing of numeric data, you should study the memfiles module carefully. You may need to consult additional resources or ask for help, as the module documentation is still short and lacks many examples.
The table below summarizes our results. All programs are run on a modern AMD Ryzen 9 5900HX (8 cores) machine, and have been compiled with Nim v1.9.3 with option -d:release and gcc 12.2.1 on a 64-bit Linux box.
| Method | Runtime refc | Runtime arc |
|---|---|---|
regex |
1881 ms |
4905 ms |
npeg |
1315 ms |
1176 ms |
split() |
408 ms |
429 ms |
parseutils |
263 ms |
302 ms |
parseutils float/int |
245 ms |
282 ms |
strscans |
240 ms |
260 ms |
parsecsv |
275 ms |
157 ms |
memfiles |
31 ms |
31 ms |
References:
Making it parallel
The next task is to somehow distribute all the work to a set of threads. In this section, we do not focus on optimum I/O performance but on the actual parsing of all the data fields, which is a CPU-intensive task and should benefit from the use of all available CPU cores. So we do not use the memfiles or the dedicated parsecsv module in this section, but ordinary file operations like readChars(buf) provided by the system module and parsing functions from the parseutils module.
The number of threads should be at least as large as the number of physical cores of our computer so that we can really distribute all the work on all available cores. Our first idea may be to use a thread for each line of the file, but obviously really creating millions of threads make not much sense, and even feeding millions of procs to spawn of the threadpool should generate a lot of overhead. Processing only one line is just too little work for a thread, so that the switching process generates too much overhead. A better idea seems to be, to use a thread for maybe a few thousand lines.
So our first task is to split the whole file into chunks or fragments, where each chunk should contain a number of lines. Seems to be easy, but this splitting of the whole CSV file into chunks should be really fast, so using the lines() iterator is not a good idea. But the io module provides the functions readBytes() or readChars(), which we can use to read the CSV file fast in larger blocks. Here is a first sketch of the code:
const
FileName = "csvdata.txt"
proc main =
var buf = newString(1024)
var f: File = open(FileName, fmRead)
while not f.endOfFile:
let res = f.readChars(buf)
#stdout.write(buf) # wrong for last read, setLen(res) is missing in this sketch
f.close
main()This first attempt takes only 8 ms to read the file in. But the obvious issue is, that the chunks of 1024 bytes contain fractional lines. To fix that, we can just do a backward search for the line end marker '\n' in the buffer:[85]
const
FileName = "csvdata.txt"
BlockSize = 1024 - 1 # one byte for the terminating NULL char?
proc main =
var buf = newString(BlockSize)
var f: File = open(FileName, fmRead)
while not f.endOfFile:
let res = f.readChars(buf)
if f.endOfFile:
buf.setLen(res)
else:
var i = res - 1
while buf[i] != '\n':
dec(i)
inc(i)
f.setFilePos(i - res, fspCur)
buf.setLen(buf.len + i - res)
stdout.write(buf)
echo "---"
assert buf[buf.high] == '\n'
buf.setLen(BlockSize) # reset initial size for the next read
f.close
main()The code from above is again easy, we only have to get the indices right. The setFilePos() function may be new for you. Ee use it to jump back in the file. The setFilePos() function allows it, to set the new position relative to the file start, to the actual position, or to the file end. As we want to move back, we used the mode fspCur to indicate the actual position. We have added an echo() statement that prints "---" after each chunk, which helps us to verify, that the chunk boundaries are really the line endings. Without the output operations, this code runs in 14 ms, which is still not that bad. Now, we can just pass each chunk to its own thread, which then can select and return a candidate line from this chunk. So we finally have only to select the best of all candidates.
We will use Nim’s threadpool for the actual parallel processing, as spawn offers an easy way to return results to the main thread. Using the threads module should also work, but then we would need Channels to return results.
import std/threadpool
import std/parseutils
from std/strutils import splitLines
const
FileName = "csvdata.txt"
BlockSize = 1024 * 1024 - 1
type
Res = object
dist, count, state, vreg: string
area: float
pop: int
proc candidate(lines: string): ref Res =
var res: Res
result = new Res
result[] = Res(area: NegInf, pop: int.low)
for l in lines.splitLines():
if l.len > 0 and l[0] != '#': # skip first two and all other comment lines
var i: int
i += parseUntil(l, res.dist, ',', i) + 1
i += parseUntil(l, res.count, ',', i) + 1
i += parseUntil(l, res.state, ',', i) + 1
i += parseUntil(l, res.vreg, ',', i) + 1
i += parseFloat(l, res.area, i) + 1
i += parseInt(l, res.pop, i) + 1
if res.pop > result.pop:
result[] = res
proc main =
var flowVarSeq: seq[FlowVar[ref Res]]
var buf = newString(BlockSize)
var f: File = open(FileName, fmRead)
while not f.endOfFile:
let res = f.readChars(buf)
if f.endOfFile:
buf.setLen(res)
else:
var i = res - 1
while buf[i] != '\n':
dec(i)
inc(i)
f.setFilePos(i - res, fspCur)
buf.setLen(buf.len + i - res)
flowVarSeq.add(spawn candidate(buf))
assert buf[buf.high] == '\n'
buf.setLen(BlockSize)
f.close
var final = Res(area: NegInf, pop: int.low)
for c in flowVarSeq:
let h = ^c
if h.pop > final.pop:
final = h[]
echo "Final result:", final
main()Note that we always have to compile the program with --threads:on.[86] When we compile the code above with option -d:release, it takes approx 38 ms to run, on our AMD Ryzen 9 5900HX (8 cores) machine. Indeed, that’s an eightfold performance improvement, which is not bad.
Unfortunately, when we compile the code with -d:release --mm:arc, we get runtimes of about 500 ms,
which is no improvement compared to the single-threaded code. And with -d:release --mm:orc
the runtime is even in the range of 700 ms.
At the end of this section, we will present a solution, which works fine also for --mm:arc — for
--mm:orc the runtime is decreased to 300 ms at least.
(Has been fixed for Nim V 2.0, --mm:arc, --mm:orc and --mm:refc are all below 40 ms now.)
When you think about the code for a few minutes, its basic idea should become clear: We read a block from the CSV file, and when the end of the file is not yet reached, we go back to the last newline character. Then we use spawn to run our candidate() proc with the fixed data block as a parameter. Similarly, as before, the candidates() proc uses functions from parseutils to parse the lines and select the best candidate. To simplify the data handling, we have declared a Res object, which contains the parsed fields. All the FlowVar[ref Res] instances are collected in a sequence. When the end of the file is reached and all the data chunks have been passed to a spawned candidate() proc, we can start reading the FlowVar sequence. The ^ operator blocks, until the thread has finished, and we can access the data of the FlowVar to select the optimum from all the candidates.
To allow easy testing of our code, we have decided to select the line with the highest population count. So we can just edit our CSV file with a text editor, replace the population of a line with a very large value, and prove if our program will really find that line. Searching for the minimal or maximal area, or for population density, requires only some tiny modifications of the code.
You may wonder why we have added the condition if l.len > 0 in the body of the candidate() proc. Well, our data chunks end with newline characters, and the splitLines() iterator gives an empty line for the last split. That empty line has to be ignored. The test l.len > 0 should cost not that much performance. You may think yourself about a way to save this test, by passing only chunks to candidate() proc that do not end with a newline character. Seems to be possible, but then we have to care for the fact, that our whole CSV file may end with a new line, or may not end with a new line. We have to take care of that.
The performance of our code strongly depends on the used BlockSize. We used one megabyte, which results in about 40 spawn calls for our 44 MB CSV file. Smaller block sizes decrease the performance, as more spawn calls increase the overhead for managing the threads of the pool. For playing with the program, using an explicit BlockSize makes some sense. But for a real-world application, it would make more sense to start with some useful number of threads and calculate the block size by dividing the CSV file size by the number of desired threads. As for total thread count, we would usually use at least the number of physical CPU cores, but not a much larger value, to avoid the unnecessary overhead for thread management.
You may wonder why we chose ref Res instead of just Res as the result for the candidate() procedure. The reason is, that currently a spawned proc may only return a value object when the object has no fields, that contain data types that are handled by the garbage collector. For details, you may consult the Nim language manual.
Note that the call spawn candidate(buf) copies the buf parameter. This way all the chunks of the initial CSV file have to be copied, which may minimally decrease performance. But the copying of data blocks is fast — modern hardware has memory bandwidths of a few dozen GB/s. Our initial sketch for only reading in the CSV file took 12 ms, so we may guess that copying all the chunks may take not more time. As an alternative solution to the above code, we could try the threads module, using Channels to pass the candidates back, or maybe the parallel construct. Or we may experiment with so-called memory-mapped files, see https://nim-lang.org/docs/memfiles.html.
Fixes for ARC and ORC
| These fixes are no longer necessary for Nim V 2.0! |
As we found out, the performance is currently disappointing, when we compile with --mm:arc or --mm:orc. One easy way to fix that is when we use additional the compiler option -d:useMalloc. This avoids using Nim’s own memory allocator, which seems to be slow when we compile with --threads:on. The issue becomes very obvious due to the fact that the current implementation of the splitLines() iterator calls subStr() for each yield, and subStr() does allocate a new string. Actually, it is not really necessary to do a string allocation for each yield. As strings have value semantics, it would be possible to reuse the same string — the lines() iterator does that. It is even possible to avoid allocations at all, by using the openArray[char] data type as the result type for the iterator, see https://forum.nim-lang.org/t/6968#43685. But actually, we do not need the splitLines() iterator at all, we can again just use parseUntil():
import std/[threadpool, parseutils]
const
FileName = "csvdata.txt"
BlockSize = 1024 * 1024 - 1
type
Res = object
dist, count, state, vreg: string
area: float
pop: int
proc candidate(lines: string): Res =
var
res: Res
j: int
l = newStringOfCap(127) # avoid reallocations
result = Res(area: NegInf, pop: int.low)
while true:
j += parseUntil(lines, l, '\n', j) + 1
if l.len == 0:
break
if l[0] != '#':
var i: int
i += parseUntil(l, res.dist, ',', i) + 1
i += parseUntil(l, res.count, ',', i) + 1
i += parseUntil(l, res.state, ',', i) + 1
i += parseUntil(l, res.vreg, ',', i) + 1
i += parseFloat(l, res.area, i) + 1
i += parseInt(l, res.pop, i) + 1
if res.pop > result.pop:
result = res
proc main =
var flowVarSeq: seq[FlowVar[Res]]
var f: File = open(FileName, fmRead)
while not f.endOfFile:
var buf = newString(BlockSize) # passed as sink parameter to candidates()
let res = f.readChars(buf)
if f.endOfFile:
buf.setLen(res)
else:
var i = res - 1
while buf[i] != '\n':
dec(i)
inc(i)
f.setFilePos(i - res, fspCur)
buf.setLen(buf.len + i - res)
flowVarSeq.add(spawn candidate(buf))
assert buf[buf.high] == '\n'
f.close
var final = Res(area: NegInf, pop: int.low)
for c in flowVarSeq:
let h = ^c
if h.pop > final.pop:
final = h
echo "Final result:", final
main()This code, compiled with nim c --threads:on -d:release --mm:arc t.nim, runs in less than 36 ms. With -d:useMalloc, we can save a few more ms. With --mm:orc, we get a runtime of 37 ms, which is not that great. As you may have noticed, we have used only Res value objects in the code above, we do not need references. This is possible, when we only compile with --mm:arc or --mm:orc, for --mm:refc we would get the compile Error: cannot create a flowVar of type: Res. We have done one additional modification — we allocate the buffer buf inside the while loop. This may look strange, as we generally avoid allocations in loops. But as candidates() gets a copy of the buf string and ARC uses move semantics and sink parameters, this may make sense. The compiler may pass the newly allocated buf variable just to candidates(), instead of copying it. And we do not have to call buf.setLen(BlockSize) at the end of the loop.
Use of malebolgia instead of threadpool
With some small changes in the main() procedure, we can use the code from above with the new malebolgia module:
import malebolgia
import std/parseutils
const
FileName = "csvdata.txt"
BlockSize = 1024 * 1024 - 1
type
Res = object
dist, count, state, vreg: string
area: float
pop: int
proc candidate(lines: string): Res =
var
res: Res
j: int
l = newStringOfCap(127) # avoid reallocations
result = Res(area: NegInf, pop: int.low)
while true:
j += parseUntil(lines, l, '\n', j) + 1
if l.len == 0:
break
if l[0] != '#':
var i: int
i += parseUntil(l, res.dist, ',', i) + 1
i += parseUntil(l, res.count, ',', i) + 1
i += parseUntil(l, res.state, ',', i) + 1
i += parseUntil(l, res.vreg, ',', i) + 1
i += parseFloat(l, res.area, i) + 1
i += parseInt(l, res.pop, i) + 1
if res.pop > result.pop:
result = res
proc main =
var flowVarSeq = newSeq[Res](1000) # ugly
var f: File = open(FileName, fmRead)
var m = createMaster()
var blocks = 0
m.awaitAll:
while not f.endOfFile:
var buf = newString(BlockSize) # passed as sink parameter to candidates()
let res = f.readChars(buf)
if f.endOfFile:
buf.setLen(res)
else:
var i = res - 1
while buf[i] != '\n':
dec(i)
inc(i)
f.setFilePos(i - res, fspCur)
buf.setLen(buf.len + i - res)
assert(blocks < flowVarSeq.len)
m.spawn candidate(buf) -> flowVarSeq[blocks]
inc(blocks)
assert buf[buf.high] == '\n'
f.close
echo "Blocks: ", blocks
flowVarSeq.setLen(blocks)
var final = Res(area: NegInf, pop: int.low)
for c in flowVarSeq:
if c.pop > final.pop:
final = c
echo "Final result:", final
main()Note that malebolgia was designed for Nim 2.0 with ARC or ORC memory management and may not work with old refc memory management. When we compile the above code with option -d:danger the program runs on our box (AMD Ryzen 9 5900HX, 8-core) with the original test data set in less than 50 ms, which is a good value. One disadvantage of the malebolgia module with its -> operator is, that we can not use add() to fill the sequence with the results, but have to pre-allocate a large seq.
References
Code execution with async/await
The async/await framework allows asynchronous code execution by use of only one single thread — the currently active thread can suspend itself when waiting for data or other events.
Async/await is mostly used for IO-bound tasks, where a significant amount of time is spent waiting for data to become available. In such a scenario, multi-threading, even when the various threads run parallel on multiple physical CPU cores, would not really help to improve the throughput or performance.
The initial idea of asynchronous operations was to avoid blocking the CPU for longer time periods during slow network and IO (input/output) requests. Indeed, that made much sense in times, when we read data from floppy disks or magnetic tapes and send data with 300 baud modems. And when true parallel thread execution was not possible at all, as CPUs had only one core and computers with more than one CPU were very expensive and not used by ordinary people.
Today, with network data rates of up to one Gbit/s for our smartphones or home networks, and SSD devices, which have data transfer rates of multiple Gbit/s, it is not that easy to motivate the use of asynchronous operations at all. Still, for server applications like online shops or communication platforms used by thousands of people simultaneously, where network throughput is the limiting factor and delays have to be avoided, the use of async/await may actually provide the best performance. And it can be combined with threading and parallel program execution when needed.
Asynchronous program execution can work with only one thread running on a single CPU core due to the fact, that some hardware like network cards or disk controllers can read or write small data blocks autonomously without active CPU support, using their own data buffers or writing to parts of the system RAM by use of DMA (direct memory access). The hardware can signal to the CPU, when buffers are full or empty, or when all data transfer is completed, so that the CPU may copy the buffer content or start to process or display the data. Because these external hardware signals interrupt the current CPU work, they are called hardware interrupts. Operating systems generally provide various levels of support for these interrupt-driven data transfer operations, such as the epoll framework of the Linux kernel, or Kqueue, the scalable event notification interface in FreeBSD.
For user programs, one solution for doing asynchronous IO by watching for hardware interrupt signals is to connect callback functions to these interrupt signals. That way, the program can launch an IO operation, and perform other work, until that work is interrupted by a call of the callback function. As most programming languages support the use of callback functions, this form of asynchronous IO is widely supported by software libraries, e.g. the Glib library of the GTK GUI toolkit. As doing asynchronous IO with callback can get complicated when we have a lot of nested IO operations, the async/await workflow was introduced, which allows asynchronous code to be written in a synchronous style.
The async/await pattern is a syntactic feature of many programming languages, that allows an asynchronous, non-blocking function to be structured in a way similar to an ordinary synchronous function. It is semantically related to the concept of a coroutine and is often implemented using similar techniques, and is primarily intended to provide opportunities for the program to execute other code while waiting for a long-running, asynchronous task to complete, usually represented by promises or similar data structures.[87] The programming language F# (pronounced F sharp) introduced asynchronous workflows with await points already in 2007 for version 2.0 of the language. And in 2012 Microsoft released C# in version 5 with async/await support. Later languages like Haskell, Python, JavaScript and TypeScript, Kotlin, Dart, Julia, Zig, Swift, and Rust used the async/await pattern, and since 2020 it is also available for C++.
Is async/await faster than multi-threading?
For IO-bound tasks, the use of async/await can actually have performance benefits.
The multithreaded program execution, that we described in the previous sections, is some form of preemptive multitasking, where switching between the active threads occurs at arbitrary time intervals, controlled by the OS. But the async/await pattern is a form of cooperative multitasking, which provides the user with full control of the code execution. We can pause the code execution by using the await keyword when it really makes sense. e.g. when we have to wait for new data packets or events, and immediately enable execution of a different code path.
As for this form of cooperative multitasking, only the code execution path is changed, but no switching between threads is necessary, additional overhead can be avoided, and typical problems of multi-threading, like the passing of data between different threads or race conditions, do not exist.
So at least in theory, the cooperative multitasking controlled by the async/await pattern is more efficient, and for maximum performance, it can be combined with threading and parallel program execution.
Nim’s asynchronous dispatcher
The core elements of Nim’s async/await framework are provided by the modules std/asyncdispatch and std/asyncfutures.
These modules provide a dispatcher, a generic Future[T] type implementation, and the async macro, which allows asynchronous code to be written in a synchronous style with the await keyword.
The asyncdispatch module implements a global dispatcher (technically one per thread), which is responsible for running the procedures that are registered with it.[88]
Built on top of these two modules, there exist various modules for asynchronous communication: Module std/asyncnet implements a high-level asynchronous sockets API and std/asynchttpserver implements a high-performance asynchronous HTTP server. Some other modules, like std/httpclient, support synchronous and asynchronous data transfers.
Nim’s async/await framework is not part of the language itself, but it is implemented with macros and metaprogramming, and with the use of Nim’s iterators. The underlying implementation is based on epoll on Linux, IO Completion Ports on Windows, and select on other operating systems.
Currently, Nim’s async/await uses only one single thread on its own, but applications can combine it with multiple parallel running threads. As an alternative implementation, we could use https://github.com/status-im/nim-chronos, which provides similar functionality.
Asynchronous procedures
Asynchronous procedures are marked by the {.async.} pragma and must return a generic Future[T] type or return no result at all. In the latter case, a Future[void] is assumed. A Future, also called Promise in other languages, is a generic container type, which holds a value that is not yet available, but which may be available in the future. So a Future has some similarities with the generic FlowVar type, that we used as return types for threads of Nim’s threadpool.
Inside asynchronous procedures, the keyword await can be used to call other asynchronous procedures or procedures that return a Future type.
The await keyword will suspend the code execution until the awaited Future completes. After completion, the asynchronous procedure will resume its execution. During the period, when an asynchronous procedure is suspended, other asynchronous procedures will be run by the dispatcher.
The generic future[T] data type
The Future[T] data type, also called Promise, Delay or Deferred in other programming languages, acts as a proxy for a result that is initially unknown or unavailable.
We can think of a Future[T] as a container. Initially, it’s empty, and while it remains empty, we can’t retrieve its value. At some unknown point in time, something is placed in the container, and it is no longer empty, and we can read out its value. That is where the name Future comes from.
Every asynchronous operation in Nim returns a Future[T] object, where the T corresponds to the type of value that the Future promises to store in the future. We don’t have to know that many details of the internal structure or behavior of the Future[T] data type, but we can easily experiment with it without involving any actual asynchronous I/O operations. The code below shows the behavior of a simple Future[string] object:
import std/asyncdispatch
proc cb(f: Future[string]) =
echo "executing callback: ", f.read
let f1: Future[string] = newFuture[string]()
echo f1.finished
f1.callback = cb
f1.complete("Nim and its future")
#f1.fail(newException(ValueError, "Future failed"))We can create a new instance of the generic Future[T] data type with the newFuture[T]() constructor. We can query if the instance variable is already finished and attach a callback function. Finally, we can call complete() on it to set its value, which then automatically calls the attached callback function. Or we can call fail() on it to set an exception, which later is raised when someone tries to read its value.
Simple example
We will start our explanations with a very simple asynchronous program, which will not do an actual asynchronous data transfer yet, but an asynchronous sleep (wait). The asynchronous sleep, called sleepAsync(), actually behaves very similar to the asynchronous data transfer functions, that is, the execution of the actual code path is suspended until a hardware condition is fulfilled, and the dispatcher continues with the code execution.
import std/[asyncdispatch, times]
from std/os import sleep
let t0 = epochTime()
proc tick(t: string): Future[void] {.async.} =
for i in 0 .. 1:
os.sleep(100) # sleep 100 ms
echo "tick ", t, ((epochTime() - t0) * 1000).int, "ms"
let f1: Future[void] = tick(" AAA ")
let f2 = tick(" BBB ")
echo "total time elapsed: ", epochTime() - t0In the code example above, we import the asyncdispatch module and have attached the {.async.} pragma to our tick() procedure. As the tick() proc does not return any actual data, we use Future[void] as return type — actually, we could leave out the return type for this case. We call tick() two times with different string arguments and use the function epochTime() to measure the total execution time of our program. When we compile and run the code, we receive this output:
tick AAA 100ms tick AAA 200ms tick BBB 300ms tick BBB 400ms total time elapsed: 0.4007678031921387
The result is not really surprising, as for each call of proc tick(), the loop in its body is executed two times, generating a 100 ms delay for each iteration. But the output will drastically change when we call the sleepAsync() function provided by the asyncdispatch module, instead of the ordinary sleep() function:
import std/[asyncdispatch, times]
from std/os import sleep
let t0 = epochTime()
proc tick(t: string): Future[void] {.async.} =
for i in 0 .. 1:
await sleepAsync(100) # suspend code execution for 100 ms
echo "tick ", t, ((epochTime() - t0) * 1000).int, "ms"
let f1: Future[void] = tick(" AAA ")
let f2 = tick(" BBB ")
echo f1.finished, ' ', f2.finished
echo "time: ", epochTime() - t0
waitFor f1
# waitFor f1 and f2 # wait for both futures to finish
echo f1.finished, ' ', f2.finished
echo "total time elapsed: ", epochTime() - t0false false time: 9.72e-05 tick AAA 100ms tick BBB 100ms tick AAA 200ms tick BBB 200ms true true total time elapsed: 0.20061
The two calls of the tick() proc each return a Future[void] object nearly instantly; no waiting happens here. The use of the await keyword in the procedure body causes the proc to suspend its execution, and control flow returns to the call site immediately. But at the same time, the asynchronous tick() proc got registered by the dispatcher loop so that it can resume its execution.
The returned Future object encapsulates the actual return type of the call — in this case only void — and gives us a reference that we can use to ask the dispatcher whether our call has been completed or not.
But futures can’t get resolved by themselves; we need to actually run the dispatcher in order for any of the code registered with it to resume its execution. Remember, all of this is still running in a single thread of execution. There are many ways to run the dispatcher, but in this case, it is done by the waitFor call. When we run waitFor, the dispatcher will run in a loop until the given future is completed, and the proc which has returned that future is removed from the dispatcher loop. The function waitFor actually calls poll() in a loop until the future is finished, and then returns the generic value of the future — in the code above, waitFor returns no actual result, as we used a Future of void type.
We can use the operators and or or to combine multiple futures, in this way we can wait until all of them or at least one of them completes. Note that the dispatcher loop stops when waitFor() succeeds, so when we wait only for one future and that one is finished, then the dispatcher loop stops, and other futures may stay unfinished.
We can use the function finished() to check if a future variable is already finished. When a future is finished, it means that either the value that it holds is now available or it holds an error instead. The latter situation occurs when the operation to complete a future fails with an exception. We can distinguish between the two situations with the failed() function. Future objects can also store a callback procedure, which will be called automatically once the future completes, see the example in the previous section.
In our example code above, we called waitFor f1. This is necessary to actually execute the dispatcher loop and to wait for the future f1 to complete. We could have used waitFor f1 and f2, or waitFor f1 or f2 to wait for the completion of both futures or one of them. The result would be identical in this case, as the proc that returns f1 and f2 is identical and returns always after 2 loop iterations.
The important result of this modified code is that the proc execution alternates and the total runtime of the program is only 0.2 ms. The reason for this is, as we already explained, that use of the await keyword in our tick() proc suspends the execution, and so immediately the next call of tick() with "BBB" as an argument is executed.
As one more simple example, let us investigate this code where two different asynchronous procs are executed:
import std/[asyncdispatch, times]
let t0 = epochTime()
proc numbers() {.async.} =
for i in 1 .. 3:
await sleepAsync(250)
echo i, ' ', ((epochTime() - t0) * 1000).int, " ms"
proc letters() {.async.} =
for i in 'a' .. 'e':
await sleepAsync(400)
echo i, ' ', ((epochTime() - t0) * 1000).int, " ms"
var
n = numbers()
l = letters()
echo "start: ", ((epochTime() - t0) * 1000).int, " ms"
waitFor sleepAsync(1500)
echo "done: ", ((epochTime() - t0) * 1000).int, " ms"As both asynchronous procs use different arguments when they call sleepAsync(), they are not executed in strict alternation, so the numbers 2 and 3 are printed with no letter in between:
start: 0 ms 1 250 ms a 400 ms 2 500 ms 3 751 ms b 801 ms c 1202 ms done: 1501 ms
In this example, we do not call waitFor() directly on our actual asynchronous procs, but on sleepAsync() from asyncdispatch. As the procedures numbers() and letters() got registered by the dispatcher, they are executed by the dispatcher loop, but only as long as determined by waitFor sleepAsync(1500). So the execution of the dispatcher loop stops before letters() is fully executed, and letters d and e are never printed. The fact that the printed time values can be a few ms larger than the actual specified sleep times should not surprise us, as additional code is executed in our procs, and the dispatcher loop itself may require some minimal execution time. When an exact timing should be required, we may use the std/times module to read the exact time and adjust the actual delays. Also note that async/await, as a cooperative approach to multitasking, also implies that long-running tasks can unexpectedly delay the execution of other tasks. Imagine that in our code above, the numbers proc contained a lot of additional code, which would take more than 250 ms to run — that would disrupt the entire timing scheme. As async/await is most often not used to create actual delays, but for asynchronous network and IO operations, we will not discuss the problems of exact timing here in detail. The linked paper by P. Munch discusses this topic in greater detail and offers some possible solutions for more accurate timings.
File download
The module std/httpclient of Nim’s standard library provides procedures for synchronous and asynchronous file transfer. Let’s start with this simple synchronous example to download two small text files from a URI. You might need to compile the example using the -d:ssl option:
# nim r -d:ssl t.nim
import std/httpclient
let client = newHttpClient()
echo client.getContent("http://ssalewski.de/tmp/texttestpage1.txt")
echo client.getContent("http://ssalewski.de/tmp/texttestpage2.txt")We uploaded the two plain text files to that location in advance. When we compile and run the above code, we should get:
This is a plain two lines test page. This is one more two lines test page.
Nim’s API documentation for std/httpclient shows us how we can do the download in an asynchronous way — at least for one single file:
# nim r -d:ssl t.nim
import std/[asyncdispatch, httpclient]
proc asyncProc(): Future[string] {.async.} =
let client = newAsyncHttpClient()
return await client.getContent("http://ssalewski.de/tmp/texttestpage1.txt")
echo waitFor asyncProc()In this example, we use an asynchronous HTTP client, for which the overloaded proc getContent() returns a Future[string] in this case. The call of waitFor waits for the download to finish and returns the actual content of the future, which is a string containing the page content.
With the knowledge we gained from our previous example with sleepAsync(), we can easily modify the above code to download two files asynchronously:
# nim r -d:ssl t.nim
import std/[asyncdispatch, httpclient]
proc asyncProc(url: string): Future[string] {.async.} =
return await newAsyncHttpClient().getContent(url)
let f1 = asyncProc("http://ssalewski.de/tmp/texttestpage1.txt")
let f2 = asyncProc("http://ssalewski.de/tmp/texttestpage2.txt")
waitFor f1 and f2 # this returns Future[void]
echo f1.read
echo f2.readThe combination f1 and f2 actually creates a new future of void type. We use two string type variables, f1 and f2, and read the content with the read() proc when both futures are completed.
We can extend this program shape to asynchronously download multiple HTML pages:
# nim r -d:ssl -d:release t.nim
import std/[asyncdispatch, httpclient, strutils, strformat, times]
const
#Urls = "google.com duckduckgo.com wikipedia.com".split
Urls = "ssalewski.de heise.de wikipedia.de".split
proc getHttpResp(client: AsyncHttpClient, url: string): Future[string] {.async.} =
let start = epochTime()
try:
result = await client.getContent(url)
stdout.write &"{url} - response length: {len(result)}"
except Exception as e:
stdout.write &"Error: {url} - {e.name}"
echo fmt" --- Request took {epochTime() - start:.2f} seconds."
proc main =
var transferred: int = 0
let start = epochTime()
echo "Starting requests..."
var f: seq[Future[string]]
for url in Urls:
let client = newAsyncHttpClient()
f.add(client.getHttpResp(fmt"http://www.{url}"))
let res: seq[string] = waitFor all(f)
for x in res:
transferred += x.len
let elapsed = epochTime() - start
echo fmt("Sum of transferred data: {transferred} bytes. " &
"({transferred.float / (1024 * 1024).float / elapsed:.2f} MBytes/s)")
echo fmt"Requested {len(Urls)} websites in {elapsed:.2f} seconds."
main()Here, we used the construct waitFor all(f) to wait until all the downloads are finished. For our tests, we typically got only transfer rates of a few MB/s max. We currently don’t know the reason for this; perhaps we should compare it to the Chronos framework.
References:
A chat server application
In the API documentation of the std/asyncnet module, we find this example for a very basic chat server application:
import std/[asyncnet, asyncdispatch]
var clients {.threadvar.}: seq[AsyncSocket]
proc processClient(client: AsyncSocket) {.async.} =
while true:
let line = await client.recvLine()
if line.len == 0: break
for c in clients:
await c.send(line & "\c\L")
proc serve() {.async.} =
clients = @[]
var server = newAsyncSocket()
server.setSockOpt(OptReuseAddr, true)
server.bindAddr(Port(12345))
server.listen()
while true:
let client = await server.accept()
clients.add client
asyncCheck processClient(client)
asyncCheck serve()
runForever()The purpose of a chat server is to allow multiple clients to connect to a running server. Then, all messages that a client sends to the server are resent to all other connected clients. So one user can talk to all the other connected users.
A chat server has to perform two primary tasks:
-
Listen for new connections from potential clients
-
Listen for new messages from clients that have already connected to the server
All the messages that the server receives will need to be sent to every other client that is currently connected to it.
We do not have a working client app yet, but if you have the telnet program installed on your computer, you can already use it to test this server. Telnet sends messages unencrypted, so its use is generally not recommended to send messages over the Internet, but for testing purposes on the local net, we may use it. If the telnet app is not installed on your computer, you may install it with the package manager of your OS — for Gentoo Linux, we would run "emerge -av telnet-bsd". An alternative is the use of the busybox app, which provides telnet functionality as well.
If you have a telnet app available, you may open three terminal windows. On the first one, you compile and run the server app — you will see no output in that window. In the other two terminals, type telnet localhost 12345. That should start the telnet app, which connects to our running server. When you now type in some text, that text is echoed to both telnet windows:
$ telnet localhost 12345 Trying ::1... telnet: connect to address ::1: Connection refused Trying 127.0.0.1... Connected to localhost. Escape character is '^]'. We use Nim. We use Nim. ^] telnet> quit Connection closed.
Note, that terminating the telnet app is not that simple — you may have to type CTRL ] first, then you get the telnet prompt, where you type quit to terminate the app.
Before we will try to explain the details of the above server app, we should summarize a few facts about network communication. Then, at the end of this section, we will create a simple client app, which you can use instead of telnet to send messages to the server.
Data transfer over a network
For our chat application, we will use the TCP protocol, with so-called network sockets as endpoints. The use of sockets and the TCP protocol is a common practice in network communication. We will not try to explain any details here, so citing some definitions from Wikipedia should be enough for now:
A computer network is a set of computers sharing resources located on or provided by network nodes. Computers use common communication protocols over digital interconnections to communicate with each other.[89]
The Internet protocol suite, commonly known as TCP/IP, is the set of communications protocols used in the Internet and similar computer networks. The current foundational protocols in the suite are the Transmission Control Protocol (TCP) and the Internet Protocol (IP). The Internet protocol suite provides end-to-end data communication specifying how data should be packetized, addressed, transmitted, routed, and received.[90]
A network socket is a software structure within a network node of a computer network that serves as an endpoint for sending and receiving data across the network.[91]
In Nim, a network socket is represented by the Socket data type, defined in the std/net module. We can create new Socket instances with a call of newSocket(), or newAsyncSocket(), for synchronous or asynchronous communication.
Sockets have some similarities with file descriptors — instead of file operations like read, write, and open, for socket instances we have the operations recv(), send(), connect(), bindAddr(), and listen(). The functions recv() and send() are used to receive or send data packages.
TCP is a connection-oriented transport protocol that allows the socket to be used as a server or as a client. A newly created TCP socket is neither, until the bindAddr() or connect() procedure is called. The former transforms it into a server socket and the latter into a client socket.
By default, the newSocket() constructor will create a TCP socket, but we could pass more options to the newSocket() constructor for other socket types, or to customize the socket instance.
As we want to create a non-blocking, asynchronous server app, we create our socket instance with a call to newAsyncSocket() of the default TCP type. We then bind it with a call of bindAddr() to a socket address, which is the combination of an IP address and a port number. The IP address is a string, it may consist of four or six 8-bit numbers, each separated by a period, or of a symbolic name like "google.com". As we aim to test our server only on our local network, we use the default IP address 'localhost'. The port numbers are unsigned 16-bit numbers in the range from 0 to 2^16-1, where the numbers 0 .. 1023 are reserved for special tasks, and can generally be used only with administrator privileges. For a real-world app, the used port numbers are important, as server-client communication works only when both use the same port number. For our experiments, we will use the number 12345 from the initial example, as this one is easy to remember. As the Port type is a distinct unsigned 16-bit data type, we have to use the notation Port(12345) for the second parameter of bindAddr().
We will start our explanations with a simplified code example, where we have removed the sending of messages to all the clients, and we have replaced some new function calls like runForever() or asyncCheck() with similar substitutes that we already know:
import std/[asyncnet, asyncdispatch]
proc processClient(client: AsyncSocket) {.async.} =
while true:
let line = await client.recvLine()
if line.len == 0: break
echo line
proc serve() {.async.} =
echo "start serve()"
let server = newAsyncSocket()
server.setSockOpt(OptReuseAddr, true)
server.bindAddr(Port(12345))
server.listen()
while true:
let client = await server.accept()
let f1: Future[void] = processClient(client)
let f: Future[void] = serve()
echo "back at main scope"
waitFor sleepAsync(320000)We have two asynchronous procs, serve() and processClient(), which are both marked with the {.async.} pragma and return a Future[void] instance each. Our program starts by calling the serve() proc. That procedure creates an asynchronous socket, binds it to localhost and port 12345, and starts listening for new connections. At the beginning of the infinite while true loop, await server.accept() is called to accept new client connections. As no client tries to connect to the server yet, control is immediately returned, and the message "back at main scope" is printed. Without the waitFor statement in the last line of our code, our program would now terminate. It is very important to remember that the call of serve() does not only call that asynchronous proc but also add it to the global dispatcher loop. And with the last line in our code, we actually start this dispatcher loop. We have used waitFor sleepAsync(320000) instead of the original runForever() to make the code look less foreign — running for 320 seconds should be sufficient for our initial tests. Note that as long as no client connects to the server, proc processClient() is not executed at all. But when a client connects, then processClient() is called for that client, and an instance of this processClient() proc with the current client as an argument is added to the global dispatcher loop. This way, a new instance of the processClient() proc is added to the dispatcher loop whenever one more client connects to the server. This results in each client having its own instance of a processClient() proc in the dispatcher loop, which is executed periodically and can thus receive data for that client. This way, all connected clients are served, although we do not have an actual list of all the clients that we iterate!
The actual code in proc processClient() is not difficult: await client.recvLine() tries to receive a textual message from the client, and gives control back to the dispatcher loop, when there is no data available. And when there is data, then we just print it for now. Checking for a line length of zero is sensible and necessary to determine when a client disconnects.
When we have managed to understand the simplified code from above, understanding the original example is easy: We use a sequence with all the connected clients, as we want to forward each message that we get from one client to all the other connected clients. So the serve() proc adds each new client to that seq and proc processClient() iterates over that seq and sends the received message to all the connected clients, followed by a "\c\L" to separate the messages. And instead of waitFor sleepAsync() runForever() is used, and instead of assigning the results of the procs serve() and processClient() of Future[void] type to an unused variable, or to discard them, these results are passed to asyncCheck. AsyncCheck is used to provide us with some error messages if something goes wrong — it sets a callback on the future argument, which raises an exception if the future should finish with an error state.
We hope that you do not wonder about the two infinite "while true" loops anymore — for the async/await pattern, such loops make sense of course, as each await returns control back to the global dispatcher loop. And the server would run this loop until it is terminated by CTRL-C or another OS intervention.
The client application
The client has to connect to the server, and then watch for keyboard input from the user and for the arrival of new messages from the server at the same time. So again we have to care to prevent blocking operations. Unfortunately, reading user input in a terminal window is always blocking, and there is currently no input method available that is directly supported by Nim’s async/await framework. However, we have already presented a way to avoid the blocking behavior of the readLine() procedure by using Nim’s threadpool library earlier in the book. We will use that method again for the realLine() calls, and combine it with the async/await pattern for sending messages to the server and for watching for other messages from the server. Actually, our client example program follows closely the client program from Mr. Picheta, the creator of Nim’s async/await framework, which he sketched in the Manning book years ago:
import std/[threadpool, asyncdispatch, asyncnet]
proc doConnect(socket: AsyncSocket, serverAddr: string) {.async.} =
echo("Connecting to ", serverAddr)
await socket.connect(serverAddr, Port(12345))
echo("Connected!")
while true:
let line = await socket.recvLine()
echo "Received Message: ", line
proc main =
echo("Chat application started")
var socket = newAsyncSocket()
asyncCheck doConnect(socket, "localhost")
var messageFlowVar = spawn stdin.readLine()
while true:
if messageFlowVar.isReady():
asyncCheck socket.send(^messageFlowVar & "\c\l")
messageFlowVar = spawn stdin.readLine()
asyncdispatch.poll()
main()The structure of this client implementation is a bit different from the server one. The main reason is that we have to use Nim’s threadpool and spawn to avoid the blocking behavior of the readLine() proc. Note that our main() procedure is not marked with the {.async.} pragma and contains no await statement. Only the doConnect() proc, which connects to the server and then watches for messages sent by the server, is marked with the async pragma and awaits the new messages. The main() procedure creates the new asynchronous socket and then calls the asynchronous proc doConnect(), which actually connects to the server and enters an infinite loop watching for messages from the server. When doConnect() calls await, control flow returns immediately to our main() proc. But doConnect() has become a component of the dispatcher loop, so its infinite while loop with the await statement will gain control back later. In the main() procedure, we then use spawn to execute readLine() on one thread of the threadpool, and enter a different infinite while loop. This loop checks if user input is available, and calls poll() to ensure that the global dispatcher loop is executed. If there is user input available, that message is sent to the server, and spawn is called again waiting for the next user input.
Of course, you may wonder if this client structure really makes sense. At least it seems to work. But you could be right — the use of spawn is an important component to avoid the blocking terminal input issue, and the dispatcher loop doesn’t seem to contribute much.
Feel free to experiment with modified client app structures yourself.
Final remarks
Of course, whenever you intend to create a real-world chat application, there are a lot of other tasks to solve and points to discuss: Is the client/server architecture really the best solution, or may the clients just talk directly to each other, without the use of a central server? Then there is the problem with the actual port numbers, as routers and firewalls may block that ports. And finally, you may intend to send not only plain strings as we did, but structured messages — maybe add a time and sender name to each message, and send the content encrypted over the Internet. For encrypting the messages, you should find some ideas in Nim’s standard library, or in external packages, and sending structured messages is not difficult: For example, we used the JSON format in an earlier section of the book to save structured objects to disk and reload it later. The object content was encoded as human-readable text, which you can send of course over the net without any problems. You just have to define a protocol for the message exchange: Create Nim objects, that contain all the data you want to exchange, like sender name, time, and the actual message content. Then use one of the procs provided by the json module to encode the object before you send it, and decode it again on the receiving side. The json module provides, for example, the % operator to convert various data types to JSON strings or JSON objects, and the parseJson() procedure to convert the text string back into Nim data types. When you have some free time and are interested in that topic, you can try that yourself, it should be not difficult. Maybe, we will give later in the last part of the book a concrete example of such an app — but maybe that is just too trivial and boring? What you may try as a small exercise is this: We send the verbatim message over the net — exactly what the user typed in, and we send it to all clients, including the one who initially send it. So the sender always gets an echoed copy of its input. A simple exercise for you would be to add a username to each message so that all clients can see who wrote it. And you can use that username to identify messages that you send yourself, to suppress the echoed copy.
Another interesting point is what actually happens when connected clients disconnect. There should be at least one serious problem: The server stores all the connected clients in a list, and sends messages to all of them. But what happens when a client vanishes? Sending messages to disconnected clients is not really a good idea, so the server may remove clients from the list when they disconnect or at least mark them as disconnected. And when do we have to call close() on a client that is disconnecting? We have not used close() at all now. Should we use it in the server or in the client app? We will not try to cover all these details in this book — when you really should intend to do some form of network programming, you should consult some dedicated literature.
For a real-world Nim application for network data exchange, you may also investigate this Twitter clone: https://github.com/zedeus/nitter
References:
Concepts
Nim’s concepts are a form of constrained generics. They have some similarities to what may be called traits or interfaces in other programming languages.
For the C++ programming language, concepts have been introduced for C++11 and have been revised multiple times before formally being a required part of C++20.
These are the first two sentences in Wikipedia’s introduction to the C++ concepts:
Concepts are an extension to the templates feature provided by the C++ programming language. Concepts are named Boolean predicates on template parameters, evaluated at compile time.[92]
Note that C++'s templates are Nim’s generics, so you may replace the term "templates" in the above statement with "generics" for Nim.
The Rust programming language uses the term traits instead:
Traits: Defining Shared Behavior
A trait defines functionality a particular type has and can share with other types. We can use traits to define shared behavior in an abstract way. We can use trait bounds to specify that a generic type can be any type that has certain behavior.[93]
Nim’s concepts have been redefined in 2019 and are now sometimes referred to as "new concepts". They are described in the "experimental" part of the Nim language manual, and may still have some issues. The syntax and semantics may potentially change a bit in the future, but it is expected that they will remain part of the language.
In this section, we will try to give an easily understandable introduction to Nim’s concepts. If you already have some experience with concepts, interfaces, or traits in other programming languages, you may read the section in the Nim language manual instead. And of course, you should consult that section later, when you really intend to use concepts, to learn about all the details and possible future changes. The following explanations are based on the experimental section of the Nim language manual for Nim 1.9.1, which does not explicitly use the term 'new concepts' and has not yet incorporated the new Self data type introduced for the 'new concepts'. At the end of this section, we will reference the actual RFC (Request for Comments) for the 'new concepts' implementation.
Purpose of concepts
Modern programming languages care a lot for abstractions and code reuse. Functions like sort(), max(), or iterator variants should work on as many data types as possible. So, sort() or max() could work on all data types for which a cmp() or a < predicate is defined, and iterators like items should work on all container types. People often aim to write DRY code. "Don’t Repeat Yourself" (DRY) is a principle of software development aimed at reducing the repetition of software patterns, replacing them with abstractions, or using data normalization to avoid redundancy.[94]
Some dynamic languages like Python or Ruby use the term Duck Typing for these kinds of abstractions: Duck typing in computer programming is an application of the duck test--"If it walks like a duck and it quacks like a duck, then it must be a duck"--to determine whether an object can be used for a particular purpose.[95] Interpreted, dynamic languages may do all these type tests at runtime, while statically typed, compiled languages like C++, Rust, D, or Nim do the test already at compile-time, advertised by the term "Abstraction without overhead".
Nim’s concepts are also called "user-defined type classes" and specify a set of requirements that a data type must have. Only when all the requirements are met ("match"), can that specific data type be used as a parameter of a specific function or for other purposes.
Actually, Nim’s generic data types already allow most abstractions:
proc max[T](a, b: T): T =
if a < b:
return b
else:
return aThe procedure above works for all data types for which a < predicate is defined. We could restrict that procedure to numeric parameters using a proc header, such as proc max(a, b: float or int): auto. However, this method doesn’t allow all data types with a < predicate defined to be used as parameters. Moreover, when we use the fully generic procedure from above, the user might pass invalid parameters, such as an array or an object type with an unspecified < predicate, leading to unhelpful compiler error messages:
proc mx[T](a, b: T): T =
if a < b:
return b
else:
return a
type
O = object
i: int
var o1, o2: O
let o = mx(o1, o2)nim c t.nim /tmp/hhh/t.nim(13, 11) template/generic instantiation of `mx` from here /tmp/hhh/t.nim(2, 8) Error: type mismatch Expression: a < b [1] a: O [2] b: O Expected one of (first mismatch at position [#]): [1] proc `<`(x, y: bool): bool ...
In fact, the compiler error messages in such cases are typically quite clear. And the < predicate might not be a really good example for the use of concepts, as < is typically defined for most of Nim’s data types, including sets and tables. But concepts allow us to express the constraints more clearly, already visible in the procedure definition and resulting in even more clear compiler error messages.
So let us define a Comparable data type that we can then use for our mx() procedure.[96]
The fundamental idea of Nim’s concepts is that we define a set of expressions for variables or types: A data type matches the concept when all the expressions compile successfully and all boolean expressions evaluate to true. So we can define a Comparable concept this way:
type
Comparable = concept x, y
(x < y) is boolComparable is a concept data type. The identifiers that follow the concept keyword represent instances of data types that might or might not match this concept type. For the match test, we employ two instance variables, x and y, to which we try to apply an infix < operator. If that expression compiles and yields a boolean result, we state that the candidate data type matches this concept. We can apply this Comparable concept data type to the parameter types of our mx() procedure and observe the outcomes when attempting to pass either matching or non-matching parameter types:
type
Comparable = concept x, y
(x < y) is bool
proc mx(a, b: Comparable): Comparable =
if a < b:
return b
else:
return a
type
O = object
i: int
var o1, o2: O
let h = mx(1, 2) # integer types match, as they have an < infix operator defined
echo h
let o = mx(o1, o2) # no match, as we have not defined a < for OThe last line would not compile because the object data type O doesn’t have a < predicate defined. By referencing the Comparable type definition or the error message, it may now be easier to understand the specific issue.
We can also define more complicated concepts. The language manual has an example of a Stack concept:
type
Stack[T] = concept s, var v
s.pop() is T
v.push(T)
s.len is Ordinal
for value in s:
value is TA generic Stack for data of type T needs a pop() and a push() function, both working on the T data type, and a len() function that returns an ordinal result. Additionally, it must define an items() iterator that yields instances of the T data type.
A concept matches if:
-
all expressions within the body can be compiled for the tested type
-
all statically evaluable boolean expressions in the body are true
The identifiers following the concept keyword represent instances of the type currently being matched. We can apply any of the standard type modifiers such as var, ref, ptr, and static to denote a more specific type of instance. We can also apply the type modifier to create a named instance of the type itself:
type
MyConcept = concept x, var v, ref r, ptr p, static s, type T
...Within the concept body, types can appear in positions where ordinary values and parameters are expected. This provides a convenient way to check for the presence of callable symbols with specific signatures:
type
OutputStream = concept var s
s.write(string) # test if the matched type has a write() proc with string parameterIn a concept body, we can also utilize and test for types. We can directly use the named type instances following the concept keyword (concept x, y, type T), and we can explicitly prefix data types with the type modifier. The following example is taken from the 'Experimental' section of the Nim language manual:
type
# Let's imagine a user-defined casting framework with operators
# such as `val.to(string)` and `val.to(JSonValue)`. We can test
# for these with the following concept:
MyCastables = concept x
x.to(type string)
x.to(type JSonValue)
# Let's define a couple of concepts, known from Algebra:
AdditiveMonoid* = concept x, y, type T
x + y is T
T.zero is T # require a proc such as `int.zero` or 'Position.zero'
AdditiveGroup* = concept x, y, type T
x is AdditiveMonoid
-x is T
x - y is TWe suppose that x.to(type string) and x.to(type JSonValue) should actually be x.to(string) and x.to(JSonValue) instead. Please note that the is operator allows one to easily verify the precise type signatures of the required operations, but since type inference and default parameters are still applied in the concept body, it’s also possible to describe usage protocols that do not reveal implementation details.
Much like generics, concepts are instantiated exactly once for each tested type, and any static code included within the body is executed only once.
Note that, in the same way as generic procedures are instantiated for each used type, this also holds for concept data types. So the use of concepts with many different matching types may produce many proc instances and a large executable.
With the old concepts implementation, it was possible to test directly for the existence of object fields. It is unclear whether the new concepts will directly support these tests. Perhaps we will have to declare setter or getter procs or templates for these field tests.
Concept diagnostics
It is not always easy to understand Nim’s proc overload resolution, and using concepts may not necessarily make it easier. It may occur in rare conditions that instead of a proc with concept parameter types a different proc with an equal name is selected by the compiler. To get more detailed compiler messages, Nim provides the explain pragma, which can be attached to concept data types or to procs with concept parameters.[97]
Generic concepts
Concept data types can be parametric just like regular generic types. The Nim language manual presents a generic concept for a 2D matrix type that can be used with arbitrary numeric base types.
Concept-derived values and concept refinement
The language manual also explains how existing concepts can be refined and how we can even define constants and types inside a concept body.
Concept redesign 2019
The above descriptions are based on the experimental section of the Nim compiler manual for Nim 1.9.1 (RC 2.0) as available in early 2023. An RFC (Request for Comments) from 2019 suggested a concept redesign, which, while not explicitly mentioned in the Nim language manual, seems to have been partly implemented already. The most noticeable change for these "new concepts" is that a Self data type can now be used to refer to the concept type instance. The concept body consists now mostly of a set of procs, which may use the Self data type. So we can now define a Comparable type this way:
type
Comparable = concept
proc `<`(a, b: Self): boolWe will quote the complete RFC verbatim here for reference, including the suggested each T and either orelse constructs, both of which are still unimplemented:
Atoms and containers
Concepts come in two forms: atoms and containers. A container is a generic concept like Iterable[T], while an atom always lacks any kind of generic parameter (as in Comparable).
Syntactically, a concept consists of a list of proc- and iterator declarations. There are 3 syntactic additions:
-
Self is a built-in type within the concept’s body, representing the current concept. (Or perhaps the data type that is being matched?)
-
each is used to introduce a generic parameter T within the concept’s body that is not listed within the concept’s generic parameter list.
-
either orelse is used to provide basic support for optional procs within a concept.
We will see how these are used in the examples:
Atoms
type
Comparable = concept # no T, an atom
proc cmp(a, b: Self): int
ToStringable = concept
proc `$`(a: Self): string
Hashable = concept
proc hash(x: Self): int
proc `==`(x, y: Self): bool
Swapable = concept
proc swap(x, y: var Self)Self represents the currently defined concept itself. It is used to prevent recursion because proc cmp(a, b: Comparable): int is invalid.
Containers
A container has at least one generic parameter, typically called T. The first syntactic use of the generic parameter determines how T is inferred and bound. Subsequent uses of T are then checked to ensure they match its bound value.
type
Indexable[T] = concept # has a T, a collection
proc `[]`(a: Self; index: int): T # we need to describe how to infer 'T'
# and then we can use the 'T' and it must match:
proc `[]=`(a: var Self; index: int; value: T)
proc len(a: Self): intNo significant changes occur when we use multiple generic parameters:
type
Dictionary[K, V] = concept
proc `[]`(a: Self; key: K): V
proc `[]=`(a: var Self; key: K; value: V)The usual : Constraint syntax can be used to add generic constraints to the involved generic parameters:
type
Dictionary[K: Hashable; V] = concept
proc `[]`(a: Self; key: K): V
proc `[]=`(a: var Self; key: K; value: V)each T
Note: each T is currently not implemented.
each T allows the introduction of generic parameters that are not part of a concept’s generic parameter list. Furthermore, it is a special case designed to handle the common scenario where 'every field must fulfill property P':
type
Serializable = concept
iterator fieldPairs(x: Self): (string, each T)
proc write(x: T)
proc writeStuff[T: Serializable](x: T) =
for name, field in fieldPairs(x):
write name
write fieldeither orelse
Note: either orelse is currently not implemented.
In generic code, it is often desirable to specialize the code in an ad-hoc manner, as exemplified by system.addQuoted:
proc addQuoted[T](dest: var string; x: T) =
when compiles(dest.add(x)):
dest.add(x)
else:
dest.add($x)If we want to describe T with a concept, we need some way to describe optional aspects. either orelse can be used:
type
Quotable = concept
either:
proc `$`(x: Self): string
orelse:
proc add(s: var string; elem: self)
proc addQuoted[T: Quotable](s: var string; x: T) =
when compiles(s.add(x)):
s.add(x)
else:
s.add($x)More examples
# system.find
type
Findable[T] = concept
iterator items(x: Self): T
proc `==`(a, b: T): bool
proc find(x: Findable[T]; elem: T): int =
var i = 0
for a in x:
if a == elem: return i
inc i
return -1Sortable
Note that a declaration like
type
Sortable[T] = Indexable[T] and T is Comparable and T is Swappableis possible, but not recommended. This is because Indexable either contains more procs than necessary or includes accessors that are slightly off, as they do not offer the appropriate type of mutability access.
Here is the proper definition:
type
Sortable[T] = concept
proc `[]`(a: var Self; b: int): var T
proc len(a: Self): int
proc swap(x, y: var T)
proc cmp(a, b: T): intConcept matching
A type T matches a concept C if every proc and iterator header H of C matches an entity E in the current scope.
The matching process is forgiving:
-
If H is a proc, E can be a proc, a func, a method, a template, a converter, or a macro. E can have more parameters than H as long as these parameters have default values. The parameter names do not have to match.
-
If H has the form proc p(x: Self): T then E can be a public object field of name p and of type T.
-
If H is an iterator, E must be an iterator too, but E’s parameter names do not have to match and it can have additional default parameters.
Escape hatch
Generic routines that have at least one concept parameter are type-checked at declaration time. To disable type-checking in certain code sections, an 'untyped block' can be used:
proc sort(x: var Sortable) =
...
# damn this sort doesn't work, let's find out why:
untyped:
# no need to change 'Sortable' so that it mentions '$' for the involved
# element type!
echo x[i], " ", x[j]References:
Part VII: Appendix
Disclaimer and legal notice
This book has been prepared with the utmost diligence, attention, and care. However, the authors, publishers, and any individuals involved in the preparation of this book do not provide any guarantee, warranty, or representation, whether explicit or implicit, regarding the accuracy, completeness, or reliability of the information and contents presented herein.
The authors, publishers, and contributors shall not be liable or responsible, whether directly or indirectly, for any loss, damage, injury, claim, or any other form of liability that may result from the use, interpretation, or reliance on the information contained in this book. The reader assumes full responsibility for the use of the information provided in this book.
This book may reference or mention trademarks, registered trademarks, or service marks that are the property of their respective owners. These include, but are not limited to, Windows and macOS. The use or mention of these trademarks in this book is purely for illustrative, educational, and descriptive purposes and does not imply any affiliation with, endorsement by, or challenge to the ownership of these trademarks by the authors, publishers, or contributors of this book.
Furthermore, any legal disputes arising from the content of this book or the use of the information contained within it shall be governed by the laws of the country where the main publisher of this book is based. Any claims, legal proceeding, or litigation arising in connection with the book will be brought solely in the federal or state courts located in that country, and the reader consents to the jurisdiction of those courts.
By choosing to continue to read this book or use the information contained within it, the reader accepts this disclaimer in full.
This disclaimer is subject to change without notice and was last updated on the date of publication of this book. Please check the latest edition of the book for any changes.
Acknowledgments
We extend our special thanks to Mr. Jim Wilcoxson (https://github.com/hashbackup), who diligently proofread the initial pages of the book, offering valuable advice on English grammar and spelling. Our appreciation also extends to Mr. Marek Ľach (https://github.com/marek-lach) for his keen eye in rectifying numerous spelling and grammatical errors.
We are indebted to Dan Allen, the primary author of the Asciidoctor tool, for his invaluable assistance in fine-tuning the final layout of the HTML and PDF versions of the book.
We utilized languagetool.org software through the pyLanguagetool application for command-line usage, which significantly helped in detecting numerous grammatical errors and missing commas. We also used the free grammar-check browser extension from https://www.grammarly.com/ on Firefox, as well as the online grammar checker from https://quillbot.com. These tools were particularly useful when reviewing longer prose sections.
Over the past three years, we received insightful advice regarding professional writing to ensure a fluid style and formal tone. This included advice on breaking up lengthy sentences and substituting terms such as 'but', 'so', and 'actually' with 'however', 'thus', and 'in fact' respectively. We were also advised to exclude 'then' from most conditional clauses and to refrain from using potentially offensive terms like 'kids' and 'stupid'. In addition, we replaced numerous instances of 'may' with 'might', and 'can not' with 'cannot', for improved accuracy.
Lastly, we utilized the GPT-4 model to check the grammar and suggest possible improvements. Although it found only a few remaining issues, it offered several thousand suggestions for enhancing the sentence structure to improve the readability and comprehension of the text. These suggestions were invaluable, and we have incorporated most of them into the book.
Changes for Nim 2.0
After the release of Nim v1.0 in 2019 and Nim v1.6.14 in June 2023, on 01 August 2023 the long awaited Nim 2.0 version was finally released. One of the defining features of Nim 2.0 is the adoption of the ORC memory management system as its default mechanism. While Nim 2.0 does not yet support incremental compilation (IC), it comes with a new package manager called Atlas. Additionally, with the inclusion of the Malebolgia package, Nim 2.0 has improved support for concurrent and parallel programming.
Although Nim 2.0 brings some important changes and improvements, there should be no serious incompatibility issues between Nim 1.6 and Nim 2.0, and adapting older programs for Nim 2.0 should not be difficult, at least as long as the old programs don’t use any ugly hacks. Unfortunately, with Nim 2.0 some incompatibility issues with other implementations like the https://github.com/nim-works/nimskull may arise. The future will show if alternative implementations will try to be as compatible as possible with the implementation of Rumpf, or if they will create language dialects or even new languages with new names, like Cyo for Nimskull. We had a similar case already for modules of Nim’s standard library, which have been partly replaced by incompatible, improved variants created by Status Corporation (e.g. https://github.com/status-im/nim-taskpools and https://github.com/status-im/nim-chronos) and other Nim contributors.
While we have touched upon several features of Nim 2.0 throughout this book, the subsequent sections will provide a concise summary of the pivotal changes introduced in this version.
ARC/ORC memory management
Initially, Nim used a traditional garbage collector for automatic memory management, similar to how most other high-level programming languages do. For time-critical or resource-limited systems, traditional garbage collectors have some serious disadvantages like fully blocking the system for a few milliseconds, or releasing resources late and needing a lot of memory. Early Java implementations suffered from this, and for this reason, some modern high-performance languages such as Rust, Zig, or Jai do not use automatic memory management at all. Languages like Nim and VLang tried to find automatic memory management strategies that avoided the disadvantages of traditional garbage collectors. And Nim was successful already, while Vlang seems to have some miles to go still. ARC is a deterministic, destructor-based memory management system: As soon as referenced, heap-allocated objects go out of scope, so that they can no longer be accessed by any reference, the heap object is immediately freed. This works very well, as long as the referenced objects build no cyclic structures, e.g. in graphs like the triangulation of a surface, where all the vertices and edges may have neighbor references. To handle cycles, the ORC memory handler was created and is now the default. For many applications, it is not really important if the traditional refc GC system or ARC/ORC is used. REFC may still have small performance benefits, but ARC/ORC works very well for critical applications. With ARC/ORC a Nim program should behave like one with only manual memory management, without all the disadvantages of pure memory management like double-frees, dangling pointers, or memory leaks. When your program uses no cyclic data structures, you can now use arc. When you know that you use cycles, like for a Delaunay triangulation, you should use orc to ensure that all unreferenced objects are really released immediately. Programs compiled with the option --mm:orc are typically 10 KB larger than those compiled with --mm:arc. Both options generate significantly smaller executables than --mm:refc. For performance-critical programs, it is always a good idea to do some testing, as refc or maybe even one of the other GC options like Boehm may give a larger throughput. Currently, Nim cannot report if ARC is sufficient, or ORC is needed due to cyclic references. So you may have to do some tests if you are not sure, like setting all the references at the end of a proc to nil, and then calling GC_fullCollect() and GC_getStatitics() to monitor the still-occupied memory resources.
Default values for object fields
Nim initializes variables to binary zero by default, and this applies to object fields as well. Before v2.0, it was not possible to specify other default values for object fields in the type definition. Nim 2.0 allows this now finally in the same way as we can do it for plain variables. We used this feature already in section The Prim algorithm where we set the dist field of our Vertex type to math.Inf, indicating that we have not yet found a neighbor.
type
Vertex = ref object
x, y: float
friend: Vertex
dist: float = InfDefault values for object fields are useful whenever the default zero is nonsensical or may even cause a runtime exception. This could be the case for the denominator of a fraction, or a scaling parameter, which generally defaults to 1 or 100 percent, not zero.
Note that custom default values for object fields are only applied, when we explicitly initialize a variable by use of an object constructor, or when we use the default() function for the initialization. A plain variable declaration like var c2: Computer always initializes all fields to binary zero. This behaviour could be surprising, and perhaps it would be a good idea when the compiler gives a warning when for objects with default field values a plain declaration like var c2: Computer is used.
Overloadable enums
Before Nim 2.0, using enumerations in larger programs could be very verbose, as different enum types could have members with the same name, so that we had to use the pure pragma and prefix the enum value with the type name. To avoid this, some modules used values with a prefix, like nkProc. In section Enumeration types we had two enums with a few common values:
type
TrafficLight {.pure.} = enum
red = "Stop"
yellow = (2, "Caution")
green = ("Go")
type
BaseColor {.pure.} = enum
red, green, blue
var caution: set[TrafficLight] = {TrafficLight.yellow, red}
echo caution # {Stop, Caution}For Nim 2.0, the compiler is smart now and knows that in {TrafficLight.yellow, red} the red value is also from the TrafficLight data type, so we do not have to use the type name prefix. The {.pure.} pragma is not needed anymore, and the compiler is really smart: Only a statement like "var caution = {red, blue}" would obviously not compile without type prefixes for one of the values.
CString limitations
Nim’s strings are mutable value objects that have length and capacity properties and adhere to copy semantics. As the actual Nim string data buffer is heap-allocated and NULL-terminated, it is compatible with the string data type in the C language, which is basically a pointer to a character (*char). In early Nimrod, we often used the Nim cstring data type as an alias for a string in the C language. In modern Nim, cstring stands for compatible string, which is a string that is compatible with the C and JavaScript backends. In Nim 2.0, cstrings have become second-class citizens. We can use cstrings as parameters of C library functions without problems, but when we pass a variable of cstring data type to an ordinary Nim proc, we get a serious warning:
proc callCLib(s: cstring) =
discard # call a C library
proc indirectCallCLib(s: cstring) =
callCLib(s)
var a = "Test"
indirectCallCLib(a)Warning: implicit conversion to 'cstring' from a non-const location: a; this will become a compile time error in the future [CStringConv]
This may be justified, e.g., because cstrings cannot grow and because modifying a cstring may invalidate the initial Nim string. But at the same time, this behaviour is a problem, when we call C libs indirectly by use of trampoline procs. We get the above warning, and the program may no longer compile in the future. A possible fix is to pass ordinary Nim strings to the trampoline proc. But this introduces some overhead, as we are passing an object instead of a plain pointer. Most importantly, we can no longer pass nil/NULL to the C library. However, for some C libraries, nil/NULL is very different from an empty string.
StrictDefs
In Nim, variables are generally initialized with binary zero, that is, zero for numerical values, nil for references and pointers, and "" for strings. With Nim 2.0, we can use the strictDefs pragma, which seems to be currently only available in the form {.experimental: "strictDefs".}, to enforce the explicit initialization of variables:
{.experimental: "strictDefs".}
proc main =
var a: int
echo a
let b: int
if a == 0:
b = 1
else:
b = 2
echo b
main()Compiling the above code would now give the warning:
Warning: use explicit initialization of 'a' for clarity [Uninit]
This may even be the default later. Again, the compiler is smart and does a detailed code analysis: When we assign in each possible code path a value to a variable, then there is no warning. This works now even for the let statement, as in the above example.
Out parameters
In Nim versions before 2.0, we could pass uninitialized var parameters to procs, which then initialized that variable. Although this was generally avoided for pure Nim functions, where we use function return values to pass values back to the caller, this pattern is sometimes used in C libraries.[98] To enforce the initialization of parameters passed uninitialized to a procedure, Nim 2.0 has introduced out parameters:
proc p(i: out int) =
discard # i = 0
proc main =
var n = 1
p(n)
echo n
main()Compiling the above code results in this warning:
Warning: Cannot prove that 'i' is initialized. This will become a compile-time error in the future. [ProveInit]
The reason is obviously that proc p does not assign a value to the out parameter i.
StrictFuncs
When we pass parameters to procedures and functions that should be modified in the proc body, we have to use the var keyword to make the parameter mutable. For beginners, it was sometimes surprising that when we passed reference parameters to a proc, it was allowed to modify fields of ref objects, also when the ref object was not passed as a var parameter. So the var keyword was only needed to change the ref itself, e.g., to exchange or initialize a ref to an object. With the new definition of the StrictFuncs pragma in Nim 2.0, we can ensure for functions that fields of ref objects cannot be mutated in a function.
{.experimental: "strictFuncs".}
type
R = ref object
i: int
func p(arg: R): bool =
arg.i = 0
var r = R()
discard p(r)Compiling this example now gives the message:
Error: cannot mutate location arg.i within a strict func
Unicode operators
In Nim 2.0, we can use a few Unicode operators; see https://nim-lang.github.io/Nim/manual.html#lexical-analysis-unicode-operators for details. When we create mathematical libraries, this may result in cleaner code; for example, we could use Unicode symbols for the cross-product of vectors. Entering these Unicode symbols can be difficult. In section Entering Unicode characters we learned how to type in Unicode symbols. You may also find the Linux (Gnome) tool gucharmap useful: Launch the tool, select View/By Unicode Block from the menu, and then select Mathematical Operators.
proc `∘`(a, b: int): int =
a * b + 1
echo `∘`(1, 2) # 3
echo 2 ∘ 3 # 7Unnamed break in a block
Using a plain break statement in a block gives a warning in Nim 2.0. This warning may become an error in future Nim versions. We may use a named block with a named break statement to overcome this issue:
block:
echo 1
break # warning, later an error
echo 2
block t:
echo 3
break t # OK
echo 4Changes for Nim > 2.0
For Nim 2.2, we might finally get the incremental compilation.
References:
Nimble package manager
Nimble, initially called Babel, is Nim’s default package manager, which is currently shipped together with the Nim compiler, and can be used to install additional Nim packages. Nim packages are collections of Nim modules and other related files, which have been created to serve a special purpose or to solve a special task, and have been made available to other Nim users. Nim’s packages are usually distributed in the form of Nim source code modules, which are used as libraries. But packages can also contain complete application programs, and may even contain pre-compiled executables. In Part IV of the book, we have already used the library packages nim-regex and cligen. An example of a package containing a complete application is the c2nim tool, which can convert C source code to Nim code. You can find a longer introduction to the Nimble package manager in the Manning book, and a detailed description on the Nimble GitHub page. As the GitHub page is not really intended as an introduction, and as some people may not have a copy of the Manning book, we will give a short introduction to Nimble, which includes its use to install packages, as well as the creation and distribution of packages.
Purpose of package managers
Package managers are used to install software on single computers or whole computer networks. The software to install can be libraries, which will be used by other programs, or applications, which can be run by the user.
Packages and package managers can be divided into two categories: Most Linux distributions have one or more package managers closely coupled to the OS, which are used to install libraries and executables for that OS. These package managers are usually executed by a user with administrator rights and install the software system-width, in a way that all users of that computer can access it. Most well-known tools and libraries like Firefox, Gimp, GCC, CGAL, BOOST, and GTK are installed this way. The other category includes package managers that are strongly coupled to a single programming language and help users install tools or libraries for that language. These package managers are mostly used by the user directly without administrator privileges and install the software for this user only — other users of the computer would not notice the installation at all. Well-known examples of this latter kind of package managers are pip for Python, npm for JavaScript, Gem for Ruby, and finally Nimble for Nim.
Package managers do not only simplify the installation, update, and de-installation of software, but they may also install dependencies and resolve versioning conflicts: When we intend to install a package A, that package may require again packages B and C, which may again require other packages. Most package managers, including Nimble, can resolve and install dependencies for us automatically. A big problem can occur when packages are available in multiple, incompatible versions. A common practice is to assign version numbers to packages — these version numbers are typically built of three parts, each separated with a period, like 1.2.14. Larger numbers indicate a newer package version. A common scheme for version numbers, called semantic versioning, labels the leftmost number as the major version, the second number as the minor version, and the rightmost number as the patch level. The rightmost number is increased for each tiny change of the software, e.g. for small bug fixes. The minor version number is increased for larger changes, e.g. when new functionality is added. And the major version number is only increased, when there are drastic changes, that is when the API has changed, perhaps due to a complete rewrite of the library. A major version number of zero often indicates, that the package or library is still in development, and not really considered mature — but there are many exceptions to this rule, many packages, libraries, or tools seem to never reach a major version 1, but still work very fine. On the other hand, a major version greater than zero can indicate some stability promises — the API should not change that much anymore, and the authors may have the feeling, that the software works reliably. But this is very subjective — after reaching a version 1.0, the development process may just stop, as the authors are exhausted, or soon after a 1.0 release, development of a 2.x version may start, with a completely new API design. So the 1.x version may be stable but will become legacy soon. A special aspect of version numbers is, that sometimes the major version number is increased from zero to one just to indicate some stability promises, so the content of version 0.9.7 could be nearly identical with version 1.0.
Unfortunately, even tiny bug fixes for packages or libraries, for which the major and minor version does not change, can already generate some trouble, as the fix may change the behavior of the package, and our application program, which uses this package, may be sensitive to this change. But these issues are easily fixable. More serious issues may arise when we create larger applications, that have to use multiple packages: A package A can be available in two incompatible major versions 1.7 and 2.1. And our software may depend on two external packages called B and C, where package B requires package A in version 1.7, but package C requires package A in a version >= 2.0. This is a serious problem, which can be unresolvable. For OS-bound package managers, this is a common concern. It can be solved when package updates are bundled, so that when a package changes its major version, all packages that require it, are also updated. Another possible solution is, that for dynamic libraries multiple versions are installed in parallel, or that multiple package versions are installed in so-called slots, which can coexist on the same computer. A prominent example is the GTK GUI toolkit, which can be installed in a 3.0 and a 4.0 slot. But that is in no way free from issues — an actual example in early 2022 is libsoup, which is currently available and used in incompatible 2.x and 3.x versions.
For package managers like Nimble, which provide only packages related to a programming language, version conflicts are not that likely, but when we create really large applications, which require a lot of external packages, version conflicts may occur. The package manager may help us to resolve these conflicts by attempting to select a set of package versions, that are compatible.
Nimble can work with local packages that are stored on the user’s file system, and with external packages provided by repository hosting services. Nimble uses as the foundation for external packages Distributed Version Control Systems (DVCS) like Git or Mercurial, and the packages are hosted on online platforms like GitHub or GitLab.
While Nim uses currently no dedicated central package repository, it supports a centralized list with package names and some metadata. We can upload our own packages to hosting servers and register the package, to allow others a very easy installation. For registered packages, the command nimble install package_name downloads and installs the package for us. Other packages, that are available somewhere on the Internet, but are not yet registered in Nim’s package database, can be downloaded and installed similarly, but we have to specify the full path to the package, like https://github.com/stefansalewski/gintro.git.
Nimble can also be used to install packages, that are locally stored on our computer, this includes packages that we have manually downloaded from the Internet, or packages that are not saved on a remote location at all.
Nimble packages are basically plain directories, which have to include a special text file, which name is constructed from the package name and the .nimble extension. These files are sometimes called .nimble files and provide some metadata about the package, including the current version, the license, dependencies, and a short textual description. The .nimble files use a Nim-based file format that supports a subset of Nim’s features. We can define variables and procedures in .nimble files and import other modules.
The directory structure of a valid Nimble package has to follow a well-defined shape, which we will discuss later in detail. When we have a valid local package directory somewhere on our file system, then we can cd into it and call nimble install to install that package, without having to download all the files (again) from a remote server. This installation from an existing directory saves us not only the download, but also allows us to fix the package before the installation. Maybe the package needs some tiny fixes to compile and work with the latest compiler version?
As a concrete example, we will show the three ways in which we can install the RTree package:
nimble install rtree nimble install https://github.com/stefansalewski/RTree.git cd /tmp git clone https://github.com/stefansalewski/RTree.git cd RTree nimble install
This works, as the RTree directory has a valid structure, and because it includes a valid package specification called rtree.nimble:
/tmp/RTree $ tree
.
├── LICENSE
├── README.adoc
├── rtree.nimble
├── src
│ ├── drawingarea.nim
│ └── rtree.nim
└── tests
├── config.nims
└── test.nim
/tmp/RTree $ cat rtree.nimble
# Package
version = "0.2.0"
author = "Stefan Salewski"
description = "R-Tree"
license = "MIT"
srcDir = "src"
# Dependencies
requires "nim >= 1.0.0"
skipFiles = @["drawingarea.nim"]
When we install a package with Nimble in one of these three ways, Nimble copies the module files to a location where the Nim compiler can easily find them — for the RTree example from above, this is ~/.nimble/pkgs/rtree-0.2.0/ for Linux. Sometimes it is useful to launch the nimble command with the --verbose flag, which displays a lot of additional information, including the location where the module files get installed.
Another useful command of the Nimble tool is the search command, which searches in Nim’s central package list for packages marked with tags indicating their purpose. We may search for terms such as GUI, PNG, mp3, etc. We can combine the search command with the --ver flag to get all the versions of the packages listed, like nimble search GTK --ver.
Creating and publishing Nimble packages
For creating new packages, we can create the folder structure and the .nimble file manually, maybe by copying an existing package and editing it, or we can use the nimble init command. When we use nimble init, we can first create a folder, cd into that folder, and call nimble init, or we let Nimble create the folder by specifying the folder name like nimble init MyTest. Nimble will ask a few questions and create the folder structure for us. You should test this exercise now, to get a feeling for the process. Simply navigate to a temporary directory, such as /tmp on Linux, and enter the command nimble init MyNewPkg.
nimble init MyNewPkg
... accepting all the defaults results in
/tmp $ tree MyNewPkg/
MyNewPkg/
├── MyNewPkg.nimble
├── src
│ ├── MyNewPkg
│ │ └── submodule.nim
│ └── MyNewPkg.nim
└── tests
├── config.nims
└── test1.nim
cat MyNewPkg/MyNewPkg.nimble
# Package
version = "0.1.0"
author = "Stefan Salewski"
description = "A new awesome nimble package"
license = "MIT"
srcDir = "src"
# Dependencies
requires "nim >= 1.7.1"
We immediately see a tiny issue: Nimble accepts the package name with upper case letters and uses it for the module name. But by convention, module names should be all lowercase for Nim. We can manually fix that, or use a package name with all lowercase letters. For most packages, names with only lowercase letters should be OK, but sometimes we may like to have package names like RTree. Note, that the package name itself and all the file and folder names of the package should not contain hyphens or the at symbols ('-', '@') — the minus sign is generally not allowed for Nim symbols, and the @ has a special meaning for Nimble.
It is important that the created directory structure contains the .nimble file and a src folder. When our whole package consists of only one module, that file would be MyNewPkg/src/mynewpkg.nim, and we would not need the subdirectory MyNewPkg/src/MyNewPkg. After installation of the packages, we could use the module then just as import mynewpkg. For the case that our package consists of multiple files, we put the files in the folder MyNewPkg/src/mynewpkg, and import the files as import mynewpkg/[mod1, mod5].
Another sometimes useful functionality of Nimble is that we can define tasks at the end of .nimble files, like
task test, "Run the packages tests!": exec "nim r tests/mytest.nim"
This allows us to execute nimble test from within the package directory to compile and run package tests.
Public packages
Currently, most external Nim packages are hosted on GitHub. However, other Git platforms such as GitLab should also work with Nimble. In principle, even the Mercurial format should be supported.
As GitHub is currently very popular, we will briefly explain how you can create public Nim GitHub packages. First, you need a GitHub account, which you can create easily by following the instruction on their homepage at GitHub.com. You require your username, and a valid email address, and you have to select a password for your GitHub account. As of August 2021, GitHub requires the use of personal access tokens instead of passwords when modifying repositories. In the case that GitHub has not asked you to create an access token during the initial registration, you have to create one now, before you can continue. The GitHub page or a search engine should provide detailed instructions on how to create a personal access token. The token is a long ASCII string, which you may store in some file, and paste in later when GitHub asks for passwords during uploading files. Later, you can save the token in the local git database somehow, which may save you from the copy/paste process.
When you have an account, you can easily create new public repositories following the instructions on the GitHub page. Let us assume you have created a repository named fft, a package to support the fast Fourier transform. Then you can download that Git repository using this command:
git clone https://github.com/yourname/fft.git
To turn this repository into a valid Nimble package, you need to at least create the subdirectory src/fft and a fft.nimble file. You can do this manually, or you can do it with nimble init fft or cd fft; nimble init.[99] If your package consists of only one file, you should call it fft.nim, and copy it into fft/src/. Or, if you have multiple files, create a directory fft/src/fft and copy the files to that location, maybe with file names fft.nim and ffpsup.nim. As you have modified the local repository folder, it is not consistent anymore with the remote repository. You can check that with the command git status executed inside the folder. To make it consistent again, you have to push your changes to the GitHub server, which can be done with these commands:
git add -A git commit -m "created initial Nimble file" git push origin main git status
The command add -A adds all the created files and directories to the Git content, the commit -m commits the changes with the specified message, and finally push origin main uploads all the modifications to GitHub. The push command will ask you for your GitHub username and password — for the password, you should use the access token we’ve previously mentioned. When you now visit the GitHub page of your remote repository, you should see the changes.
Other people can now already install your package by
nimble install https://github.com/yourname/fft.git # or with git clone https://github.com/yourname/fft.git cd fft nimble install
Whenever you create or update a package, you should care for possible dependencies and the required compiler version. The requirements field of the .nimble file lists all the dependencies, like requires "nim >= 1.6.0", regex, bigints. Nimble supports the command c, which can be used from within a package directory, and which we can use to compile the package, and verify the requirements: While the command nim c myapp.nim always searches for libraries at all known locations (current folder, Nimble packages, and standard library), the command nimble c myapp.nim first check the requirement field of myapp.nimble, and refuses to use nimble packages that are not listed under requirements. On the other hand, when an external package is listed under requirements but is not yet installed, then the nimble c command tries to install it.
If you think your package could be really useful for many other Nim users, you may decide to publish your package, which is to say, add it to Nim’s central package list. This can be done in two ways: You can just call from within your package folder the command nimble publish. You will then be asked for some information, such as a list of tag names and a description, after which the publishing process should begin. After manual approval by some Nim devs, which checks if your package has a valid structure and its name does not conflict with existing packages, your package gets added to the official package list. Unfortunately, the nimble publish command has failed for some people in the past. So you may prefer to publish your package manually by creating a pull request at the package list repository.
After successful publication, people can download your package just by using its name, as in nimble install fft. This publishing process can be a bit complicated, but it is necessary only once: It is not necessary to publish the package again when you update the package.
When you intend to create a public package, that is used by a lot of people and that is regularly updated, it may make some sense to create tagged versions of your package. That way people will be able to easily install an older version, in case they have issues with the most recent version, and other packages, that may use your package, can require the version that they need. Currently, creating tagged versions with Nimble is a bit complicated, as you have to update the version in the .nimble file first: Actually, the correct procedure to add a (new) tag is:
-
Update all the files of your packages, which includes all the modules and the README file.
-
Update the version field in the nimble file.
-
Upload all your modifications to GitHub, with an action sequence like
git add -A git commit -m "new version v0.2.1" git push origin main
Now, after you have uploaded all modified files, including the nimble file with the version field updated to this new version, you can create a new tag and push the actual version tags to GitHub:
git tag v0.2.1 git push origin --tags
Now, other users will get this new version by default, but they can still install older versions. For testing purposes, you can always push modified module files to GitHub, without creating a new tag. These changes will be invisible to most users; only those who explicitly request the latest changes with the tag #head will receive these updates.
nimble install fft # install latest tagged version, or nimble install fft@v0.2.0 # install an existing older version, or nimble install fft@#head # install latest changes
References:
Performance of multiplication vs. division
In various places in the book, we said that for arithmetic operations, a division is typically slower than multiplication. And we said that on modern hardware, floating-point operations are nearly as fast as integer operations. To prove this, we provide the following small test program. Compile it with the option -d:danger for meaningful results.
Float division can often be replaced by multiplication with the inverse, so instead of x / 2, we can always write x * 0.5. An expression like x / 2 looks cleaner, so we may wonder if it pays off to write x * 0.5, or if the compiler will rewrite the expression for us automatically. Therefore, our test program tests the performance of direct division and reciprocal multiplication, as well as the performance of integer data types for similar operations. As for integers, there are no reciprocal values, we have used a plain multiplication instead. We have tested for constant divisors 2, 3, and 97 (prime), and the division by a variable with unknown content. Obviously, the compiler has some freedom for optimizations when one operand is a constant. As a simple example, x * 2 can always be evaluated as x + x, and for integers, i div 2 can be replaced by a shift operation. But the compiler knows many more optimizations. An important class of optimizations for 32-bit numbers on a 64-bit CPU is the fact that division can be replaced by a multiplication and a bit shift.
# compile with option -d:danger
import std/[random, times, strformat]
proc rand(i: uint32): uint32 = rand(i.int).uint32
proc main1(T: typedesc; mul: static[bool]; val: static[int]) =
var sum: float # always float to avoid overflow
var minDelta = float.high
var s: seq[T] = newSeq[T](1e5.int)
randomize(0)
for j in 0 .. 100:
for i in s.low .. s.high:
s[i] = T(rand(T(100)))
let start = cpuTime()
for i in s.low .. s.high:
when mul:
when T is float or T is float32:
s[i] *= (T(1) / T(val))
else:
s[i] *= T(val) # *= (1 div x) makes no sense here
else:
when T is float or T is float32:
s[i] /= T(val)
else:
s[i] = s[i] div T(val) # we have no div= operator
let delta = cpuTime() - start
minDelta = min(minDelta, delta)
for i in s.low .. s.high:
sum += float(s[i])
echo "sum: ", sum # ensure that final sum is really calculated and not optimized out
var str = when mul: "* (1 / " & $val & ")" else: " / " & $val
when mul and not (T is float or T is float32):
str = " * " & $val # plain multiplication
let time = fmt": {minDelta * 1e6:>4.2f} us"
echo typeof(T), ", ", str, time#": ", minDelta * 1e6, " us"
# main2 differs only in proc header from main1
proc main2(T: typedesc; mul: static[bool]; val: int) =
var sum: float # always float to avoid overflow
var minDelta = float.high
var s: seq[T] = newSeq[T](1e5.int)
randomize(0)
for j in 0 .. 100:
for i in s.low .. s.high:
s[i] = T(rand(T(100)))
let start = cpuTime()
for i in s.low .. s.high:
when mul:
when T is float or T is float32:
s[i] *= (T(1) / T(val))
else:
s[i] *= T(val) # *= (1 div x) makes no sense here
else:
when T is float or T is float32:
s[i] /= T(val)
else:
s[i] = s[i] div T(val) # we have no div= operator
let delta = cpuTime() - start
minDelta = min(minDelta, delta)
for i in s.low .. s.high:
sum += float(s[i])
echo "sum: ", sum # ensure that final sum is really calculated and not optimized out
var str = when mul: "* (1 / " & $val & ")" else: " / " & $val
when mul and not (T is float or T is float32):
str = " * " & $val # plain multiplication
let time = fmt": {minDelta * 1e6:>4.2f} us"
echo typeof(T), ", ", str, time#": ", minDelta * 1e6, " us"
template doTheStaticTestWith(x: typed) =
main1(float, false, x)
main1(float, true, x)
main1(float32, false, x)
main1(float32, true, x)
main1(int, false, x)
main1(int, true, x)
main1(int32, false, x)
main1(int32, true, x)
main1(uint32, false, x)
main1(uint32, true, x)
template doTheTestWith(x: typed) =
main2(float, false, x)
main2(float, true, x)
main2(float32, false, x)
main2(float32, true, x)
main2(int, false, x)
main2(int, true, x)
main2(int32, false, x)
main2(int32, true, x)
main2(uint32, false, x)
main2(uint32, true, x)
doTheStaticTestWith(2)
doTheStaticTestWith(3)
doTheStaticTestWith(97) # prime
echo ""
doTheTestWith(2)
doTheTestWith(3)
doTheTestWith(97) # prime| type | operation | time in us |
|---|---|---|
float |
/ 2 |
44.30 |
float |
* (1 / 2) |
26.89 |
float |
/ 3 |
97.37 |
float |
* (1 / 3) |
26.78 |
float |
/ 97 |
97.40 |
float |
* (1 / 97) |
26.89 |
float32 |
/ 2 |
24.94 |
float32 |
* (1 / 2) |
24.92 |
float32 |
/ 3 |
65.92 |
float32 |
* (1 / 3) |
24.90 |
float32 |
/ 97 |
65.80 |
float32 |
* (1 / 97) |
24.90 |
int |
div 2 |
44.35 |
int |
* 2 |
29.40 |
int |
div 3 |
51.02 |
int |
* 3 |
32.13 |
int |
div 97 |
69.08 |
int |
* 97 |
43.87 |
int32 |
div 2 |
43.76 |
int32 |
* 2 |
28.07 |
int32 |
div 3 |
51.73 |
int32 |
* 3 |
31.55 |
int32 |
div 97 |
51.74 |
int32 |
* 97 |
30.87 |
uint32 |
div 2 |
28.18 |
uint32 |
* 2 |
28.15 |
uint32 |
div 3 |
43.68 |
uint32 |
* 3 |
31.57 |
uint32 |
div 97 |
61.23 |
uint32 |
* 97 |
30.86 |
We did the test on a modern AMD x86 CPU (AMD Ryzen 9 5900HX) with Nim version 1.7.3 and GCC version 12.2.1 on a Gentoo Linux OS. The results from the table above confirm our prior statements. Multiplication is typically faster, and float and integer operations do not differ much in performance. The operand size, 64- or 32-bit, makes no significant difference, and the same applies to signed and unsigned integers. Of course, the actual performance differences of the tested operations are a bit larger, as the loop execution and index updates generate a constant offset. We observe that the timings for / 2 vs. * 0.5 differ, indicating that the compiler does not perform an automatic replacement. The compiler refrains from making automatic replacements because such replacements could slightly impact the accuracy of the operation. With the Nim compiler option --passC:-ffast-math, we can indicate to the compiler that utmost accuracy is not our priority, thus enabling the use of reciprocal multiplication. If we wish to allow only reciprocal multiplication, and not all other math optimizations enabled by -ffast-math, we can use -freciprocal-math instead.
| type | operation | time in us |
|---|---|---|
float |
/ x |
97.37 |
float |
* (1/x) |
26.68 |
float32 |
/ x |
69.86 |
float32 |
* (1/x) |
25.03 |
int |
div x |
151.16 |
int |
* x |
44.04 |
int32 |
div x |
129.61 |
int32 |
* x |
33.46 |
uint32 |
div x |
129.65 |
uint32 |
* x |
43.72 |
The above table is the result of operations with a variable, and we assume that the compiler does not manage to know the actual content of the variable. So the compiler has no freedom for optimizations, in all cases a /, div or * is executed. You may wonder why the * (1/x) reciprocal multiplication is fast here, while it should be very slow: First calculation of (1 / x), and then the multiplication. Well, the compiler is smart and recognizes that the x does not change in our timed loop, so the (1 / x) operation is performed already before the loop. The above table shows us that integer division is indeed a bit slow compared to multiplication.
Note that addition and subtraction is typically very fast — as fast or faster than multiply. Note also that prediction of the actual performance is difficult: SIMD instructions can greatly improve performance when the compiler is able to use it. Or cache misses can greatly reduce performance, when we work with large data, that does not completely fit into the caches.
References:
ASCII table
proc print(i: int) =
let c =
if i > 31 and i < 128: char(i) else: ' '
stdout.write(" ", c, " ")
proc main =
echo "Visible ASCII Characters\n"
stdout.write(" ")
for i in 0 .. 15:
if i < 10:
stdout.write(" +")
else:
stdout.write("+")
stdout.write(i, " ")
stdout.write('\n')
var i = 0
while i < 128:
if i < 10:
stdout.write(" ")
elif i < 100:
stdout.write(" ")
stdout.write(i, ' ')
for j in 0 .. 15:
print(i + j)
stdout.write('\n')
inc(i, 16)
main()Div and mod operation
type
T = array[-5 .. 4, int]
T2 = array[-5 .. 4, T]
var t: T2
for d in 0 .. 1:
if d == 0:
echo "\nResult of i div j"
else:
echo "\nResult of i mod j"
for i in -5 .. 4: # row
for j in -5 .. 4: # col
if i == -5 and j == -5:
t[i][j] = int.high
elif i == -5:
t[i][j] = j
elif j == -5:
t[i][j] = i
else:
if j == 0:
t[i][j] = int.high
else:
if d == 0:
t[i][j] = i div j
else:
t[i][j] = i mod j
for i in -5 .. 4:
for j in -5 .. 4:
if t[i][j] >= 0:
stdout.write(" ")
if t[i][j] == int.high:
stdout.write(" ")
else:
stdout.write(t[i][j], " ")
echo ""Text styles
We use semantic markup for the book. Asciidoctor has some support for this: We can use user defined roles for the markup, and additional use substitutions. Nim keywords and operators are printed in bold, with a few exceptions: The macro keyword is printed in plain style when it occurs very often in a section, because many dense bold terms look not that nice. Initially we had the some problem with the proc keyword, but then we have used the term procedure instead when it makes sense. The predefined data types like int, float or string, and user defined types are printed in a monospace font. Variables, constants, and literals are printed in italic with a monospace font. Module names are printed as small caps, and code snippets in text blocks use monospace font with a grey background. Callable names are printed in plain text with an appended (). Finally, newly introduced terms are printed in italics.
-
New text: This is new stuff
-
Recent text: This was recently updated
-
First use: term
-
Italic: This is italic
-
Operators: + - & shl
-
Keywords: var ref object import while
-
Use of proc in text: proc
-
Use of macro in text: macro
-
Data types: float int Table
-
String data type: string
-
Function calls: setLen()
-
Variables: i, j, length
-
Module names: strutils, system, io
-
Literals: 100, false, 3.14
-
Constants: fmWrite
-
Code in text: while a > 0 and not done:
-
Terminal text: nim c -gc:arc test.nim
ChangeLog
Nov 2021
We have added a few more simple examples and exercises:
Feb 2022
-
Templates (extended)
-
Iterators (extended)
-
Exceptions (extended)
Mar 2022
Dec 2022
Mar 2023
Apr 2023
Sep 2023
-
Index for PDF version